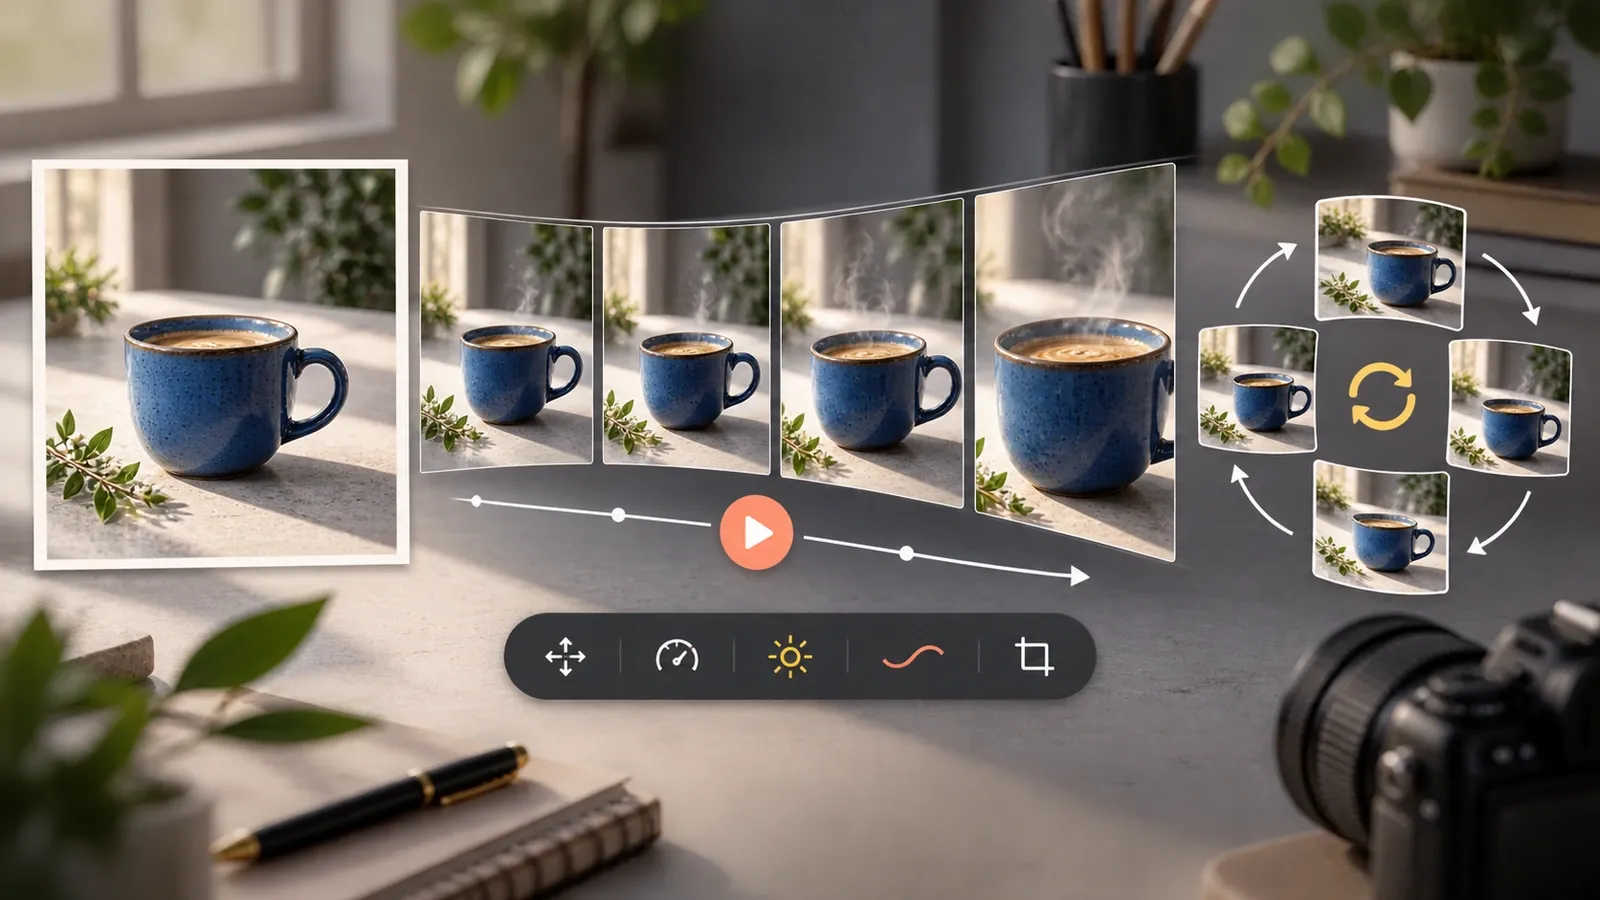

You don't need to record a new video to add motion to your content. You can start with a product photo, a drawing, or a photo from your phone. Image animation tools help you add movement and turn that image into a short video or GIF.
Creators and businesses use animated visuals to show products, explain steps, and share ideas on social media or websites. In this blog, you'll learn how to turn images into animated content, create videos and GIFs, and choose the right format for your needs. We'll also share tips to keep your animations clear and useful.
If you already have a video, an MP4 to GIF converter can turn a short clip into a looping GIF. We'll explain how this differs from adding motion to a still image.
What is animated content?
Animated content is visual content that moves or changes over time. It can be a photo with a slow zoom, text moving across a screen, or an illustration with moving parts. You can create it from a single image or a series of images shown one after another.
Static images vs animated content
A static image stays the same, while animated content shows movement or changes over time. Photos, screenshots, and simple graphics work well when readers need to look at details or read information at their own pace.
Animated visuals are useful when you need to show an action, explain a process, or present a series of changes. For example, a product photo can show what a bag looks like, while an animation can show how its pockets open. Videos can include sound and longer demonstrations, while animated GIFs suit short, repeating actions that need no audio.
Why use animated content?
Creators and businesses use animated visuals to give viewers more information within a single piece of content.
- Product presentations: Show different views of an item or demonstrate how a feature works, such as a foldable chair opening.
- Social media posts: Turn photos into short clips, with moving text to explain what viewers are seeing.
- Website visuals: Place a short animation beside written instructions to show how a website feature works.
- Marketing creatives: Introduce products one at a time or show an offer in a short sequence.
- Tutorials and demonstrations: Show where to click, how to change a setting, or what each step should look like.
How to turn an image into an animated video
An image-to-video tool uses a still picture as the starting point for a moving clip. You describe what should happen, such as clouds moving across a sky or the camera slowly moving closer to a product.
With the help of the Image to Video Generator, you can choose an AI model, upload your image, and add a prompt to guide the motion. Follow these steps:
1. Choose a suitable image
Start with a clear, well-lit photo where the main subject is easy to see. Avoid blurry pictures or busy backgrounds. For a product video, choose a photo that clearly shows the details you want viewers to notice.
2. Upload your image
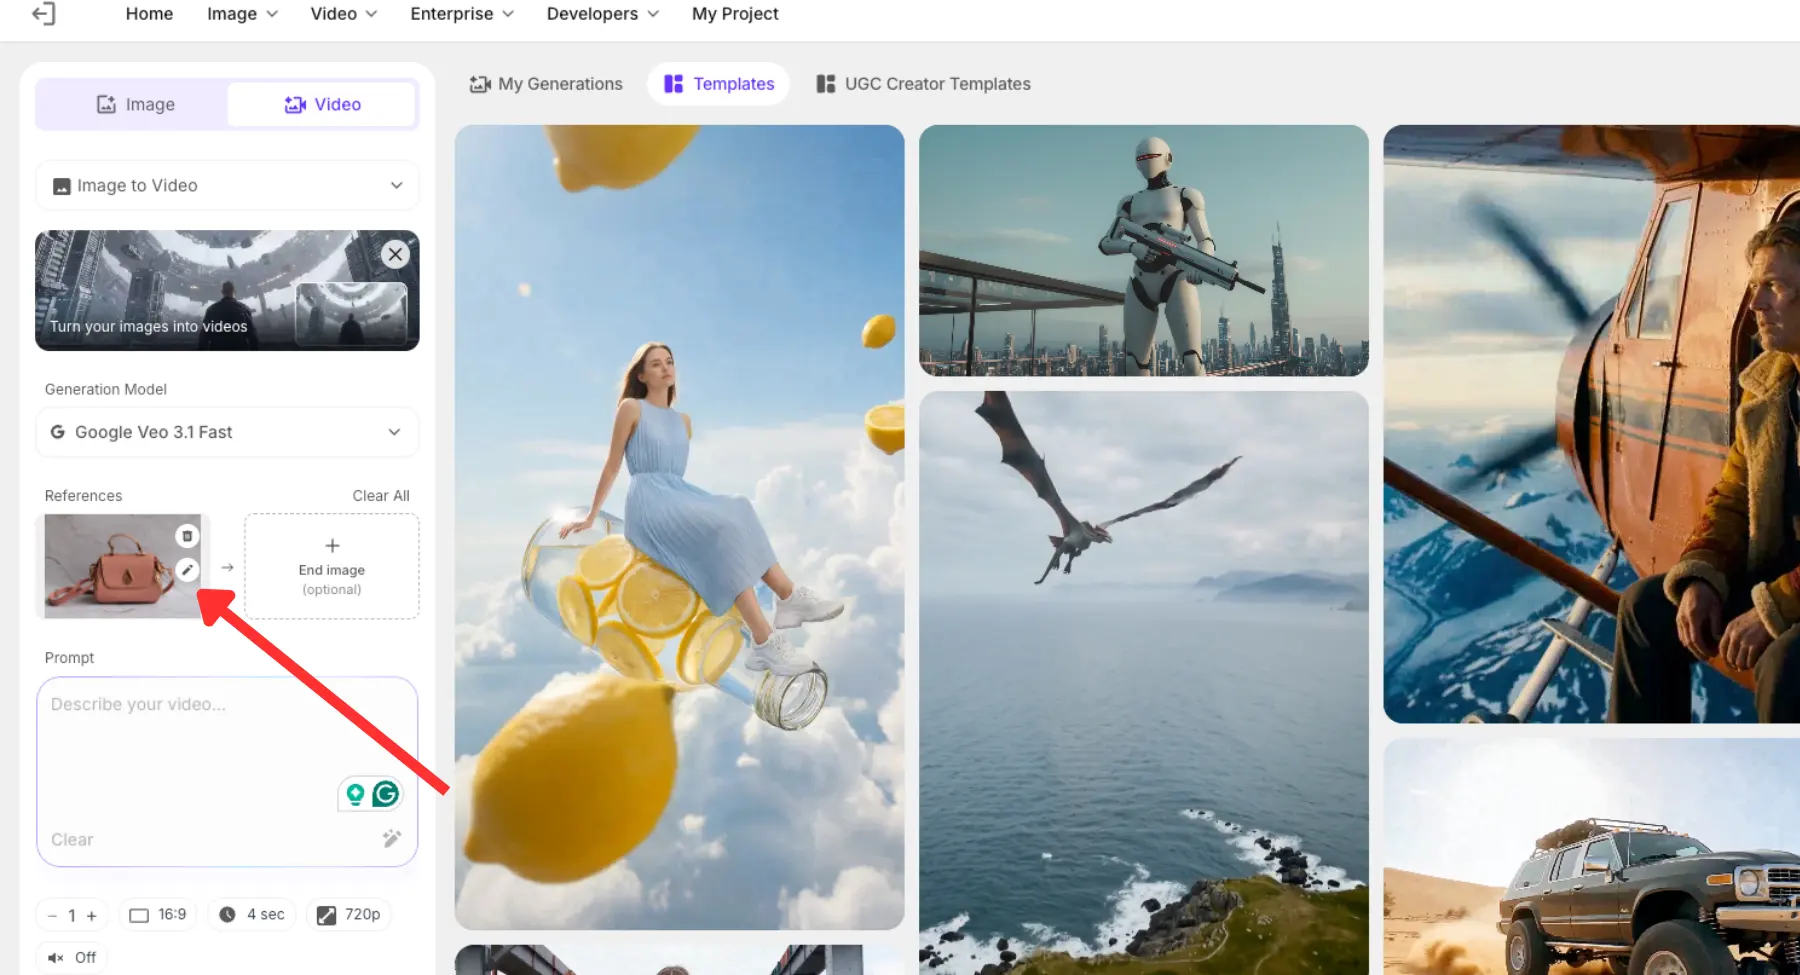
Open Pixelbin's generator, select a model, and upload your starting image. If the selected model supports an end image, you can add one to guide how the video finishes.
3. Describe the motion
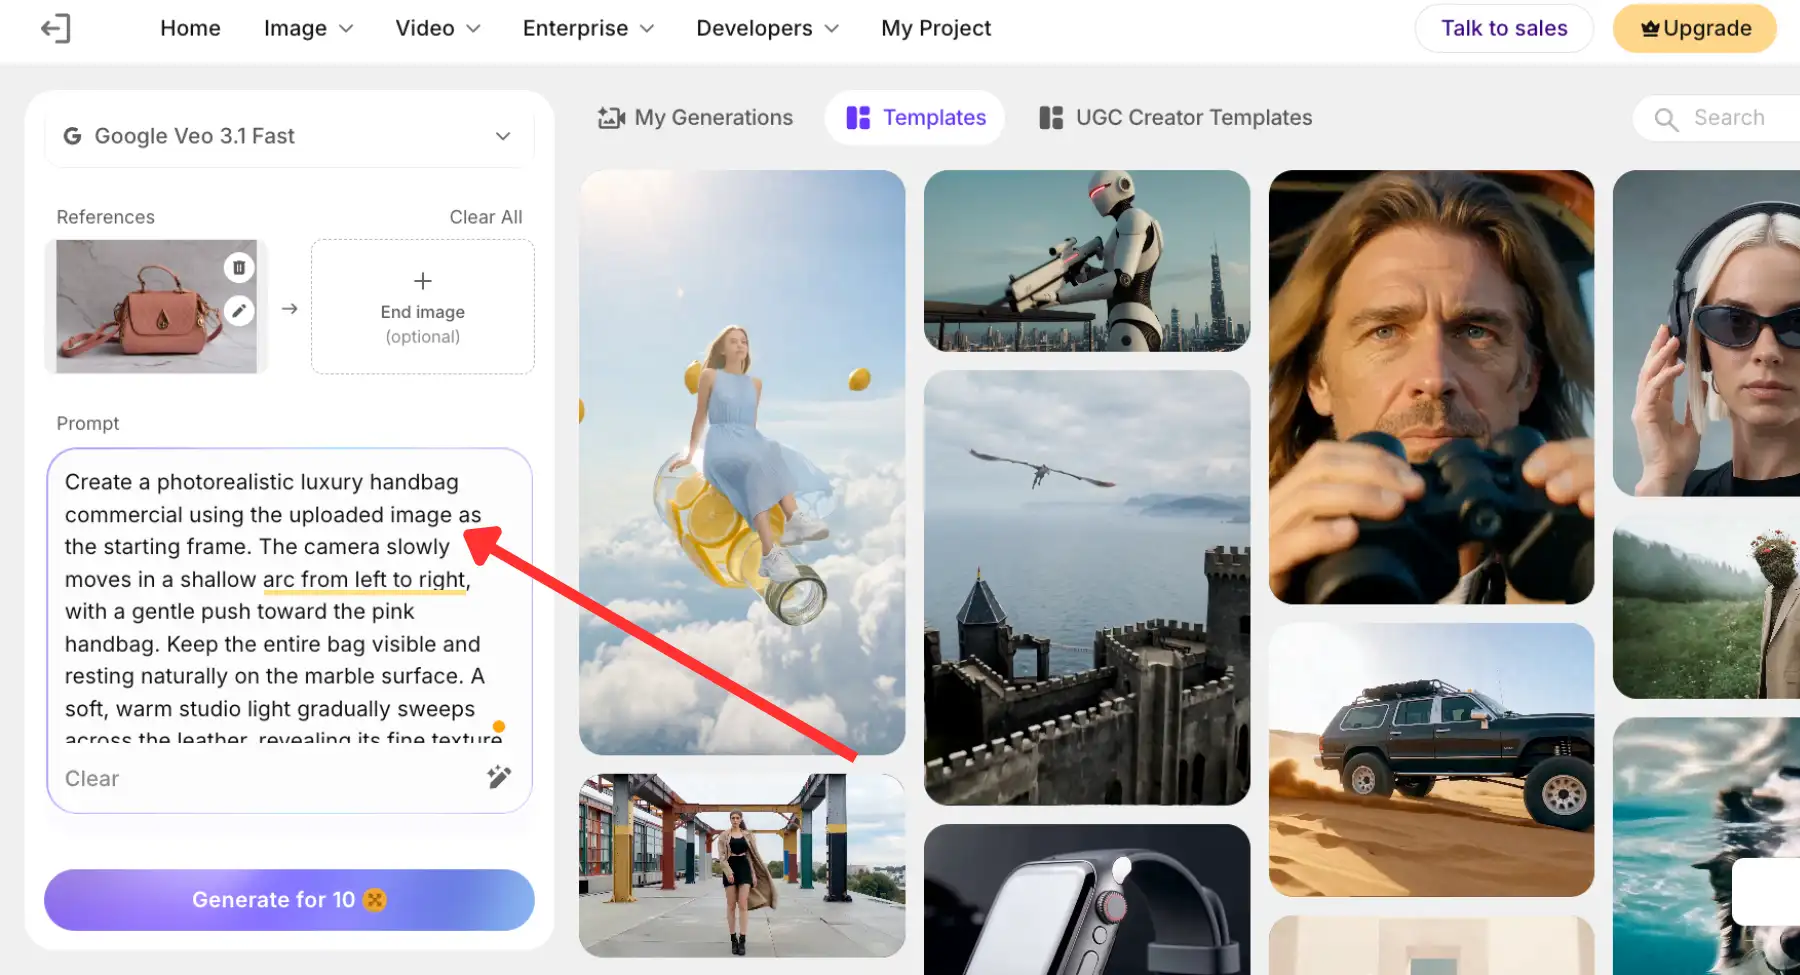
Write a short, specific instruction in the prompt box. For example: "Slowly move the camera toward the cup as steam rises." Start with one simple movement so you can judge the result.
4. Generate the video
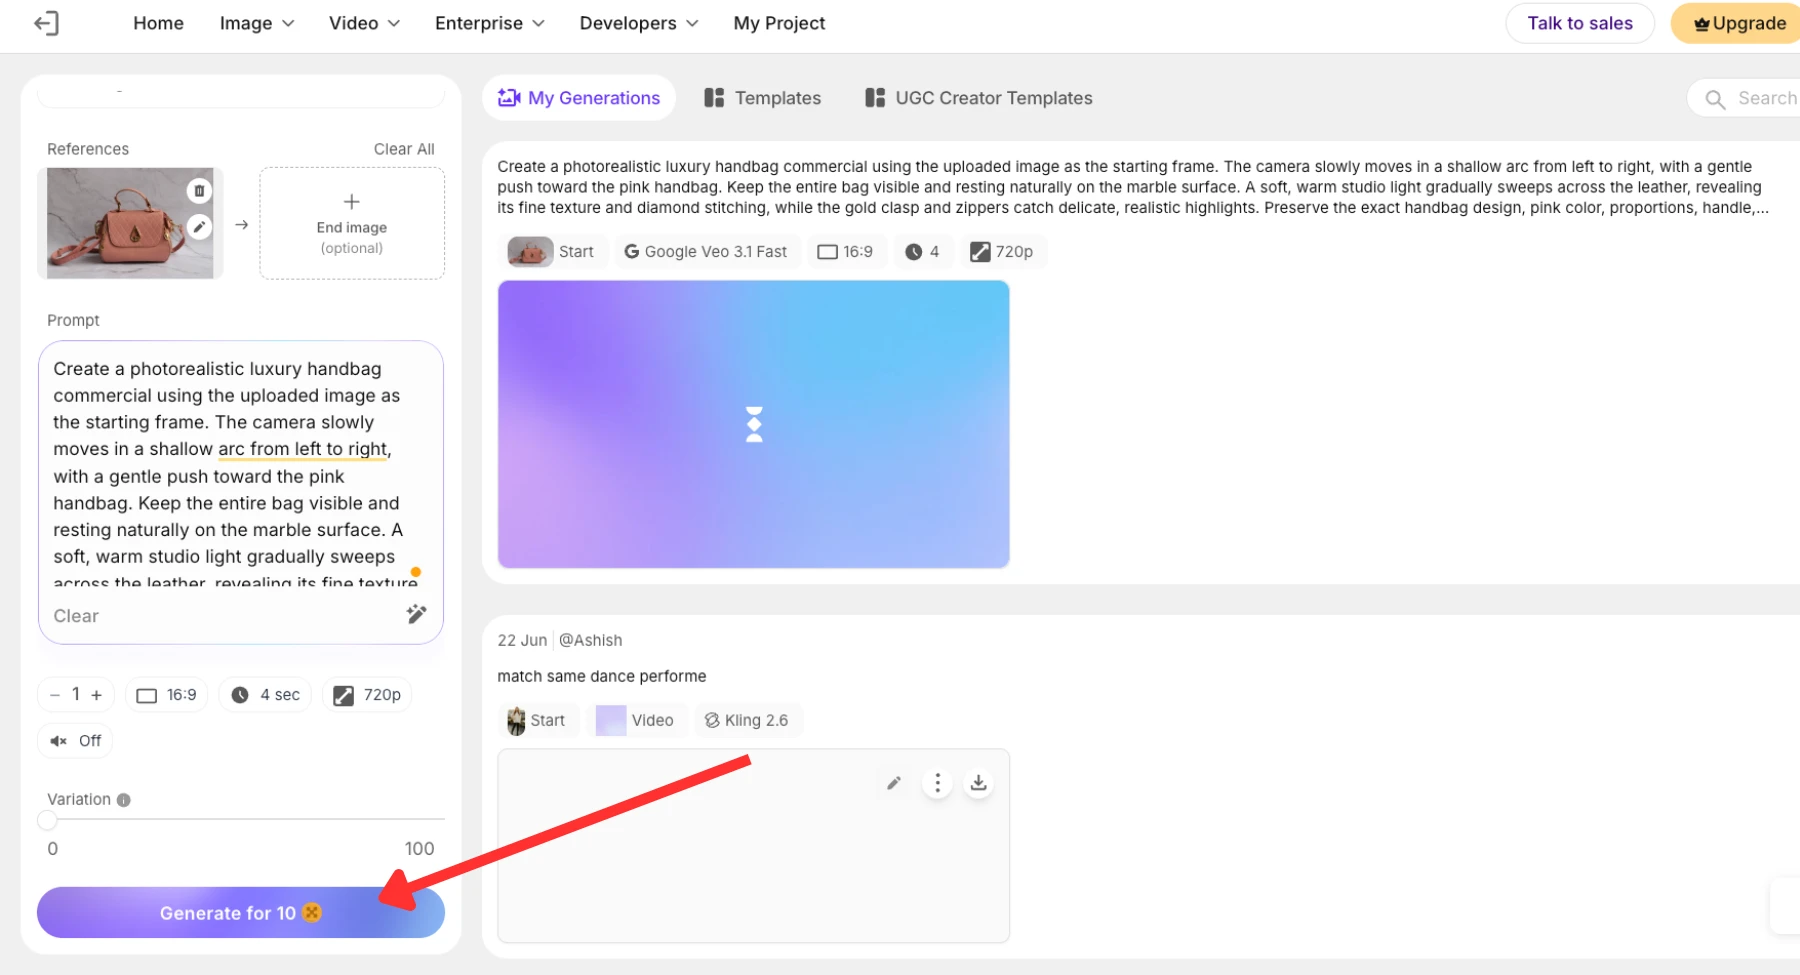
Choose the available settings for your clip, then click Generate. Options such as video length and dimensions depend on the model.
5. Review and save
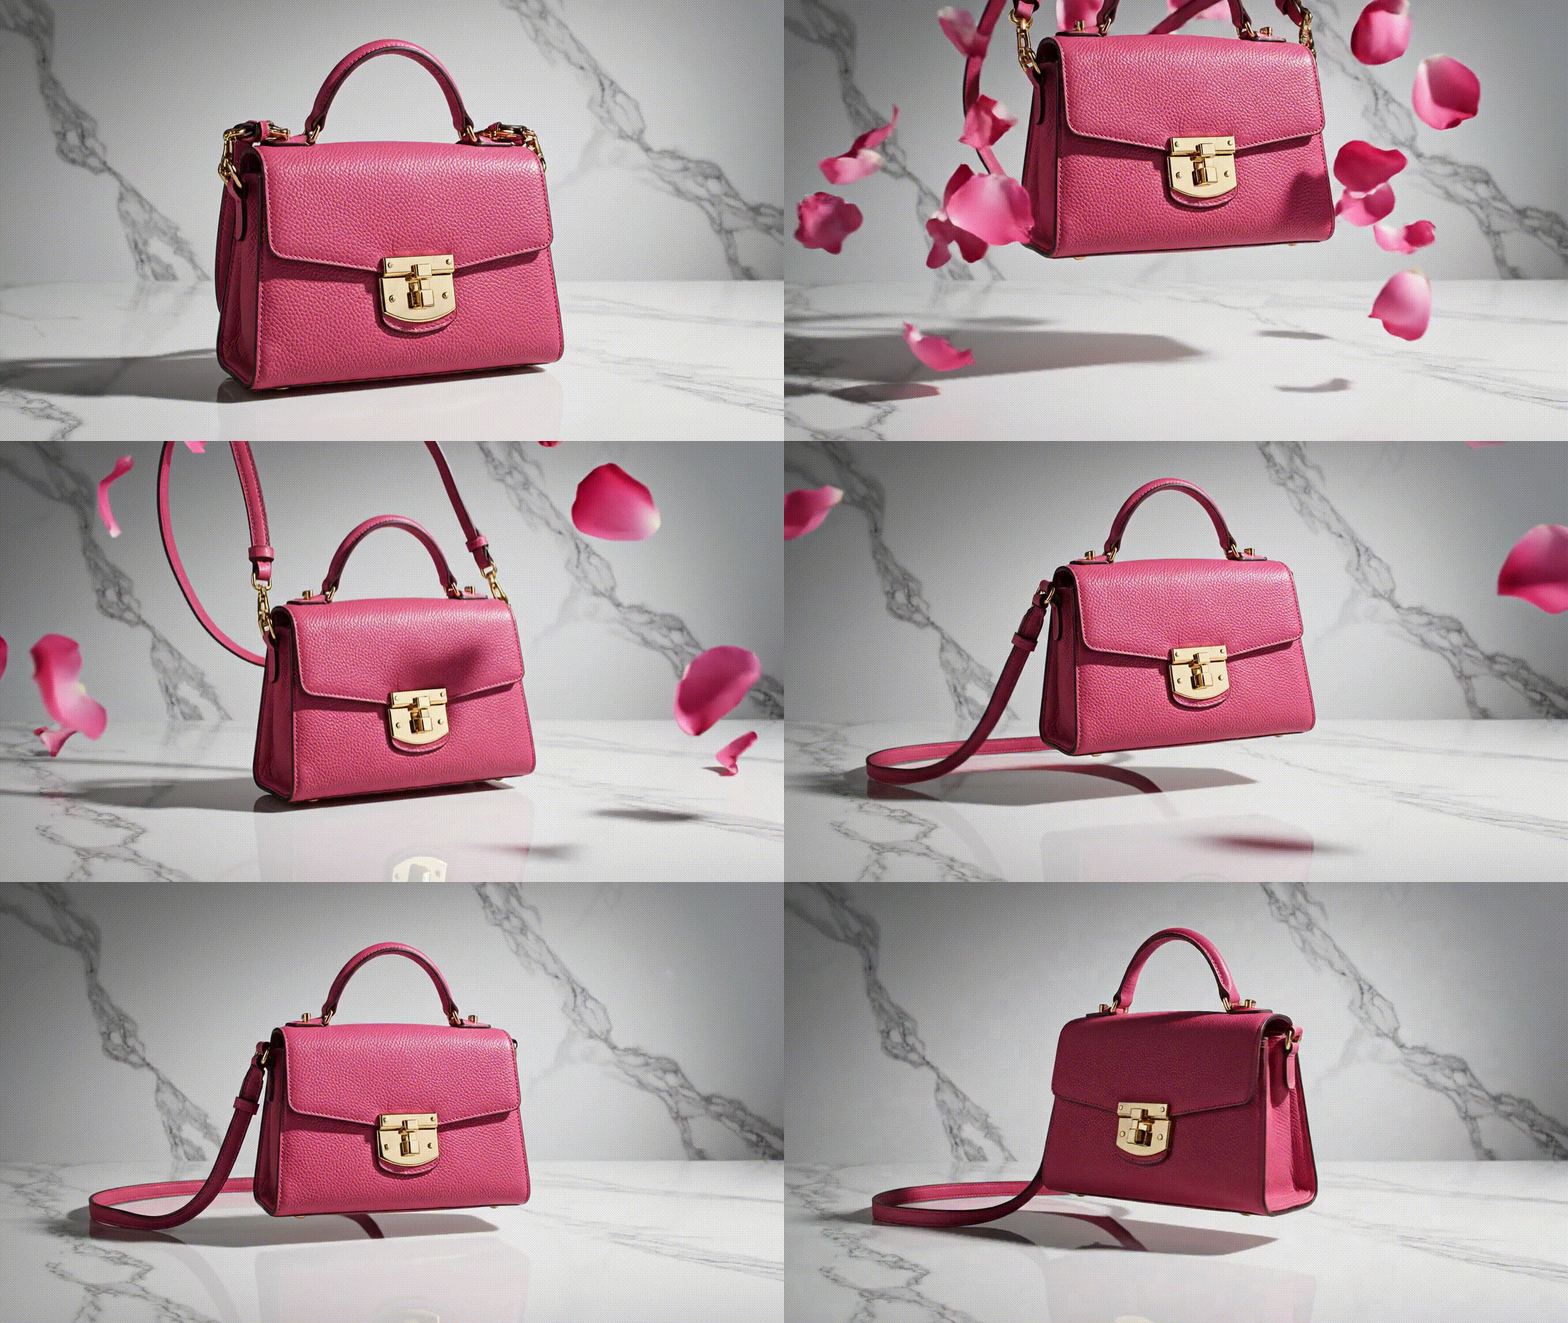
Watch the full preview before downloading. Check for odd movements, changed product details, or distorted shapes. If needed, adjust your prompt and generate another version. Save the video once you're happy with the result.
How to turn an image into a GIF
GIF files can hold still images as well as animations. If you only need to change an image's file format, you can use an image-to-GIF converter.
- Open the Image to GIF converter.
- Click Upload image or drag your image into the upload area.
- Select GIF as the output format and start the conversion.
- Download the converted GIF.
When is an animated GIF useful?
An animated GIF works well when you want to show a short action that makes sense without sound. It plays on repeat, so viewers can watch the movement again without restarting it.
- Short looping visuals can show small movements, such as a blinking character or an arrow pointing toward a button.
- Simple demonstrations can show how to open a menu or change a setting. Keep each GIF focused on one action so it's easy to follow.
- Reactions can add humour or express a feeling in a message, comment, or social post.
- Website animations can show a before-and-after change or explain a feature beside written instructions. Keep movement limited so it doesn't distract from the page.
- Marketing assets can cycle through product colours or show several items in a collection. Leave each frame visible long enough for viewers to read any text.
Where can you use animated content?
Animated content is useful when movement helps explain what you want to show. The format and length should suit where people will view it.
1. Social media
Turn photos into short videos or animated posts for your feed and stories. Choose dimensions that fit the platform and placement. Before posting, check that cropping hasn't cut off your subject or text.
2. Websites and blogs
Place a short animation beside a product description or a paragraph that explains a feature. For example, a demonstration can show how a menu works. Keep the file size manageable so the visual doesn't slow down the page.
3. Marketing and ecommerce
Use animated content to present product colours, show close-up details, or introduce a sale. A short sequence can show several items from a collection. For product demonstrations, check that the movement accurately represents how the item works.
4. Tutorials and presentations
Animation can help explain a process one step at a time. Use it to show where to click, how an object moves, or what changes after an action. Give viewers enough time to follow each step before moving to the next.
Tips for creating better animated content from images
A few choices before you start can save you from having to remake an animation. Think about what needs to move, where you'll share it, and how much detail viewers need to see.
1. Start with a high-quality image
Choose a sharp image with good lighting and a clear subject. Blur and rough edges can become more noticeable when the picture moves or the camera zooms in. Check small details, especially product labels and text, before uploading.
2. Choose the right dimensions
Match the image's shape to where the animation will appear. A vertical post needs a different crop from a wide website banner. Leave enough space around the subject so movement and cropping don't push it out of view.
3. Keep motion relevant
Use movement to show something useful. A slow zoom can bring attention to a detail, while a moving arrow can guide someone through a step. Avoid adding several effects that compete for attention or make text hard to read.
4. Consider file size
Longer clips and larger dimensions generally mean more data. The output format and compression also affect file size. Trim any unnecessary seconds and export at a size that looks clear where the content will appear.
5. Select the right output format
Choose video for sound, longer sequences, or detailed motion. A GIF suits a brief, silent loop. For website use, compare file sizes: the same animation may be much smaller as a compressed video.
Conclusion
A photo you already have can become a short video for social media or a moving visual for your website. Start with a clear image and choose motion that helps show a detail or explain an action. Choose video when you need sound or a longer sequence, and an animated GIF for a short, silent loop. Before sharing, check that the result looks clear, fits its placement, and shows what you intended.
FAQs
Open an image-to-video tool, upload your photo, and describe the movement you want. In Pixelbin's generator, you also choose an AI model. Generate the video, watch the preview, and save it once the result looks right.
Use a video if you need sound or more time to explain something. A GIF works well for a short action that repeats, such as showing where to click. For a website, check the file size too.
Yes, you can use an image-to-GIF tool that supports animation. Upload your photo, add a motion effect, and save it as a GIF. Make sure the tool can add movement, since some converters only change the file format.
Yes. Use a video-to-GIF converter and select the part of the clip you want to keep. Choose a moment that makes sense without audio, since the GIF won't include the video's sound.
Choose a clear photo with good lighting and a subject that's easy to see. Check the small details before uploading, especially text and product labels. If they're already blurry, animation is unlikely to make them clearer.