Ever tried zooming in on an image, but it turned out into a pixelated mess? Do you know why this happens?
Most of the time, it happens because the image doesn’t have enough pixels, which make up every digital picture. So when we try to enlarge the image, there's just not enough detail to keep the quality intact, which leads to blurry and pixelated images.
Today I have come with some good news, where it’s possible to increase the pixels of an image, and you don’t need to have any professional editing skills. Thanks to professional image upscalers that increase the pixels by predicting missing details. Let’s dive in and make those blurry images look sharp and professional again.
What are pixels in an image?
Pixels are the smallest dots of an image. Pixels determine the image quality whether it will be of low resolution or high resolution. So when people talk about resolution, they mean how many pixels are in an image.
Why would you want to increase pixel count?
- Printing: Printing usually needs high-resolution images, like 300 dots per inch. A low-pixel image will turn out blurry and pixelated once printed.
- Social Media Posts: Social media platforms compress photos, and low-resolution ones look terribly pixelated after upload.
- Product Images: If you sell on Etsy, Amazon, or Shopify, low-quality images will hurt your credibility, and the viewership rate will go down.
- Design Projects or PPTs: For posters, banners, and marketing graphics, you need high-resolution images to maintain sharpness while scaling them up.
What happens when you increase the pixel count of the image?
When you increase the pixel count, it is also known as upscaling an image; your software doesn’t magically know what the new pixels should look like. That’s done using a process called interpolation. Let’s break down the concept with Traditional and AI upscaling.
Traditional upscaling
Traditional methods perform upscaling by pixel interpolation through the following methods;
- Nearest neighbor: Duplicates nearby pixels. Fast, but results in jagged edges.
- Bilinear: Averages 4 neighboring pixels to create new ones. Smoother, but blurry.
- Bicubic: Uses 16 neighboring pixels for a slightly better result.
These methods can only stretch existing pixels. They don’t introduce new details, so the more you enlarge, the worse it looks.
However, image upscaling through Photoshop offers AI plugins (like Super Zoom, Preserve Details 2.0, and Neural Filters) that use deep learning for upscaling. GIMP was traditionally pixel-based; now it can be extended with an AI plugin for better quality.
AI upscaling
In contrast, AI upscaling is not only about stretching pixels but also about predicting the missing details and adding pixels in that. It uses trained methods to enhance image details, resulting in much better texture. With AI tools, upscaled images often have:
- Sharper edges and clear image details.
- Realistic appearance after upscaling.
- Removes noise as the image is upscaled by 2x, 4x, or 8x scale size.
Benefits of using AI upscaling method:
- Generates a more realistic and sharper image.
- Reduces blur and pixelation with minimal effort.
- Ideal for portraits, product images, and illustrations
How to increase the pixels of an image using Photoshop (two ways)
Photoshop has long been the go-to tool for all things image editing. It also allows users to increase the pixel count manually. But here’s the catch unless you use AI-powered features like Neural Filters, Photoshop alone won’t “Enhance” detail.
It can resize, but not re-create lost quality. To start the image upscaling in Photoshop, just give a read to the following methods.
Let’s look at two methods:
1. Manual editing
- Launch the program and open the photo you want to edit.
- Select “Image” from the menu bar and select from the drop-down list.
- Select “Image Size” from the list.
- Select “Pixels” as the measurement of the image.
- Edit the values for “Width” and “Height” to increase the number of pixels in the image.
2. Using the Neural Filters plugin
- Launch the AI plugin in Photoshop and select the image to upscale.
- Select “Filter” from the menu bar.
- Select “Neural Filters” from the dropdown.
- Choose “Super Zoom” from the list of neural filters.
- Adjust the slider to increase the image to your required size.
How to increase the pixels of an image using AI image upscalers (6 ranked tools)
When you search for AI image upscalers, you will get an uncountable number of tools. But you should know which one will give you the best results.
For your ease, I have tested the most beginner-friendly online tools to see which ones offer the best pixel enhancement with zero effort. Know the following list:
1. Pixelbin
Increasing the pixel count of an image without making it blurry is one of the biggest challenges. That’s where we need AI-powered tools like Pixelbin.
I uploaded a low-resolution image. It was dull and had blurry spots, and I honestly didn’t expect much, but the results were impressive. The edges were cleaner, the textures were more defined, and the upscaled version looked professional.
What did I like the most?
- Simple and beginner-friendly AI-powered image upscaling.
- Supports batch processing for heavy work.
- Upscale image size available for 2x, 4x, and 8x.
- API integration is available for developers.
- Free credits on sign-up.
- High-quality image enhancement.
How to increase the pixels of an image in Pixelbin?
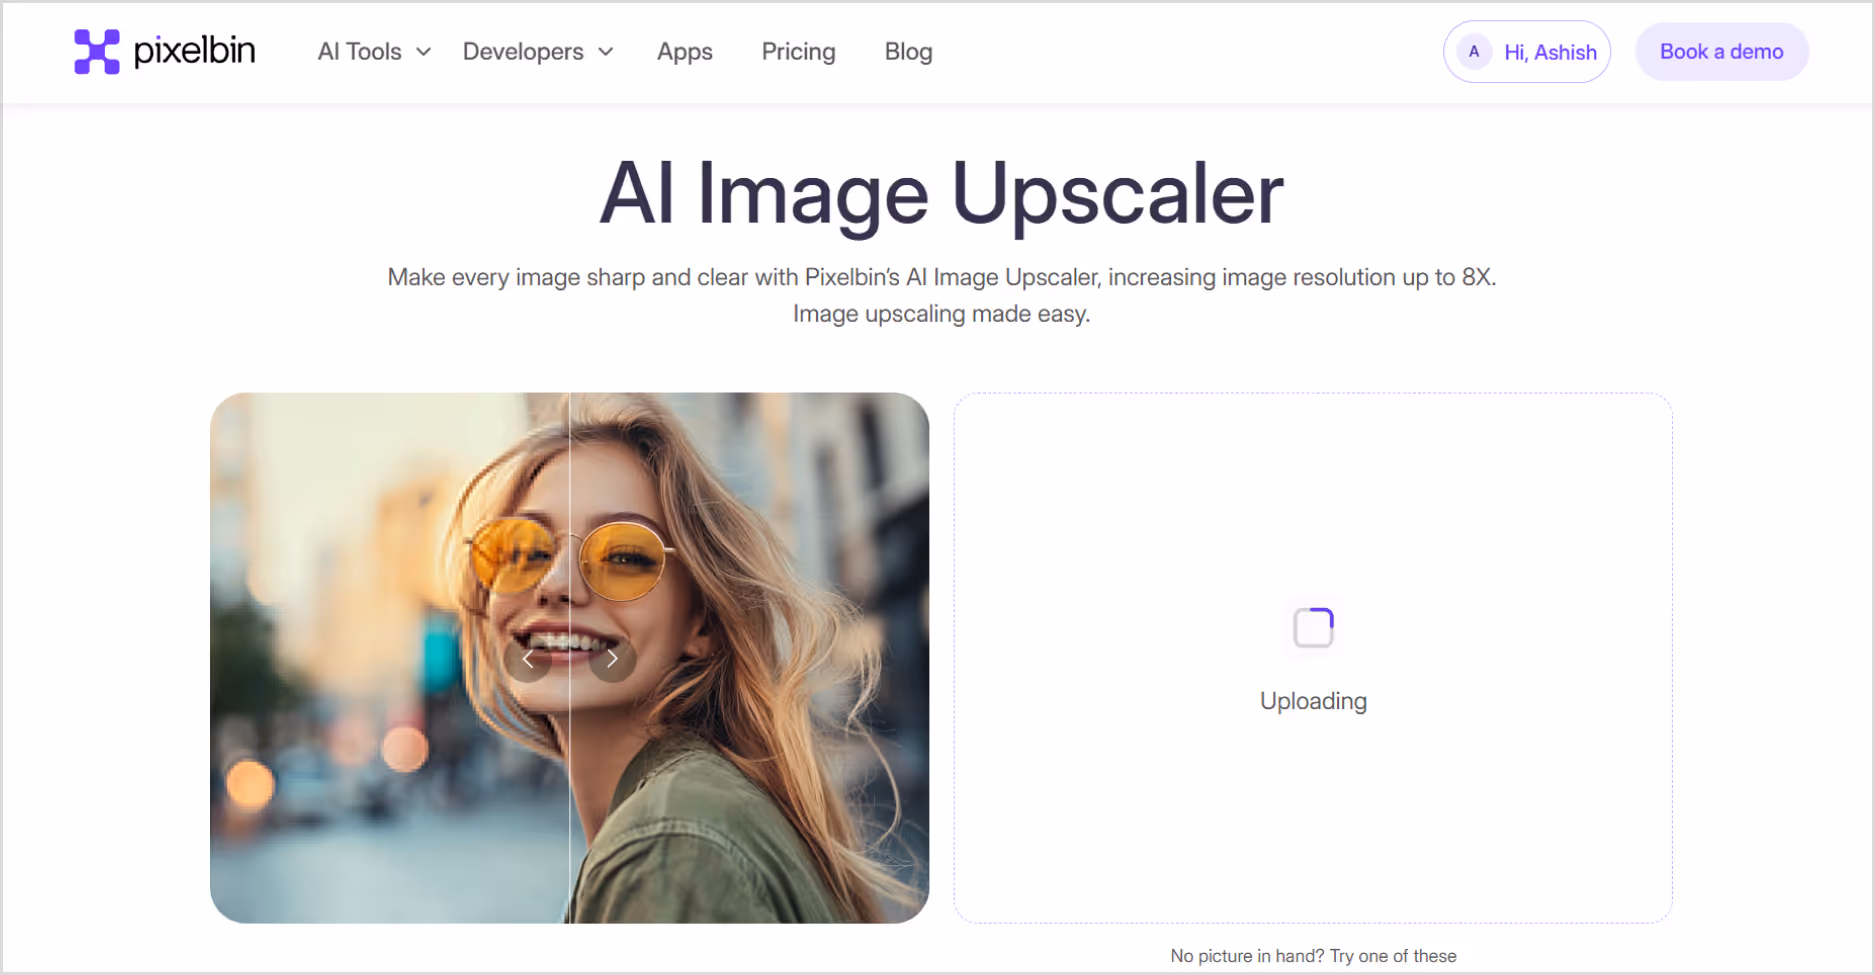
Step 1: Head over to Pixelbin’s AI image upscaler.
Step 2: Upload your image by selecting it from your device or simply pasting the image URL. As batch processing is a feature, you can add up to 10 images at a time.
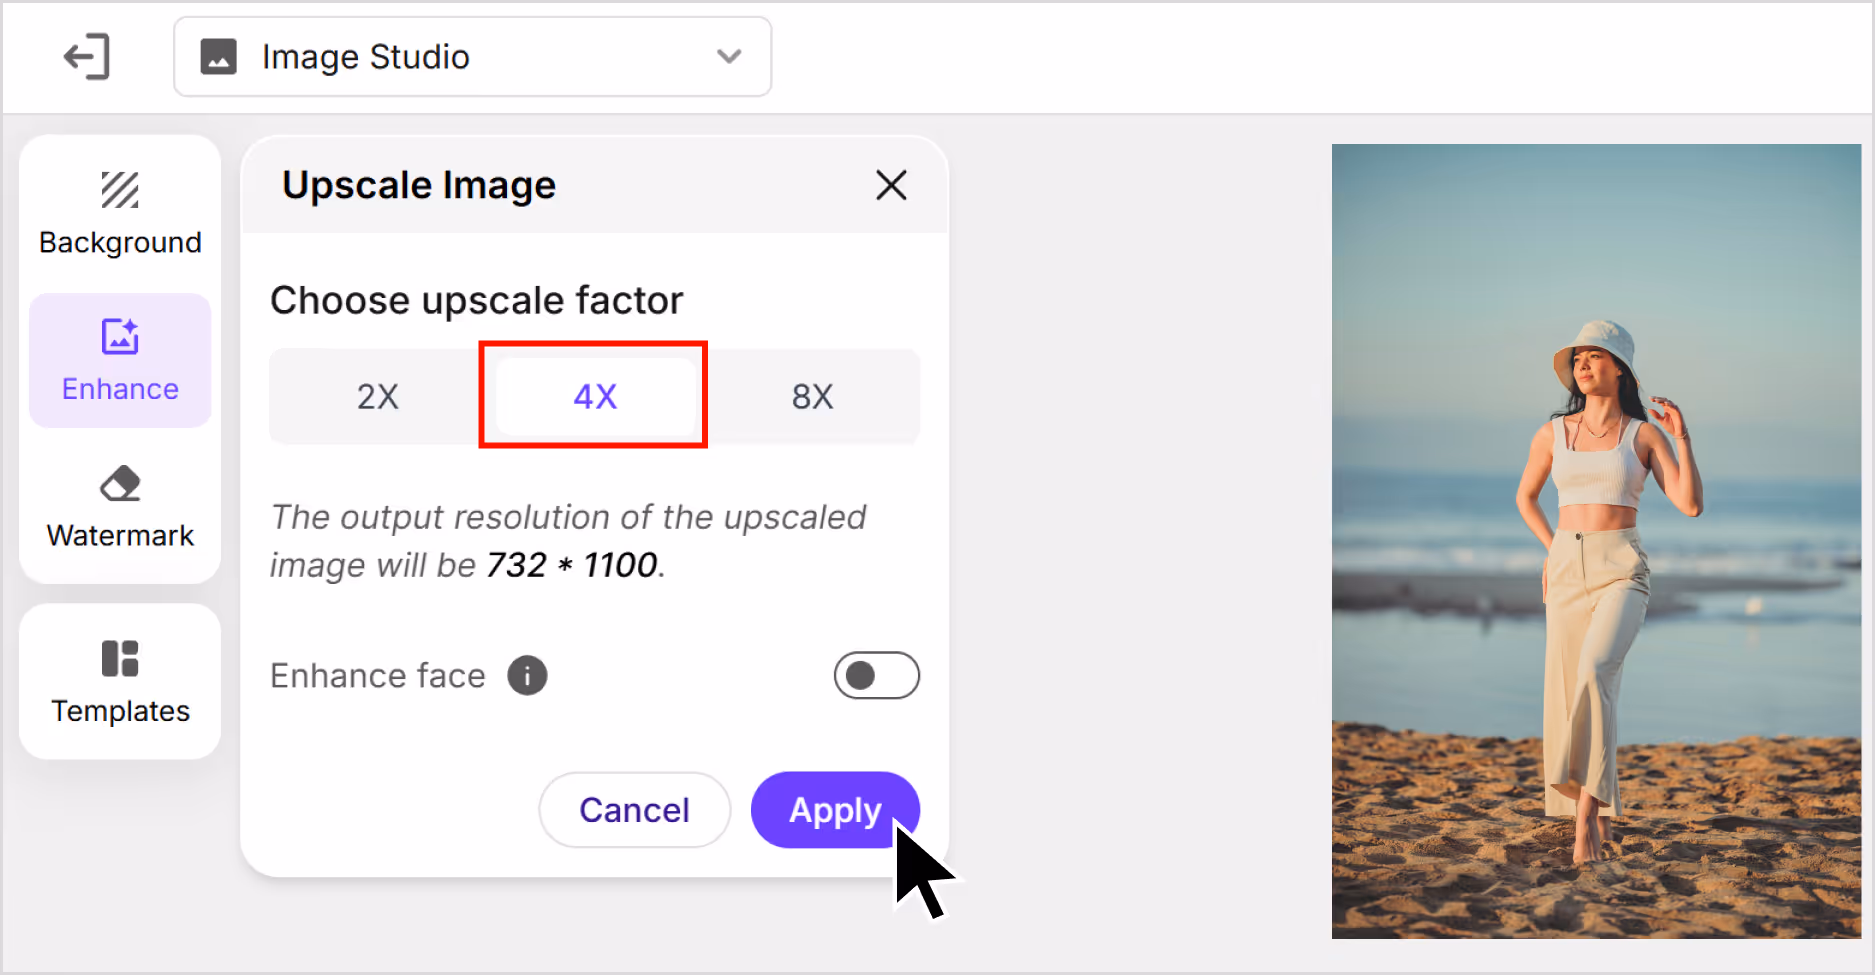
Step 3: Choose your image upscale size 2x, 4x, or 8x. To get a 4K image upscaling. Choose a 4X image scale size; my image size is upscaled to high pixels. You can also resize, crop, adjust the image, and rotate.
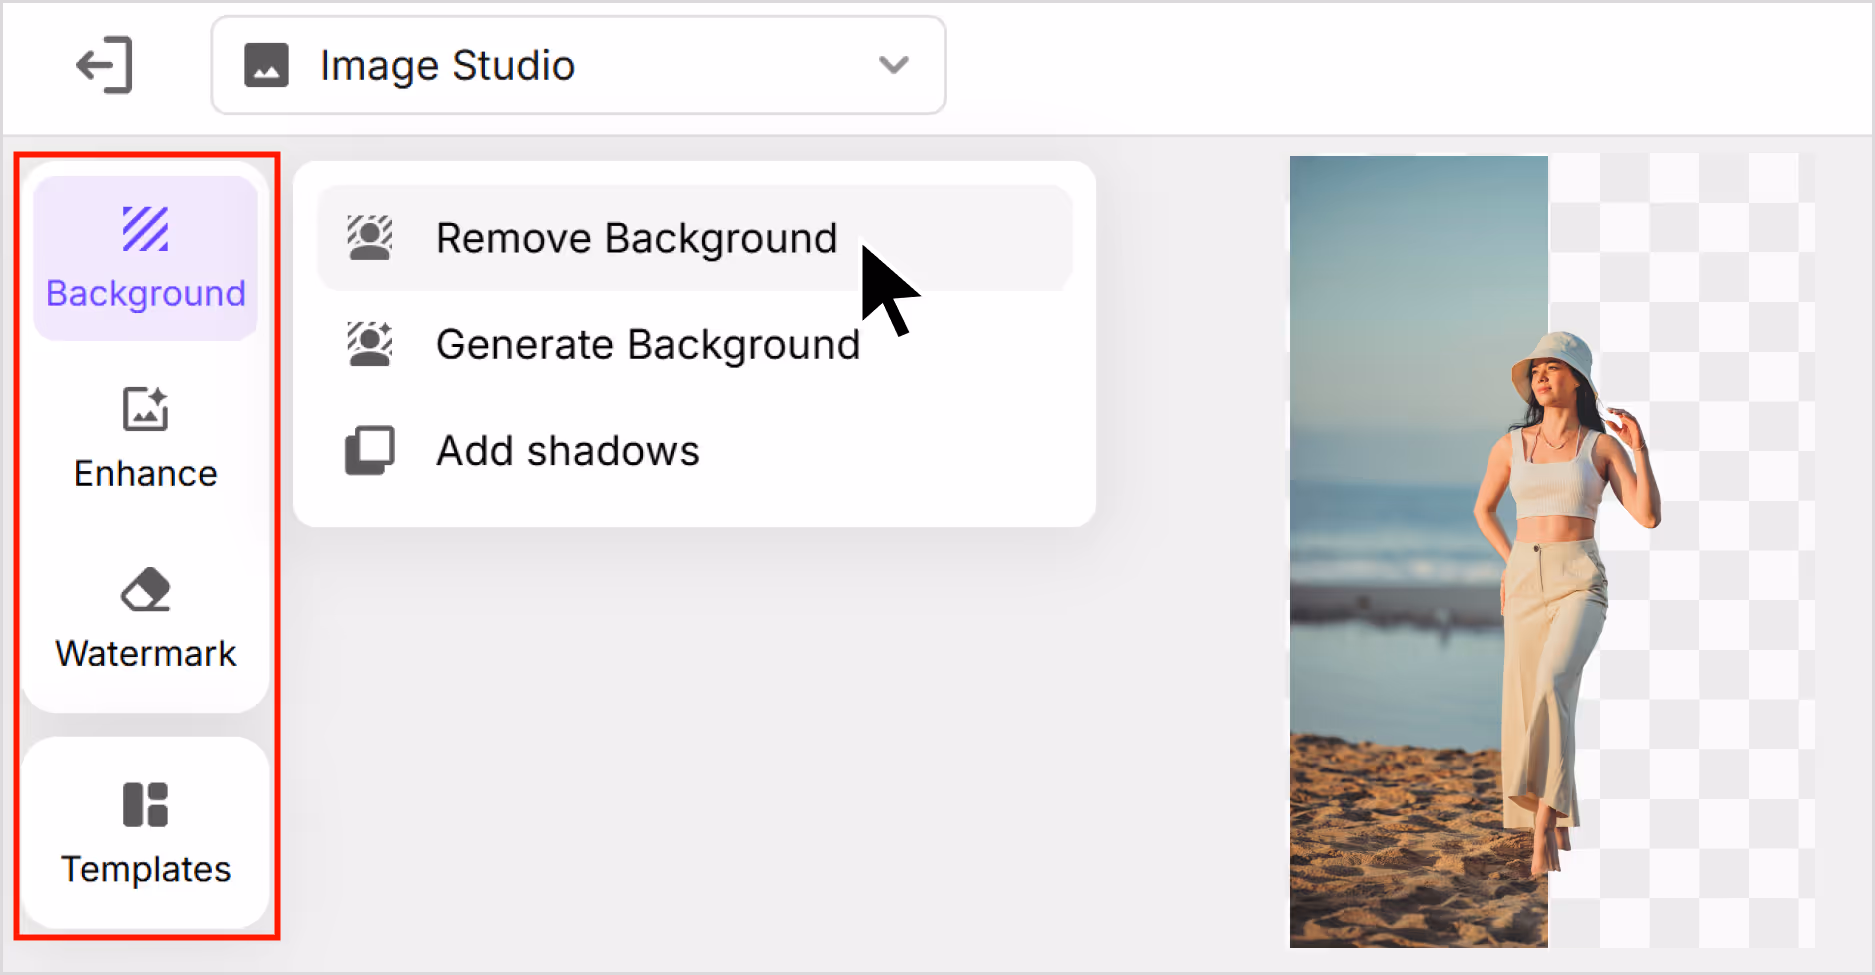
Step 4: You can also remove or change the background, add new templates, and remove the watermark.
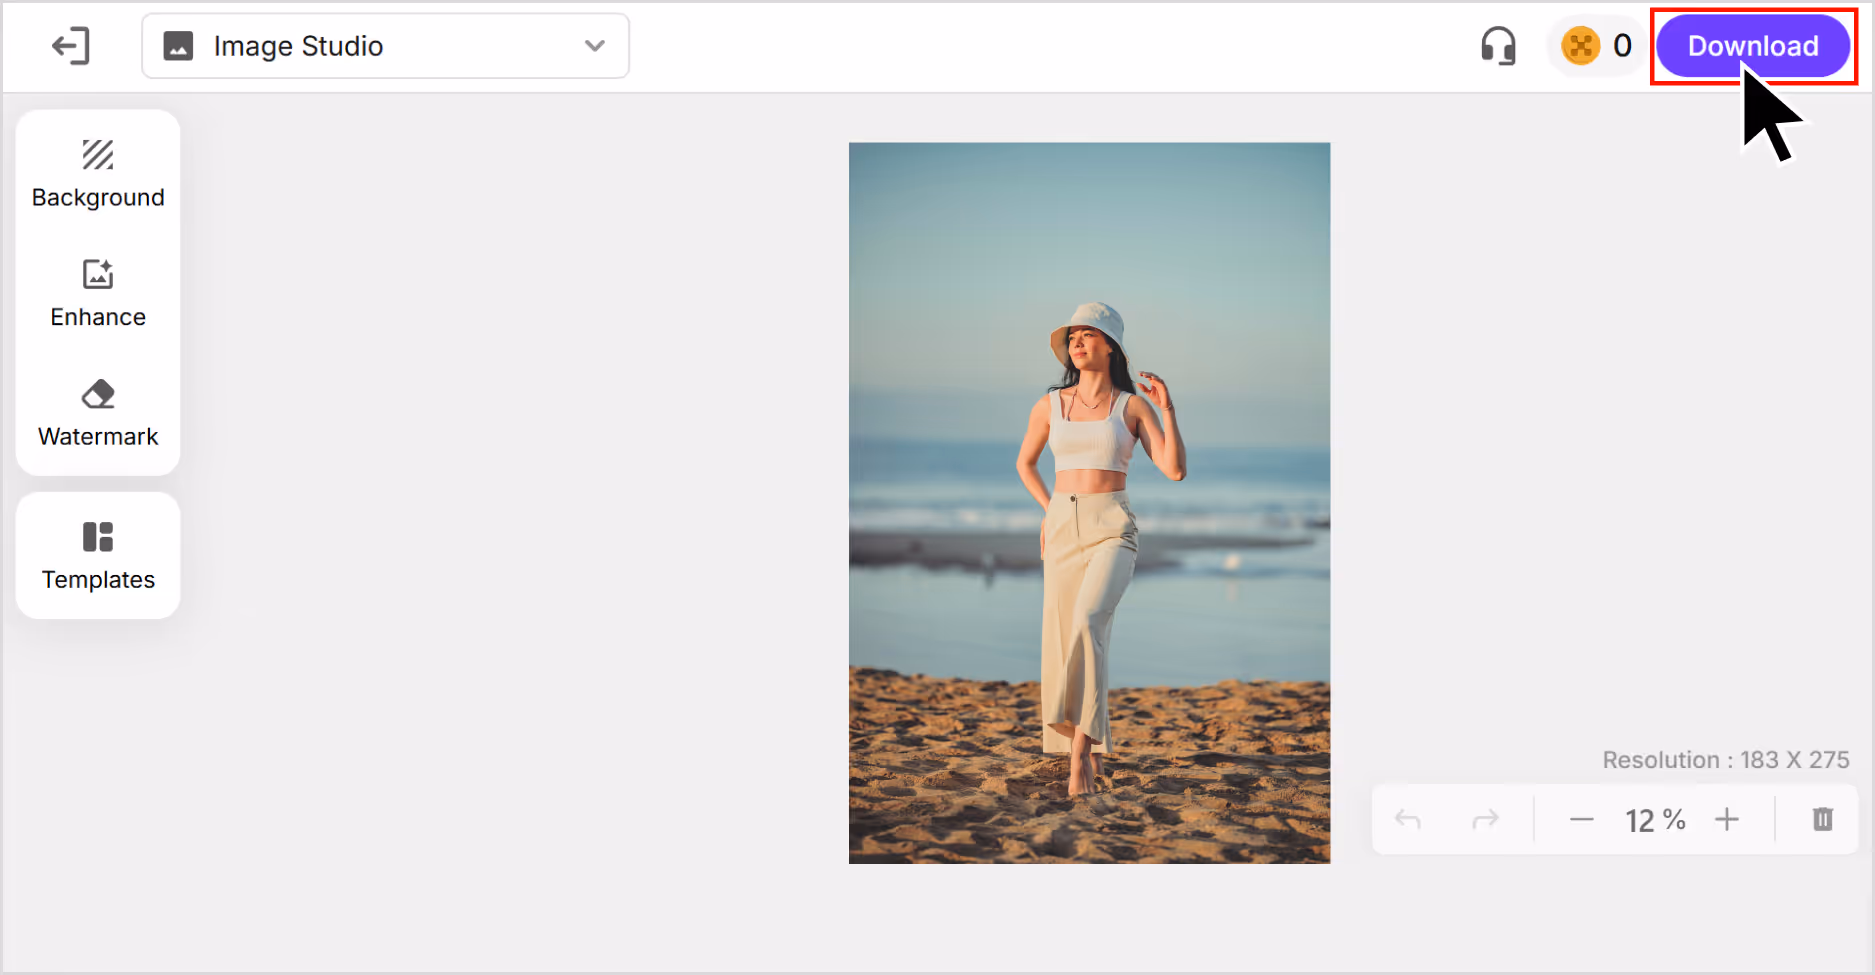
Step 5: Preview the image and select Download to save the image in SD or HD resolution.
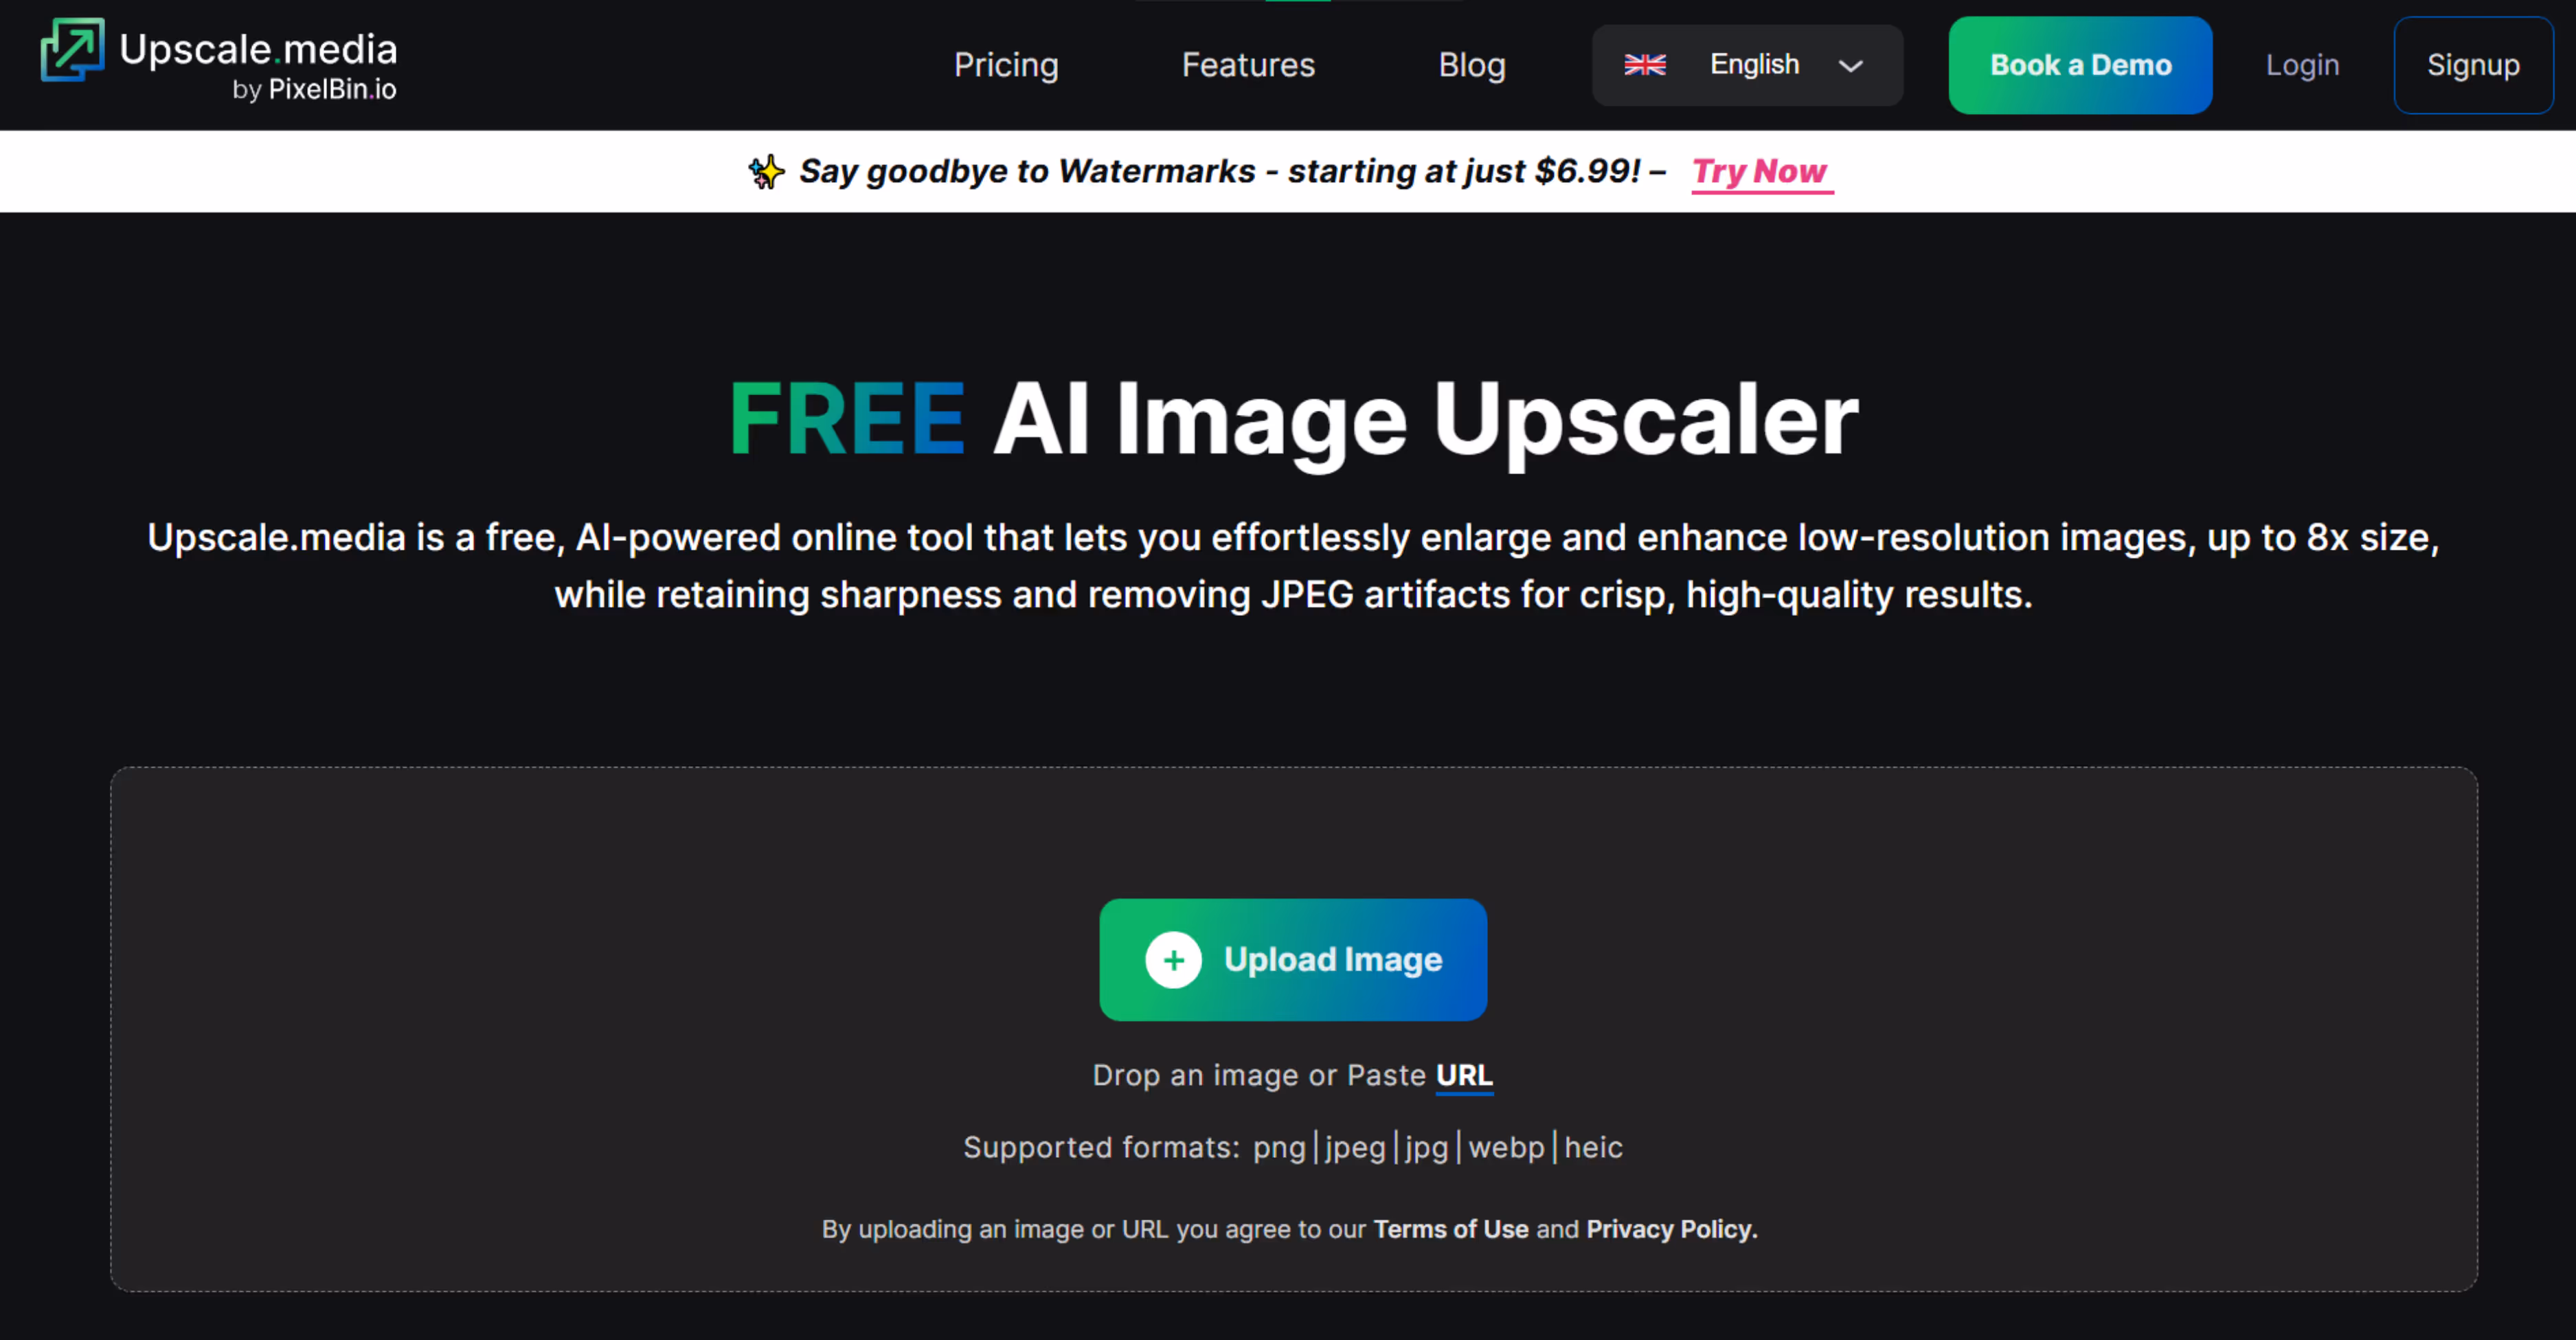
2. Upscale.media

Trying to improve a blurry photo or a low-resolution image without putting much effort? Then Upscale.media is a great option. It’s a free, AI-powered tool that helps you increase the pixels of an image.
I tested it using a low-resolution selfie of mine. After running it through Upscale.media, I was awestruck. The clarity improved, and the noise reduction kicked in well. Edges looked cleaner, details sharper, and that washed-out blur was mostly gone. You can upscale images by 2x, 4x, or 8x for free.
What did I like the most?
- You don’t need to sign up or install anything just drag and drop the image.
It’s quick my result came through in seconds. - AI noise reduction works automatically, which cleans up the grains.
The interface is clean and beginner-friendly.
How to increase the pixels of an image in Upscale.media?
Step 1: Go to Upscale.media.
Step 2: Click on “Upload Image” and add images in JPG, PNG, or JPEG formats. You can also paste the image URL.
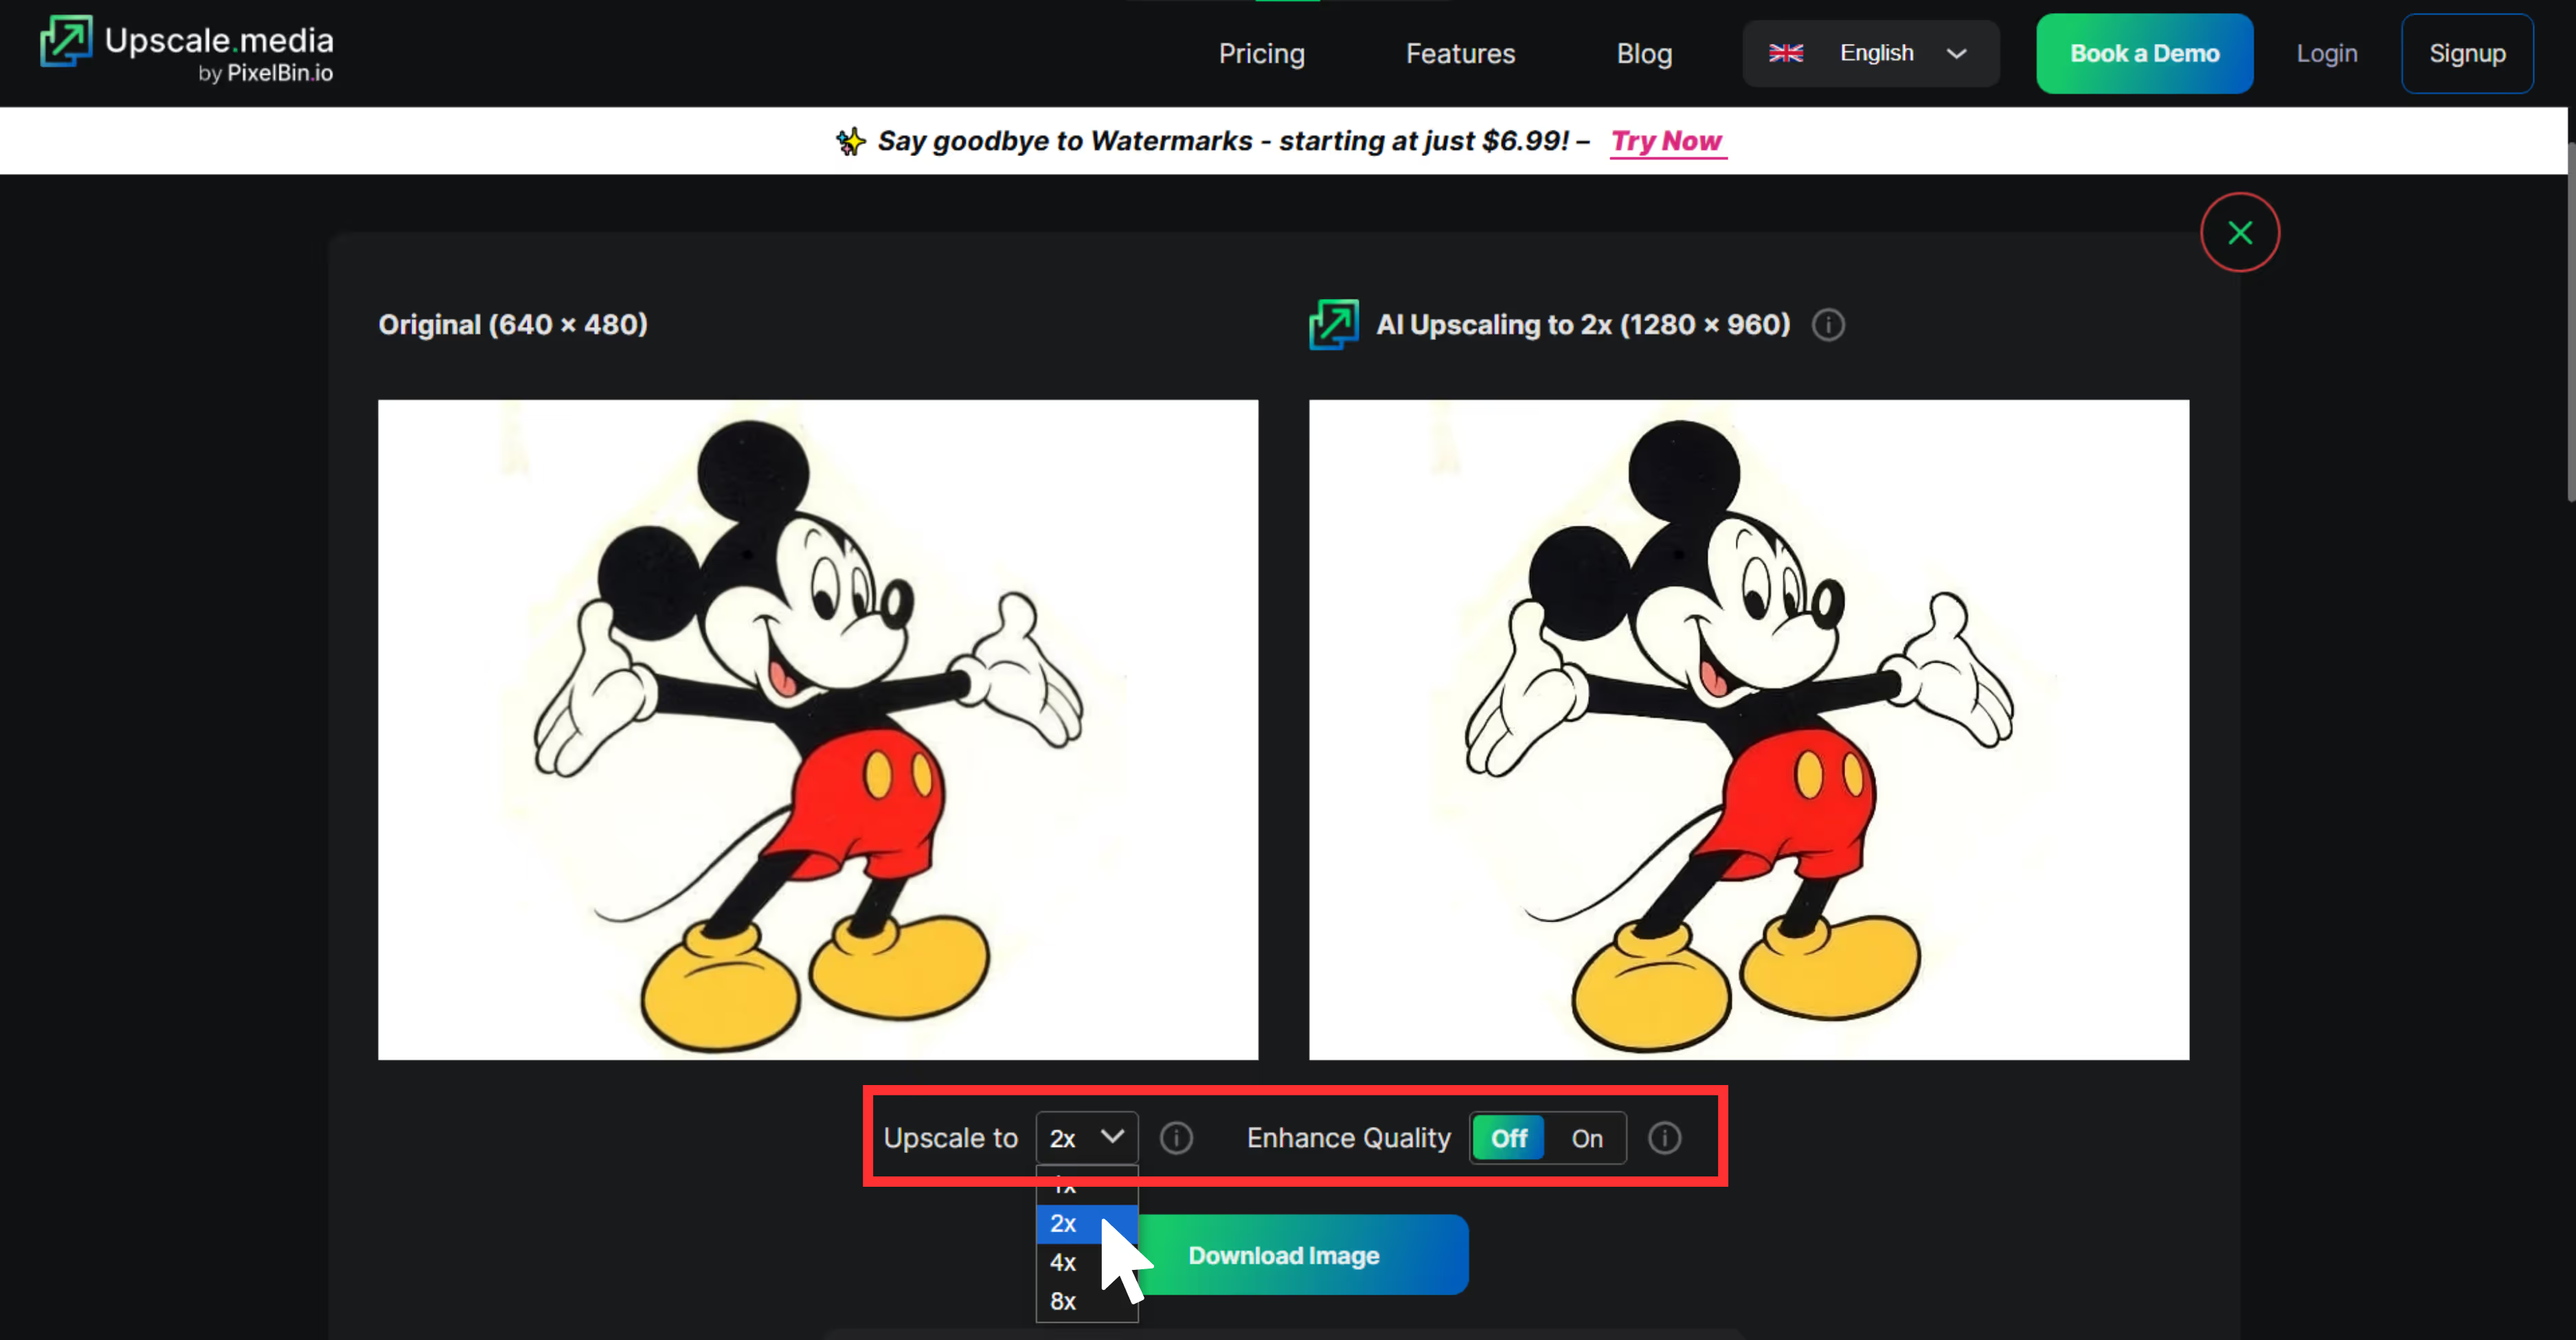
Step 3: Let the algorithms automatically process the image upscaling. You can then adjust the scale from 1x, 2x, 4x, and 8x for scaling.
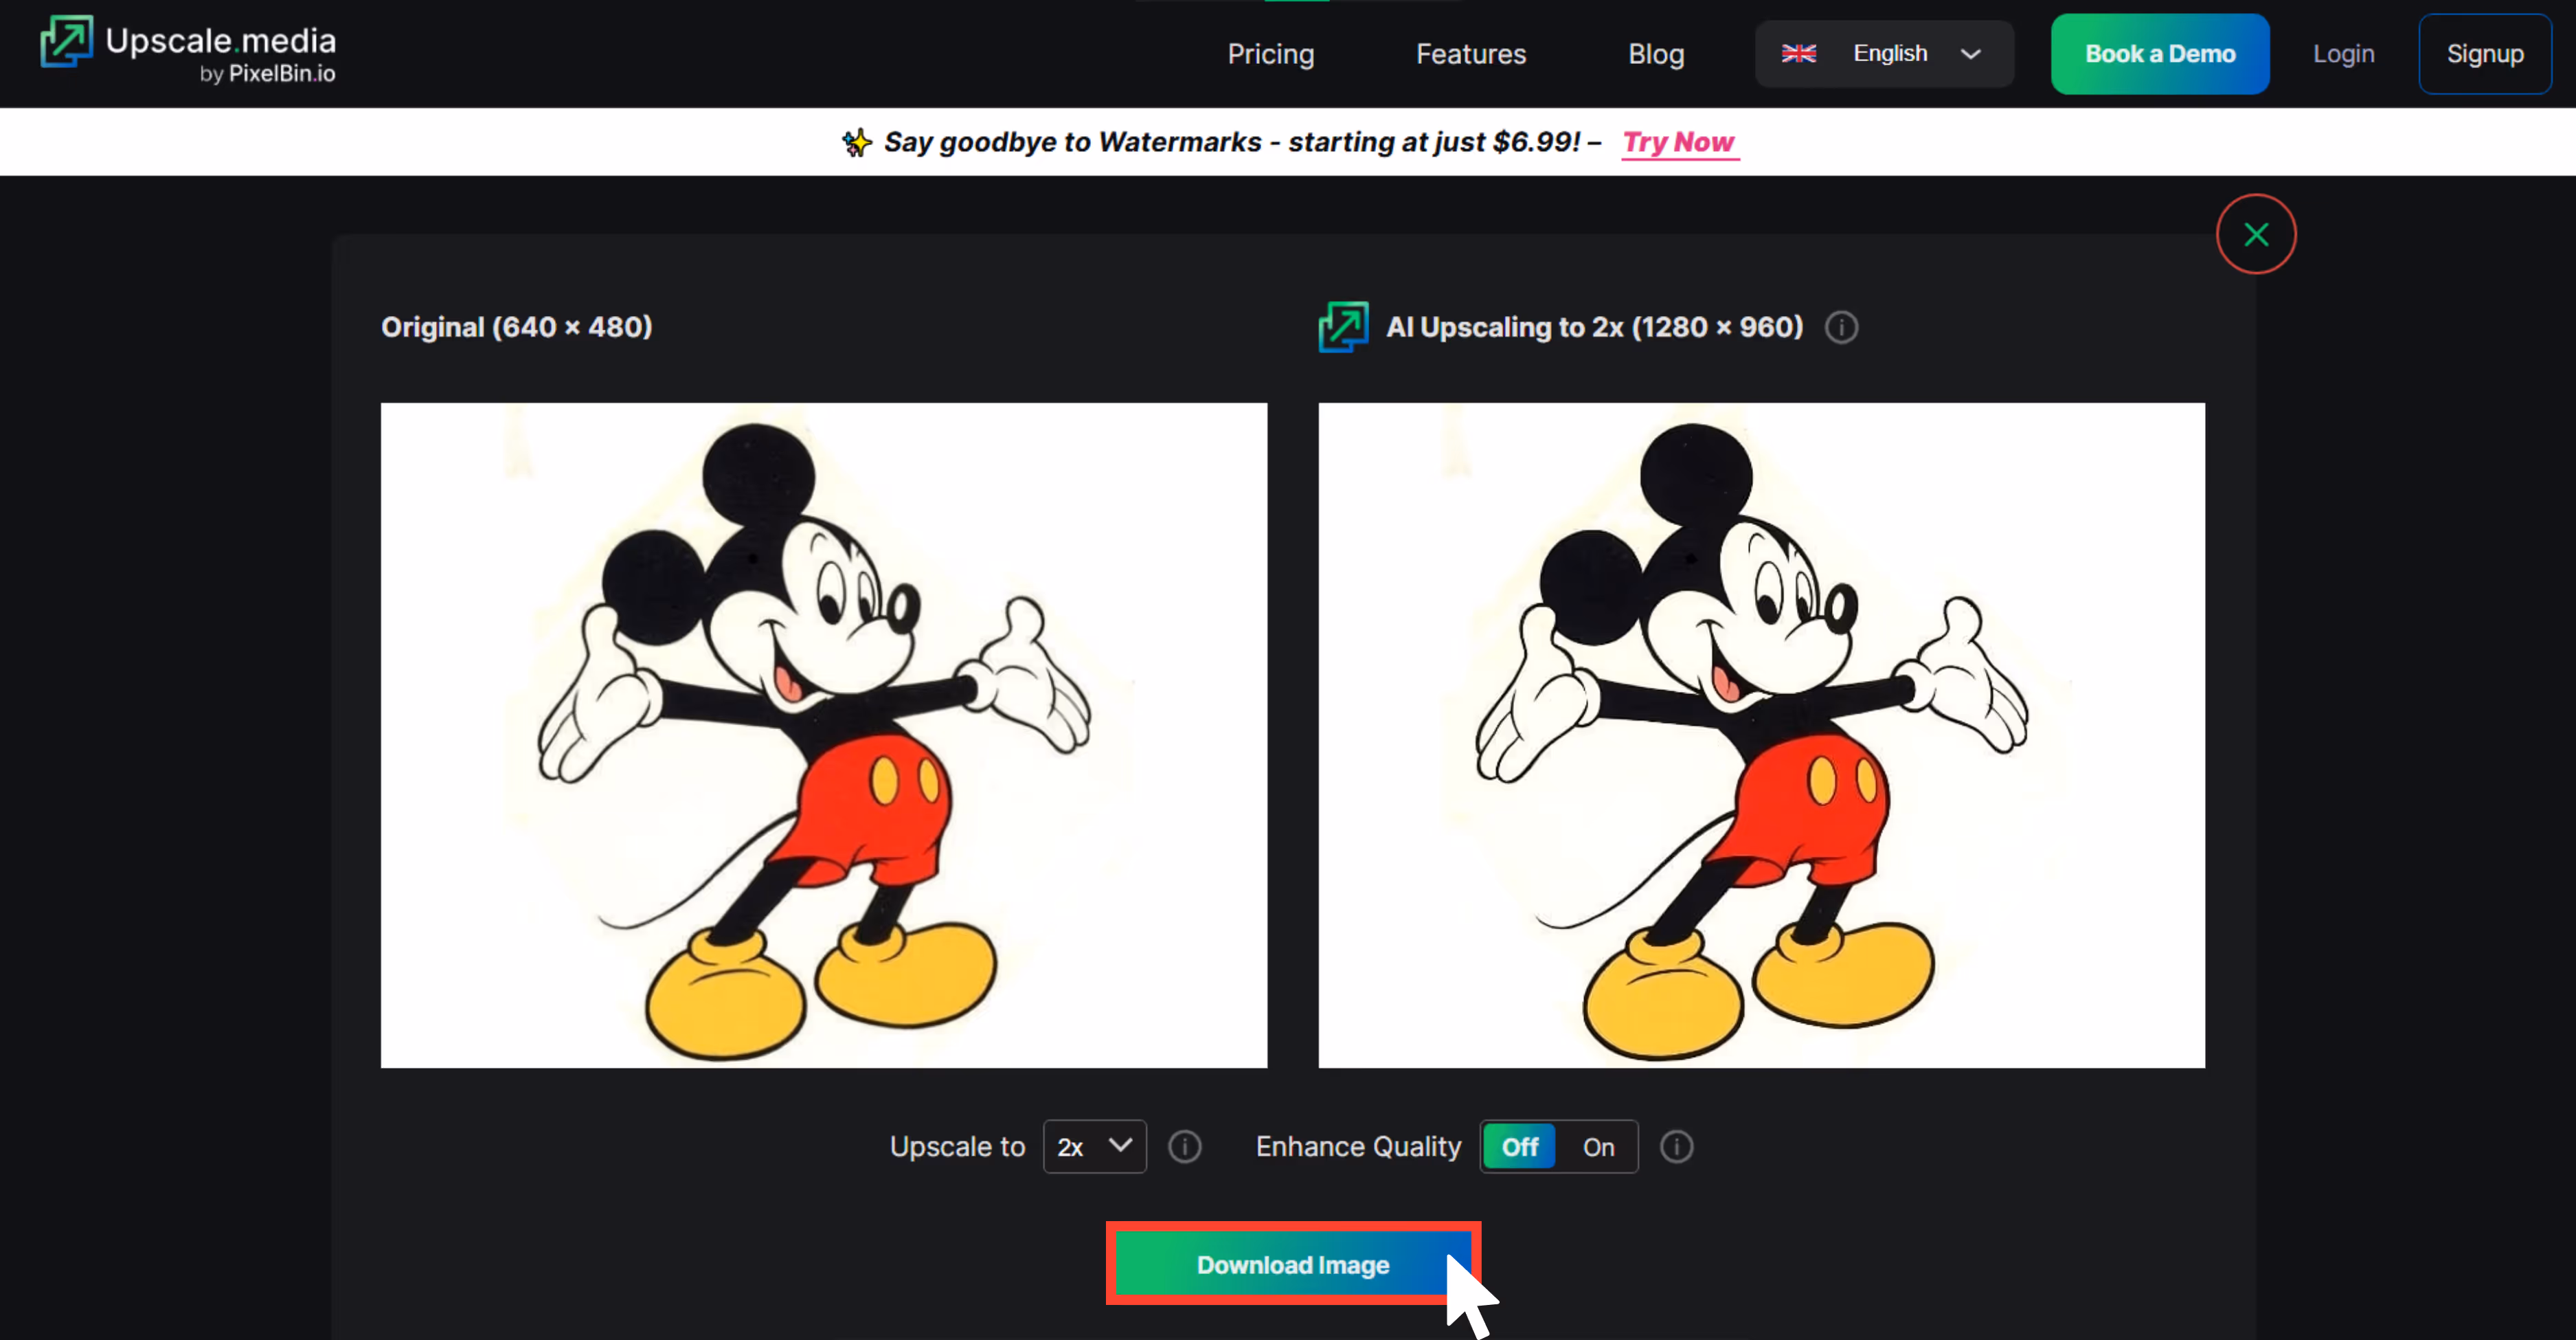
Step 4: Download the image by clicking on the “Download” chip, and you are happy with the increased number of pixels.
3. Pixelcut

If you're working with product photos, e-commerce visuals, or even quick social content, Pixelcut’s Image Upscaler is one of the smoothest tools to easily add pixels to those images. I uploaded a low-quality product image and used the 4x upscale option. The result blew my mind, definitely sharp enough to look clean on an HD screen.
Unlike some tools that try to over-fix missing details of the image, Pixelcut keeps it natural and professional. The object edges looked sharp, the background stayed noise-free, and there was no weird oversaturation. It feels like a tool made for beginners where you can just upload, enhance, and download.
What did I like the most?
- No sign-up needed to try it.
- Works great for product photography, posters, and clean visual assets.
- One-click, easy-to-understand interface.
- Mobile-friendly and fast.
- The output image doesn’t feel overly processed.
How to increase the pixels of an image in Pixelcut?
Step 1: Go to Pixelcut Image Upscaler.
Step 2: Click “Upload Image” or drag-and-drop your file.
Step 3: Wait a few seconds — it auto-upscales at 4x.
Step 4: Preview the result, then download the upscaled image.
4. Cutout.pro

One of the most reliable tools for both face enhancement and increasing pixel count in low-quality images.
I used Cutout.pro on an old image that was compressed and had blurry spots. After upscaling, facial details were clearer, and it even balanced out the background noise. It’s a great tool if you want to fix low-quality image files with people or faces in them.
What did I like the most?
- An inbuilt free enhancement app is available.
- Good for low-light shots or compressed images.
- Batch processing for multiple files is available for heavy workloads.
- Easy drag and drop of the image that you want to upscale.
How to increase the pixels of an image in Cutout.pro?
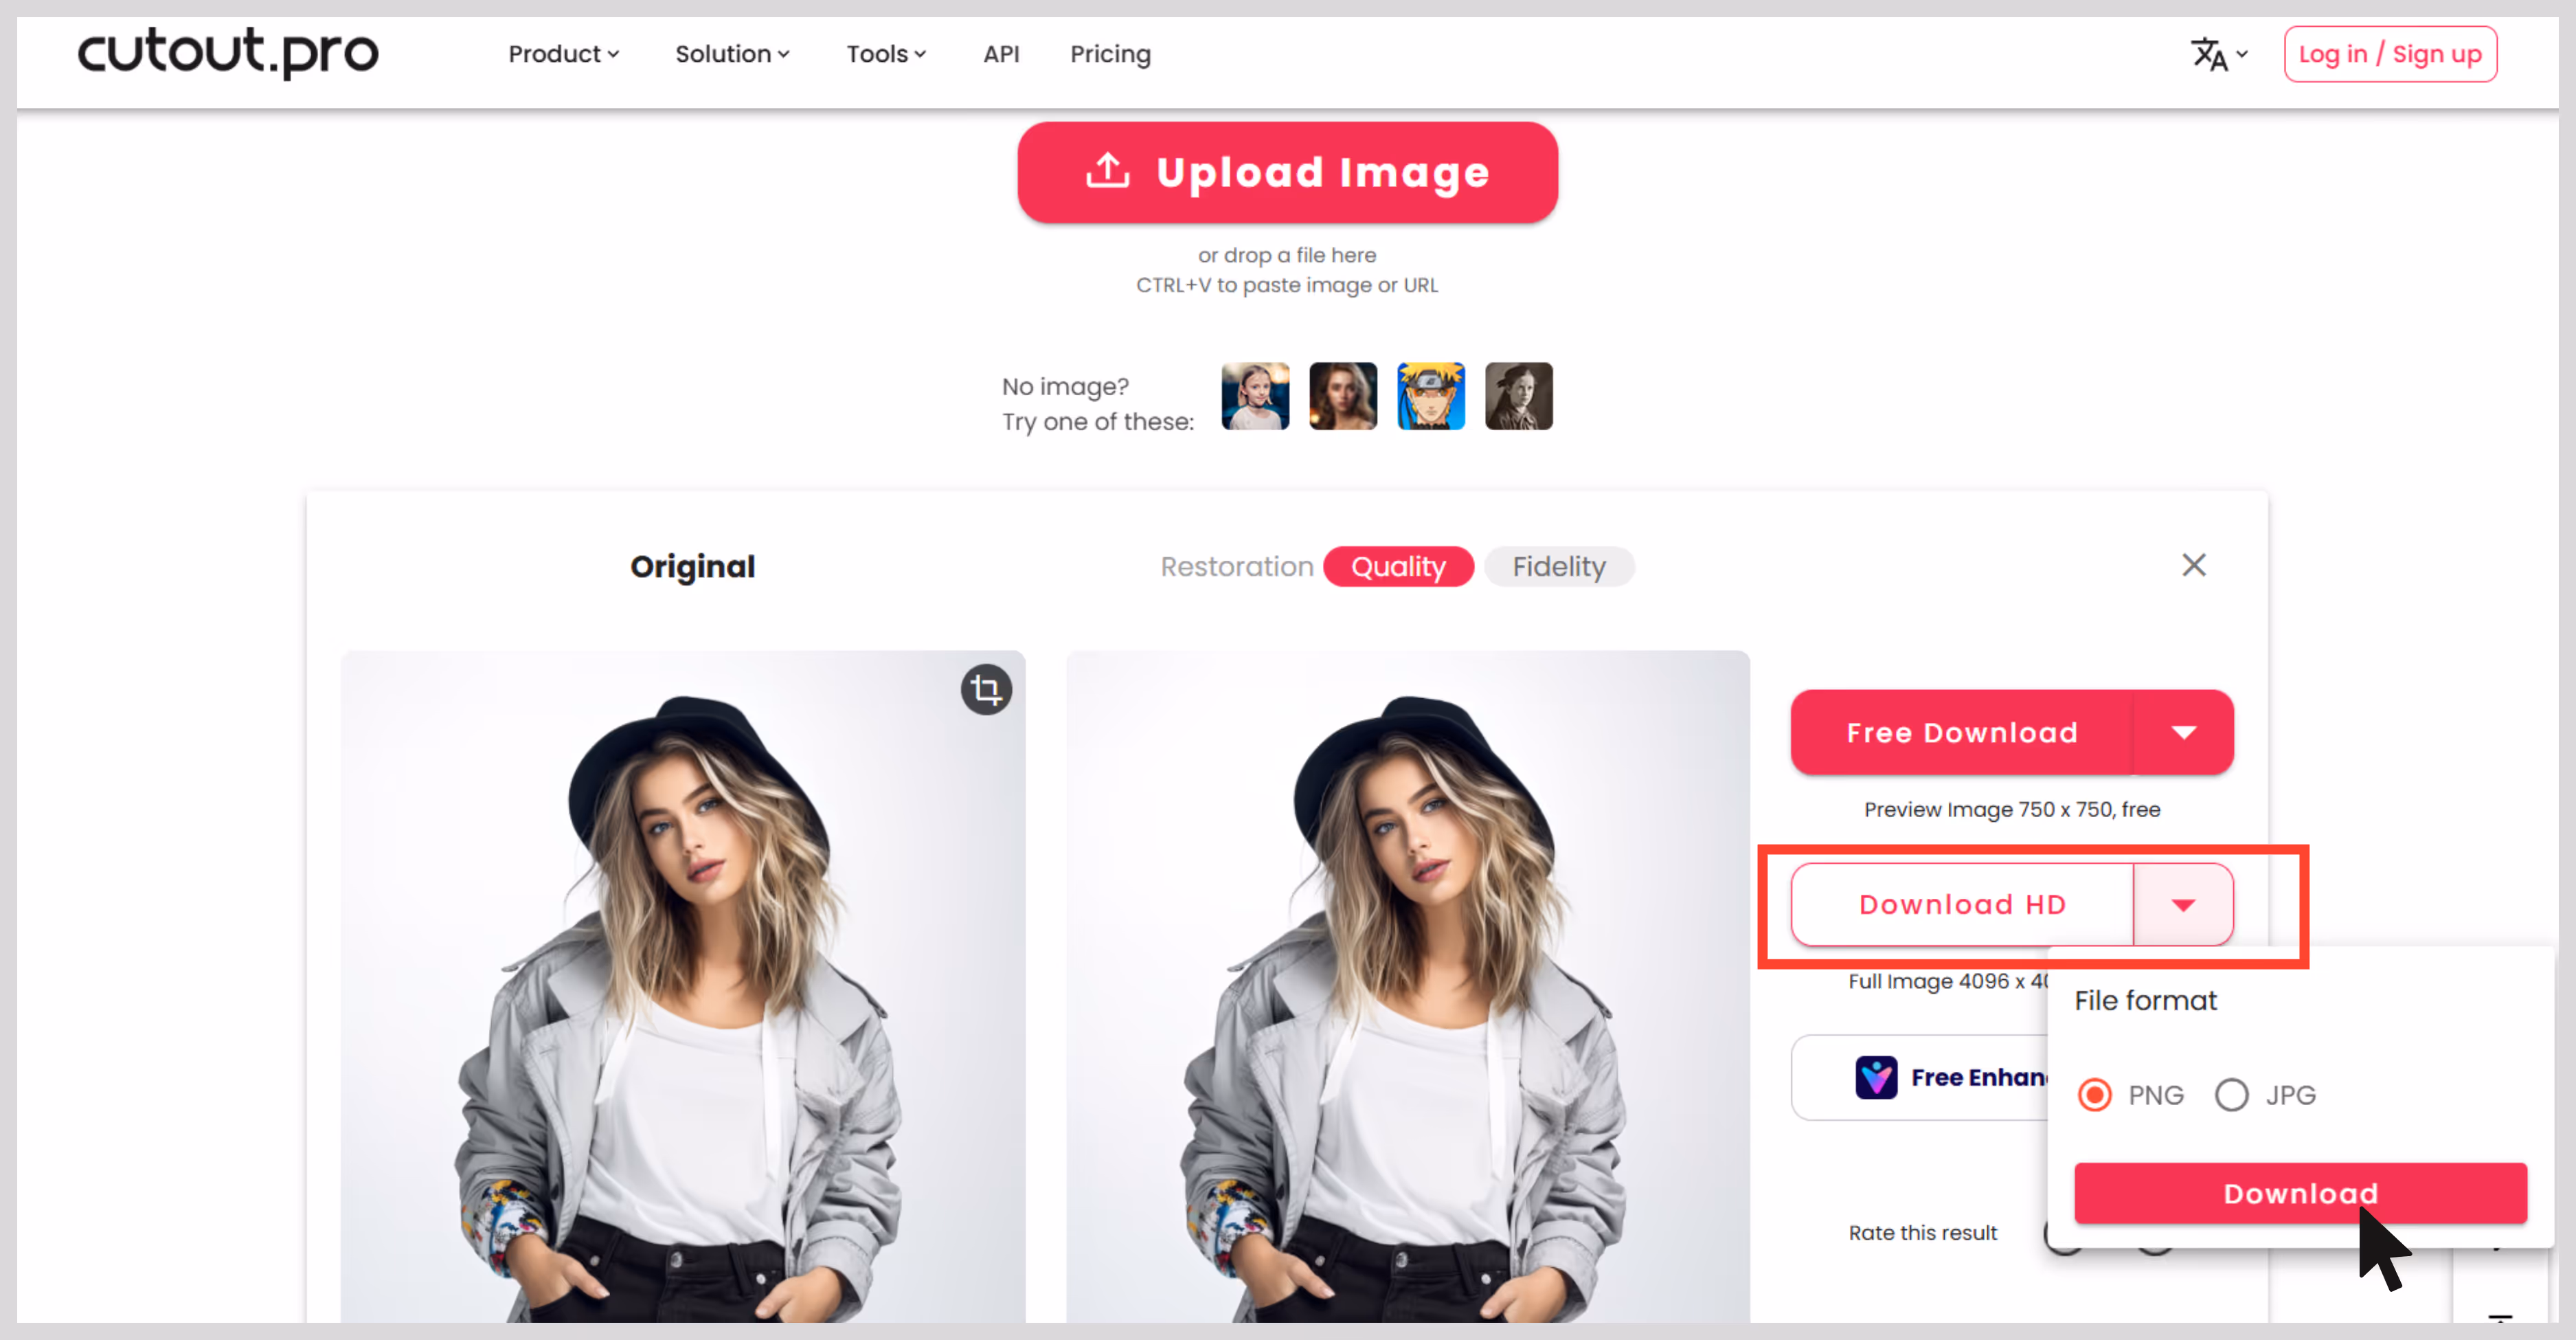
Step 1: Go to Cutout.pro.

Step 2: Upload your photo (portrait or landscape). Upload and just for the processing time.
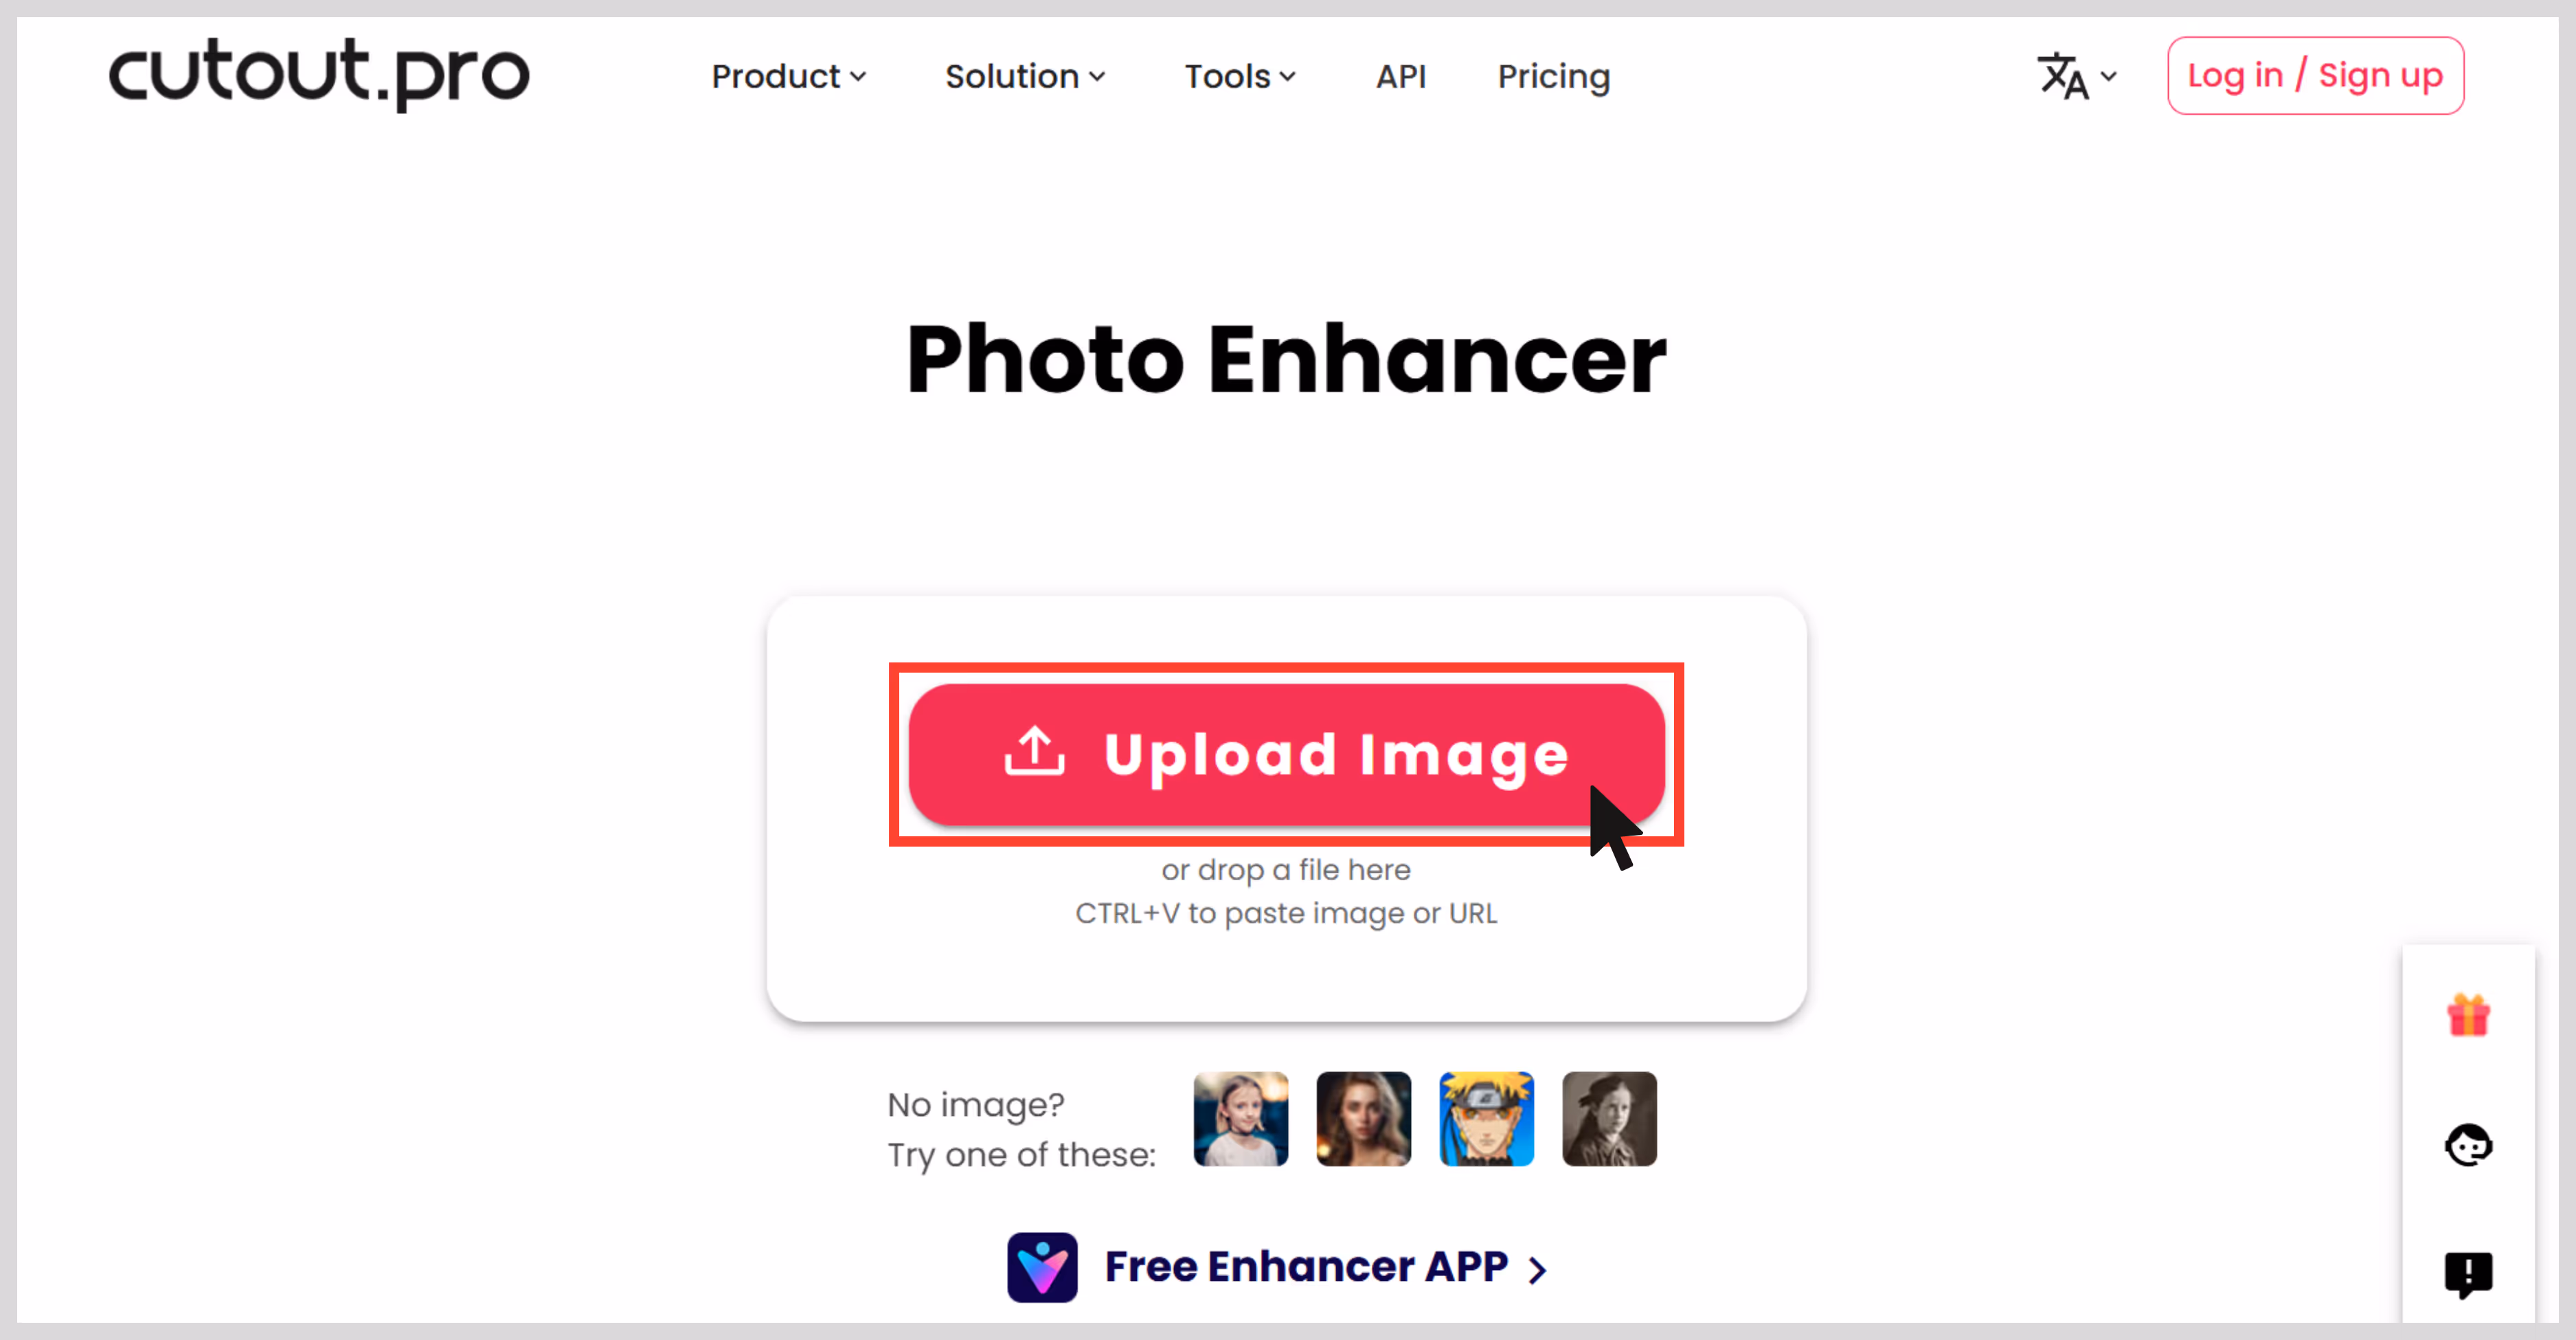
Step 3: Once done, just download the output in the preferred format. If you want to enhance the image a bit more, then click on the free enhancer app with which you can create your image to cartoon, anime, passport size, reducing noise and grains from old photos, and more.
5. DeepImage

This tool is a strong AI-powered solution for increasing pixels to an image. You can upload multiple images at once, and the tool automatically processes them, though upload limits may vary by plan.
Also, it has excellent features like facial enhancement, noise reduction, and more. I tried the tool with a few low quality images, and the tool upscaled them quickly by removing the blur spots and sharpening the textures.
What did I like the most?
- AI image upscaling that has a scale size of 2x and 4x.
- Face enhancements are available for portraits.
- Supports different image formats like JPG, JPEG, and PNG.
- API access is available for automation.
- Credit-based pricing model.
How to increase the pixels of an image in DeepImage?
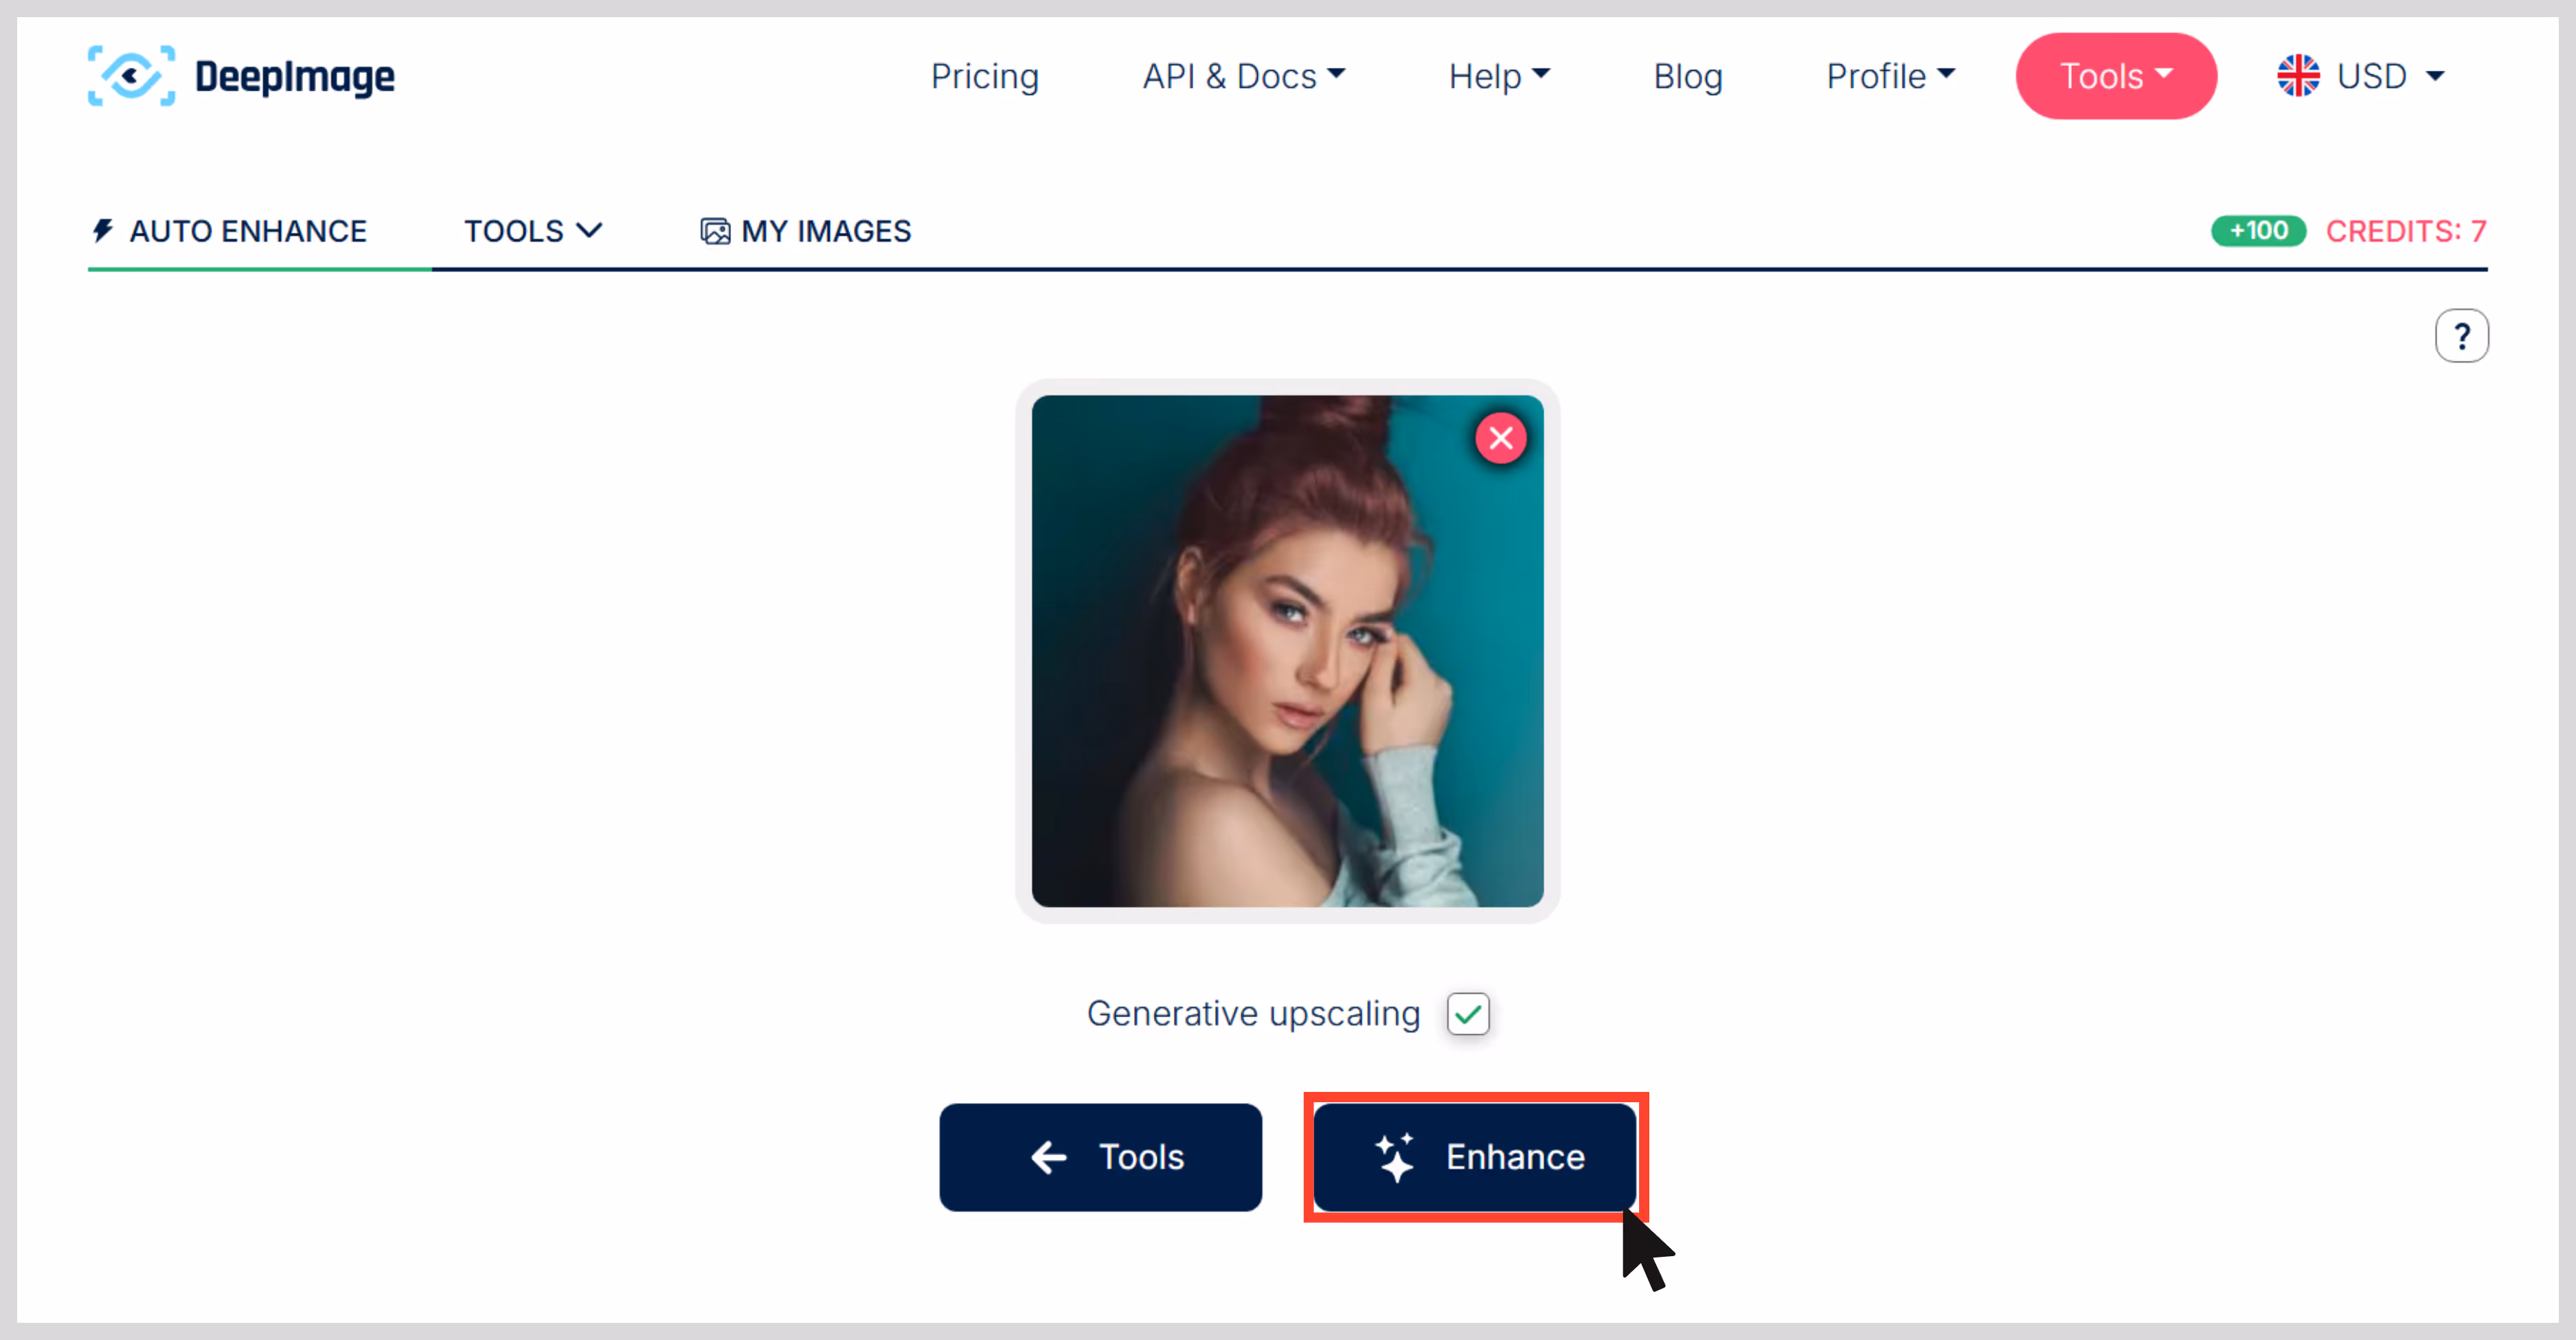
Step 1: Head to DeepImage. Here, you have a variety of options to edit your images, but you must first click on the first option, “Auto Enhance.”
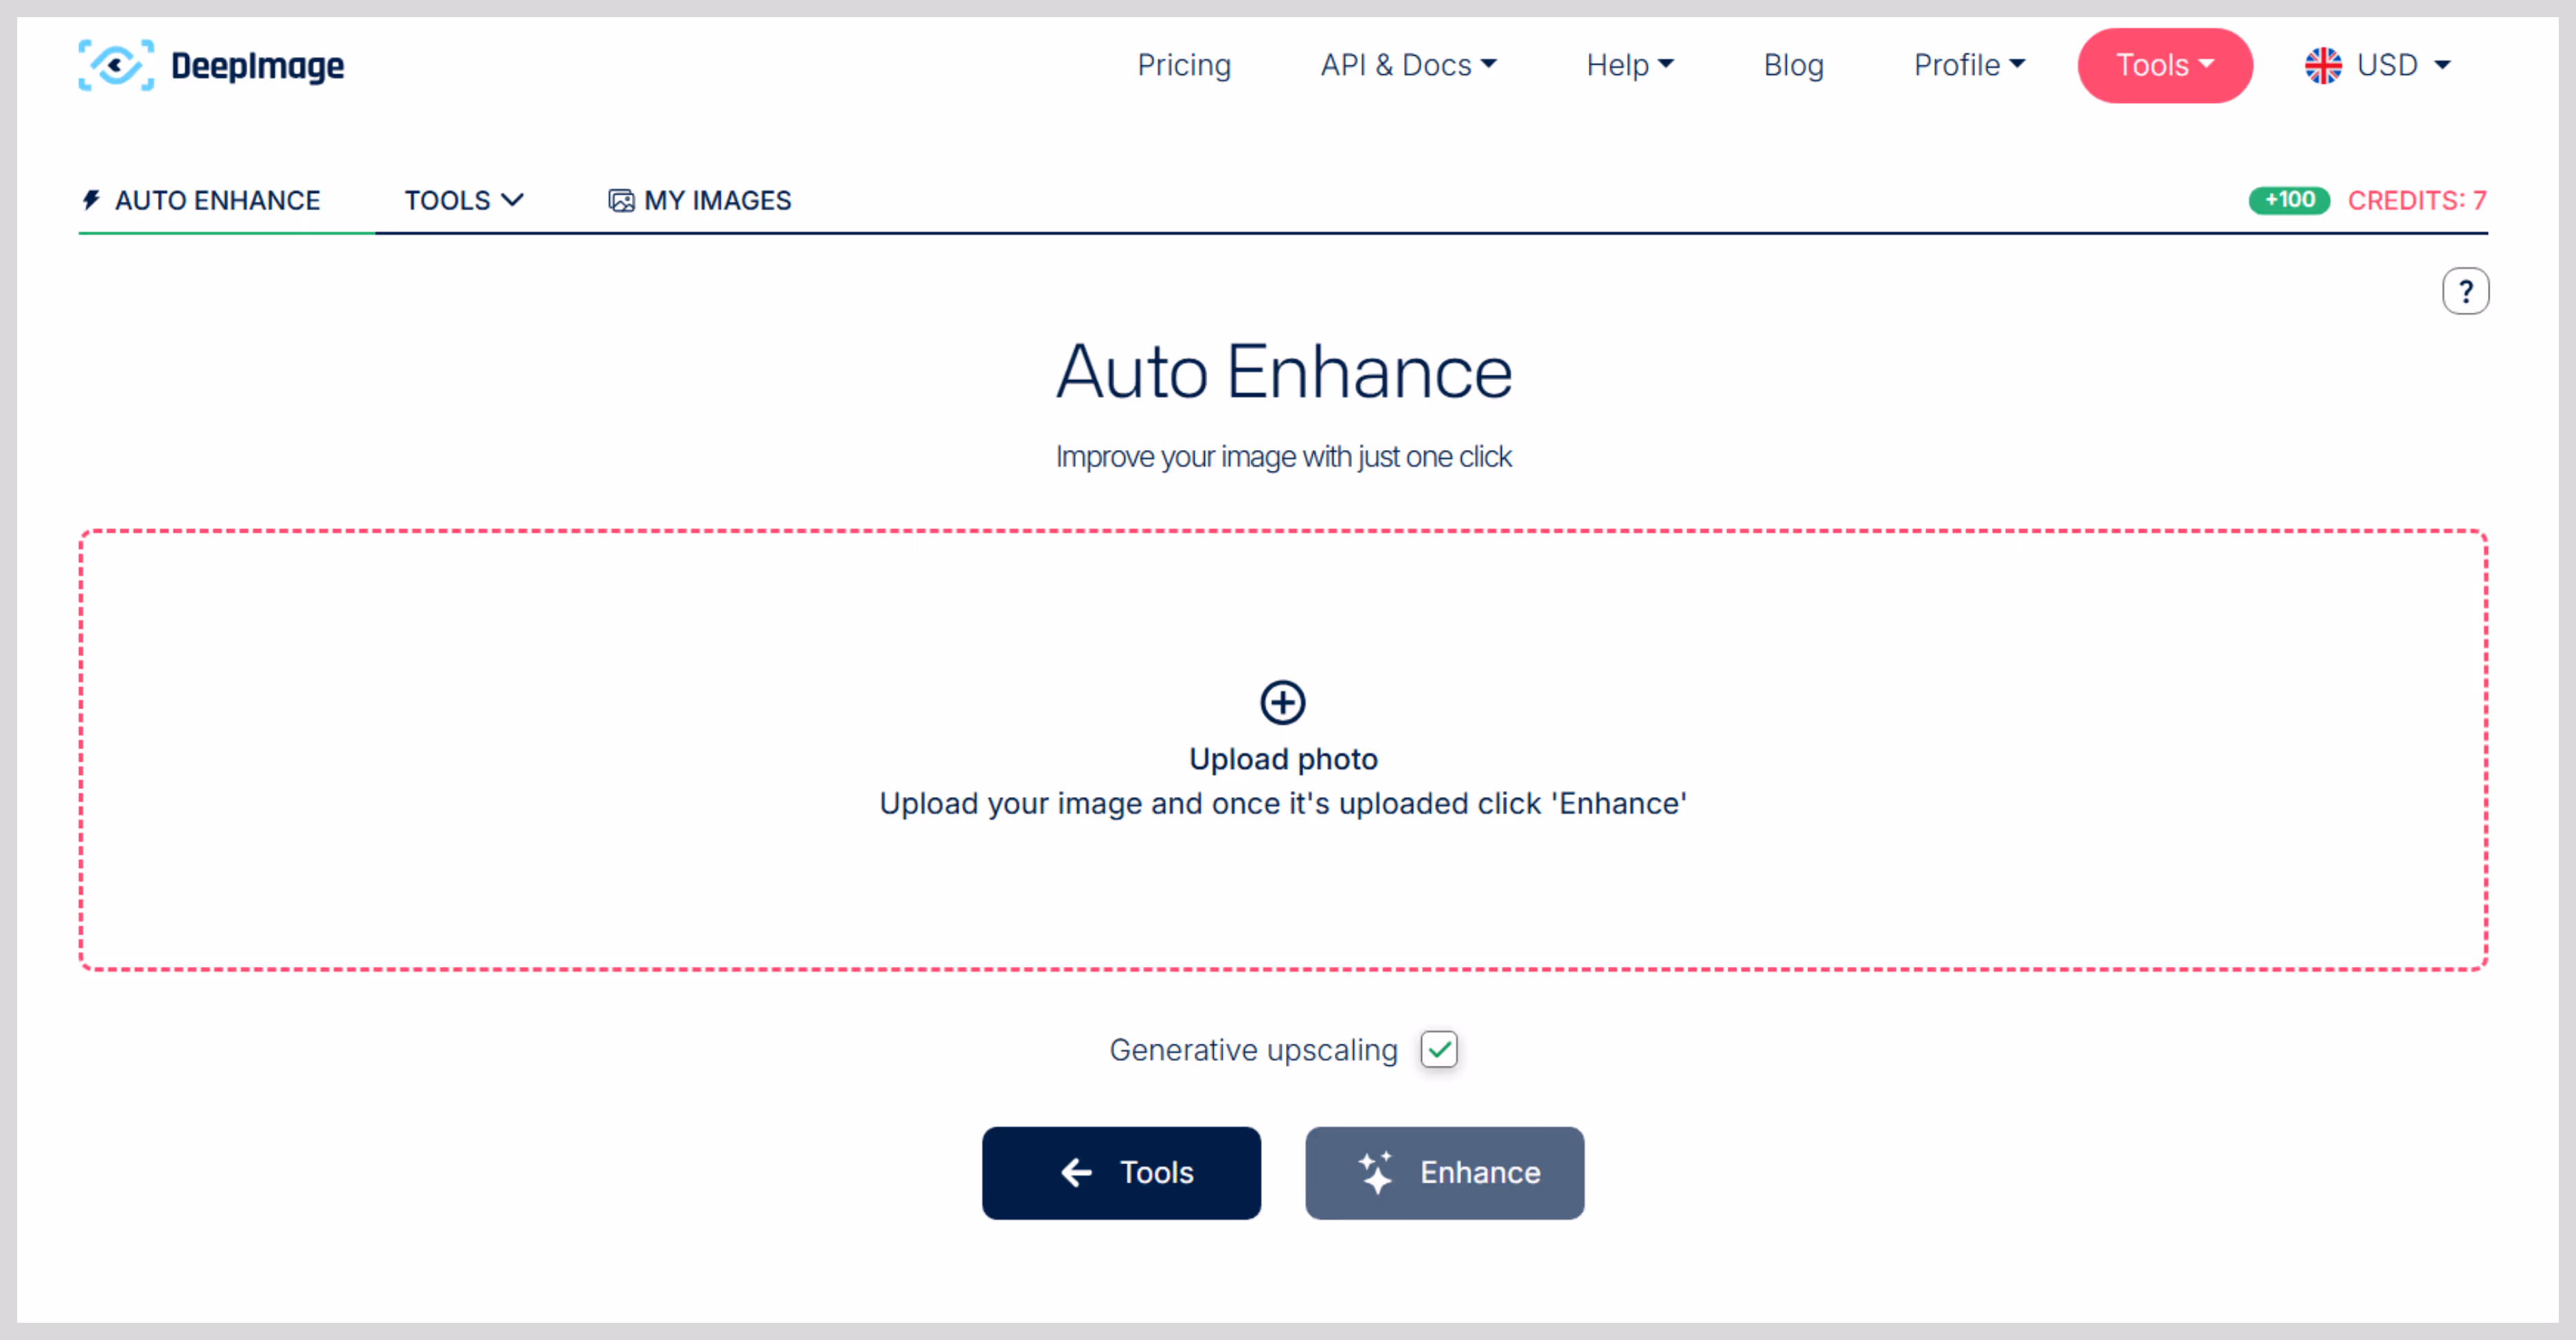
Step 2: After selecting the option, the tool will prompt you to sign up. Once signed up, you can upload one or multiple images to upscale.
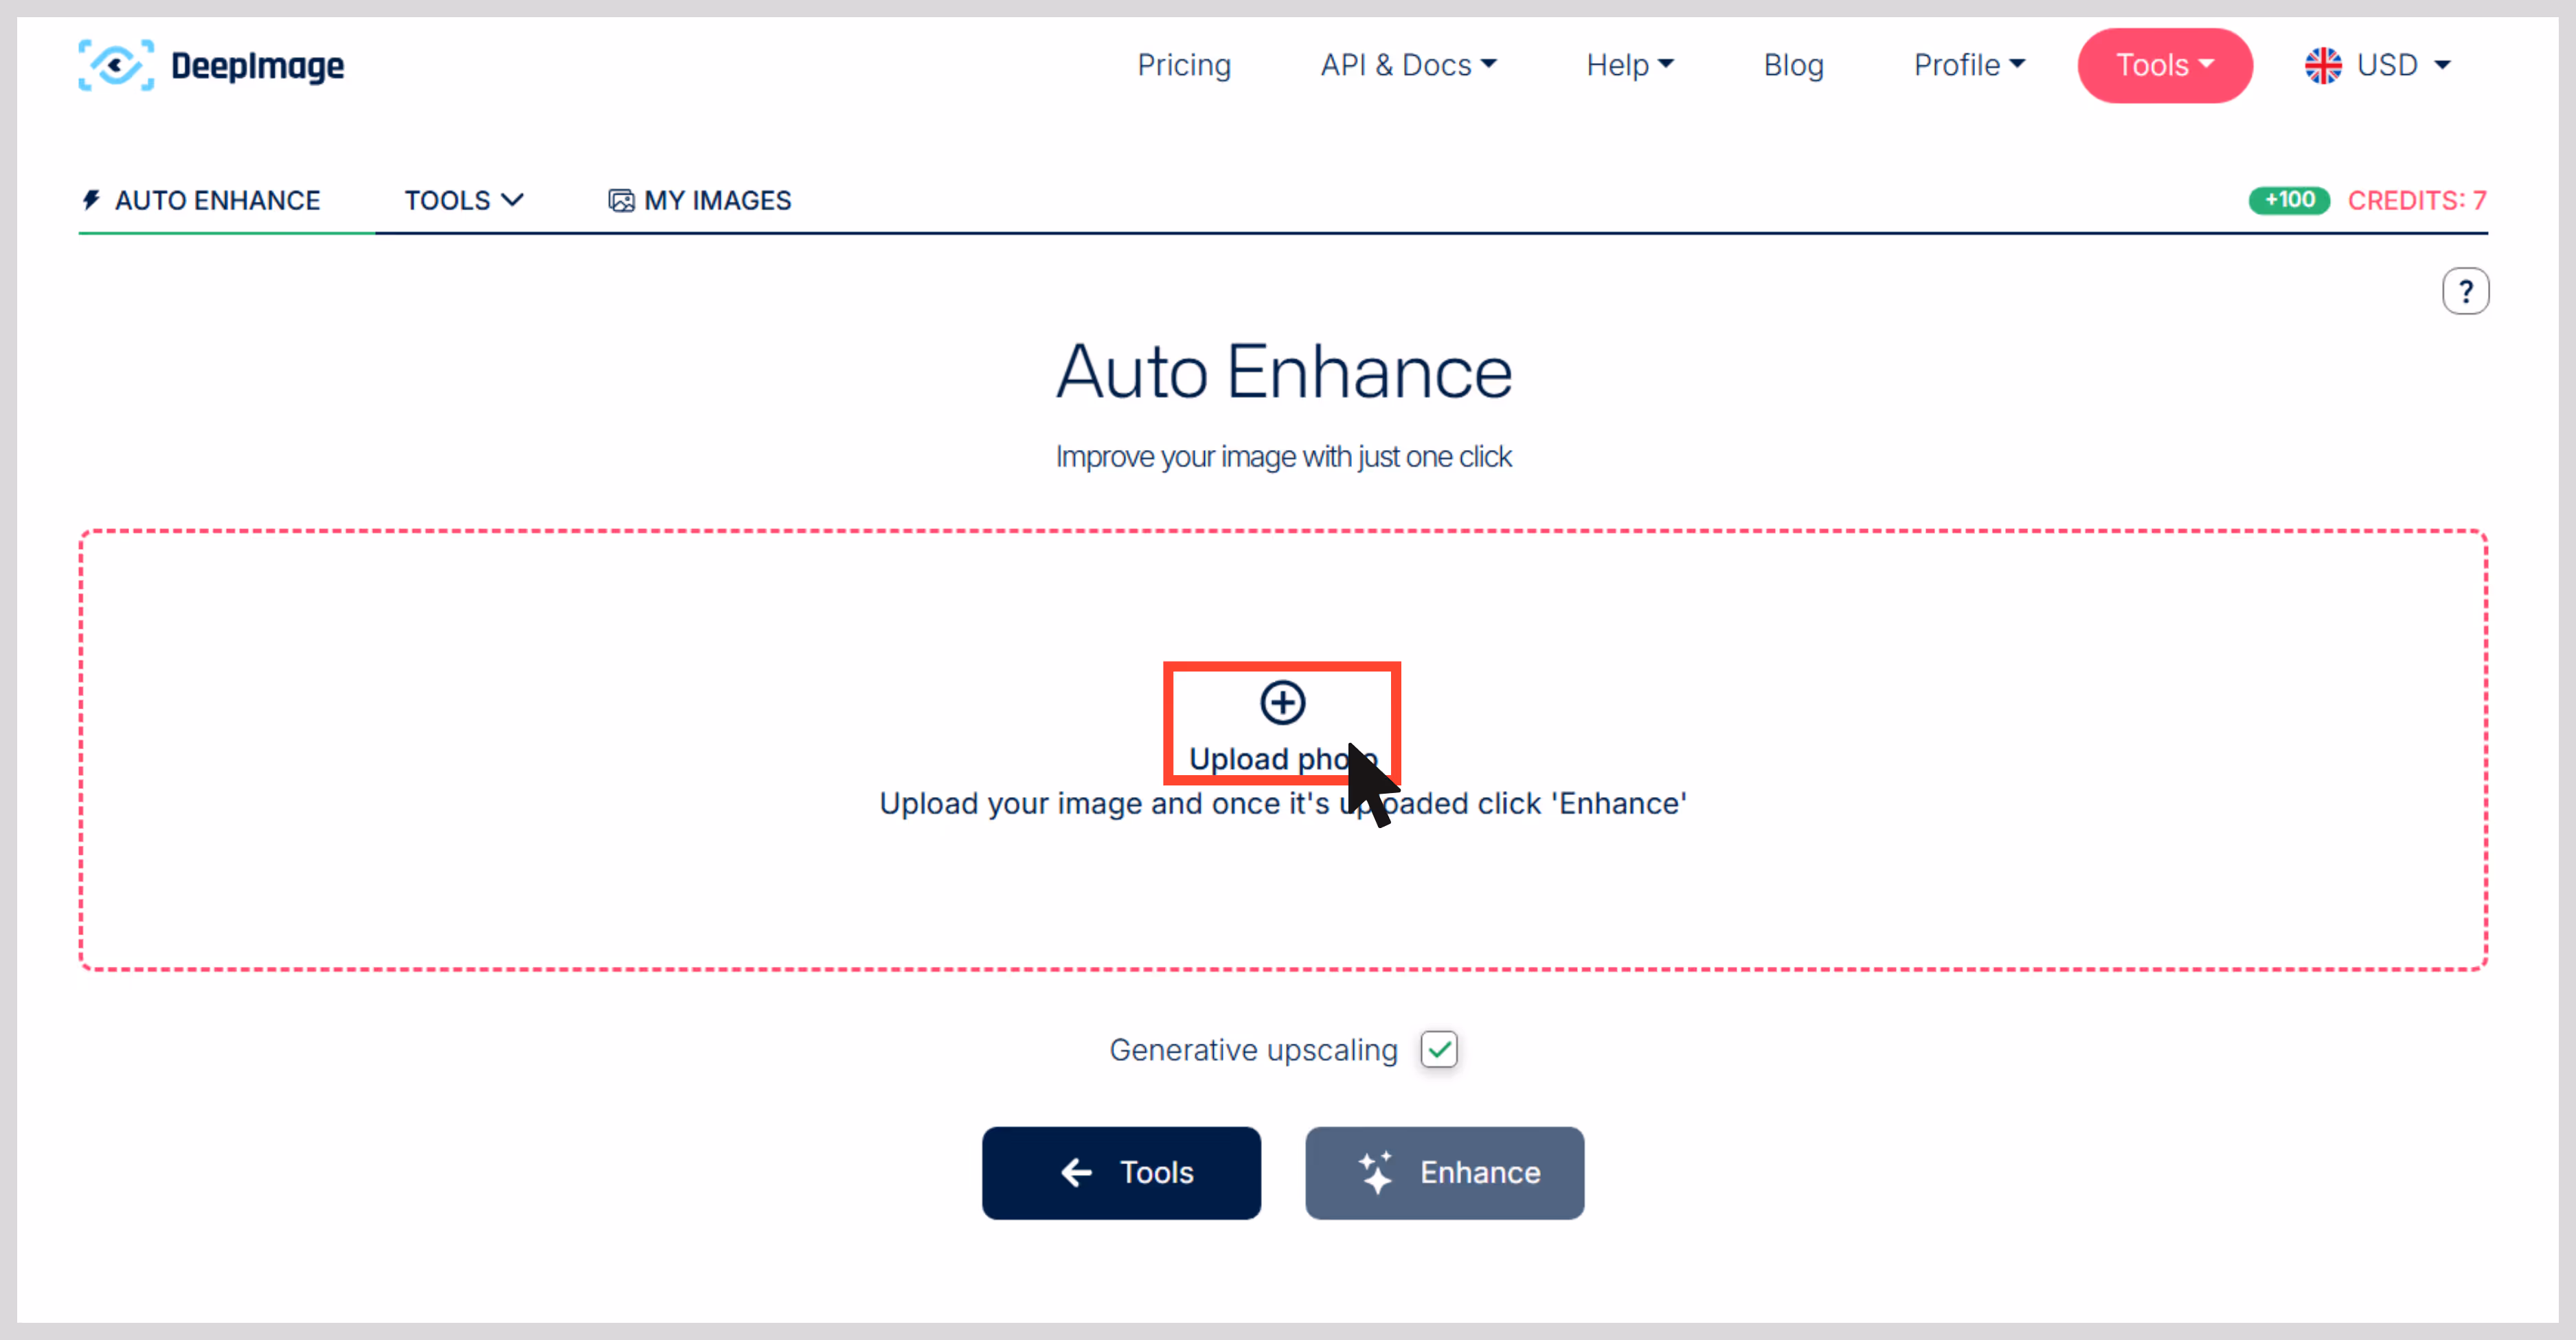
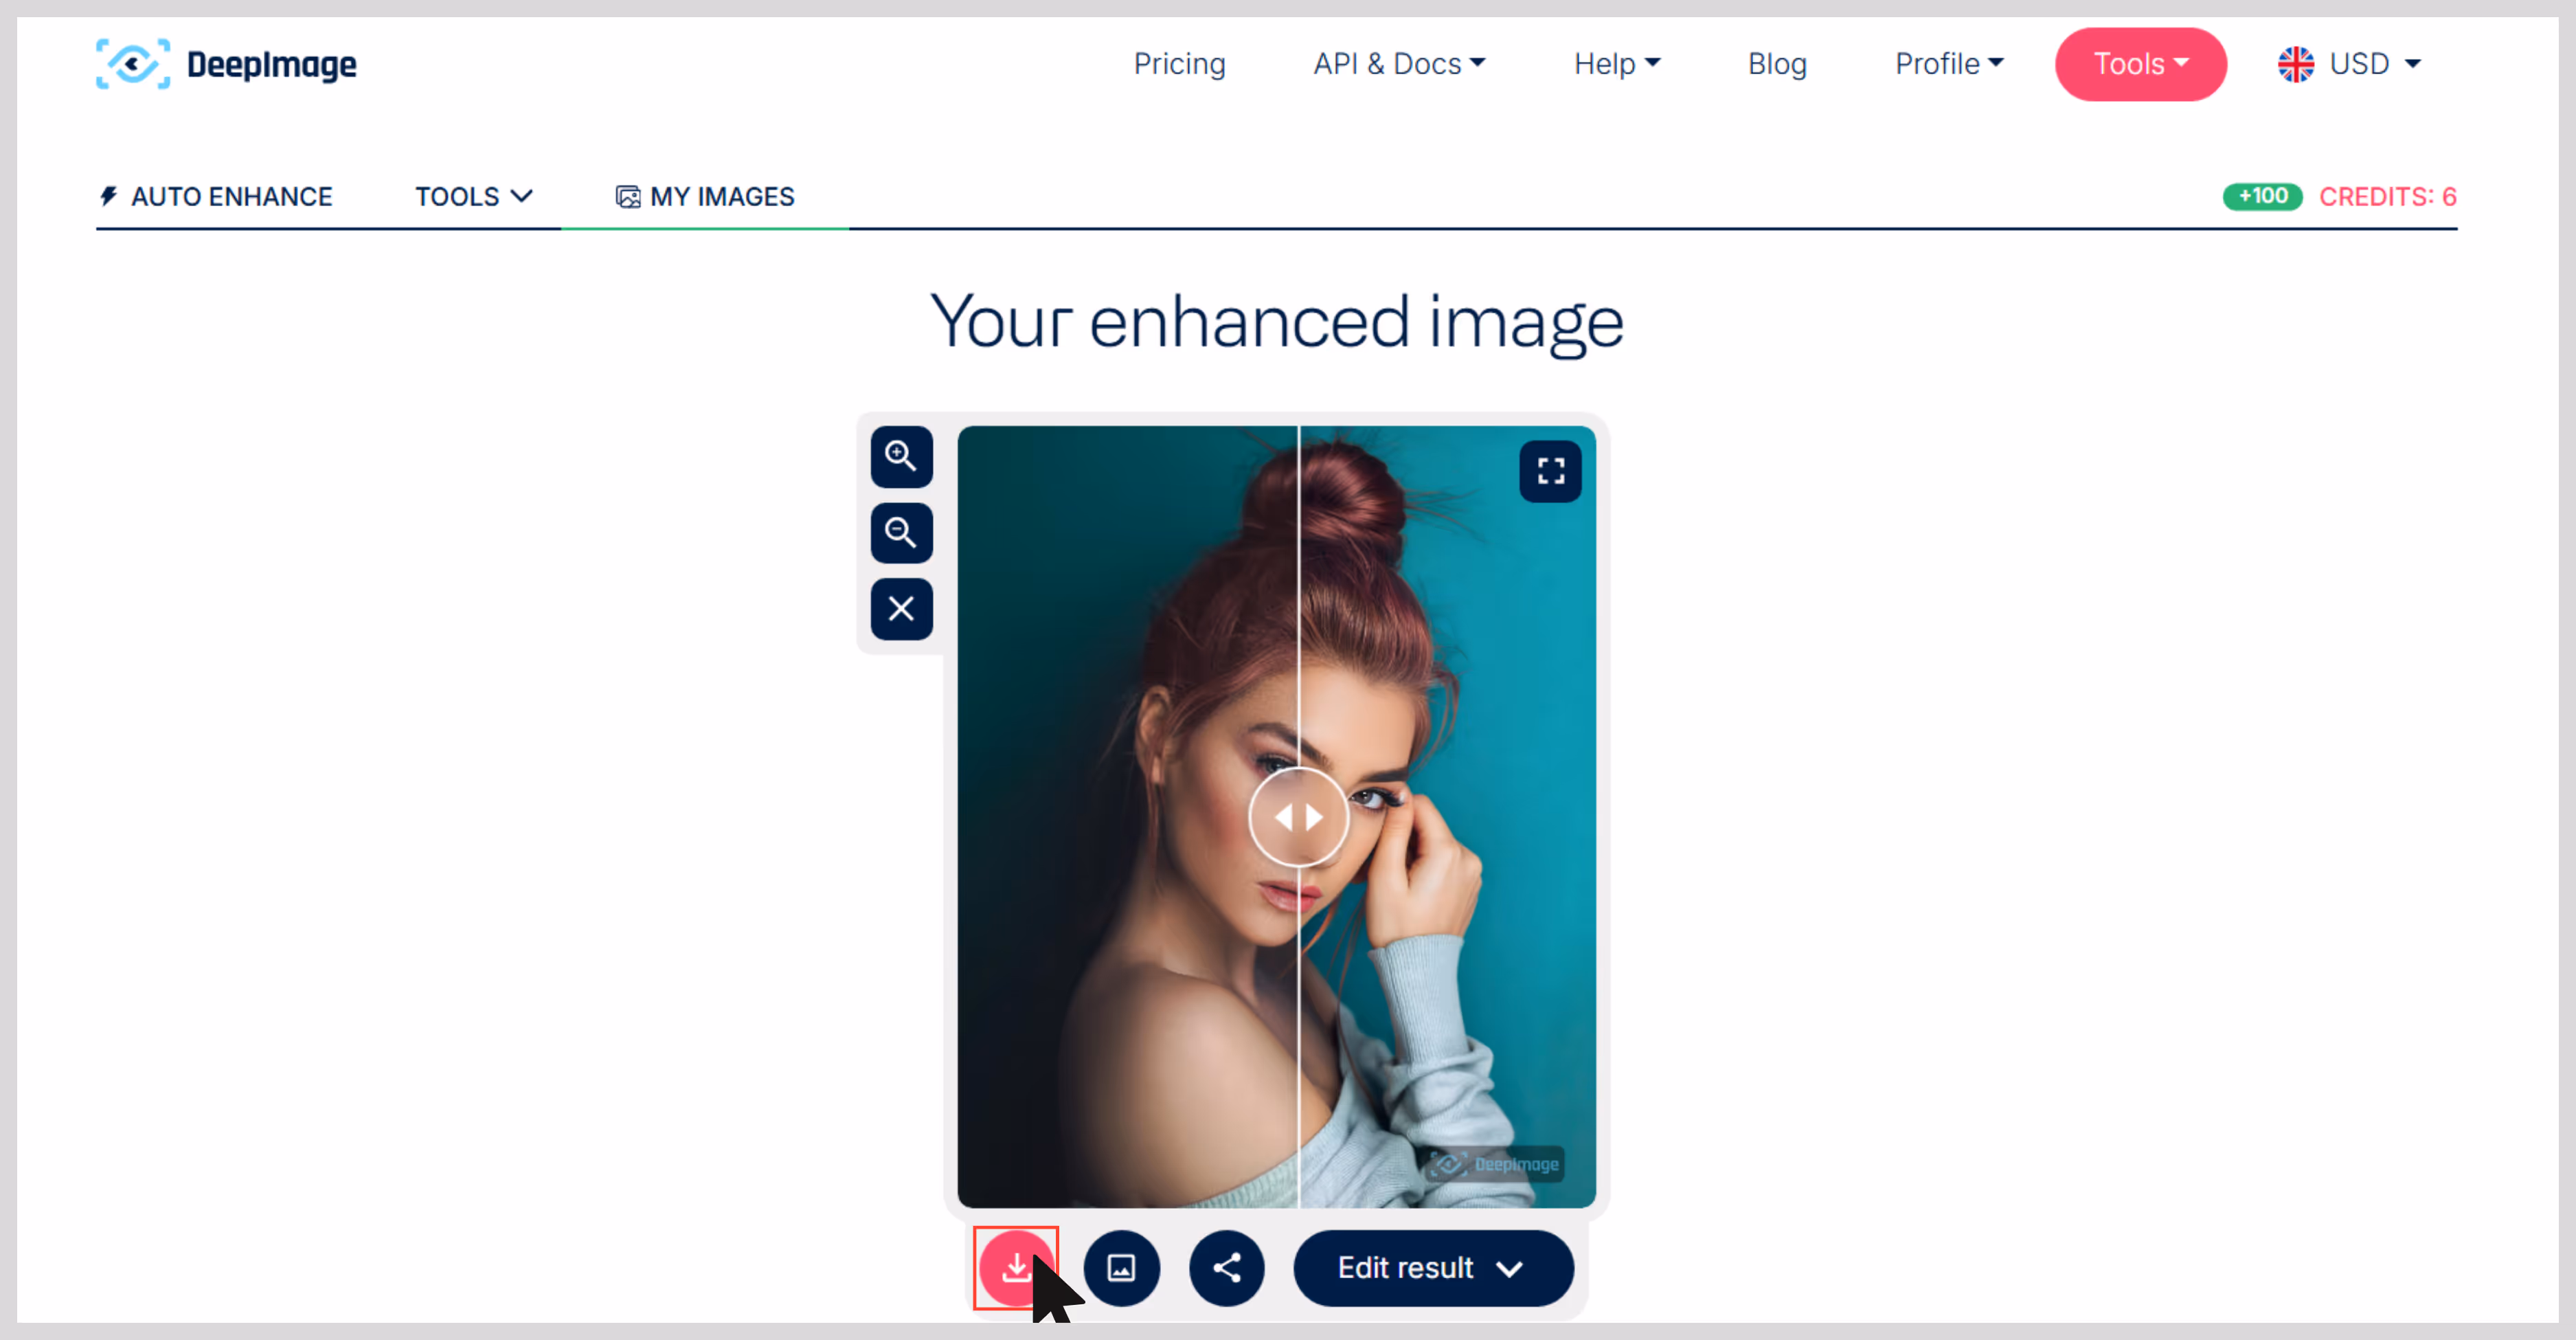
Step 3: Click on “Enhance,” and your image is ready in seconds.
Step 4: Preview and download the images. I have added the before and after results.
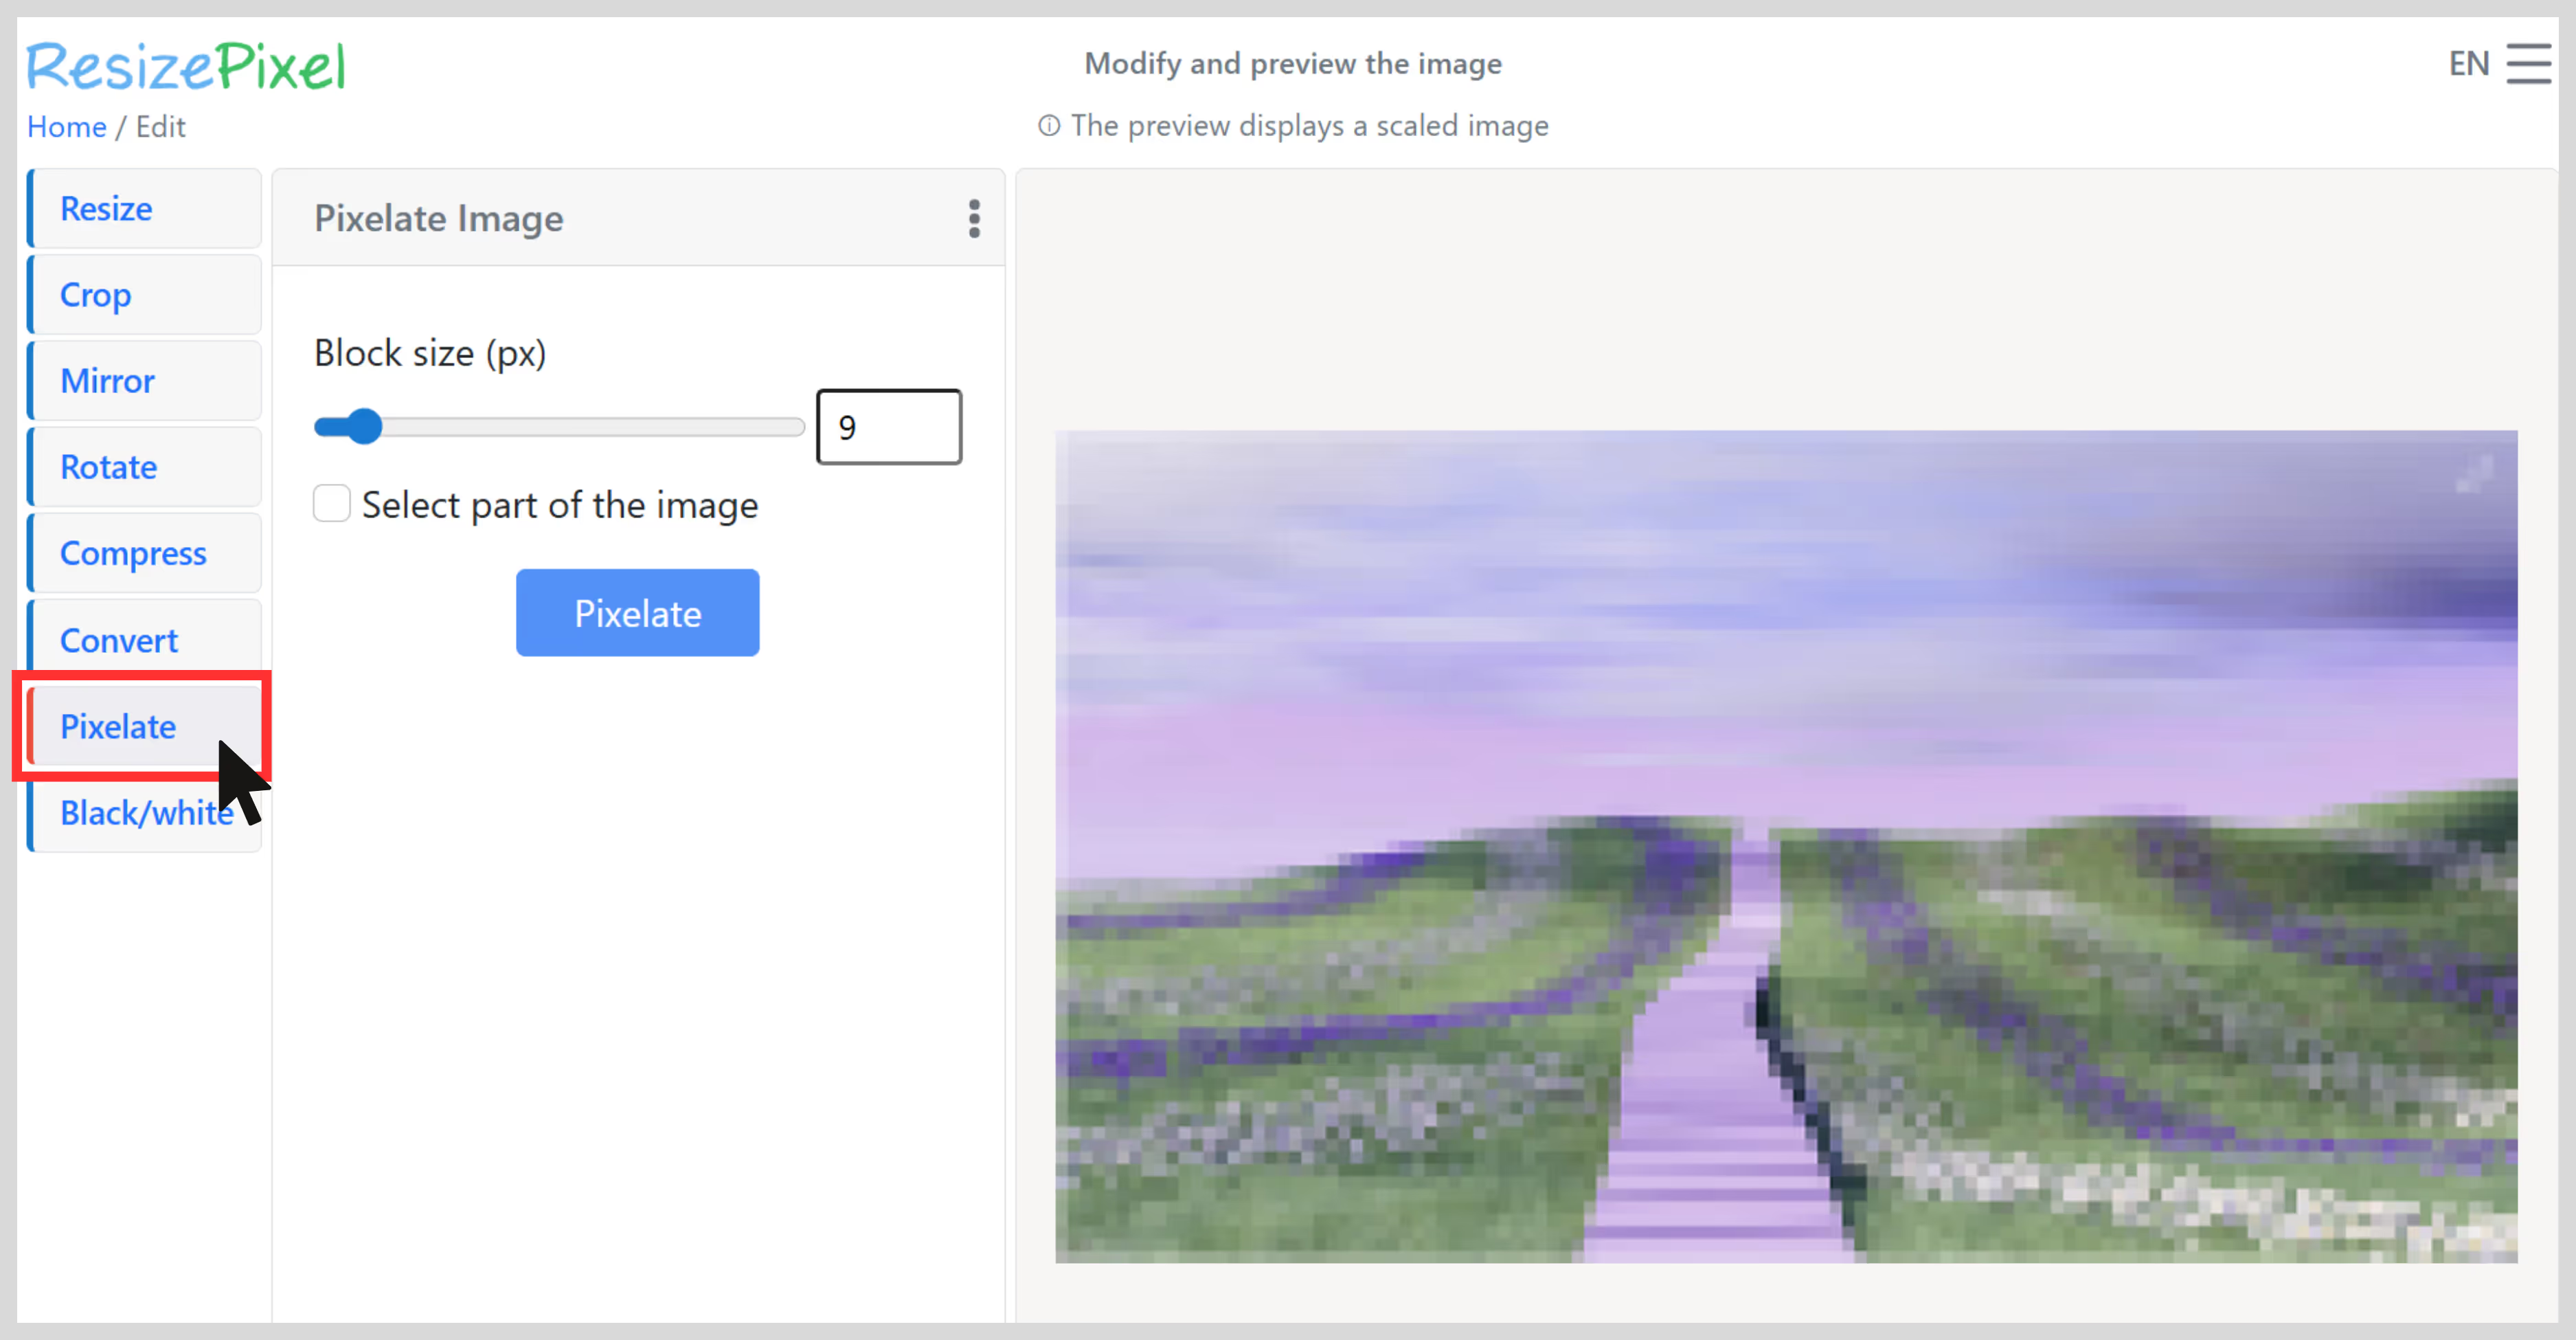
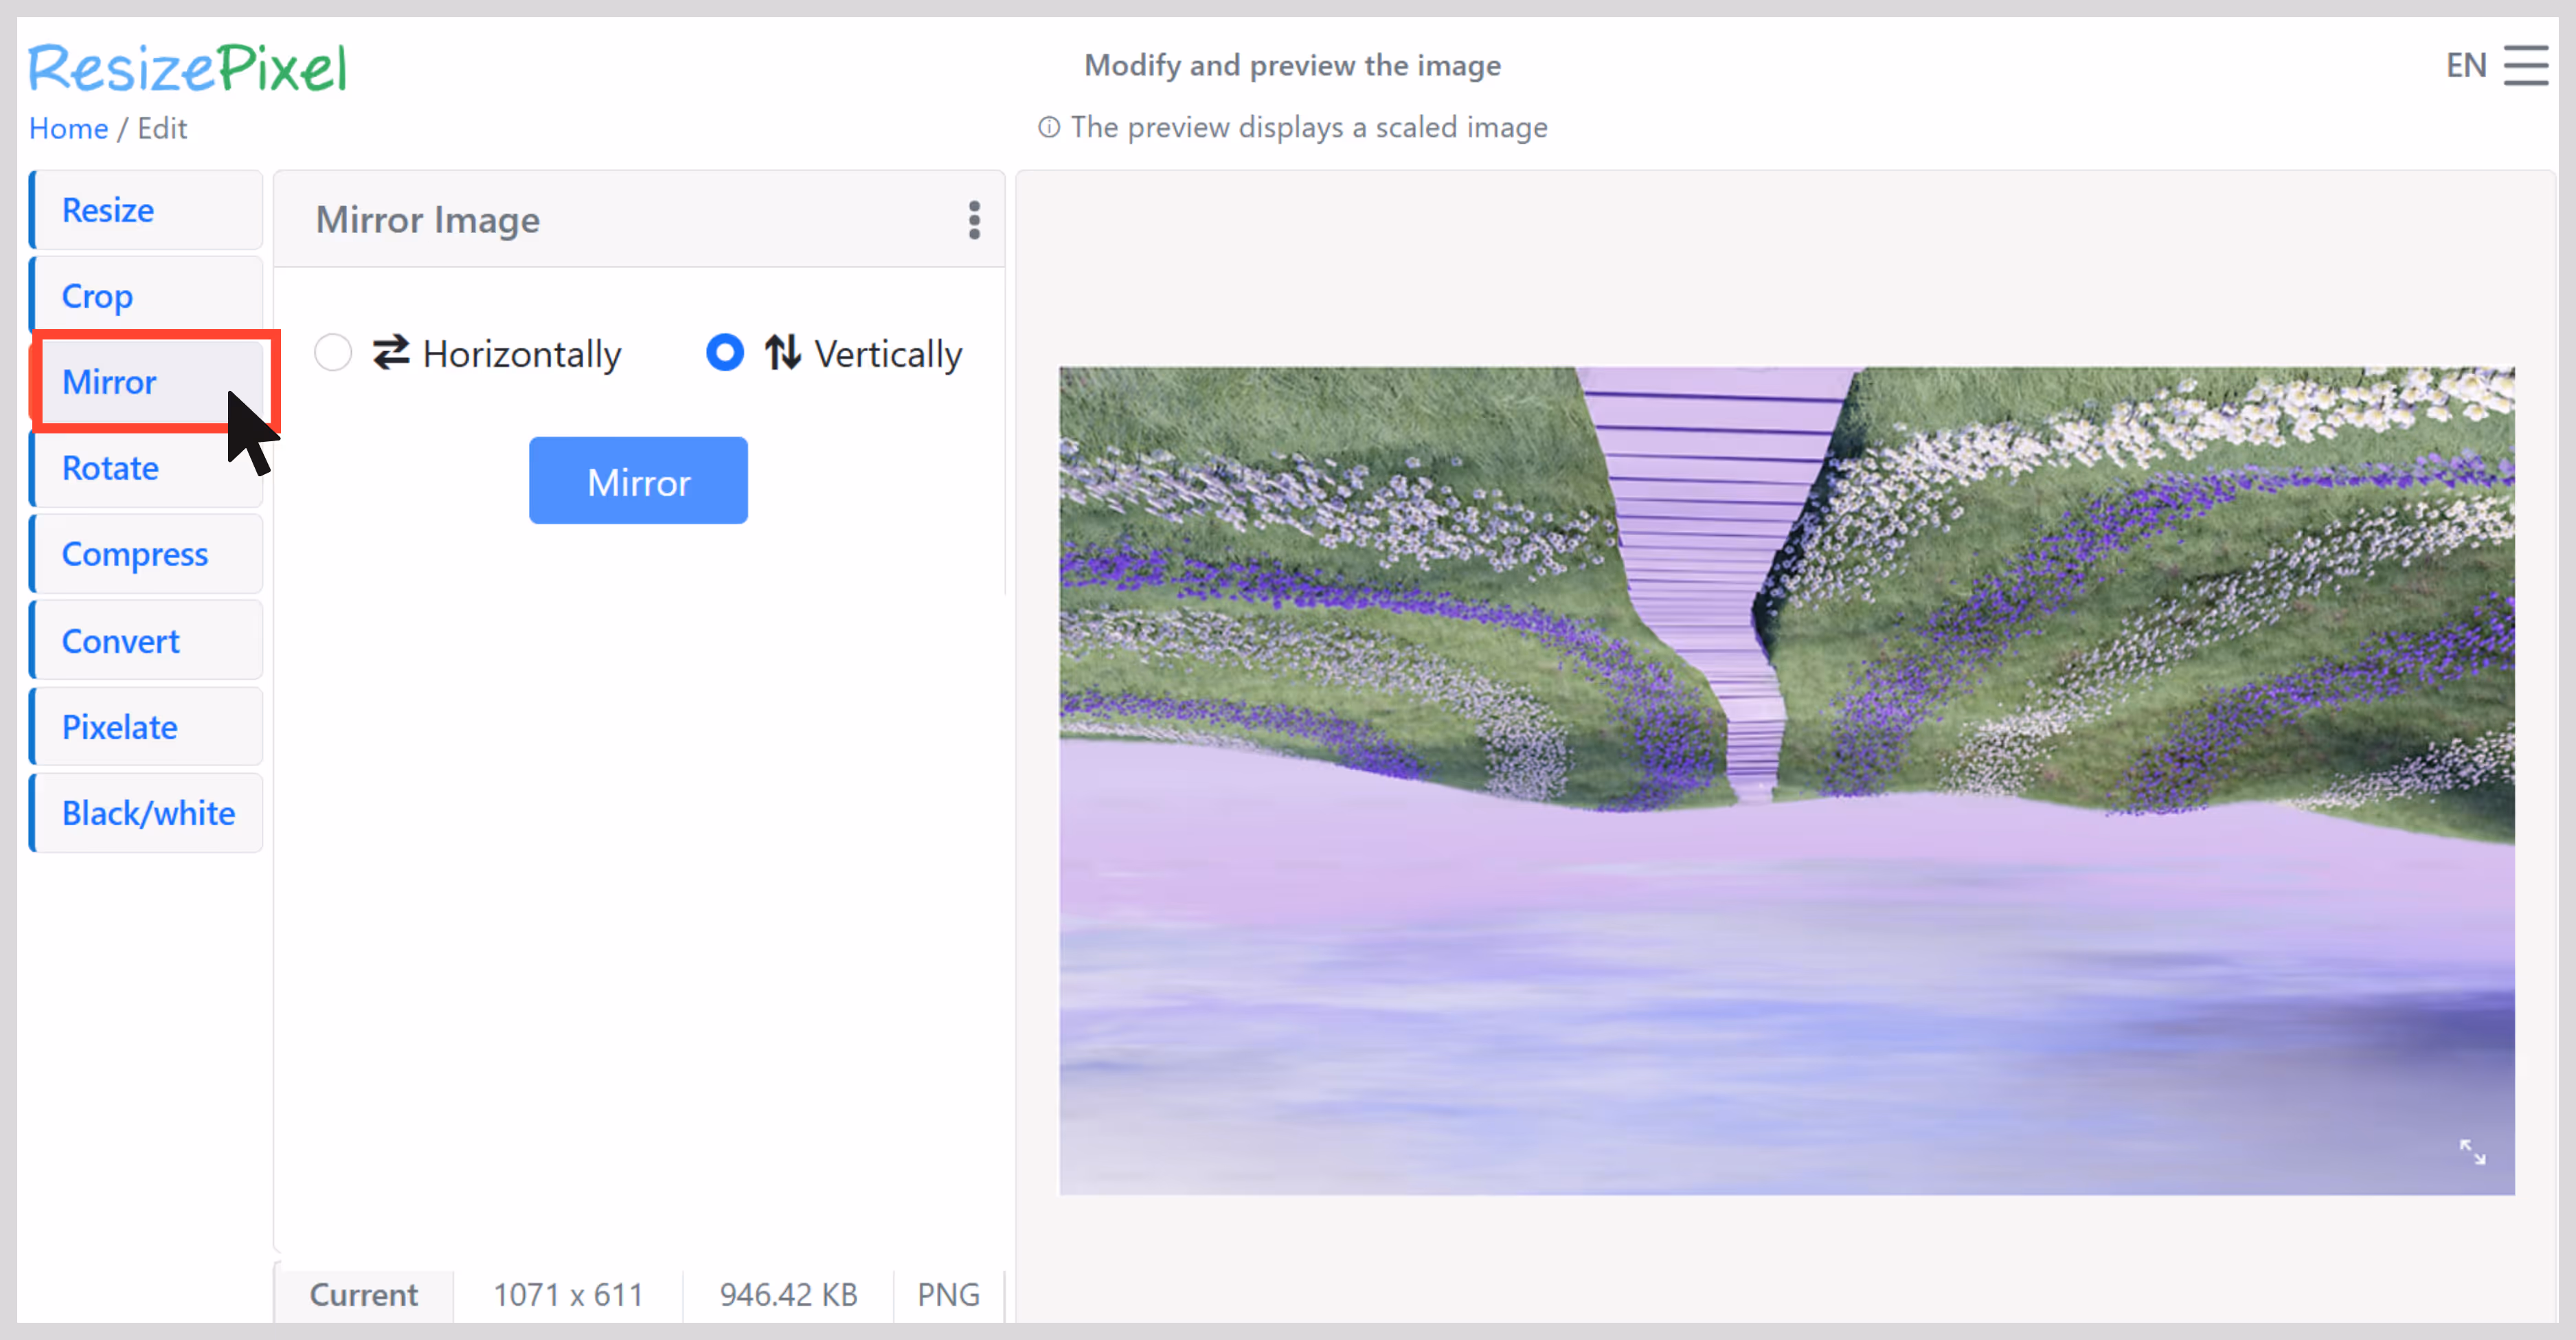
6. ResizePixel
If you're wondering how to increase the pixels of an image without downloading heavy software and just ResizePixel is a surprisingly powerful tool. It's basically a mini photo editor that lives in your browser, and it's perfect when you quickly need to resize, crop, convert, or slightly upscale an image.
After resizing my image, the result blew my mind; edges looked cleaner, the texture was sharper, and the colors looked deeper. No jagged edges, no blur—just a sharper version of the original. For minor pixel increases and format conversions, it worked brilliantly.
What did I like the most?
- Easy to understand interface, just drag and drop the image, and the app will do the rest.
- No sign-up or payment is required; it's free.
- You can perform Crop, resize, compress, rotate, mirror, pixelate, convert formats—just about everything you need for basic image repairs.
- Works entirely in-browser, so your image never leaves your device.
How to increase the pixels of an image in ResizePixel?
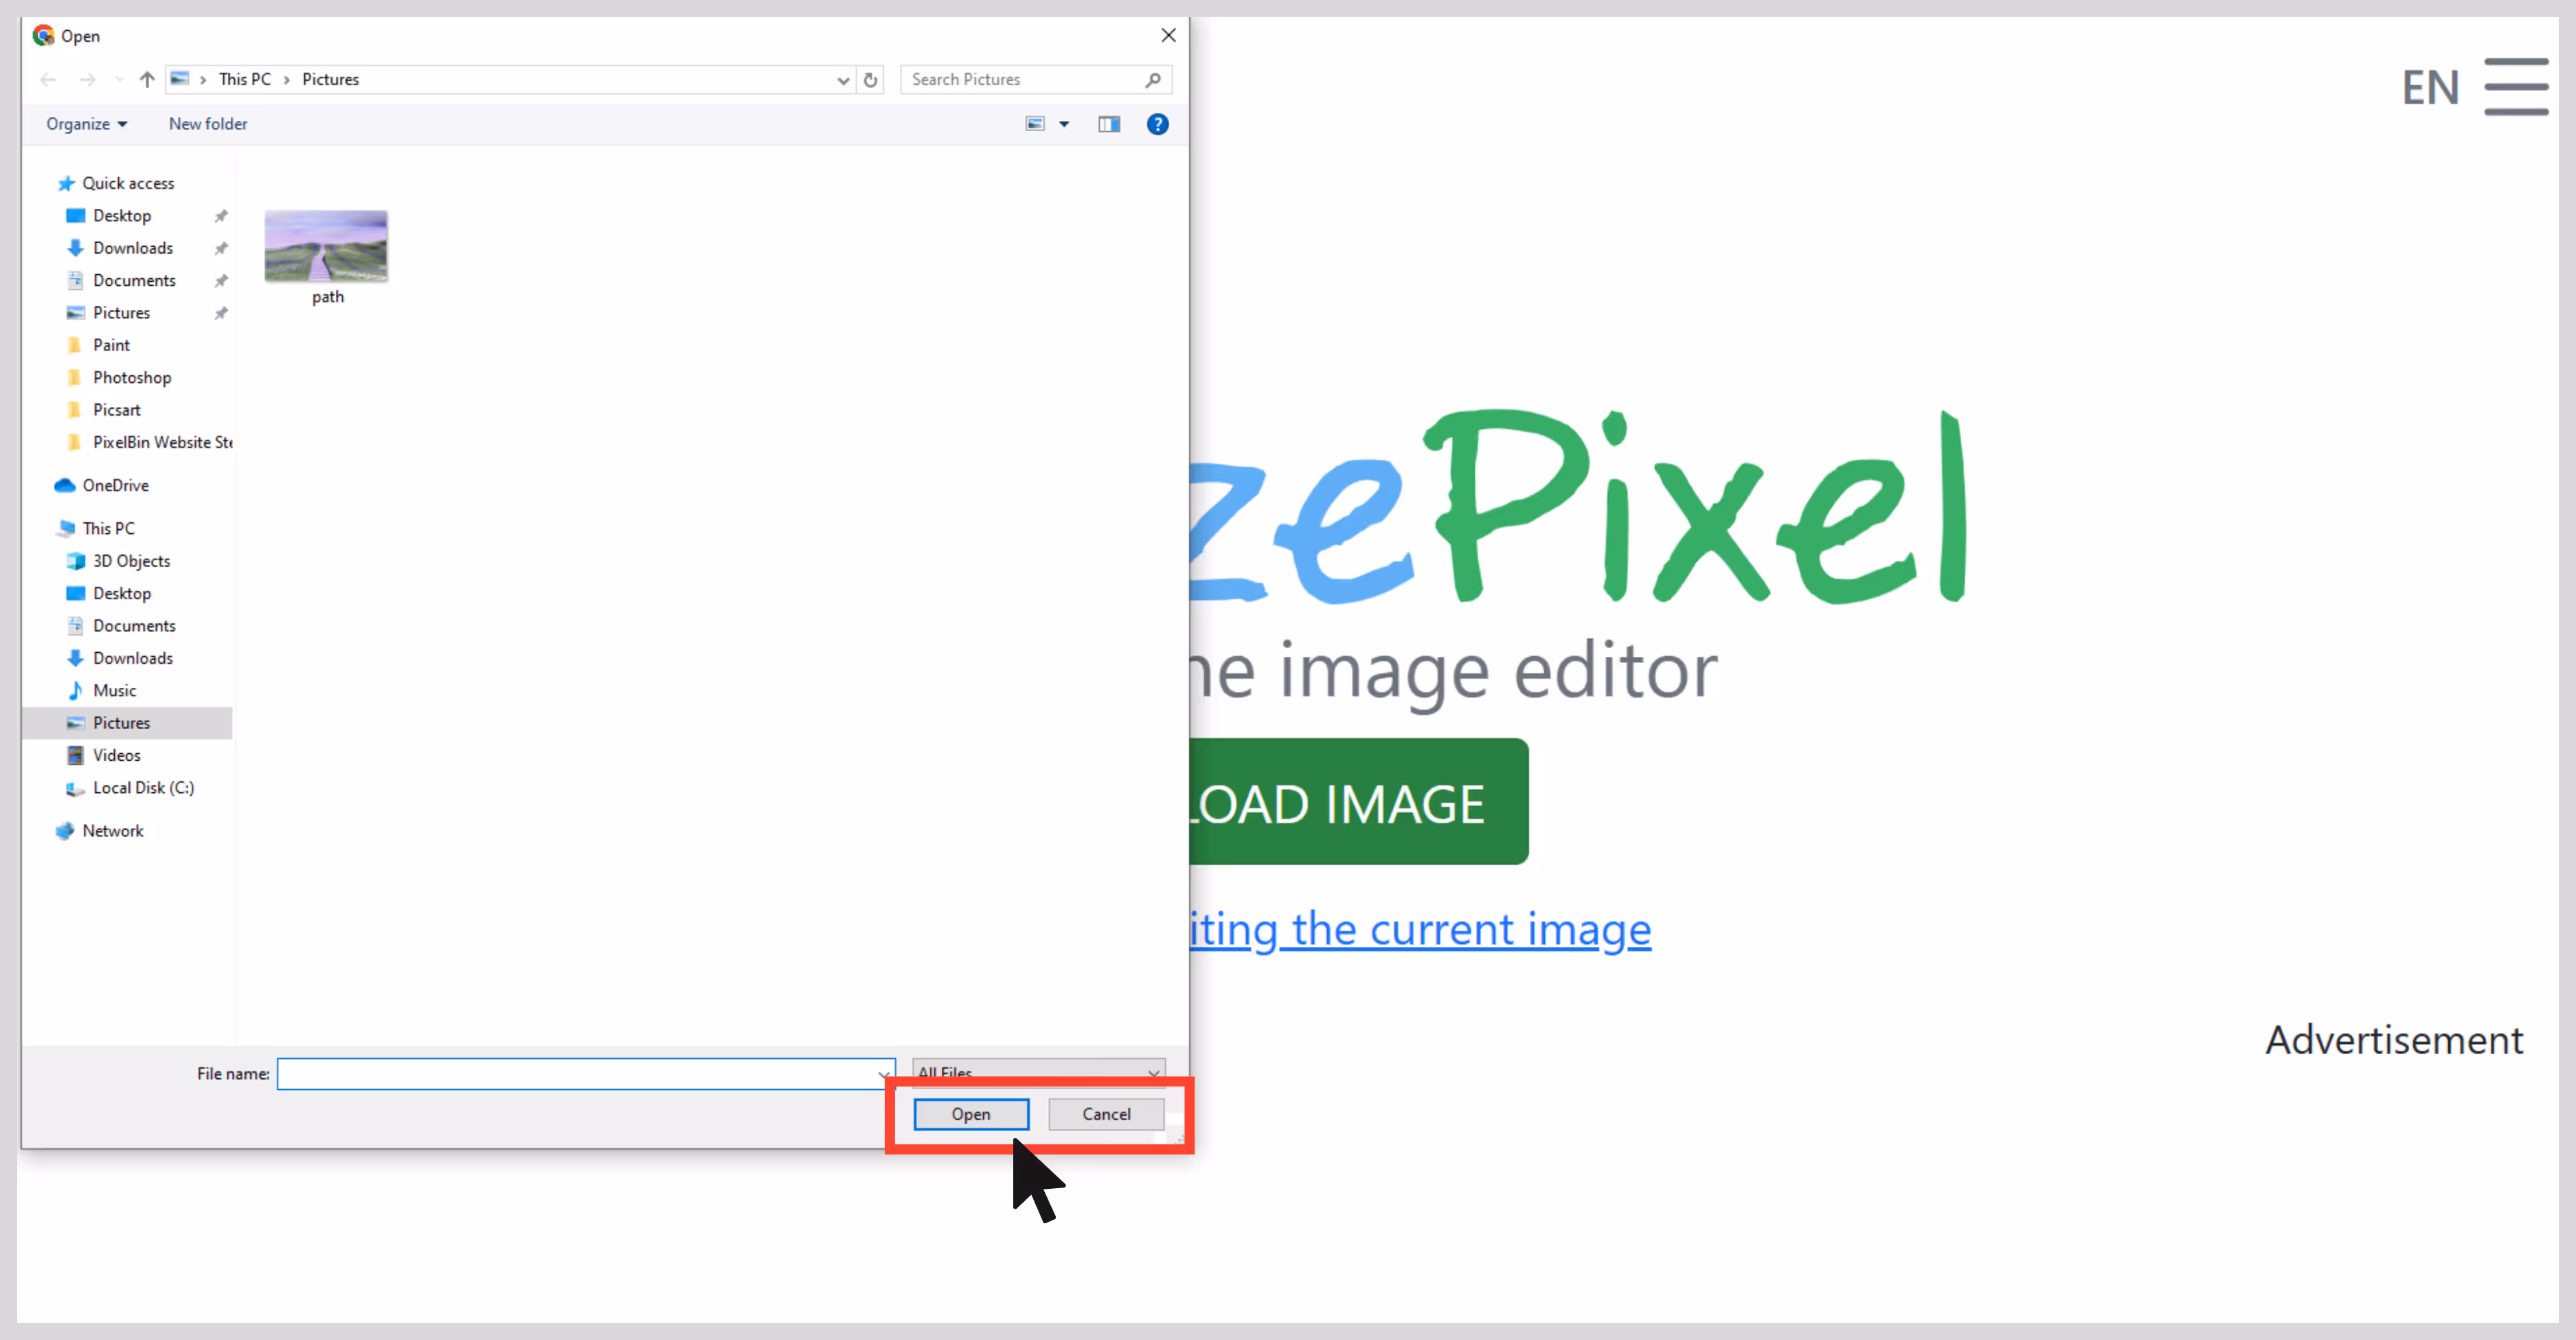
Step 1: Open ResizePixel’s online editor on any device.

Step 2: Use drag‑and‑drop or click to add your file.
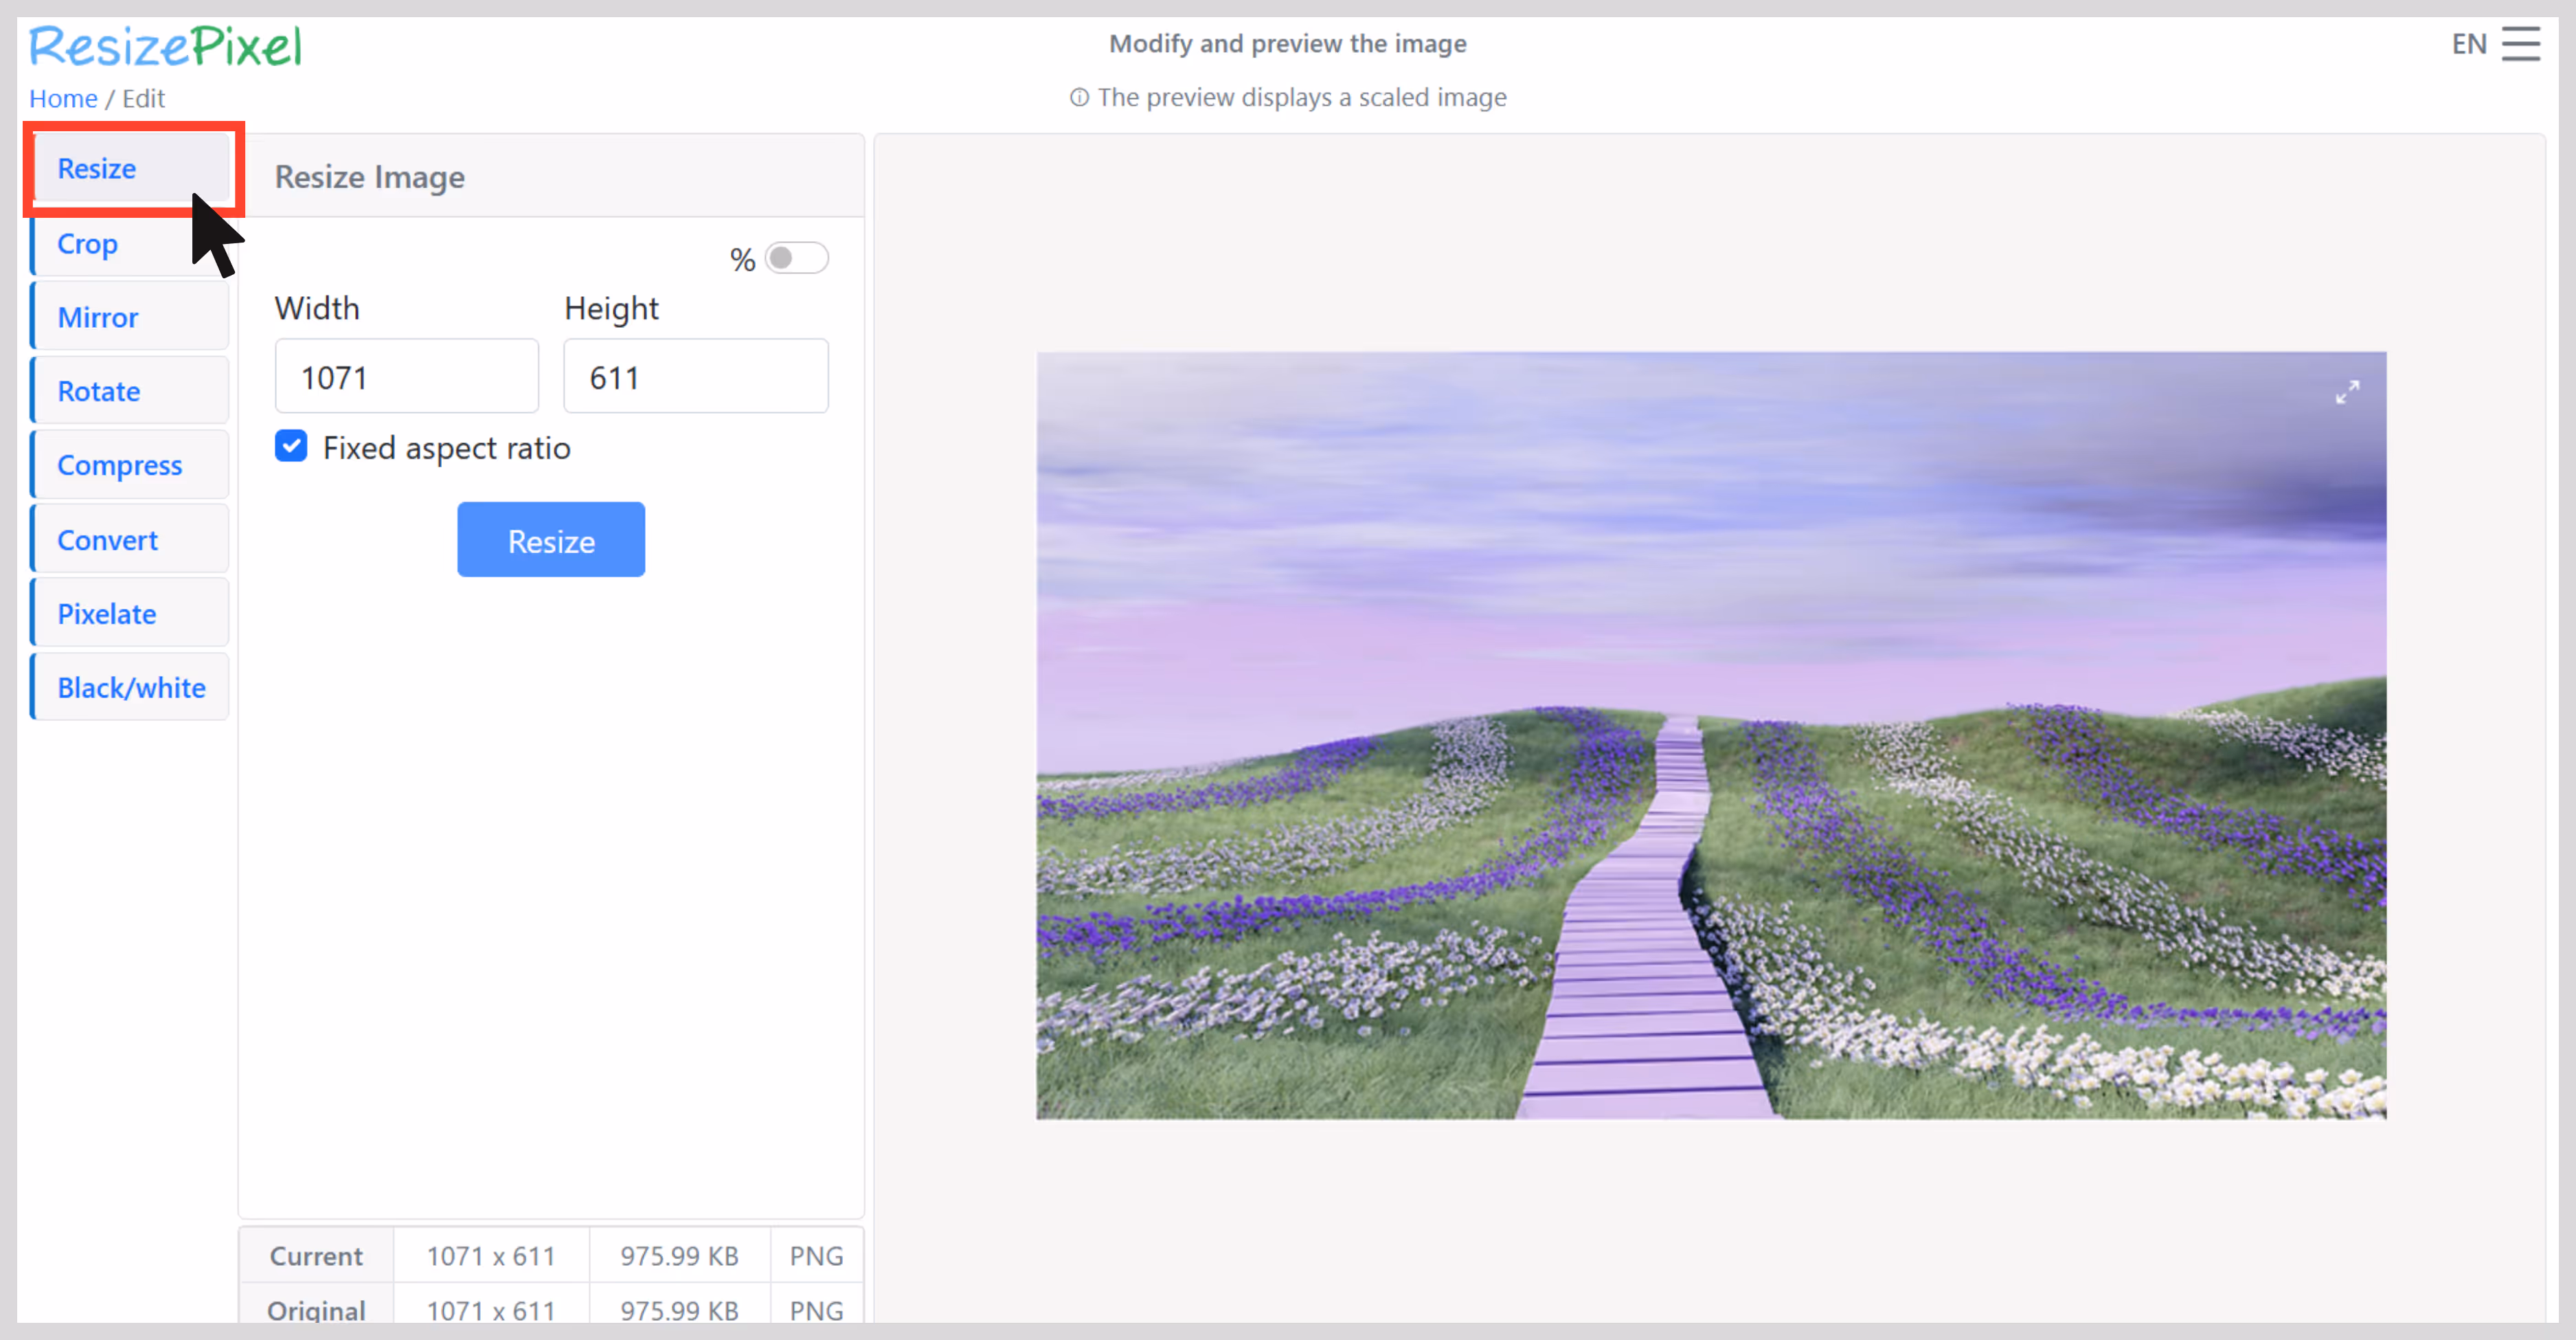
Step 3: To increase resolution, go to “Resize,” enter your new dimensions (the tool shows options or percentages).
Step 4: To focus or remove the background, use “Pixelate.”
Step 5: To further edit, try Compress, Rotate, Mirror, or convert formats (PNG, JPG, TIFF, WEBP) as needed.
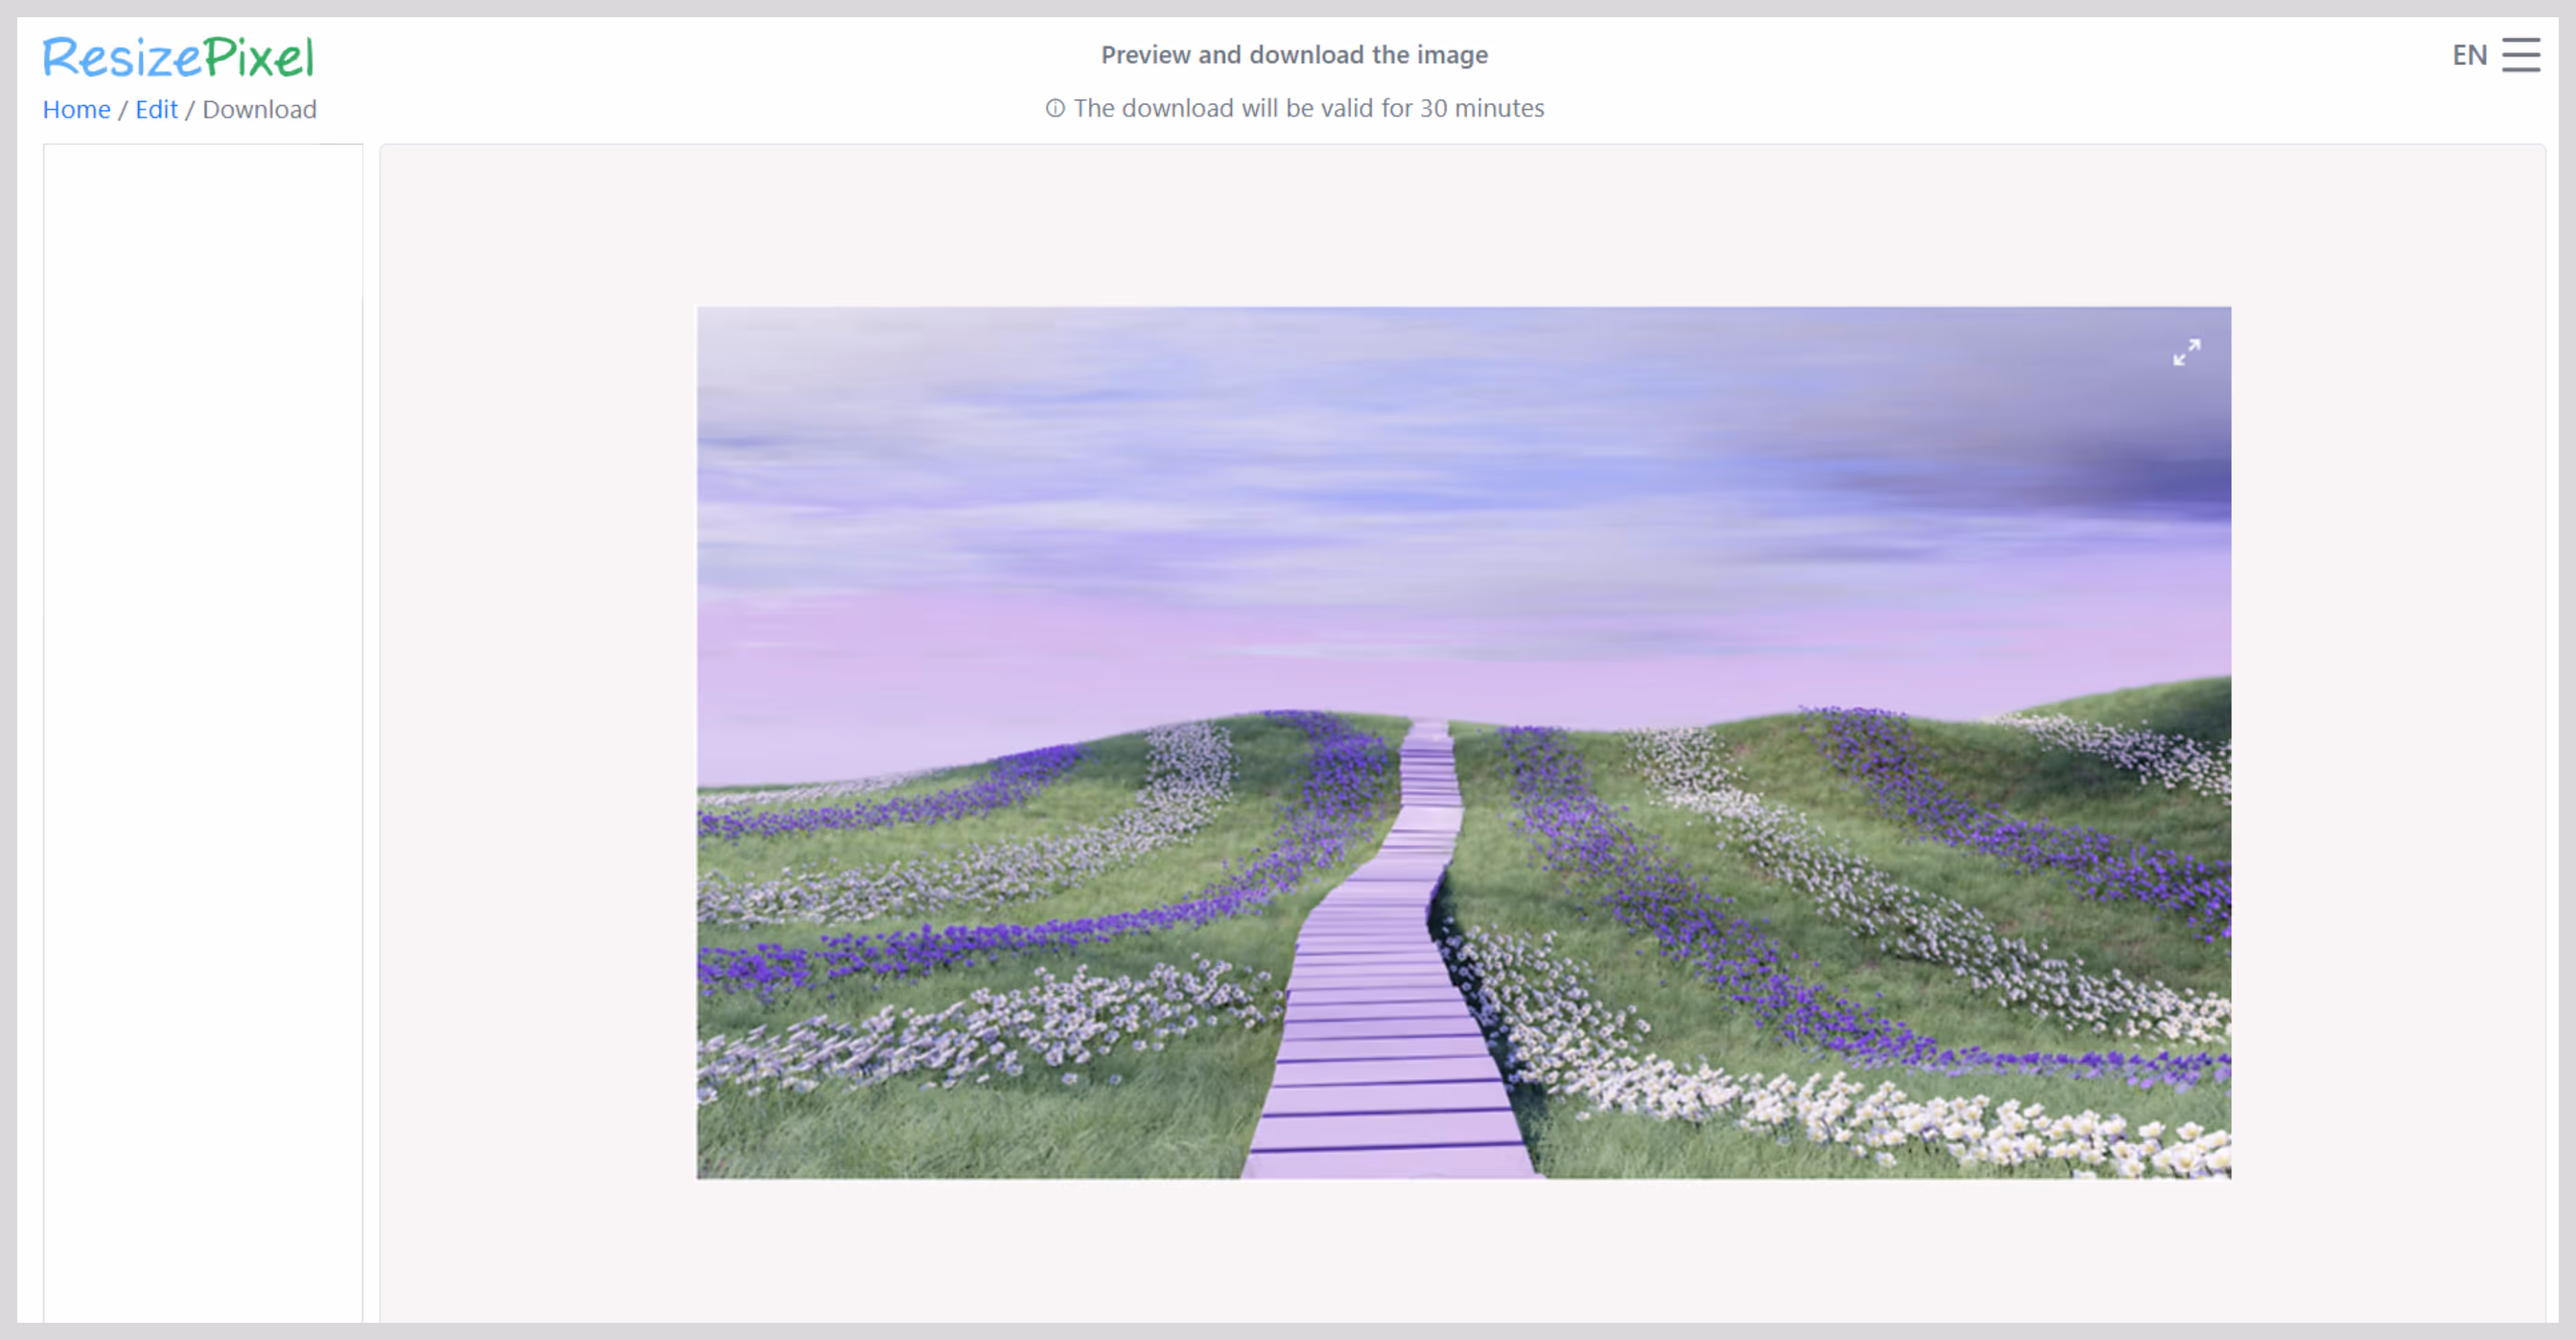
Step 6: Check your adjustments in the live preview window.
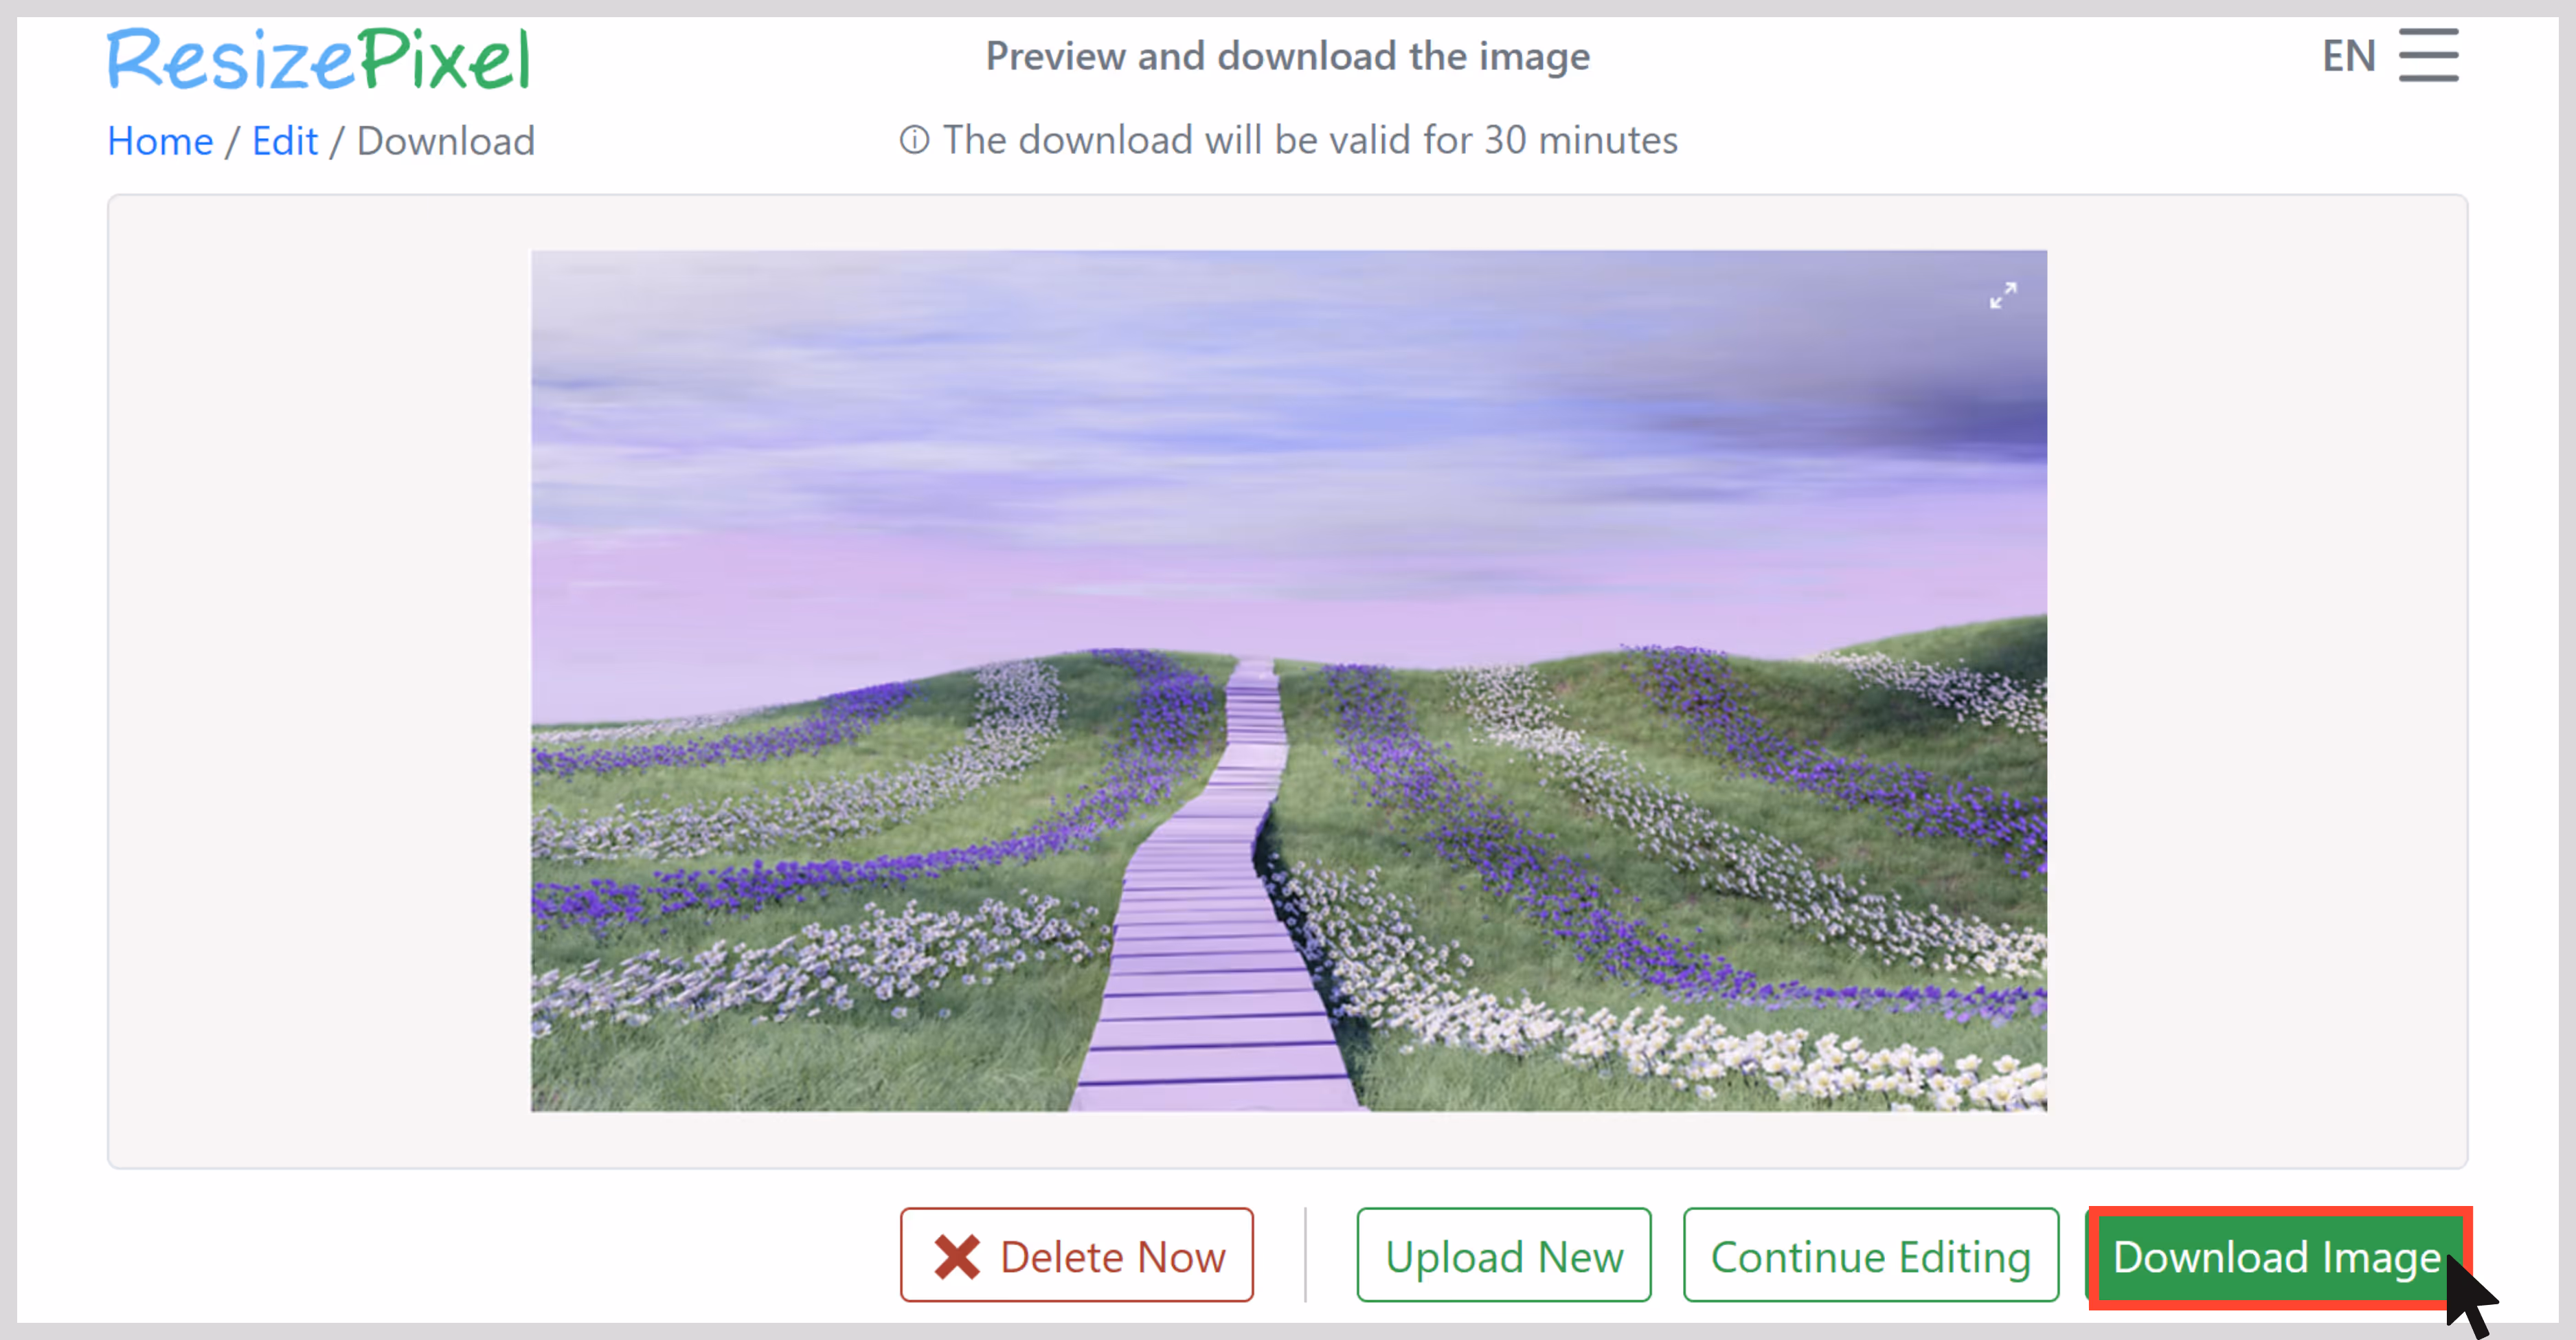
Step 7: Hit Download, and a fresh, edited version saves directly to your device.
Final thoughts
Whether you're printing an image or upscaling an old image, pixel quality matters a lot. The right result depends on choosing the right method. Traditional tools give you a lot of control, but they take time and include editing skills.
AI upscalers like Pixelbin predict the missing details of the image and add pixels without making the image look fake. Still, before using, try all the aforementioned tools and compare the results. It's the best way to figure out which one works best for your image.
FAQs
Use AI upscalers like Pixelbin, Upscale.media, or Photoshop’s Neural Filters. They add new pixels using machine learning rather than stretching the original image.
Yes. To print clearly at 300 DPI, upscale your image to match the physical size in inches. AI tools like Pixelbin, Pixelcut, and ResizePixel can prepare mobile photos for print.
Pixelbin is a great starting point. It’s free, easy, and delivers good quality for most web uses.
Try the Pixelbin or Pixelcut iOS or Android app. They’re good at restoring compressed social media images.
No. DPI (dots per inch) affects print density, not digital resolution. To truly improve an image, increase its pixel dimensions (width × height).
2x and 4x upscaling usually works well. Going beyond that may introduce artifacts, even with AI tools. Start with the best possible original image for best results.

.webp)
%20(1).webp)