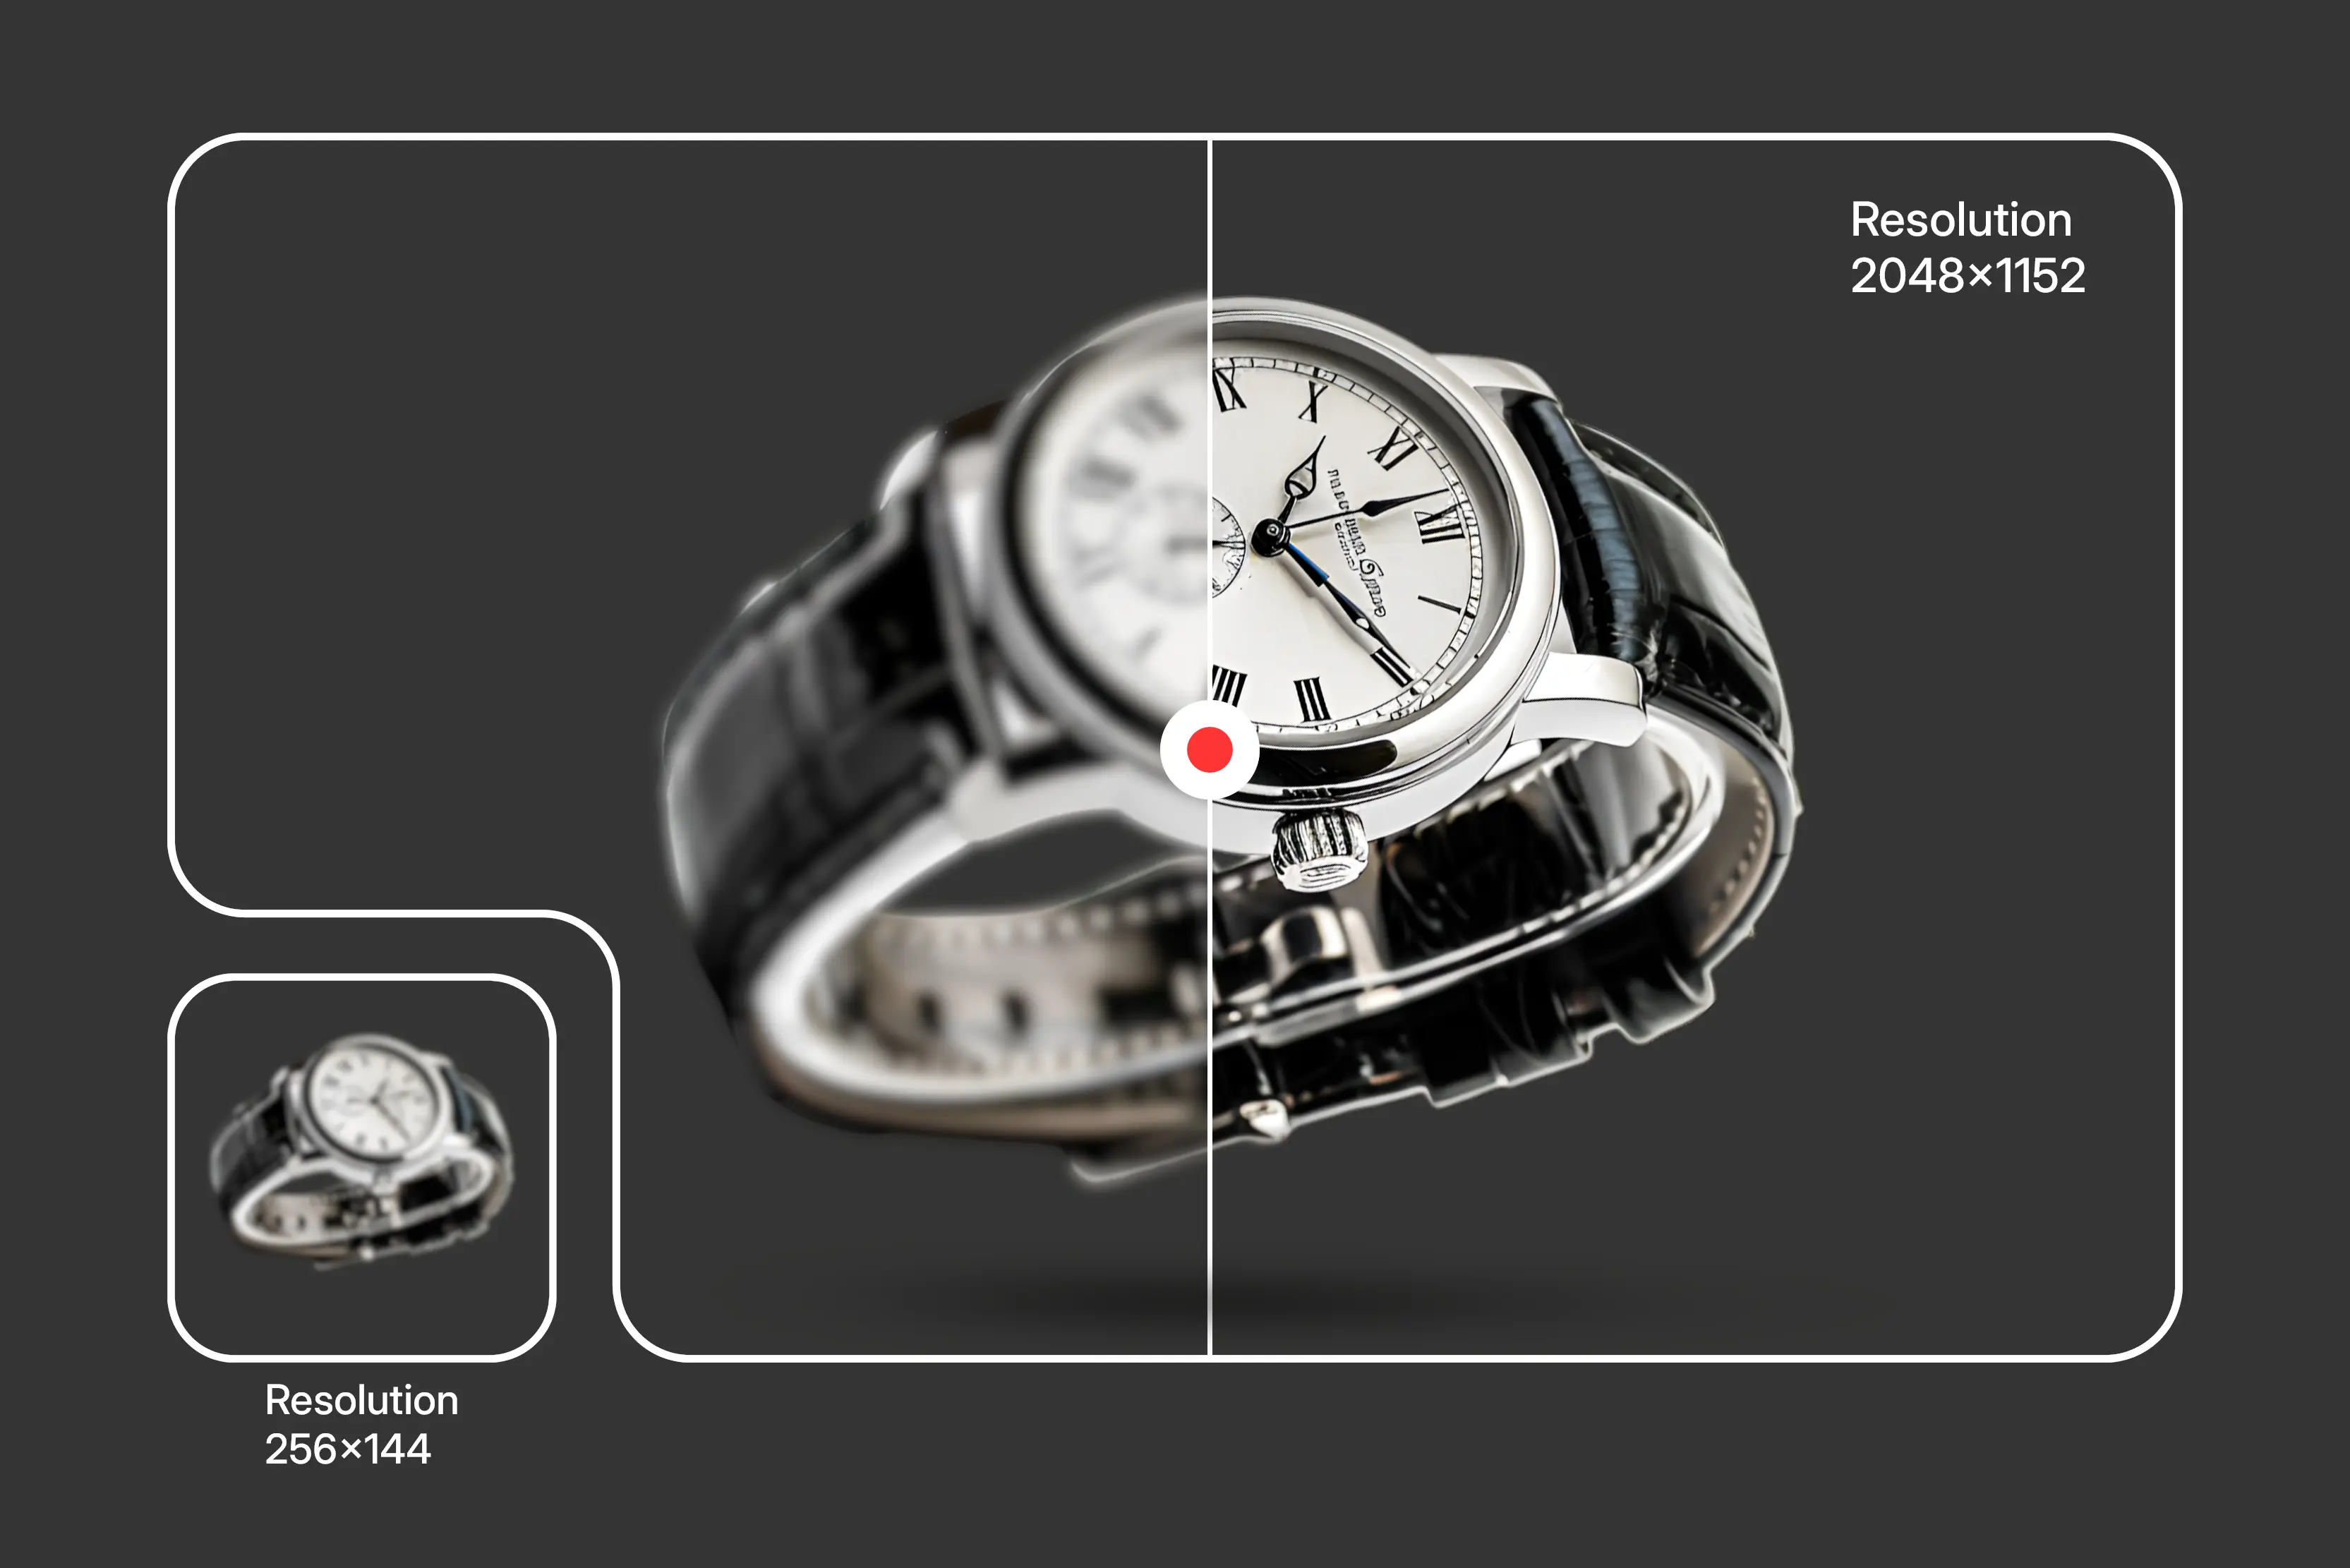

Ever tried making an image bigger than its original size while printing or showing it on a big screen, but it looked all blurry and pixelated? This happens because the image gets stretched, and it can't grow new pixels on its own. Instead, the pixels get bigger, which makes the image look unclear.
The traditional way of image upscaling was about interpolating pixels without restructuring details. These methods stretch pixels, which results in jagged edges. On the other hand, AI image upscalers use deep learning methods to predict missing details in an image and then add pixels accordingly.
In this blog, you will explore the 8 best ways to make an image bigger without losing quality. Dive in to know more.
Why do images lose quality when they are enlarged?
When you enlarge an image, especially a raster one like one that is in JPG or PNG format, you’re stretching its pixels over a larger space. These stretched pixels create blur and jagged lines.
This happens because raster images are made with a few pixels. On the other hand, vector images scale infinitely. Raster images degrade the moment you push them beyond their native resolution.
What happens while enlarging an image?
When you resize an image upwards:
- Pixels are stretched to fill more space.
- This creates blurry edges and loss of details, especially in face images or illustrations.
- Raster images (JPG, PNG) are pixel-based, and that's why their quality degrades when they are enlarged.
- Vector images (SVG, EPS) are math-based, and they don't lose quality once they are enlarged. But vectors are typically for logos, icons, and illustrations, not photos.
Testing methodology
To see which image upscalers actually work and which ones just say they work, I ran a simple test using the same low-quality image across all platforms. The photo I picked was small, a bit blurry, and not something you'd want to print or zoom in on. But that’s exactly the kind of image we usually need to fix by upscaling it.
Here’s what I did:
- I used a low-resolution photo that didn’t have much detail. It’s the kind of image that would usually fall apart if you tried to make it bigger.
- I uploaded that same photo to every upscaling tool I tested. That way, it was a fair comparison.
- Wherever possible, I increased the size by 4x at least or more, depending on what the tool allowed.
- Then I looked at how well each tool handled the upscaling:
- Did the image become clearer or stay blurry?
- Were there any over-edited portions?
- Was the tool easy to use, or did it take long to enlarge the image?
- Did I need to download anything, or could I just use it on the web?
- Is it a beginner-friendly tool or not?
How to make an image bigger without losing quality using the best traditional methods?
To perform image upscaling, traditional methods are loved by many, especially if you prefer image upscaling through manual control. Let’s look at the two most handy traditional image upscaling tools: Photoshop and Paint.
1. Adobe Photoshop
What I liked about the tool: The professional-level control and finish that Photoshop offers is incomparable. It allows for manual sharpening, noise reduction, and easy upscaling. I used a low-quality image.
After applying noise reduction and using Preserve Details 2.0 (as I have the AI plugin) for upscaling, the result was much clearer, and all the blurry spots were removed.
Steps to make an image bigger without losing quality in Photoshop:
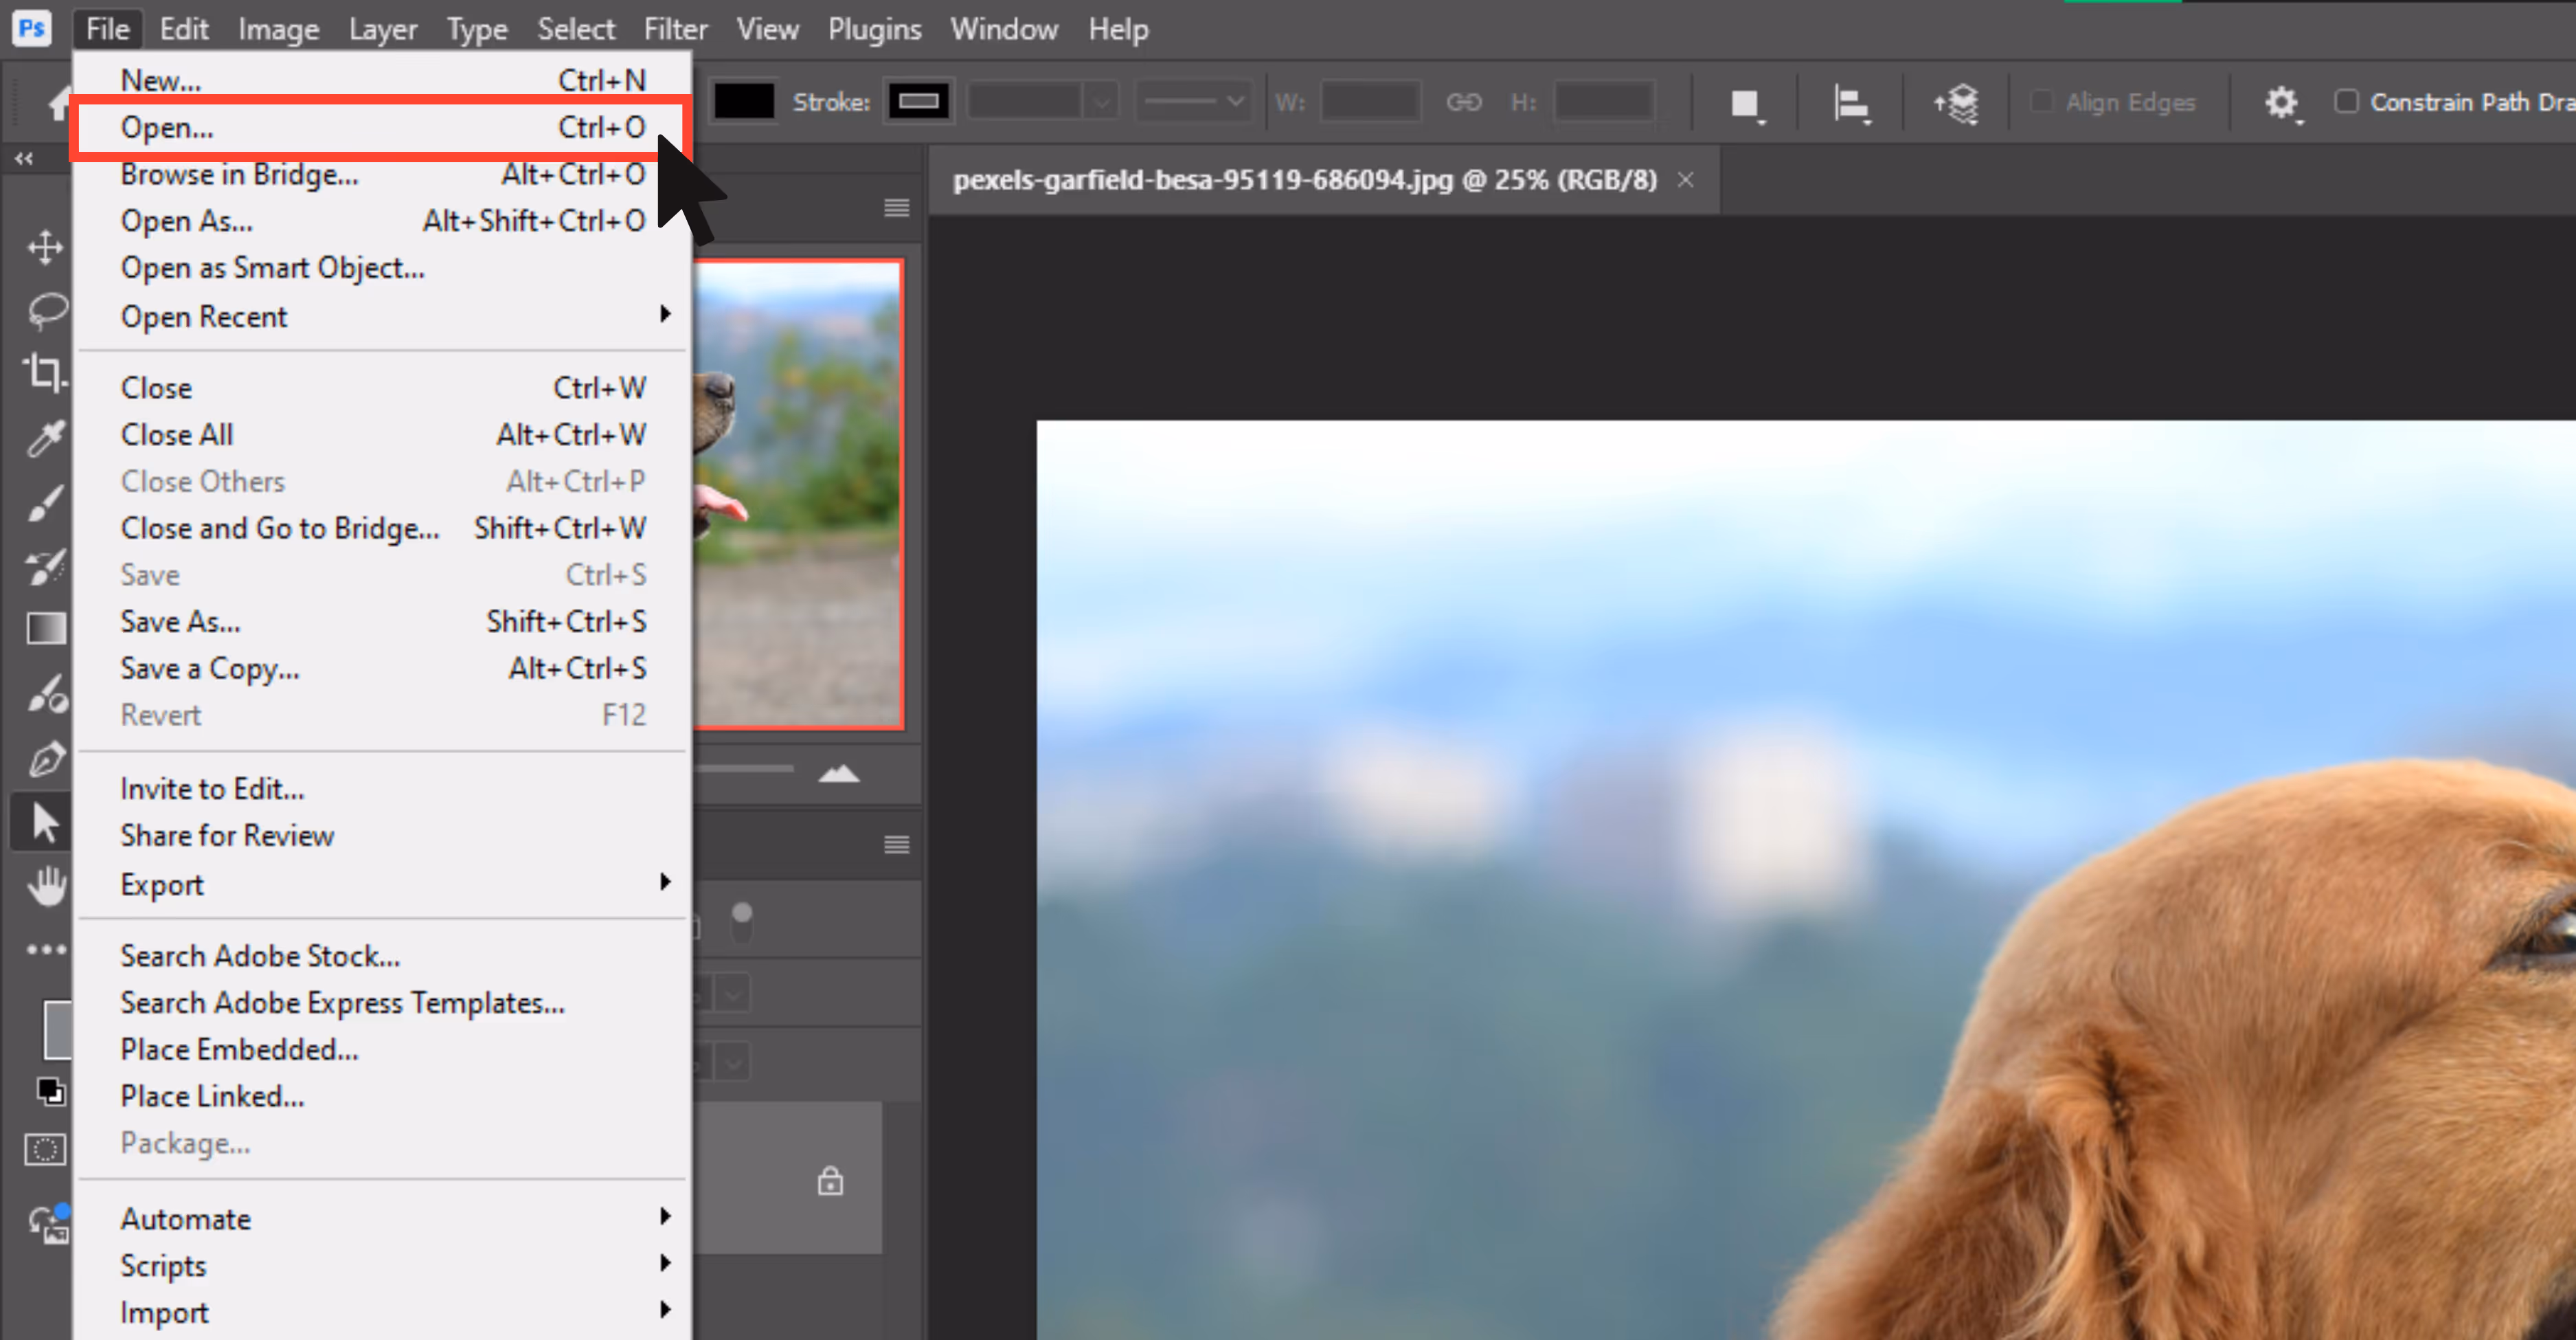
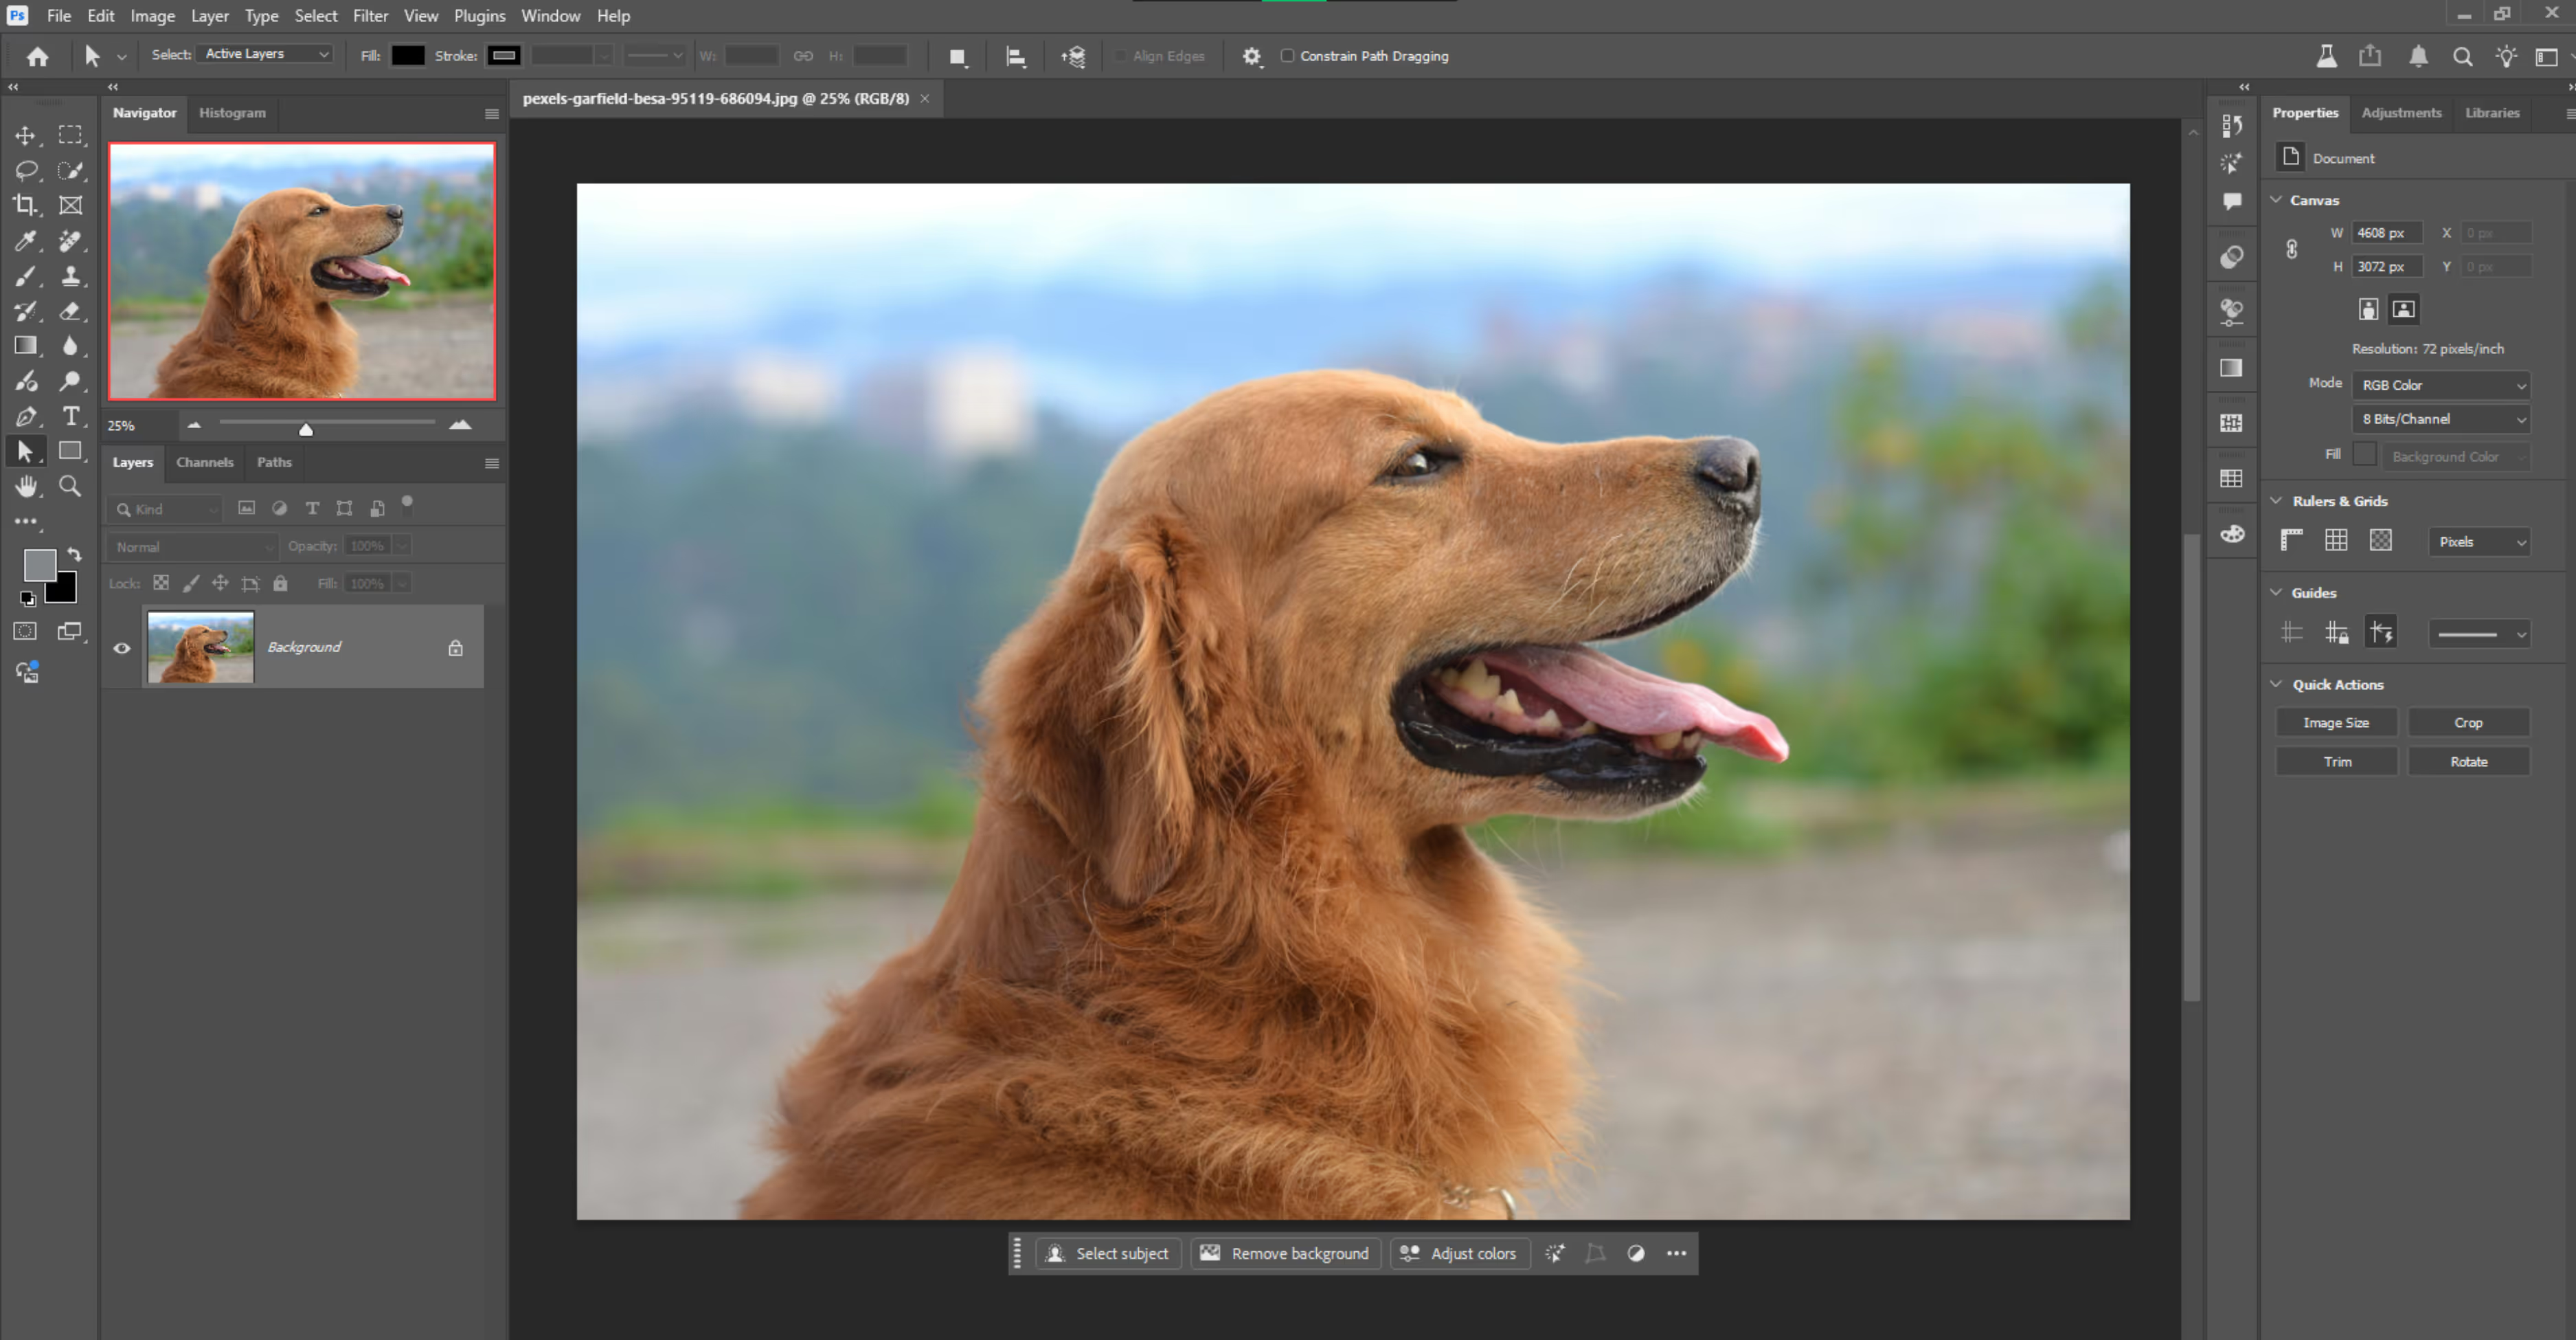
Step 1: Open your image in Adobe Photoshop and then select File, and then Open.
Step 2: After adding the image, go to Image and then Image Size.

Step 3: Add the width and height proportions, and then tick the Resample checkbox.
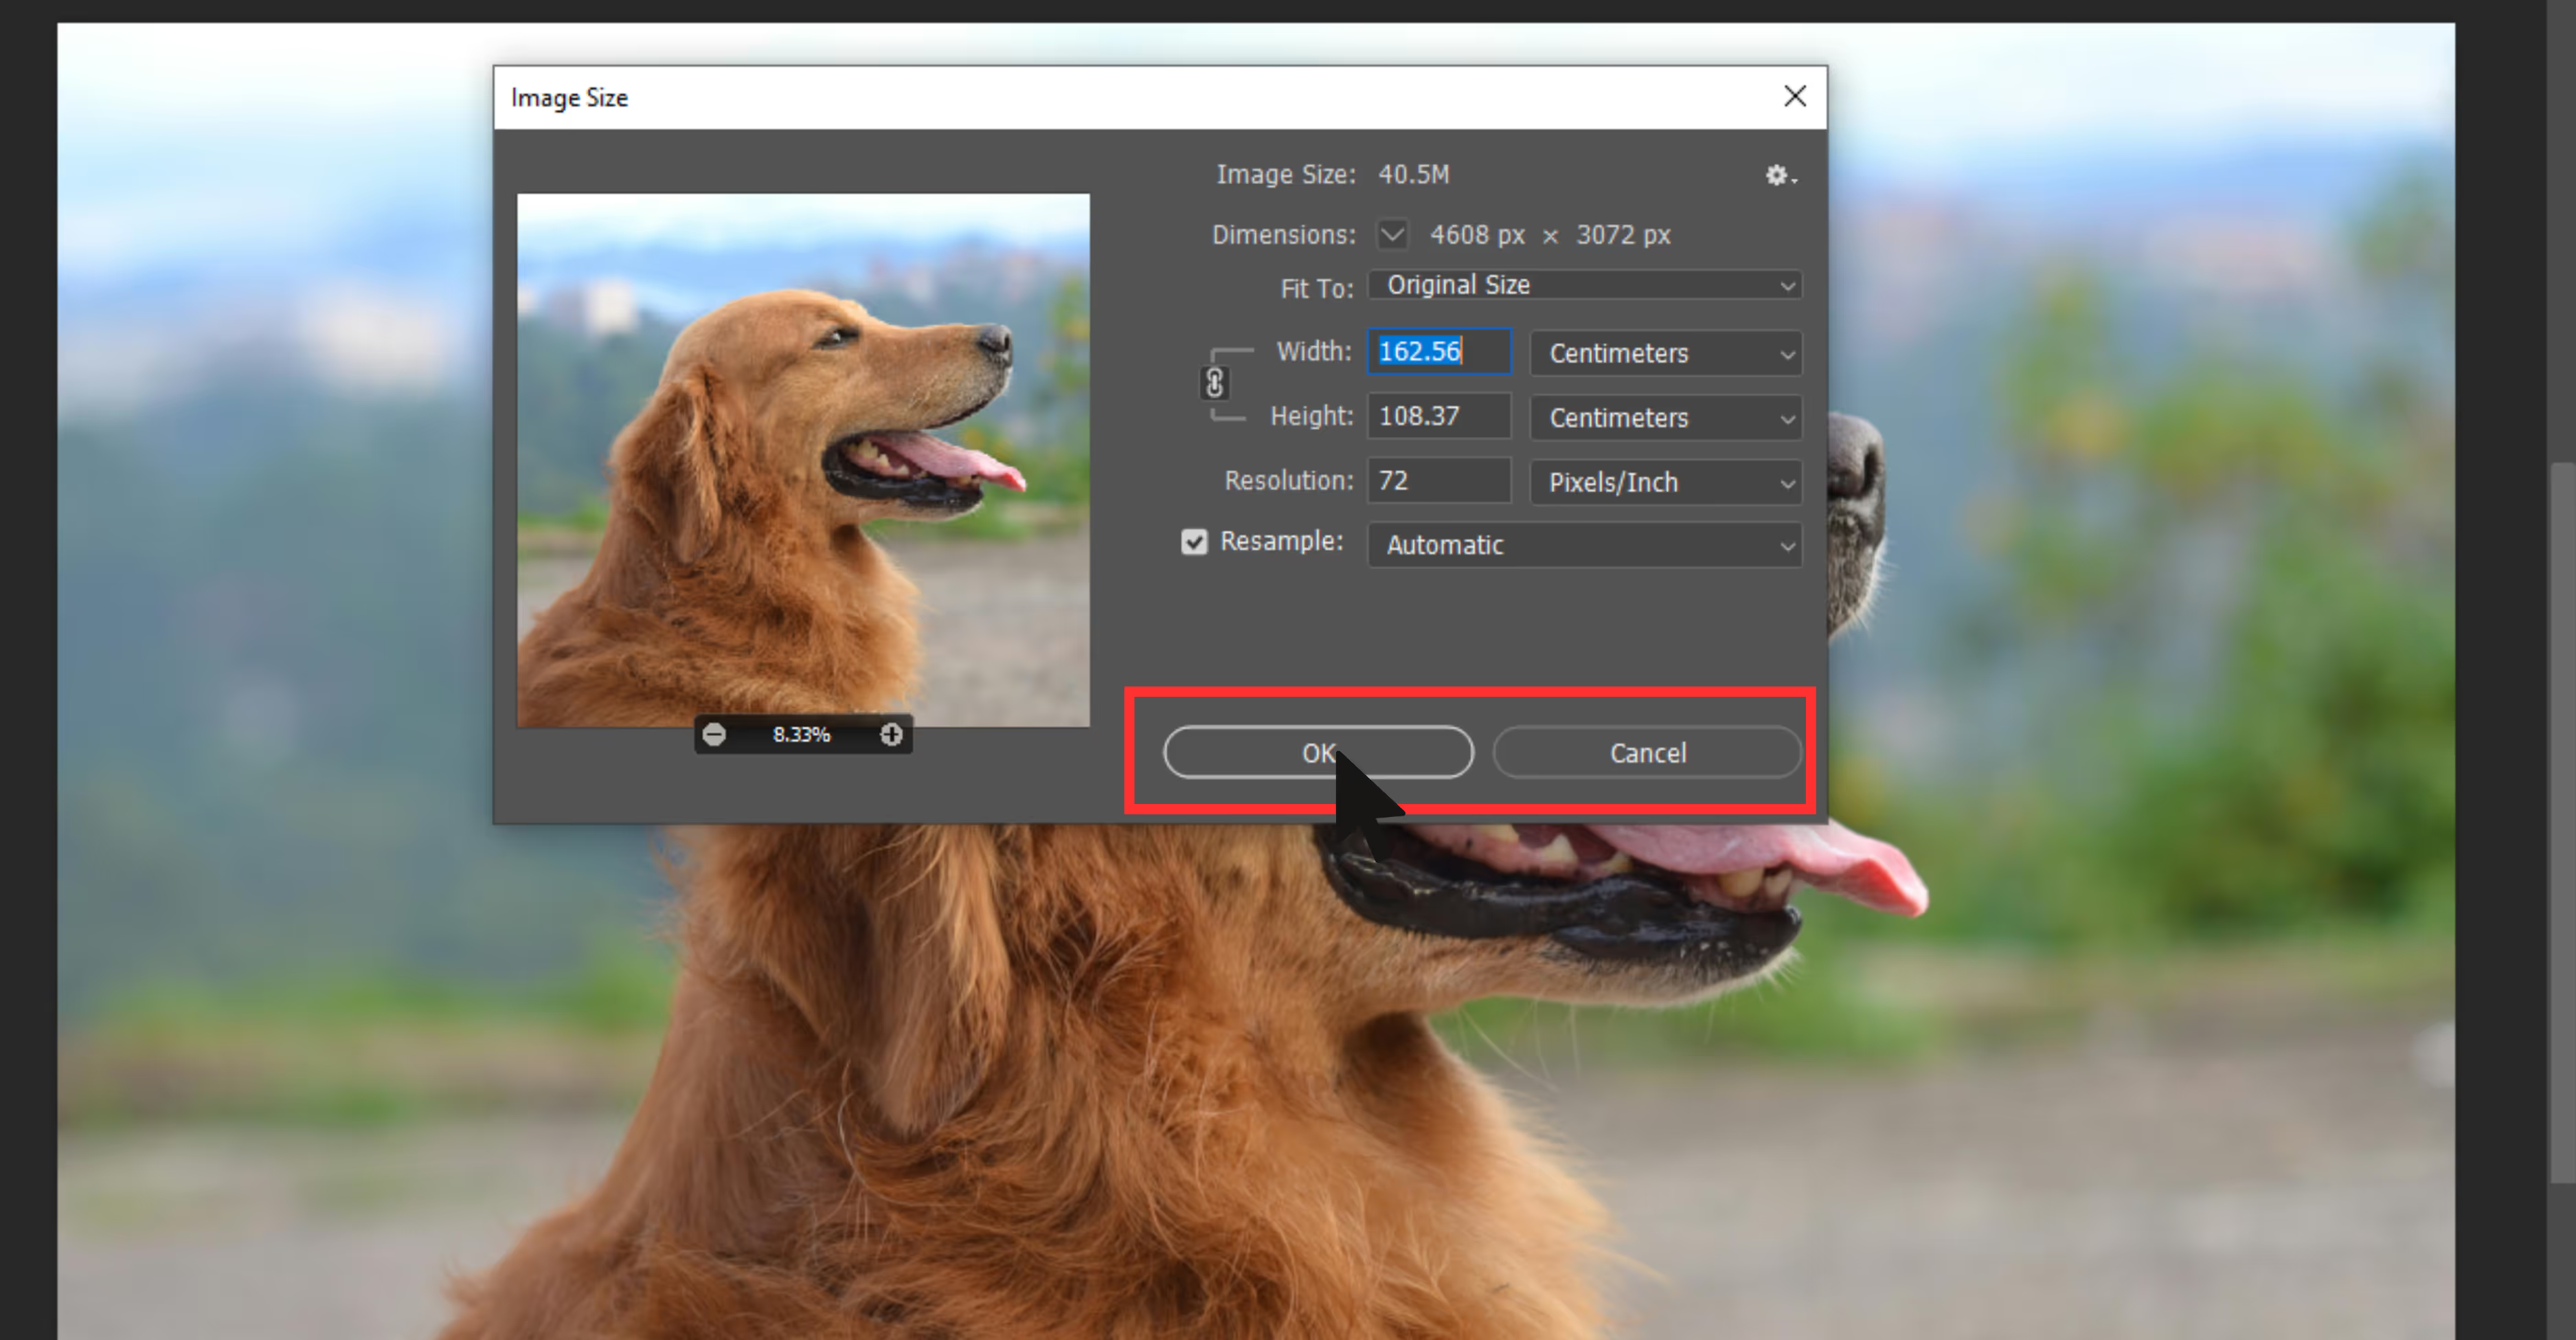
Step 4: Preview the image upscaling.
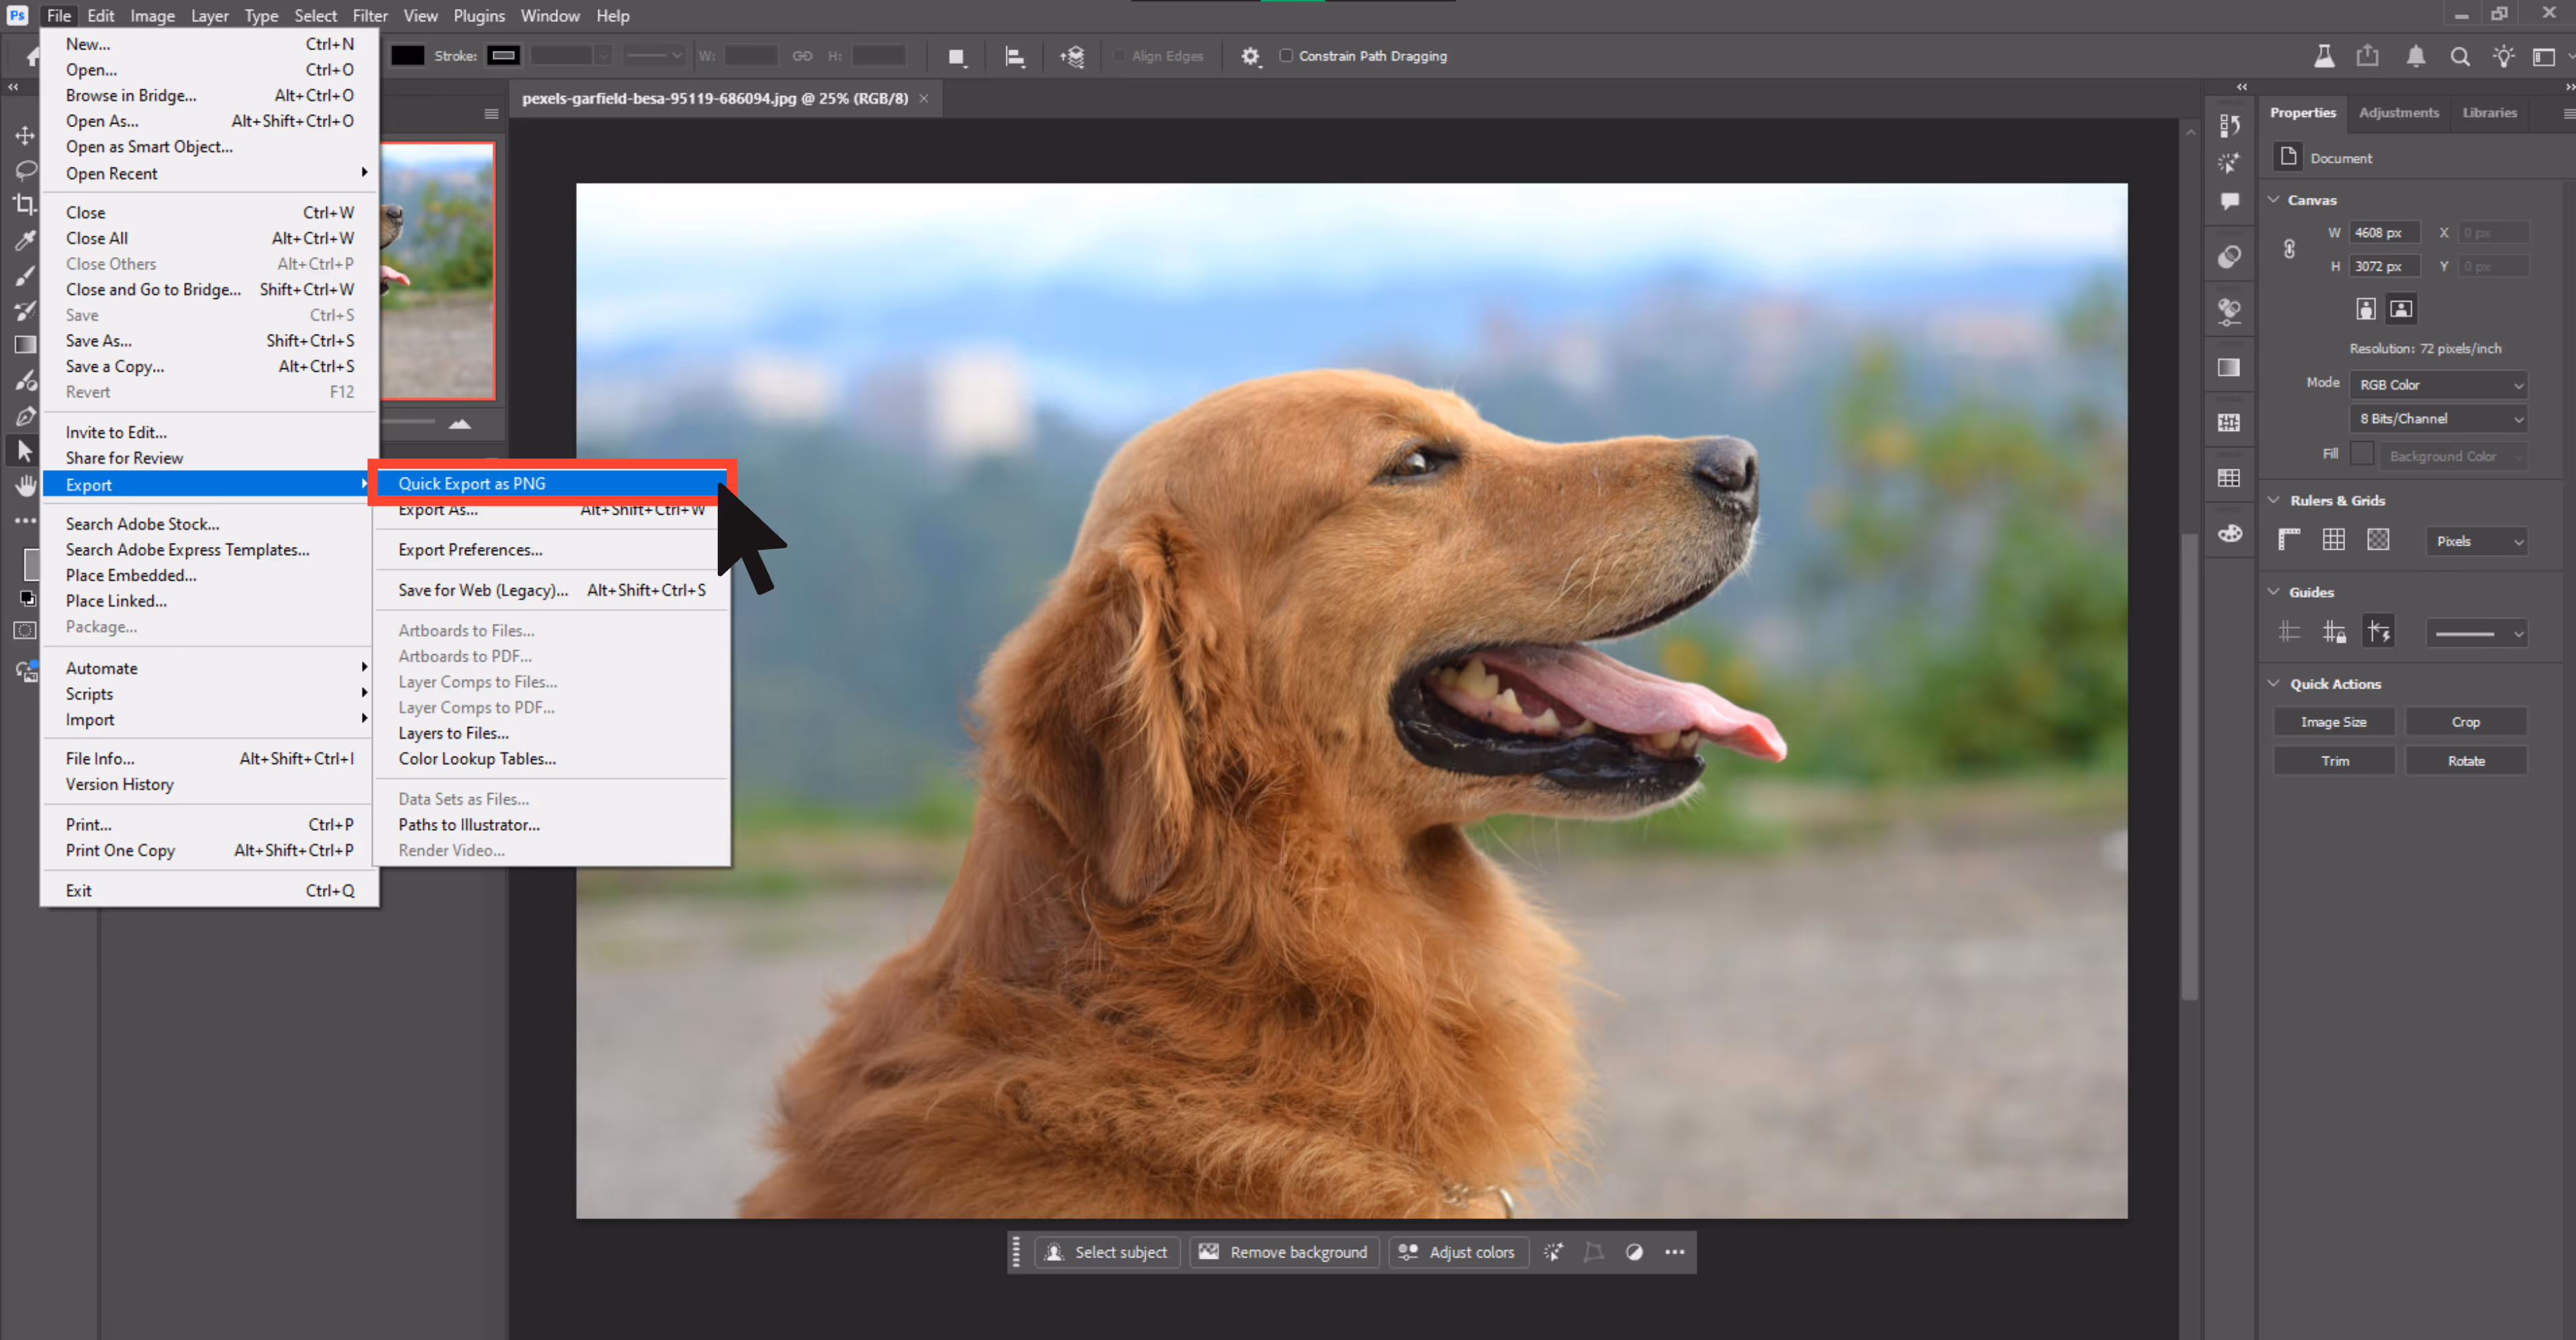
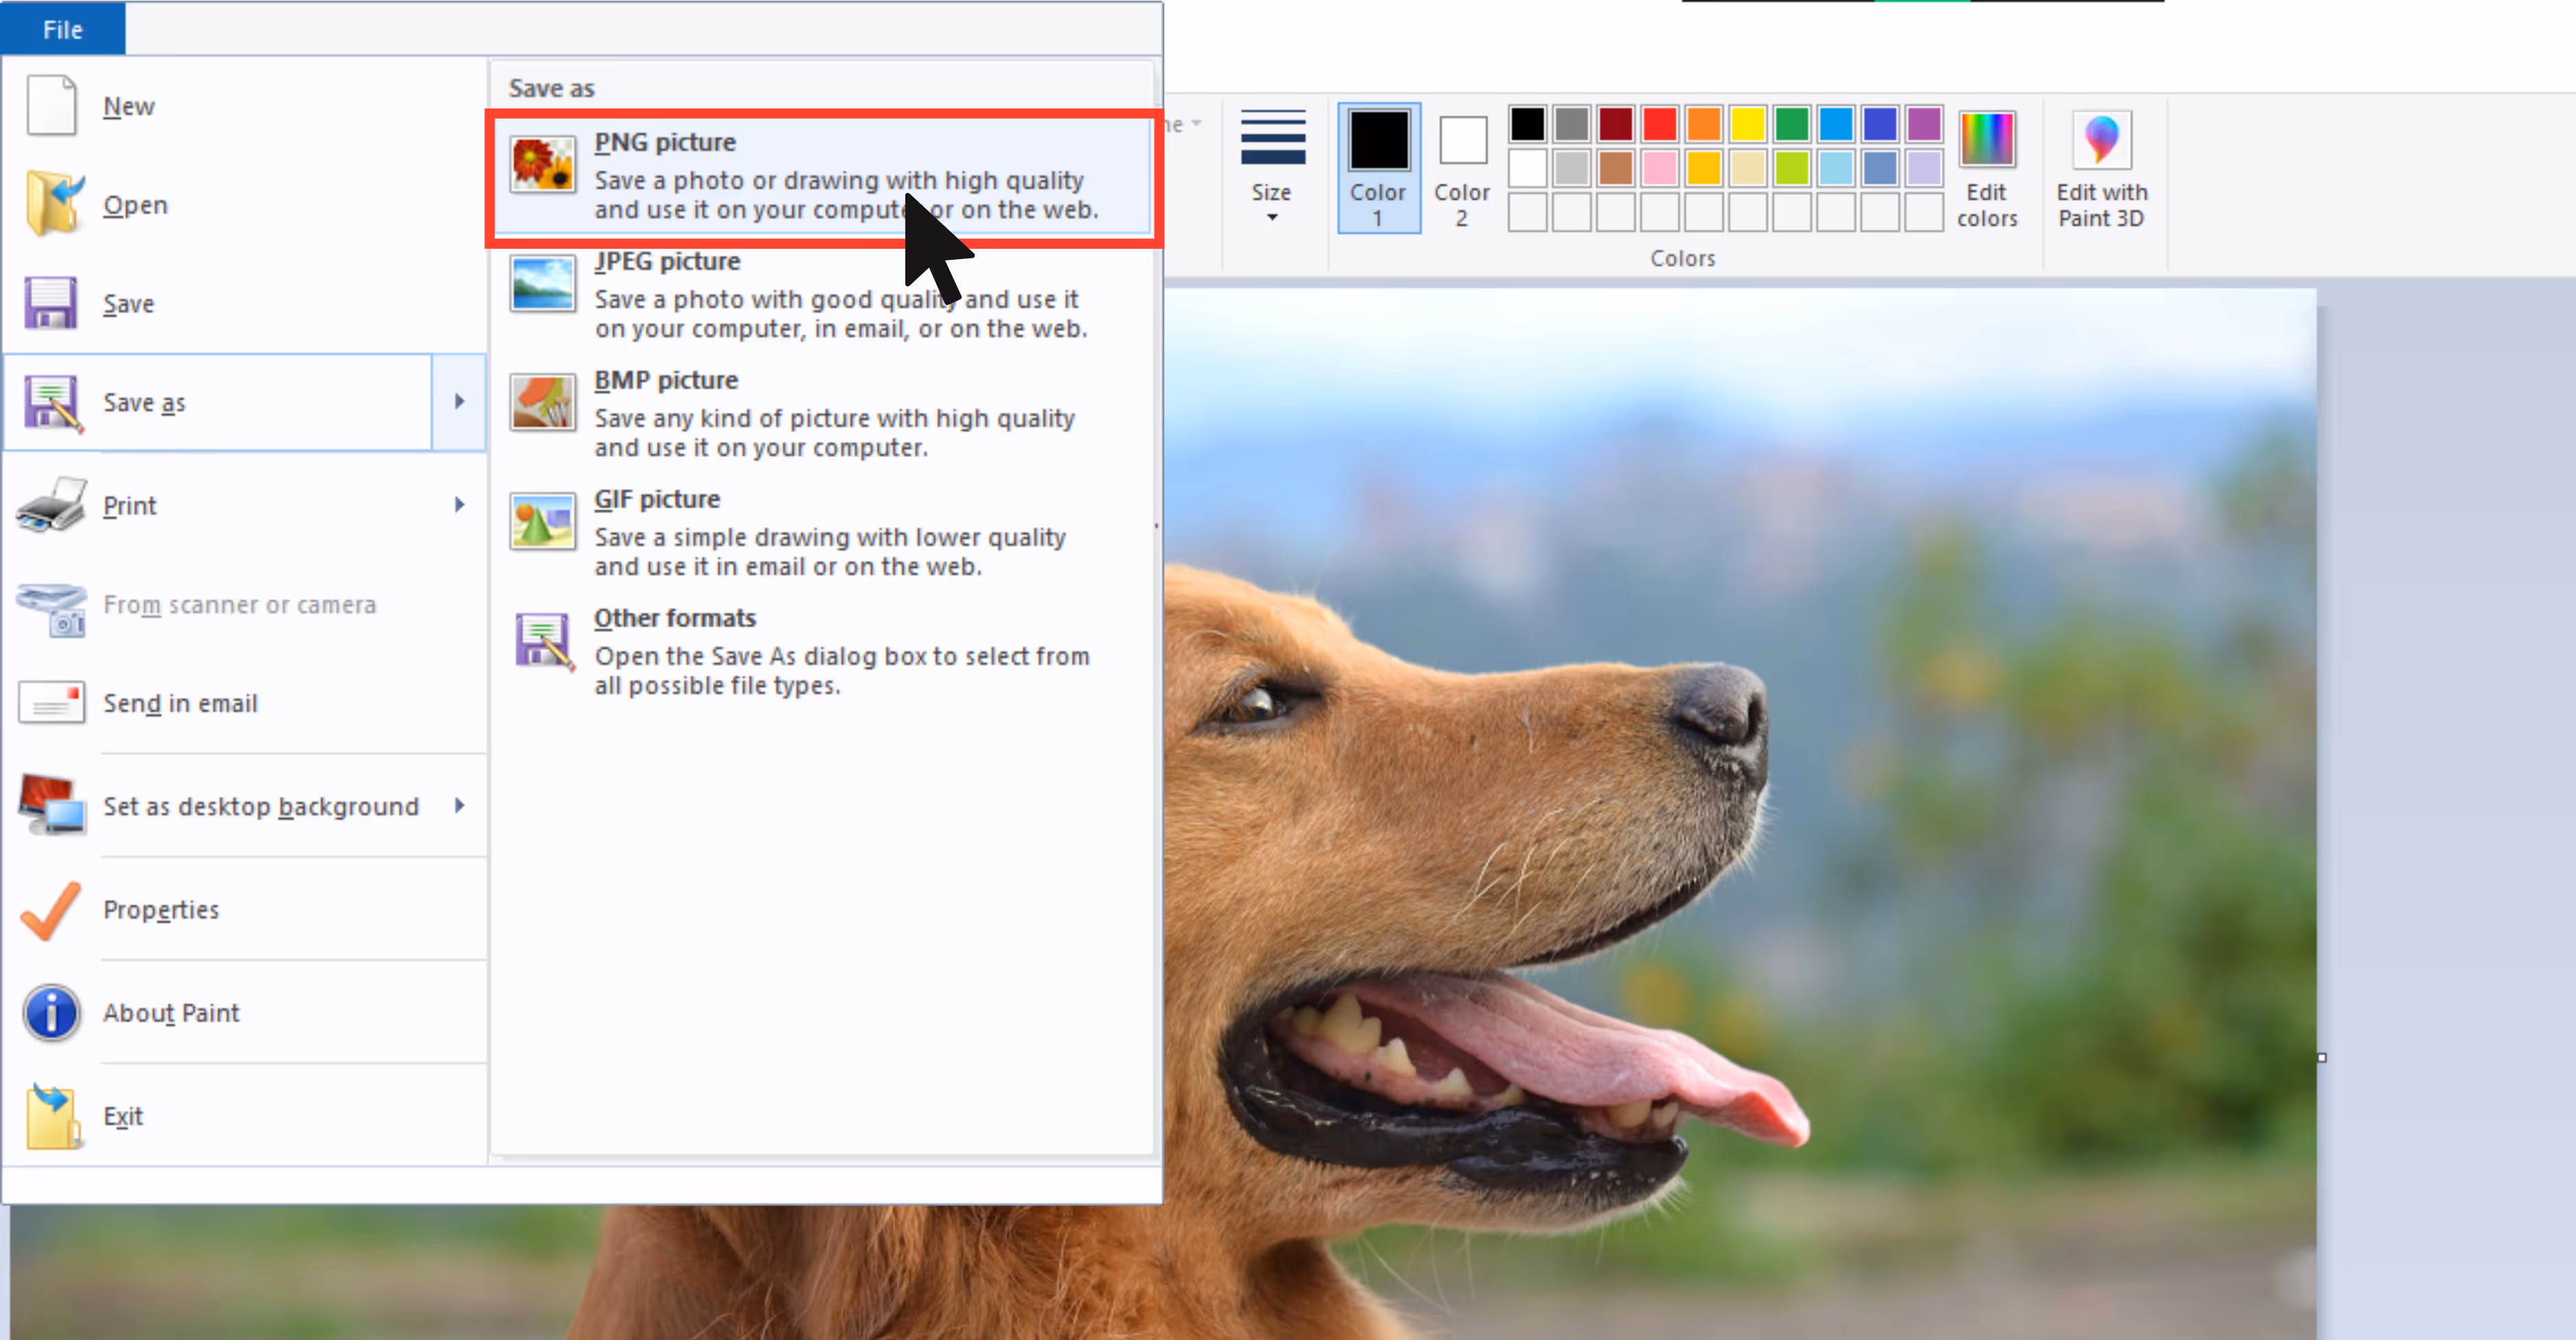
Step 5: Export the image in PNG format.
2. Microsoft Paint
What I liked about the tool: It’s free and extremely easy for quick edits. It's one of the best tools to enlarge an image without much effort.
Steps to make an image bigger without losing quality in Paint:
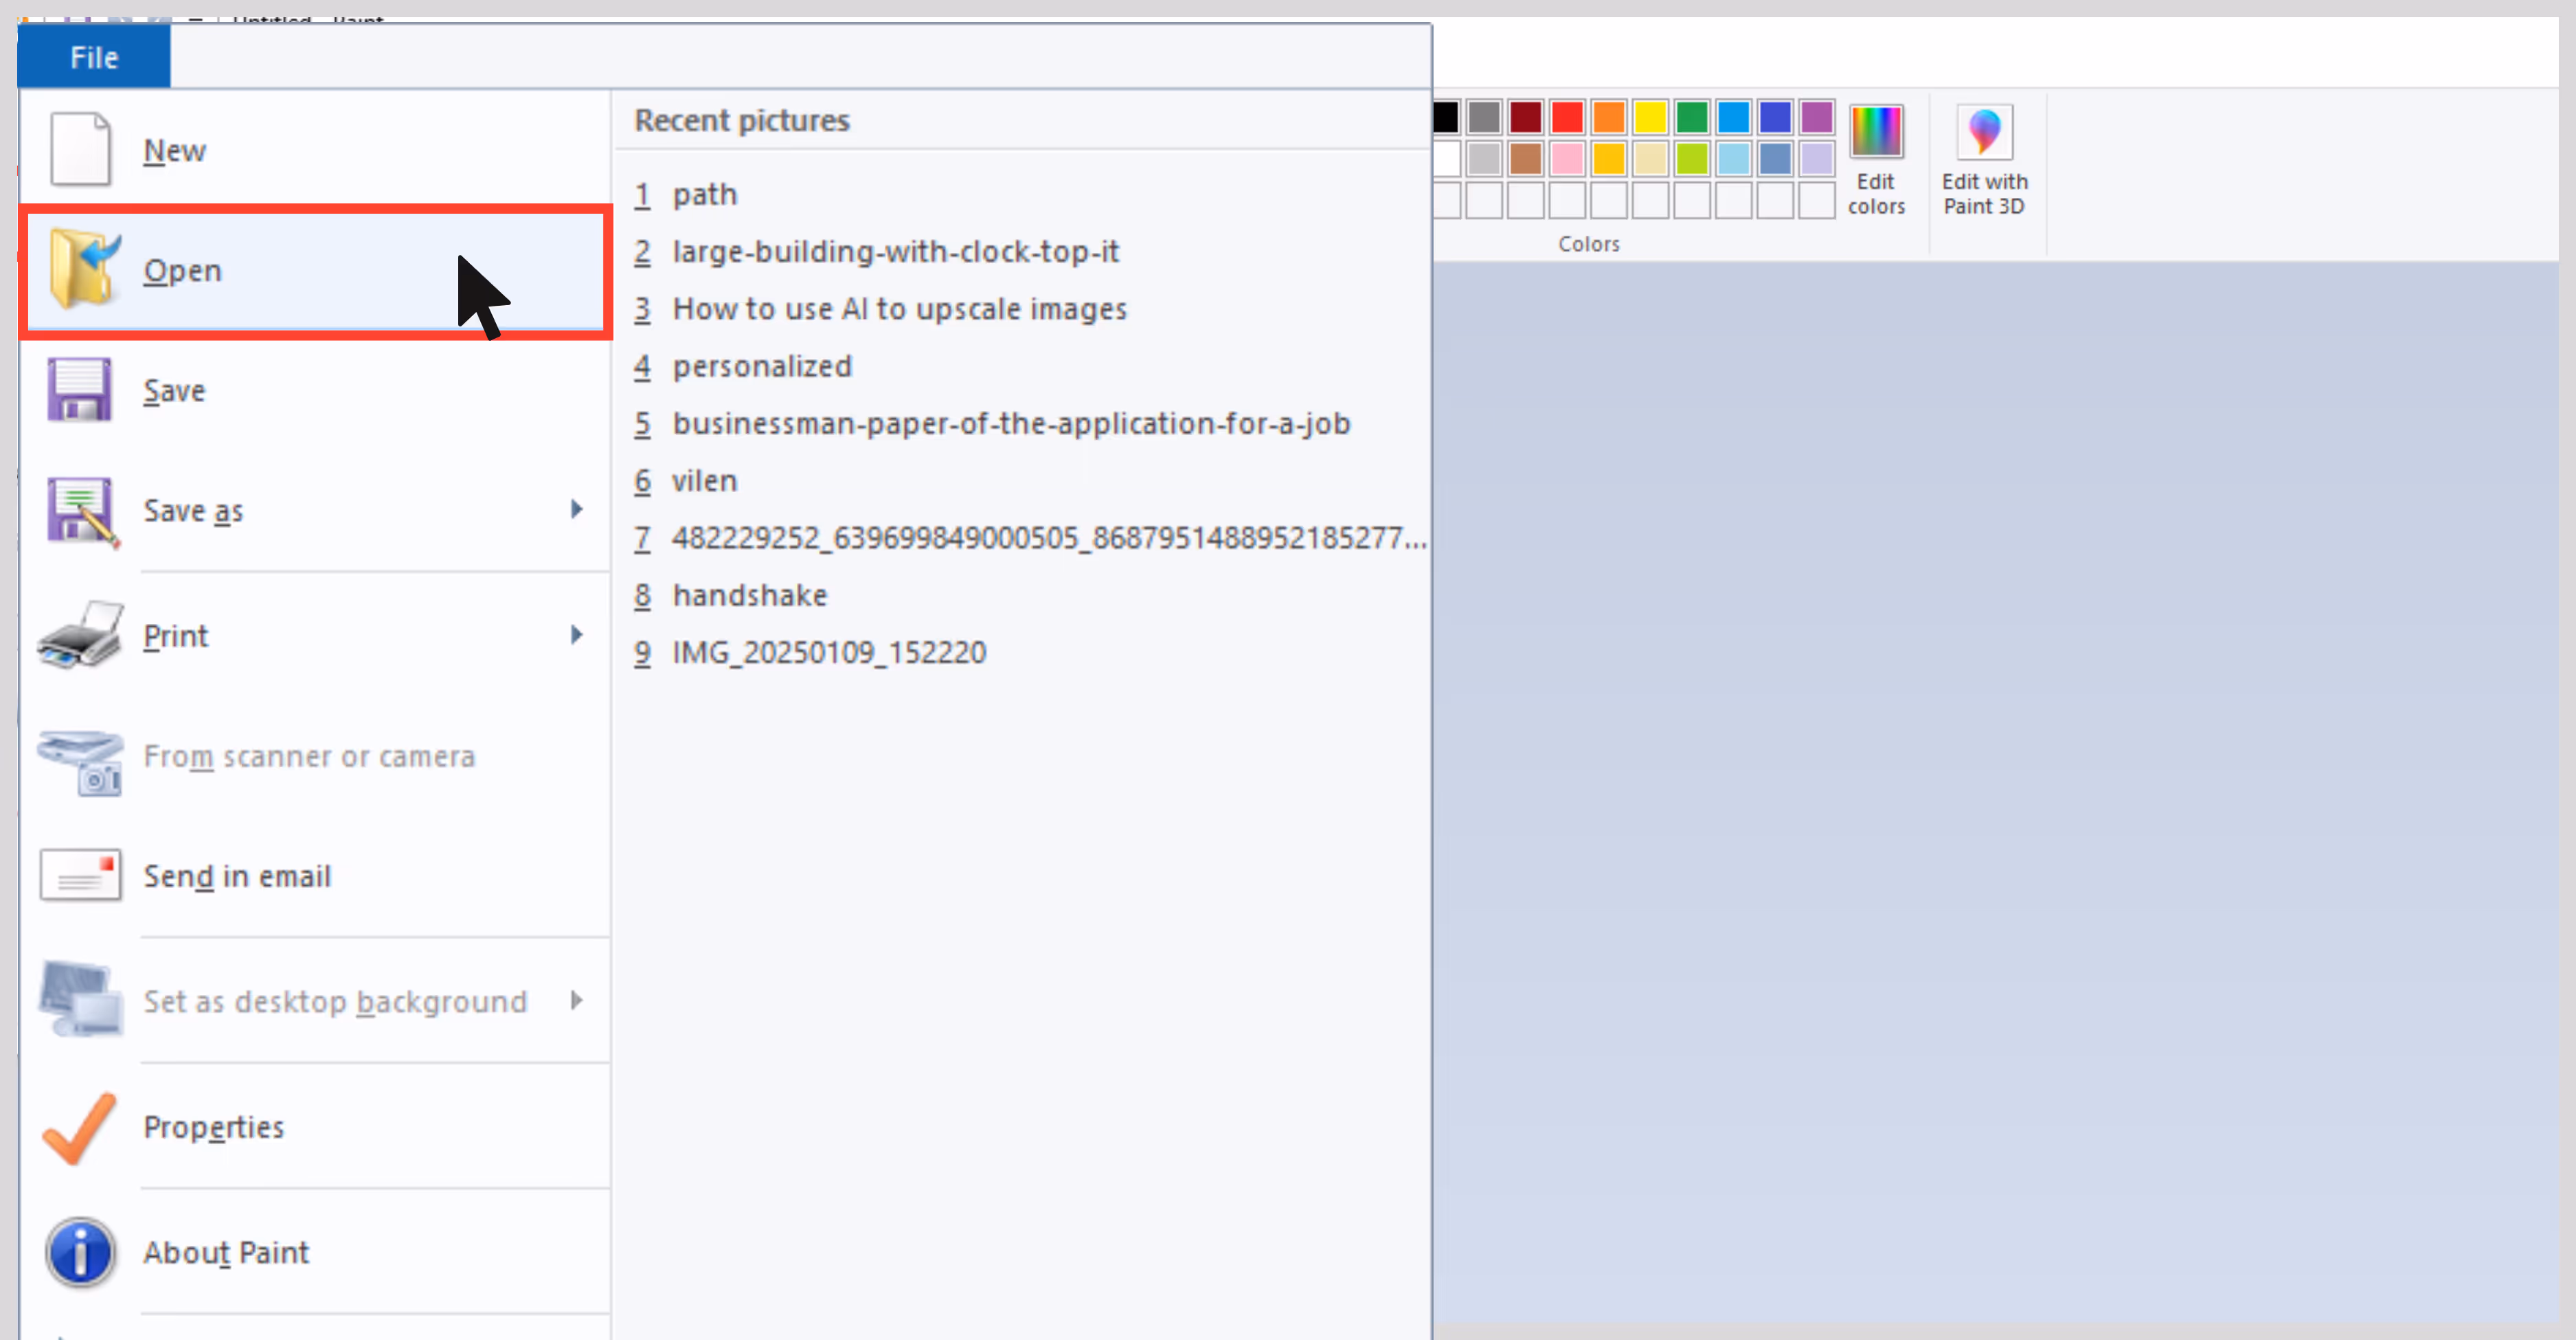
Step 1: Open the image in Paint.
Step 2: Click on Resize.
.avif)
Step 3: Choose Pixels and uncheck “Maintain Aspect Ratio” if needed.
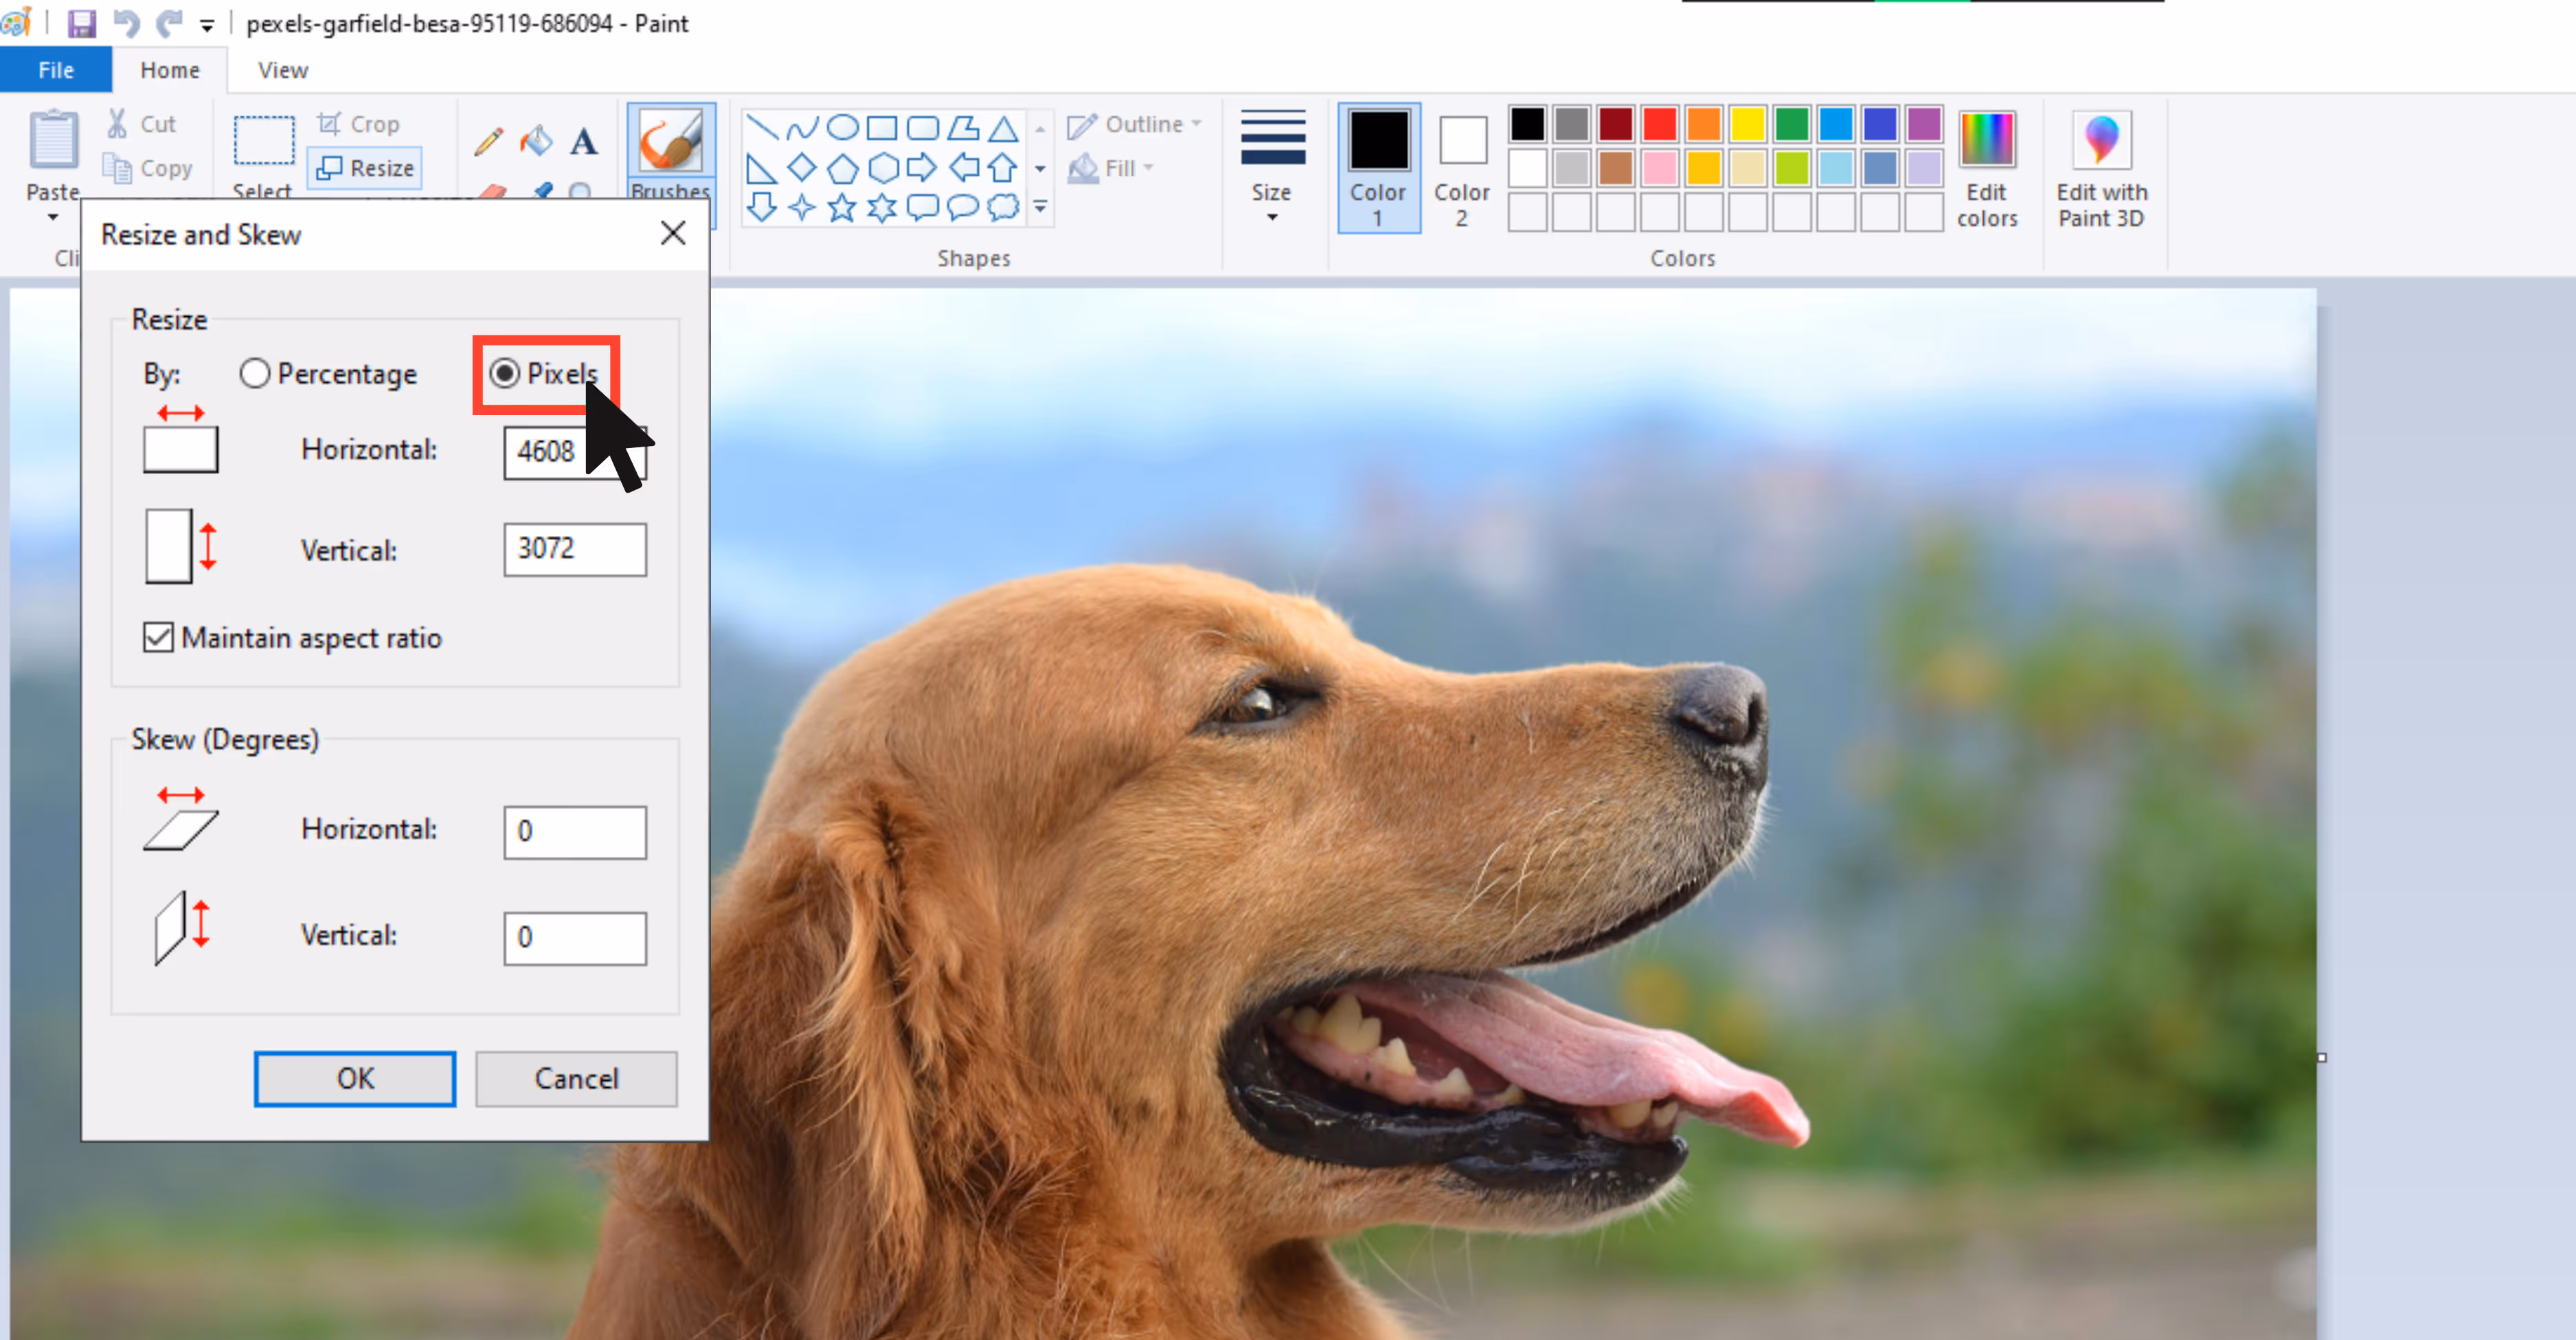
Step 4: Enter the desired dimensions of how big you want to make your image.
Step 5: Save as PNG for better output.
3. GIMP (GNU Image Manipulation Program)
What I liked: GIMP is free for basic features until you need the powerful features. Its interface is a bit like Photoshop and a bit complex for beginners. Once you get used to the interface, it's super handy for resizing images.
Steps to upscale image resolution in GIMP:
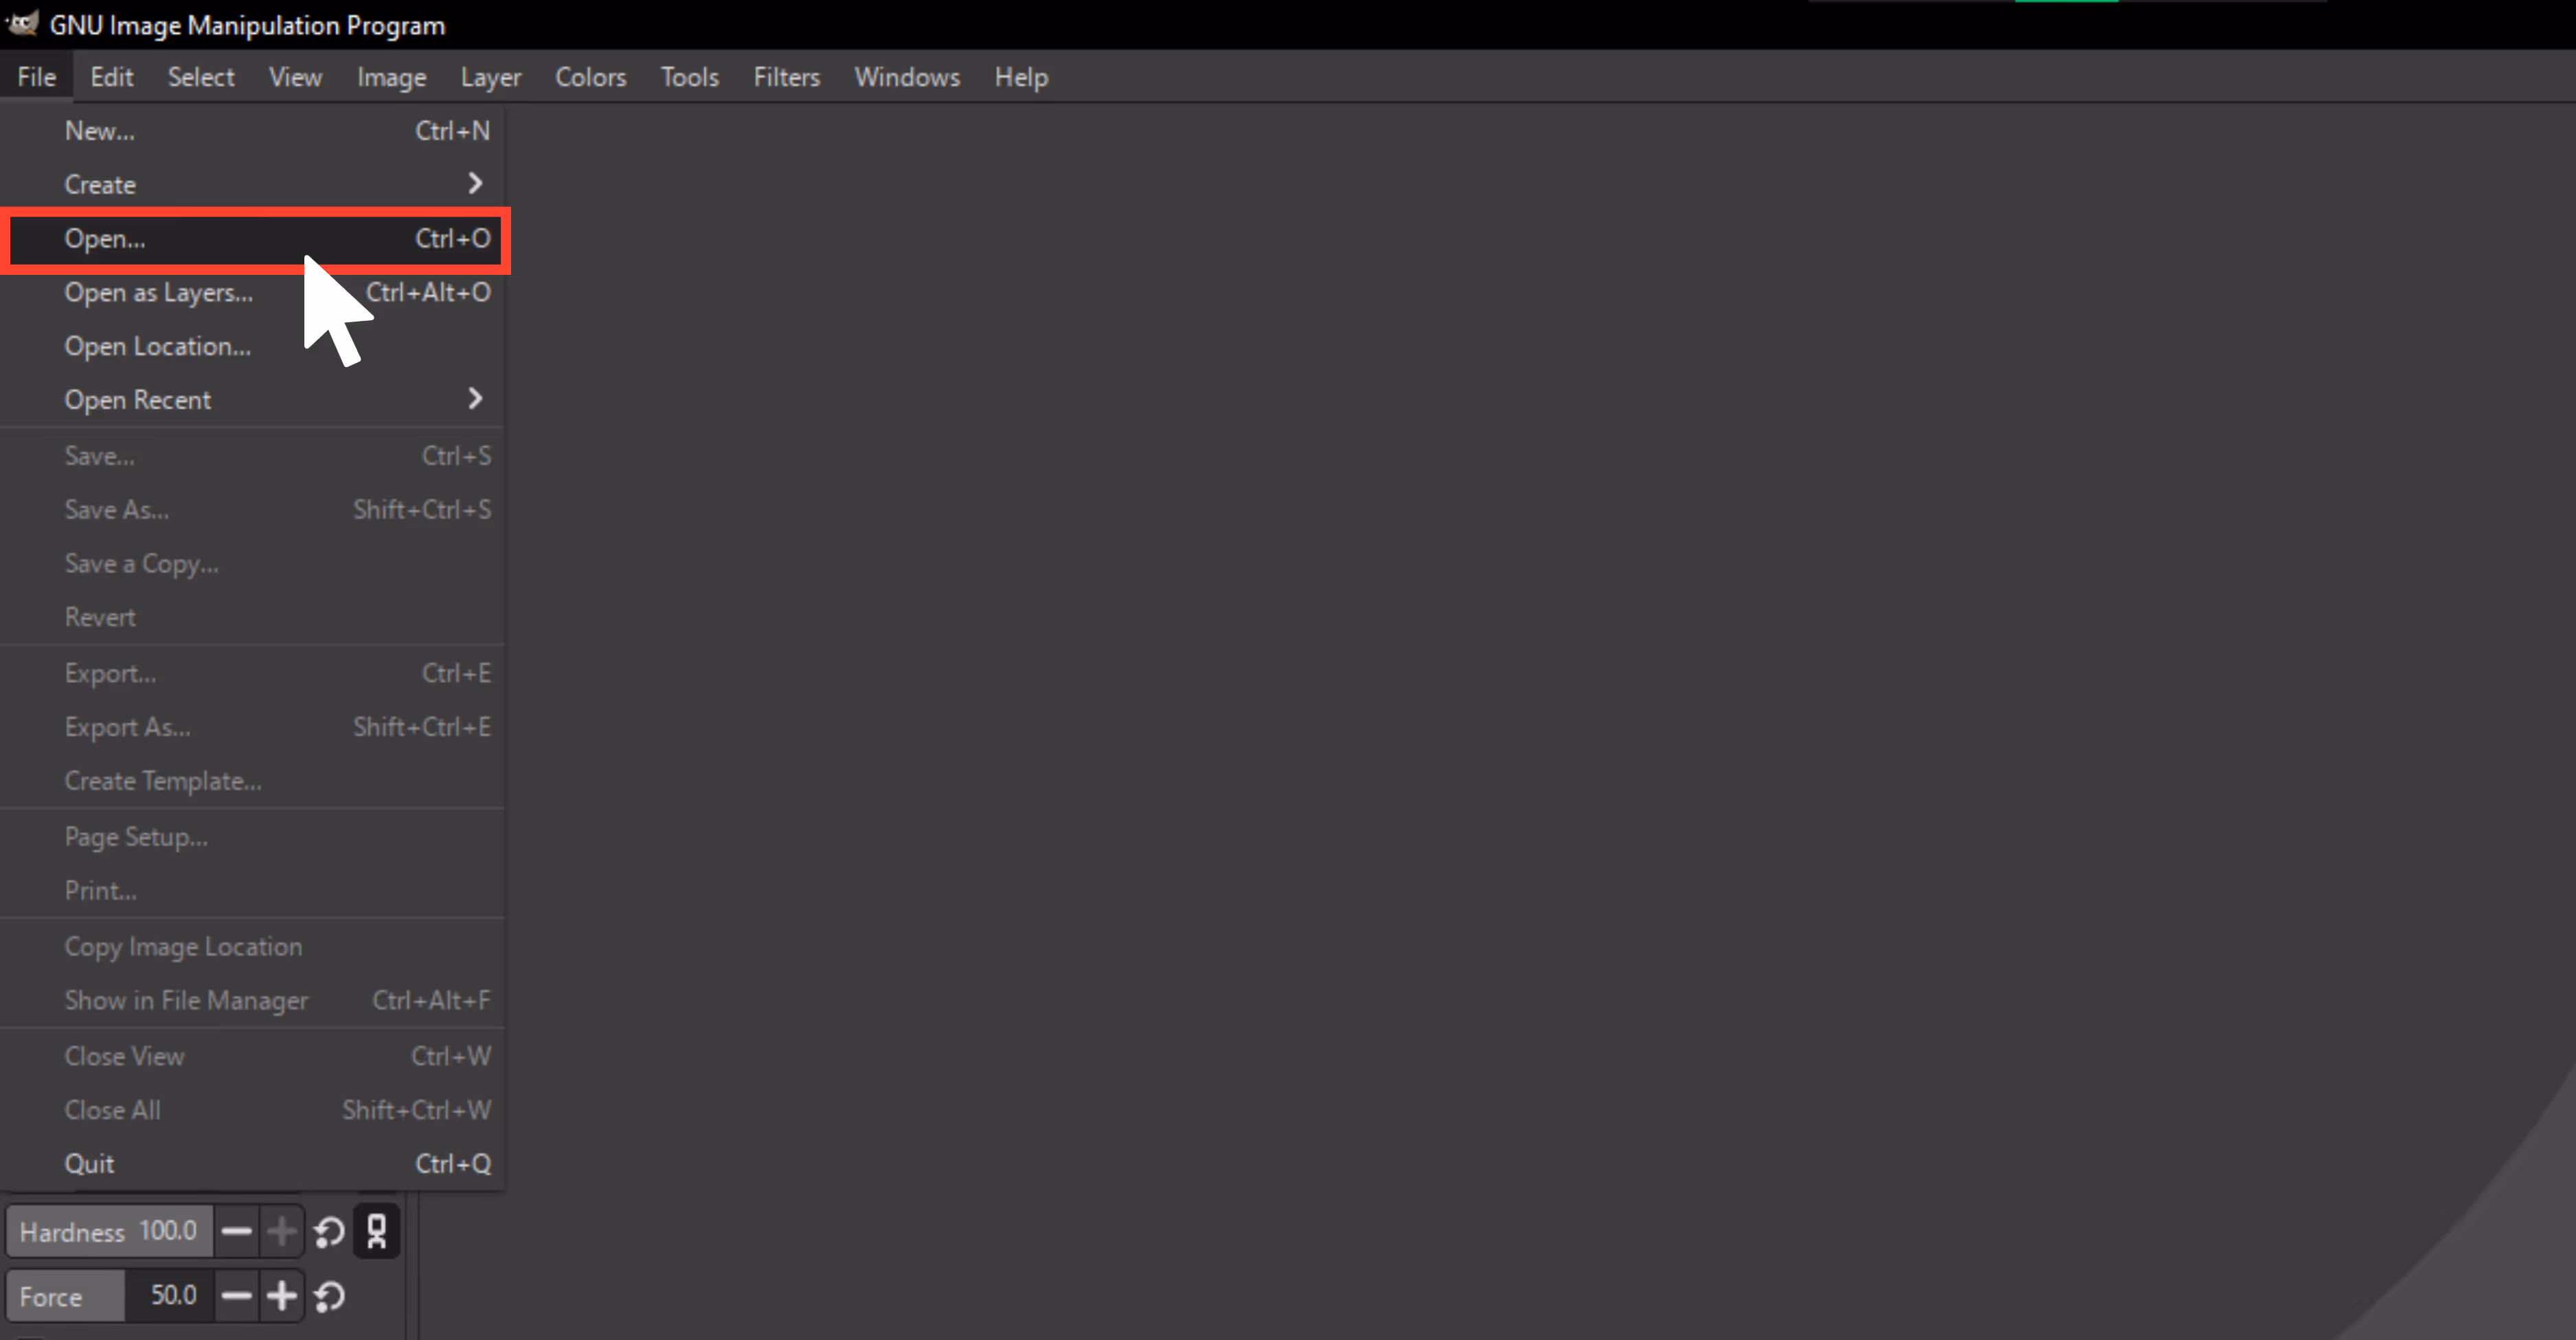
Step 1: Launch GIMP and open the image you want to upscale by going File and then Open.
Step 2: Go to Image and then select the Scale Image dialog.

Step 3: In the scale image, you can modify the width and height to any desired size by choosing the ratios.
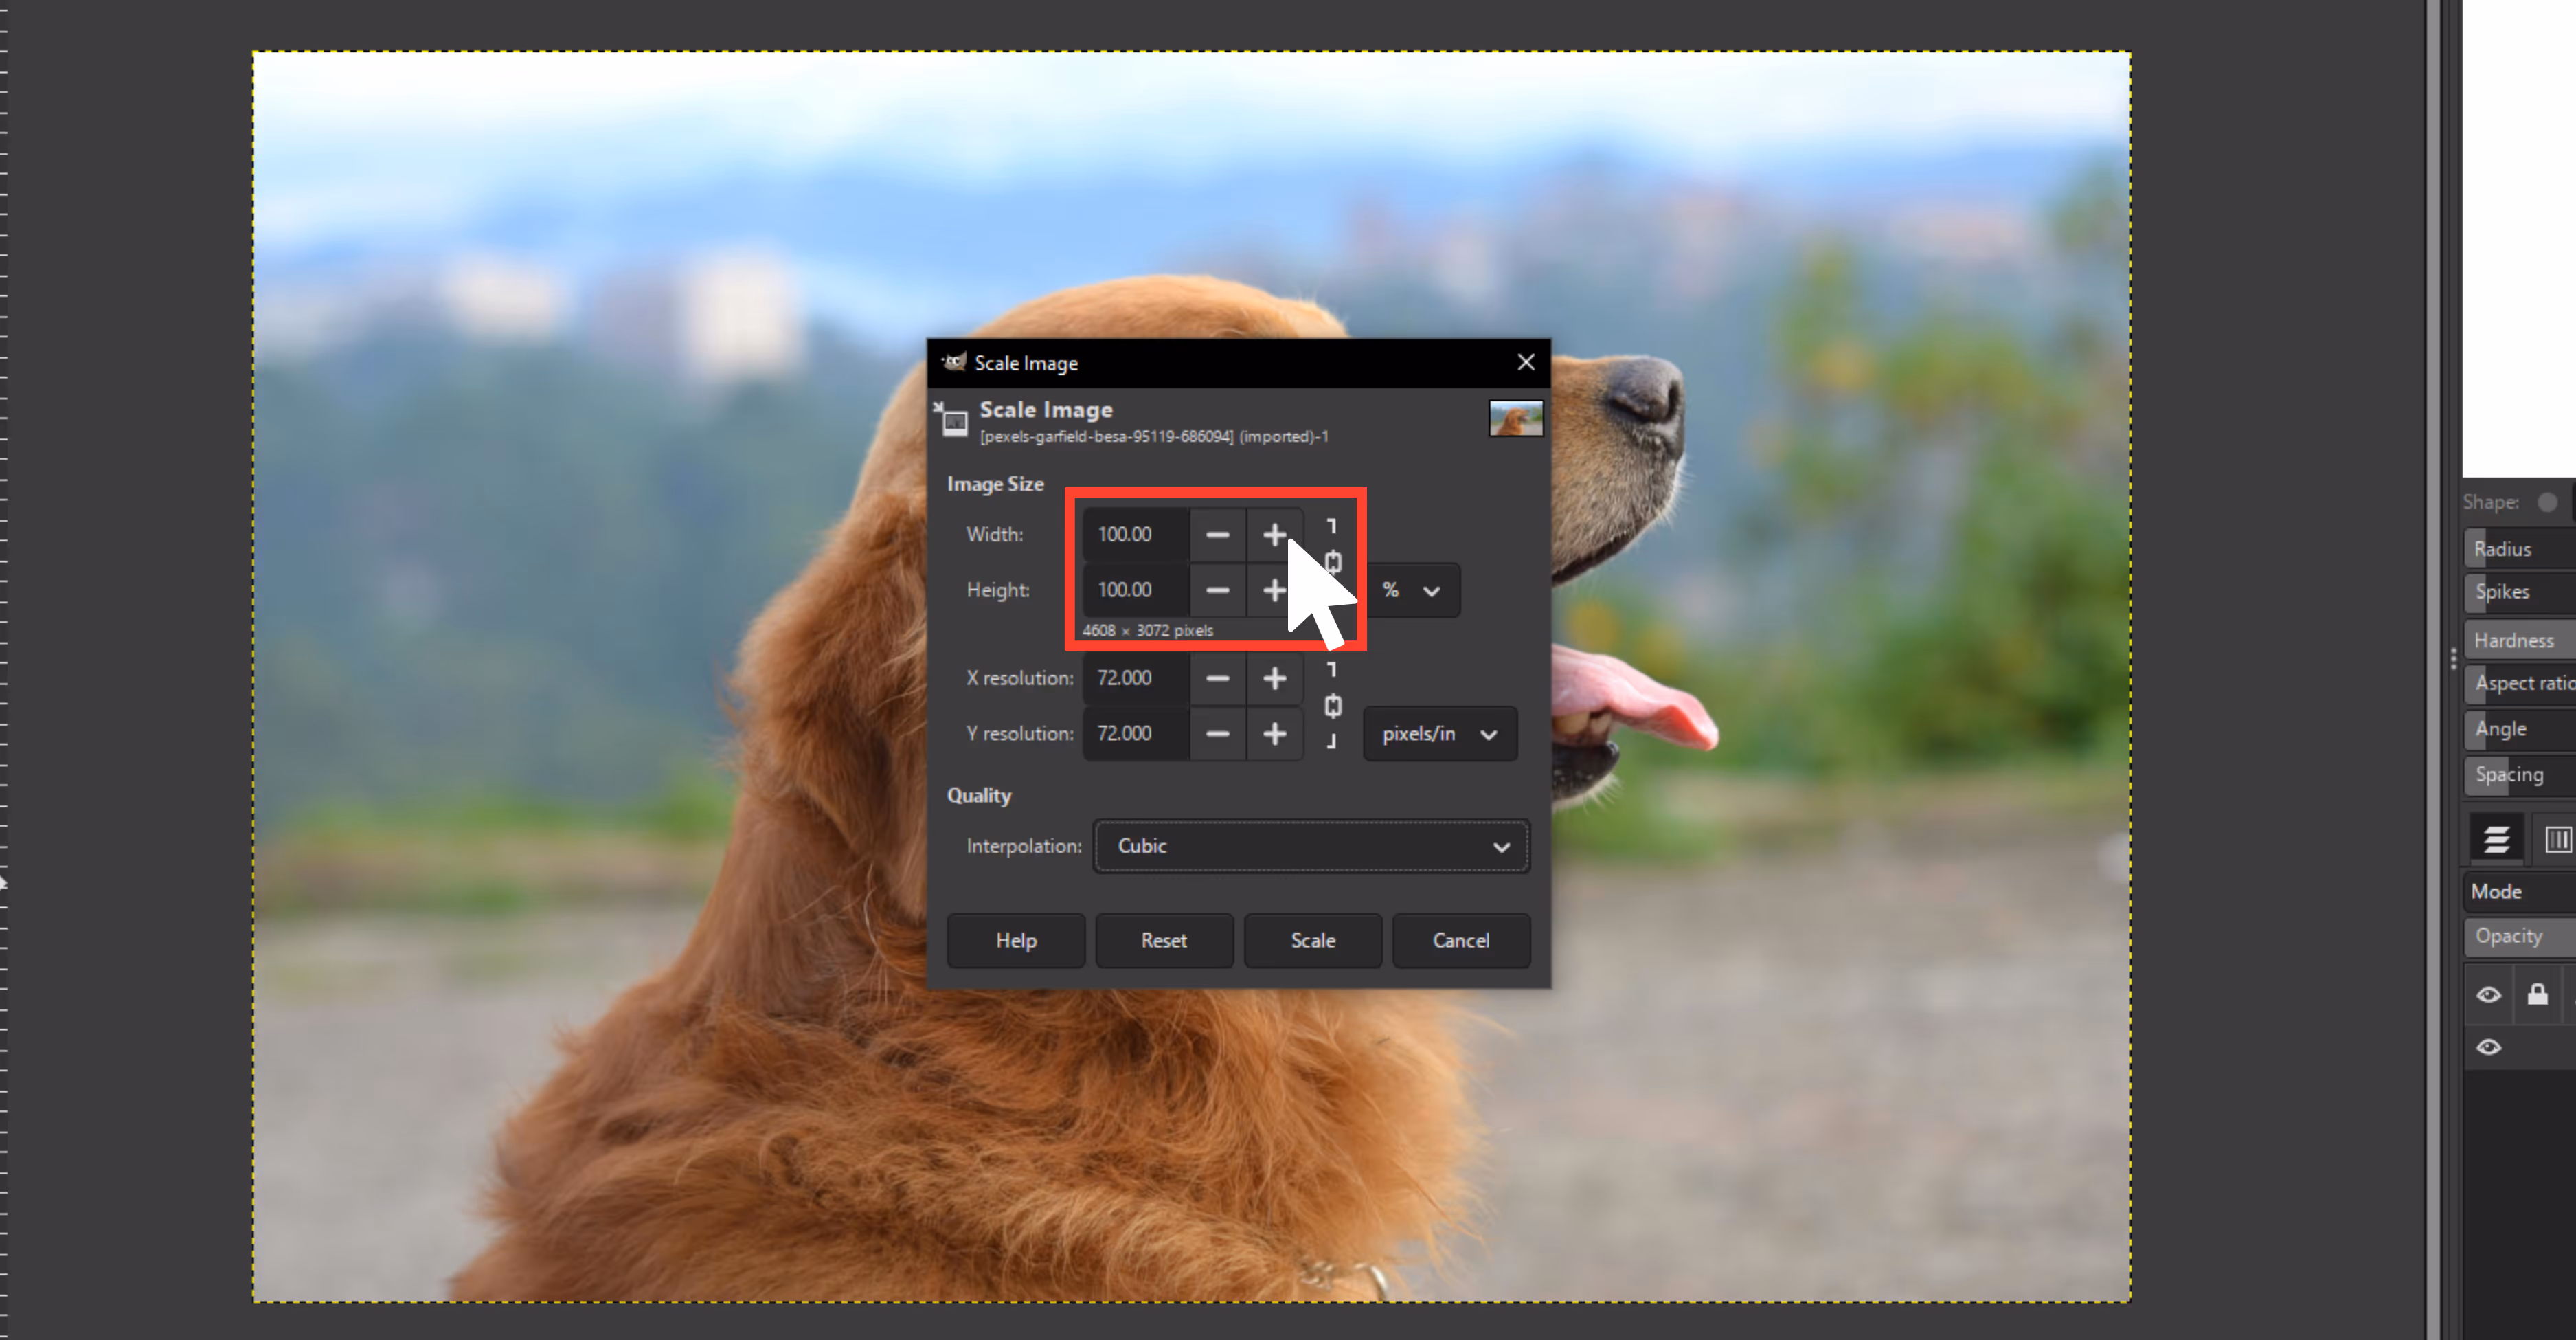
Step 4: Choose the cubic interpolation method.

Step 5: Click on the scale button to apply the changes.
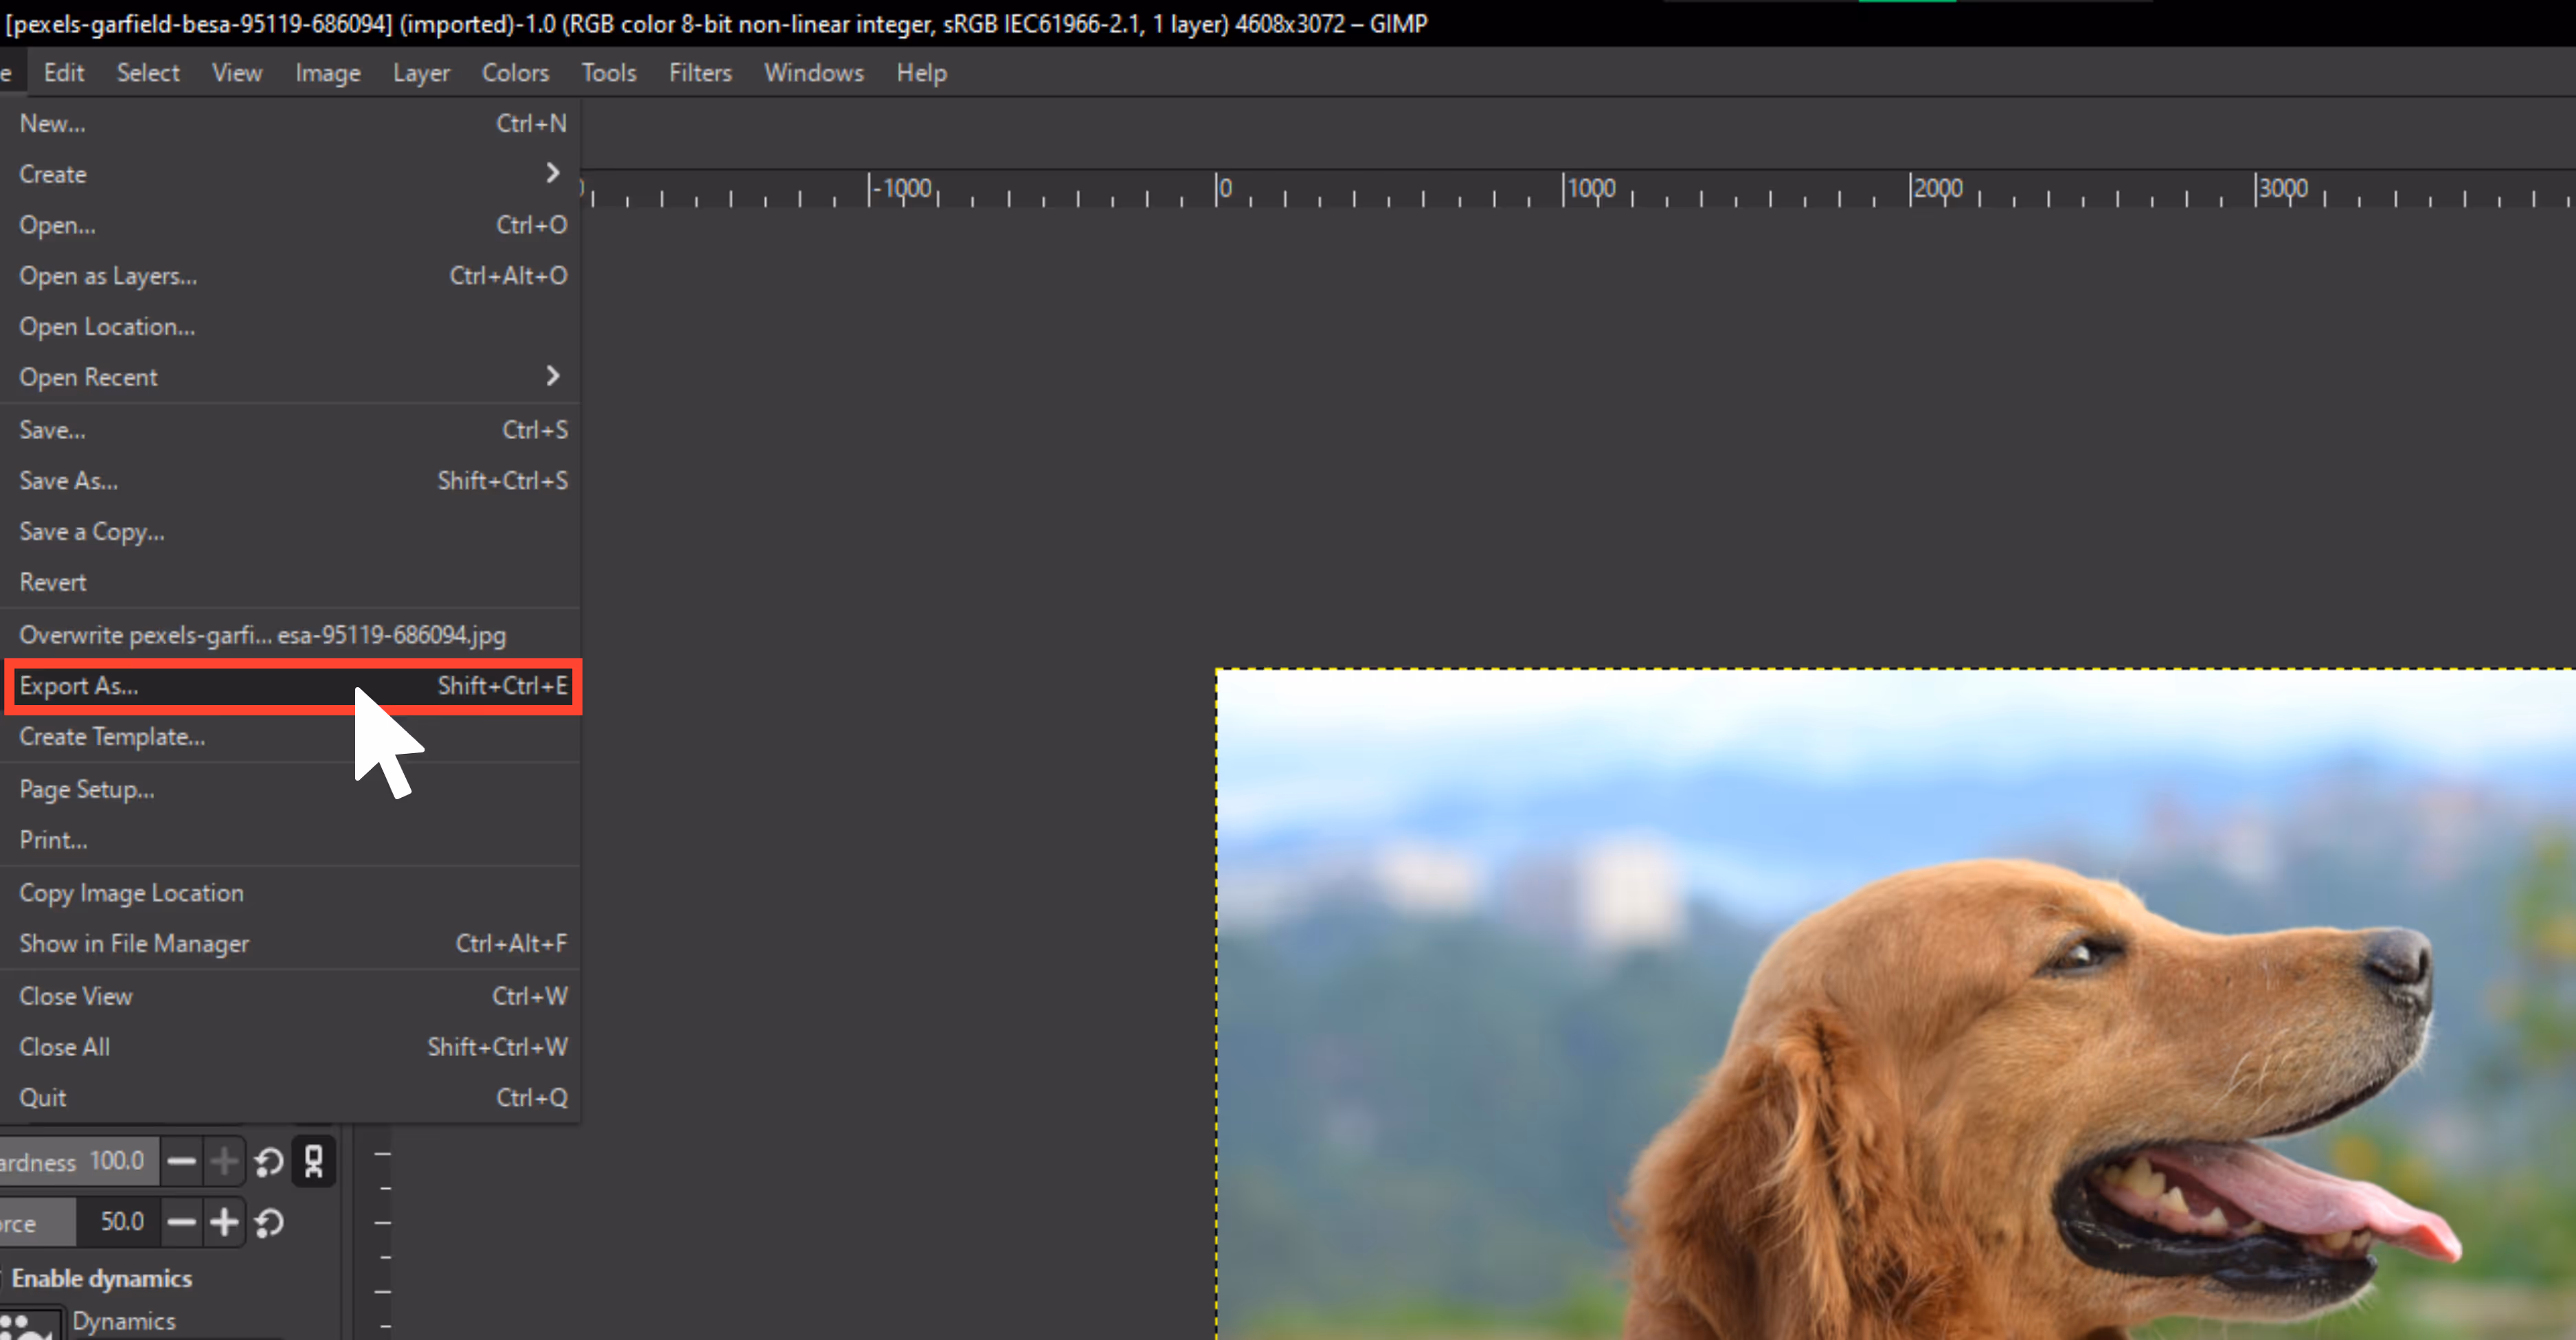
Step 6: After the final results, go to file and export as, choose a file name, and click on export, and your upscaled image will get saved.
How to make an image bigger without losing quality using the best AI tools?
Traditional methods work, but they’re time-consuming, and results may vary. That’s where professional AI image upscaling tools are the best. AI upscalers use machine learning patterns to intelligently fill in missing details, along with the following benefits;
- Fewer visible artifacts.
- Preserves facial details and texture.
- Smart noise reduction.
- Great for photos, illustrations, and low-res images.
- No need for design expertise.
Rating the below-mentioned AI image enlargers wasn’t easy. These are great for keeping image quality sharp after upscaling, but results vary a lot depending on the photo. For example, I noticed that some tools made the images look overly smooth, but kept the edges beautifully crisp.
I had to skip or tweak settings on a few when testing human subjects. Hence, there’s no one-size-fits-all tool, but I’ve found a few that deliver great results. Keep reading to find the right tool for your type of image.
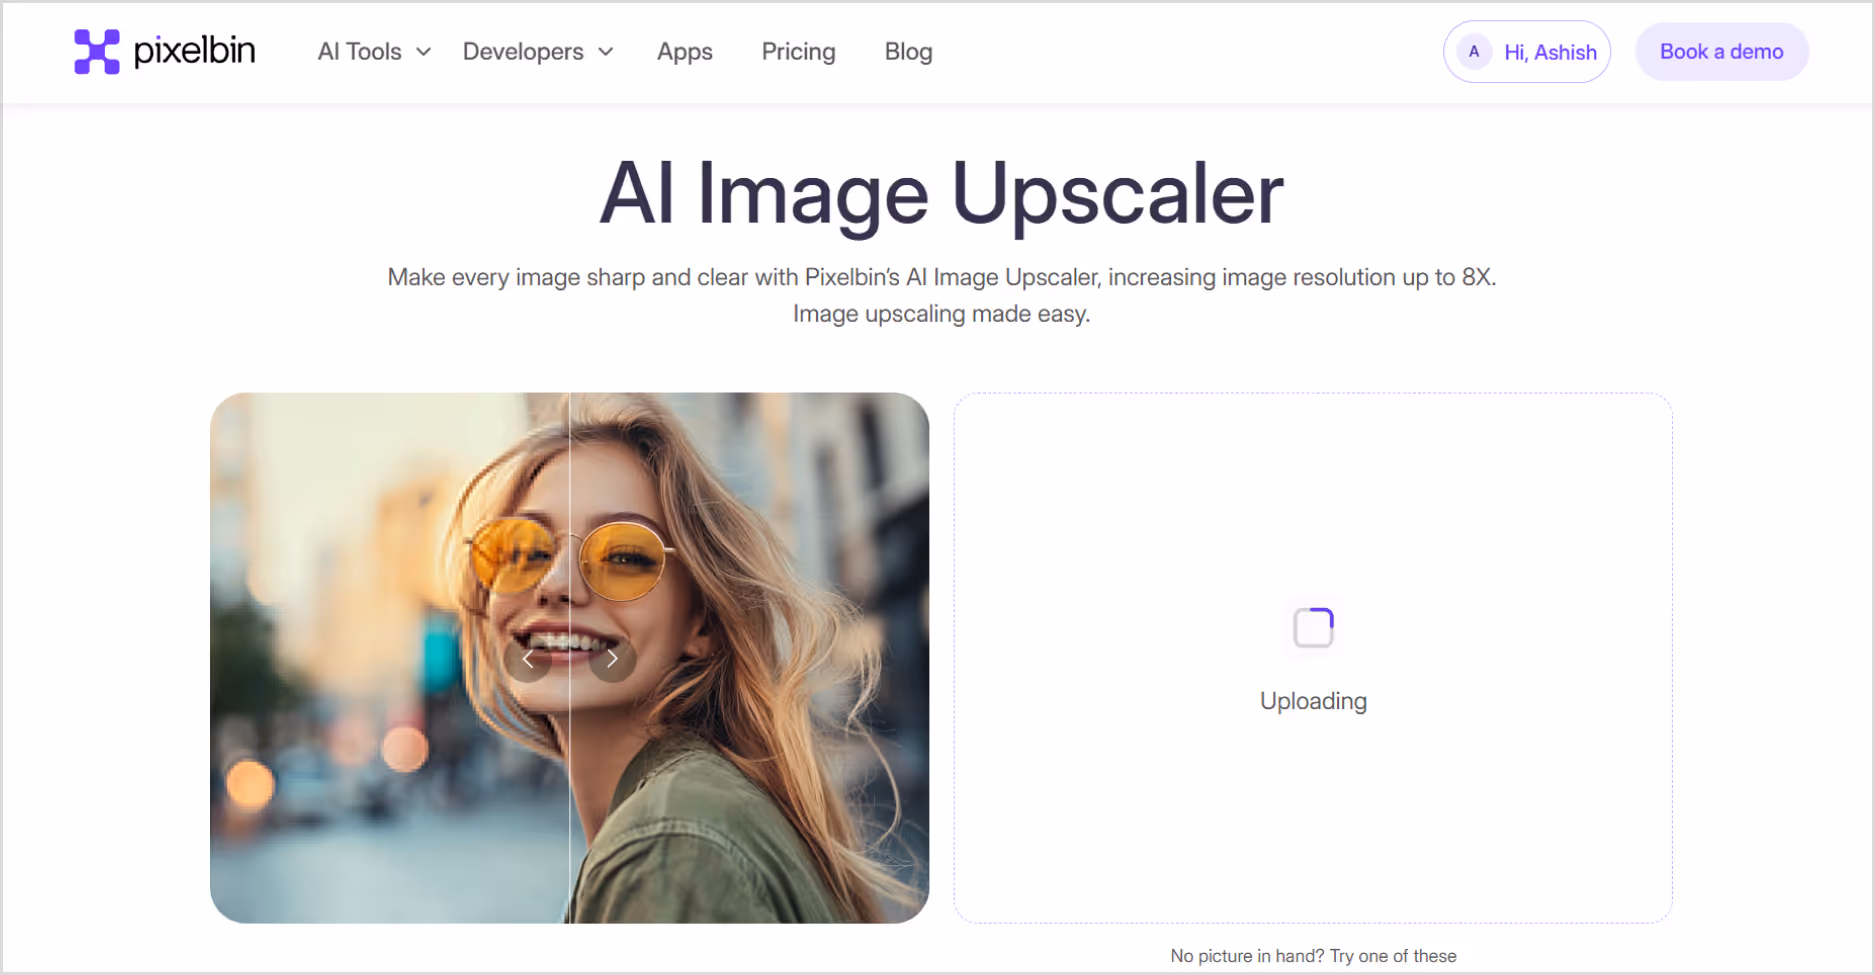
1. Pixelbin
After playing around with a lot of tools, I decided to give Pixelbin’s AI Image Upscaler a shot. It’s still super simple to use, but the interface is noticeably more focused and feels like it was built for people who want quick results without distractions.
I uploaded a low-resolution dog photo, which has blurry fur, a flat background, and not a lot of detail, and within seconds, I had a much sharper, cleaner version. The tool lets you choose your upscale level (2x, 4x, and 8x), and there’s a nice toggle called “Enhance” if you want some extra clarity, saturation, brightness, and hue for your image. You can also remove or change the background and add new templates for free once you sign up.
What I liked about the tool?
- Free 4x and 8x upscaling credits on sign-up.
- Quick processing speed, results delivered under 10 seconds.
- Maintains a clear and sharp image, with a feature named texture-preserving image details.
- Clean and easy-to-understand interface, just upload the image and the algorithms will upscale it automatically.
- It's one of the best for website images, product photos, and social media graphics.
How much it costs?
Free Plan: 3 free credits/month after signing up you will get 10 credits/month.
Pay As You Go Plan: 50 credits onwards Rs. 773.72 billed once.
Plan Benefits
- Full access to all AI tools.
- Batch processing.
- 2 GB storage.
Lite Plan: 1800credits/ year 515.81/month or Rs.6,189.77 billed yearly.
Plan Benefits
- Full access to all AI tools.
- Batch processing.
- 10 GB storage.
Pro Plan: 6000 credits/year 1,805.35/month or 21,664.19 billed yearly.
Plan Benefits
- Full access to all AI tools.
- Batch processing.
- 50 GB storage.
What are the test results?
I tested with a blurry dog image and pushed it to 2x,4x, and 8x sizes. At 4x, the improvement was clear—fur texture was sharper, and the image just looked cleaner overall. At 8x, I expected some artifacts, but honestly, the results held up.
The "Enhance" feature really helped pull out extra detail, especially around the eyes and edges. The best part was that the image after upscaling actually looked real.
- Size increase: 8x.
- Quality improvement: UHD result.
- Processing time: Around 10 seconds.
- AI artifacts: None.
How to make an image bigger in Pixelbin?
Step 1: Go to the AI image upscaler by Pixelbin.
Step 2: Upload your image by selecting it from your device or simply pasting the image URL.
Step 3: As batch processing is a feature, you can add up to 10 images in one go.
.avif)
Step 4: Choose your image upscale size—2x, 4x, or 8x.
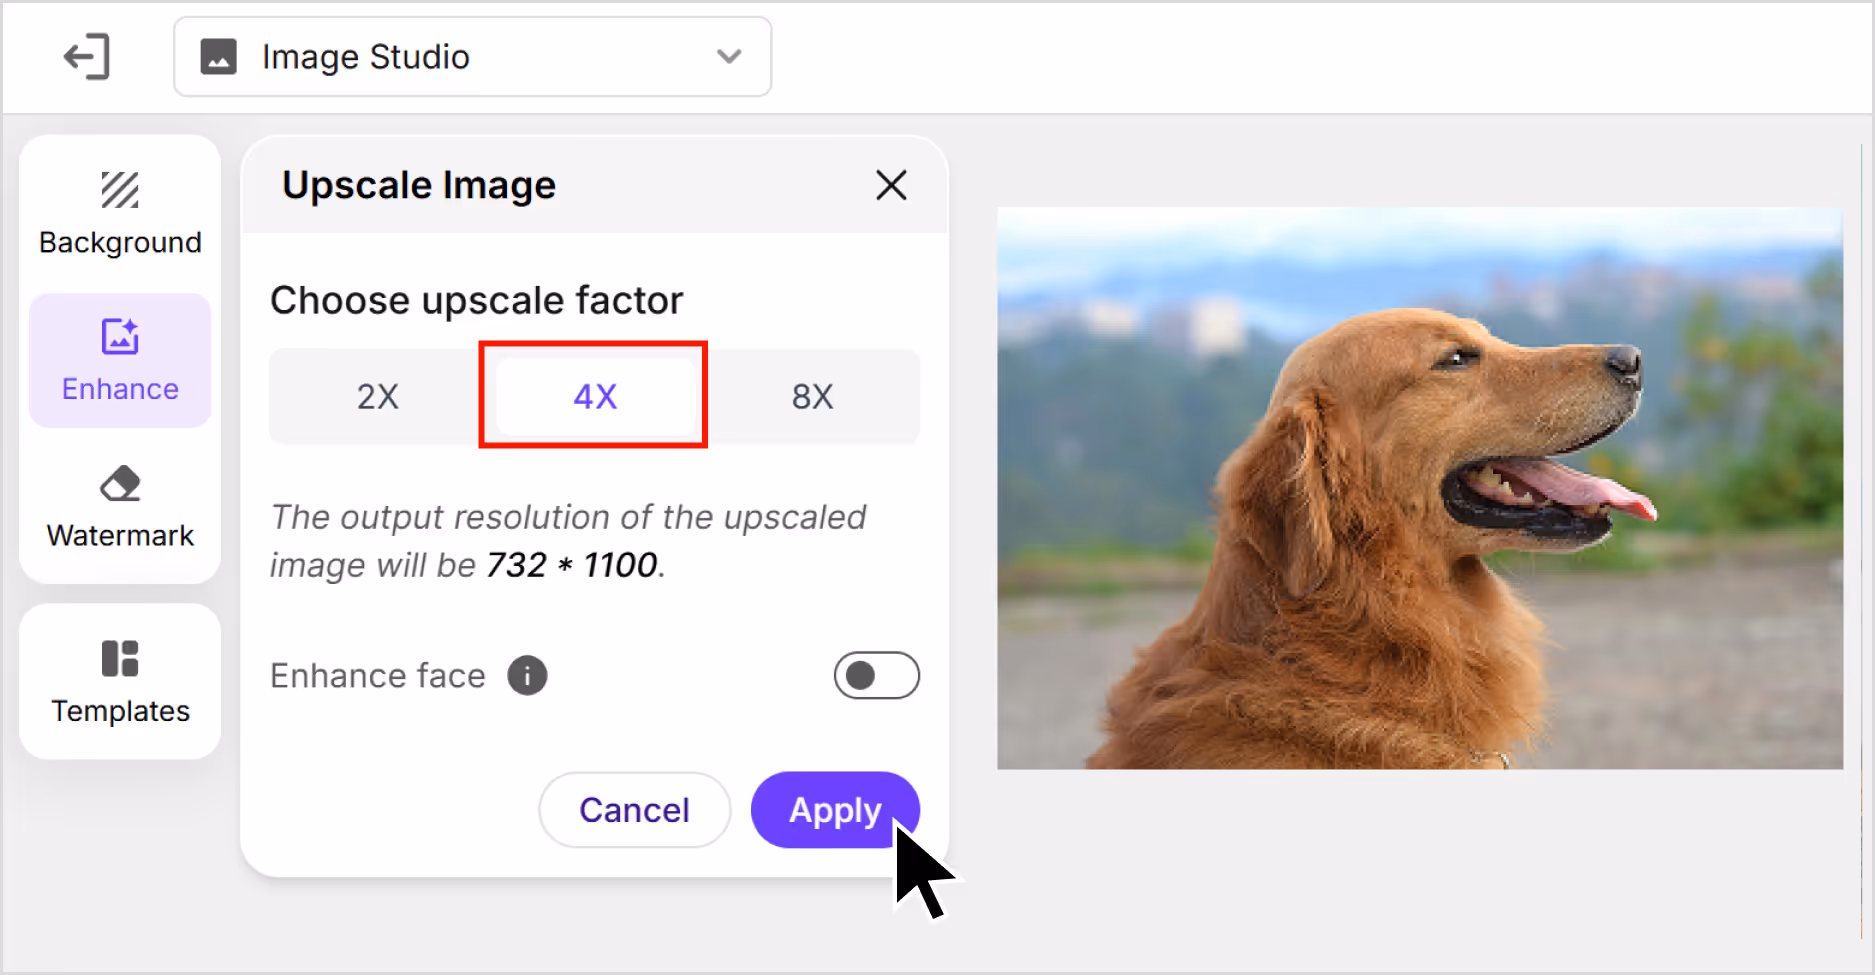
Step 5: You can adjust saturation, brightness, and hue under the “Enhance” tab. You can also remove or change the background, add new templates, and remove the watermark after you sign up.
.avif)
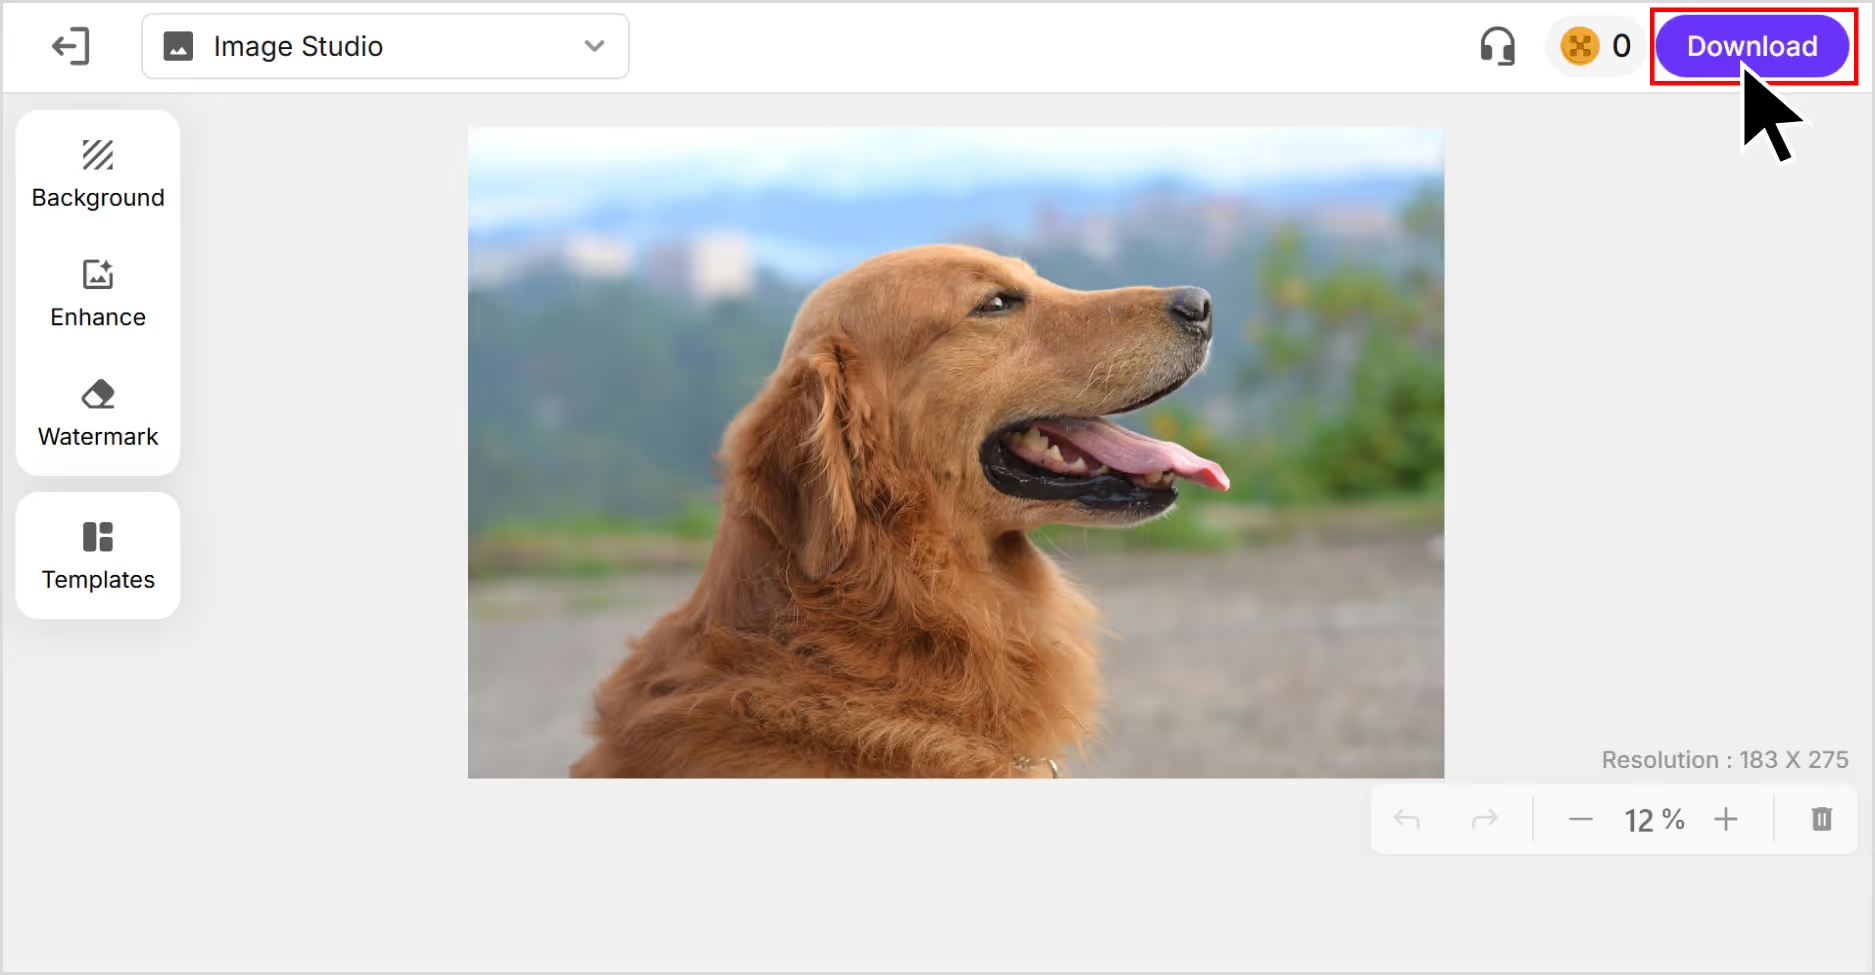
Step 6: Preview the image and select 'Download' to save it in SD or HD resolution.
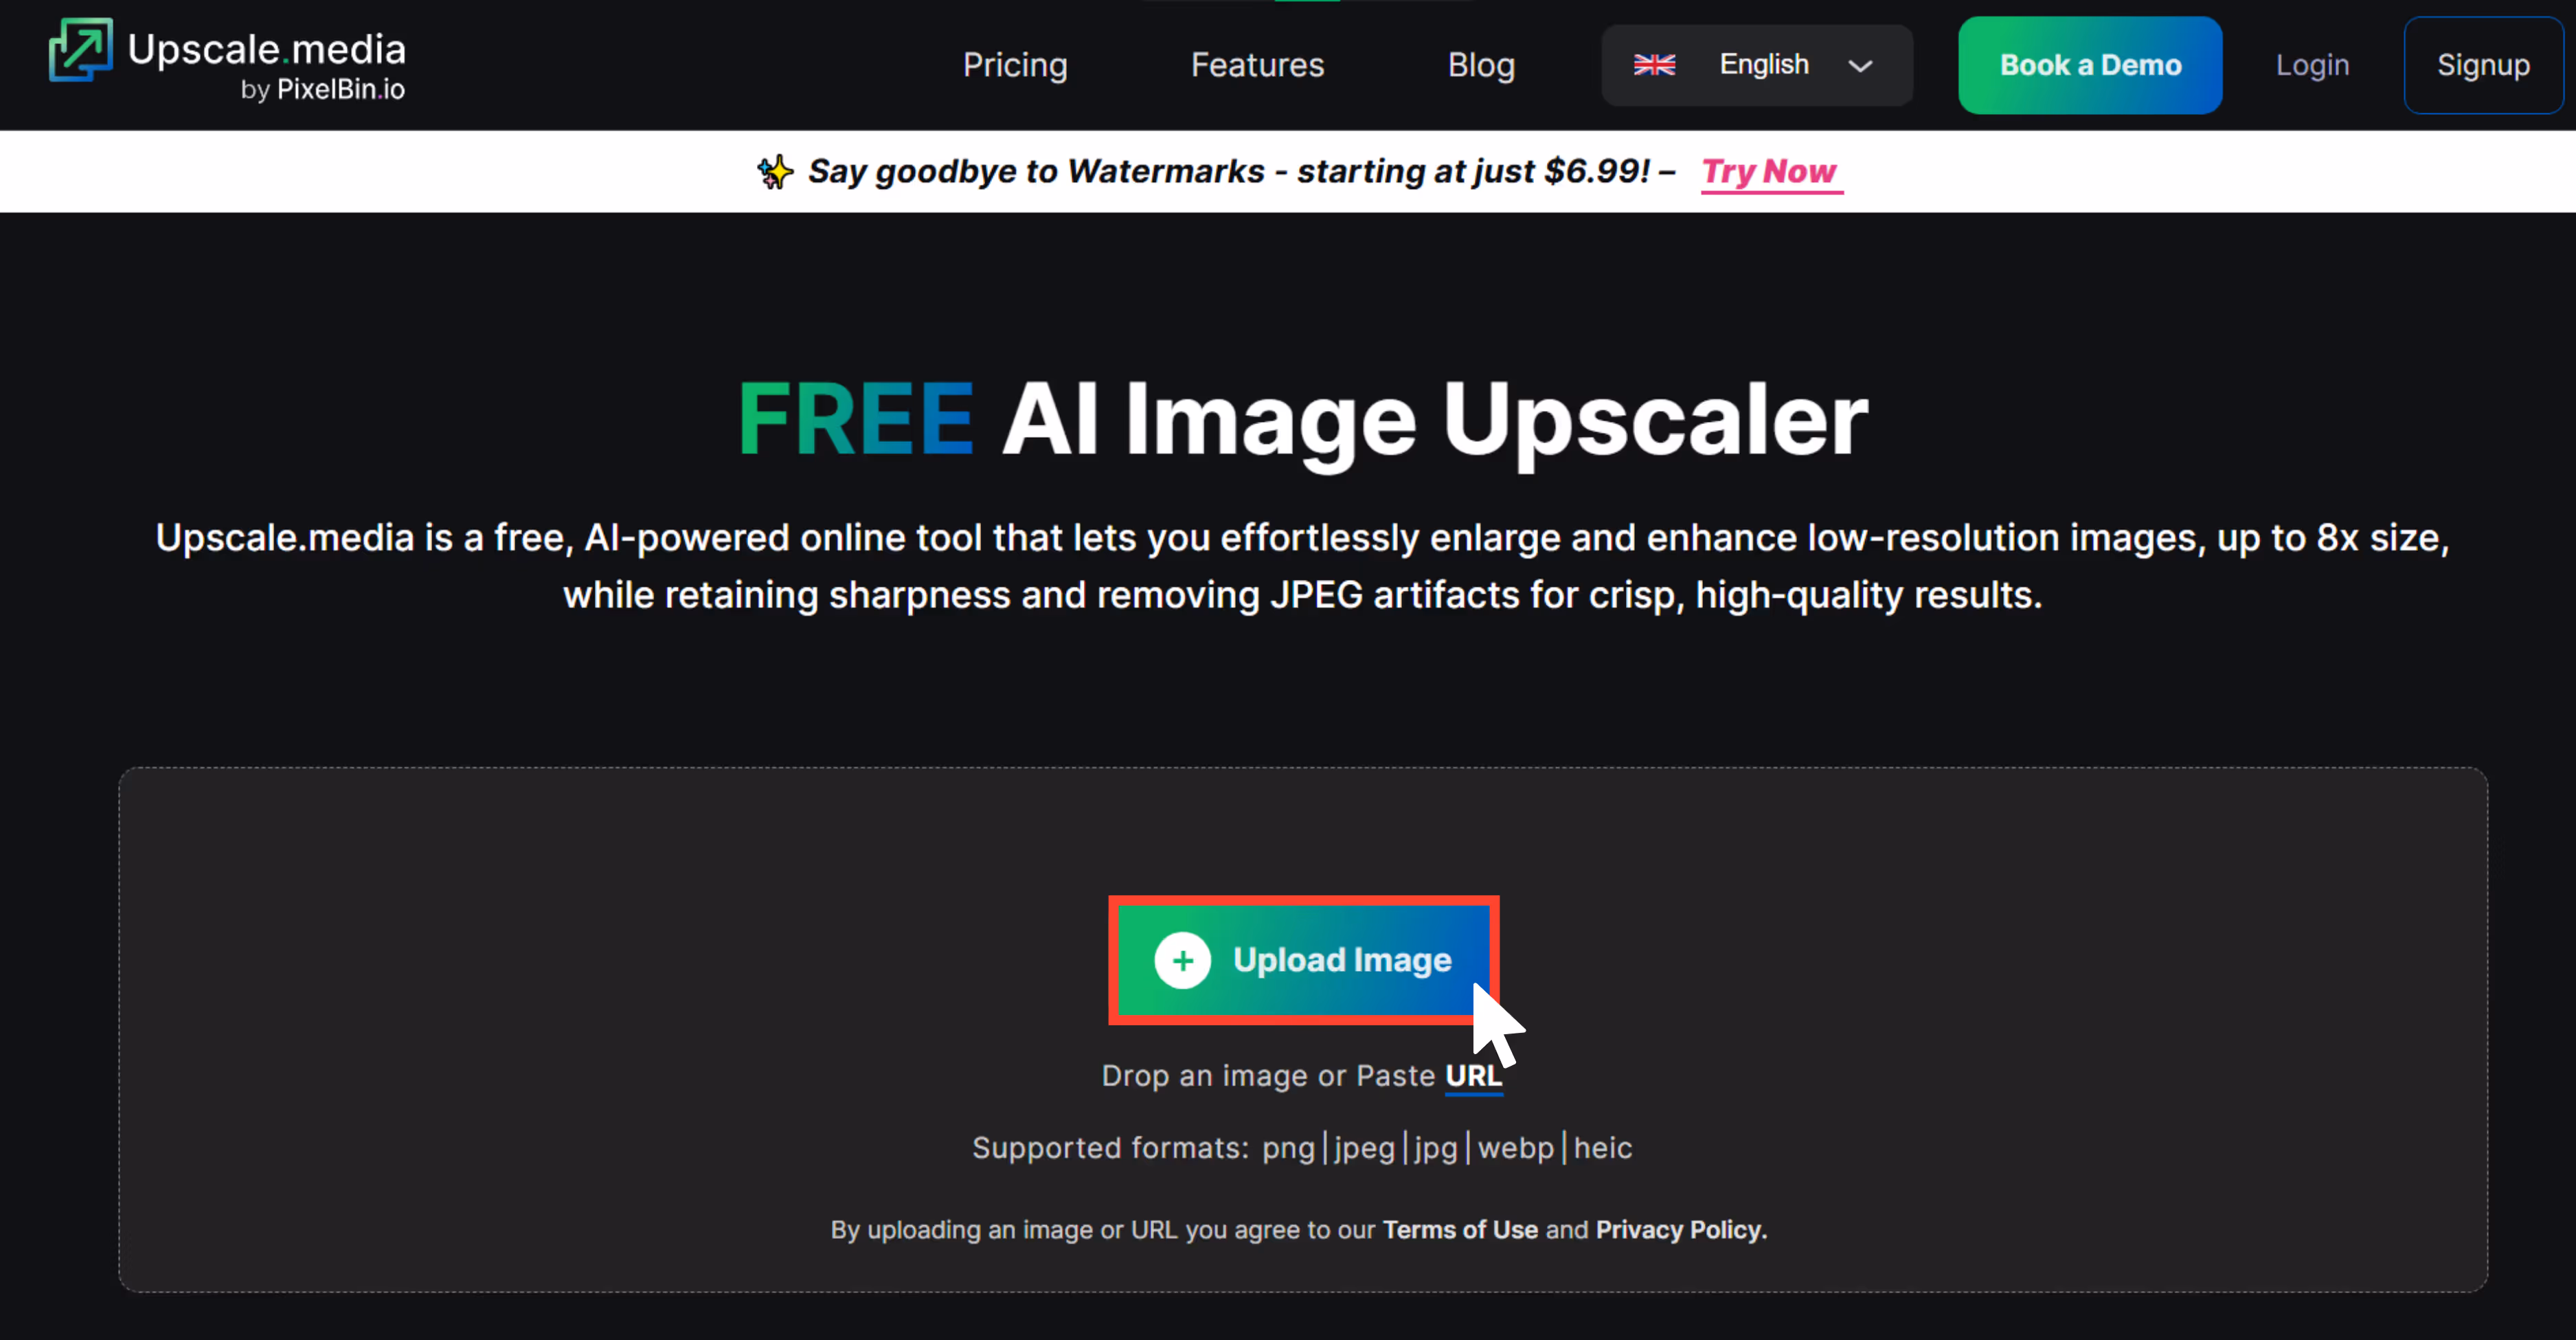
2. Upscale.media

After I opened the tool and tested it with low low-resolution image, I was impressed by seeing how fast Upscale.media works. And the best part? You can upscale images up to 8x without even signing up. The UI is clean, fast, and beginner-friendly. No complicated menus, no clutter—just drag, drop, and go.
When I ran a small and blurry image through it, the clarity and colors were definitely enhanced. It removed all the blurry spots. There was a bit of texture softness in some spots, but for a free tool, the results were impressive. Plus, you can upscale images on iOS and Android, if you like editing on the go.
What I liked about the tool?
- No need to sign up or install anything—just drag and drop the image.
- It’s quick; my result came through in seconds.
- AI noise reduction works automatically, which cleans up the grains.
- The interface is clean and beginner-friendly.
How much does it cost?
- Subscription Plan: Rs. 2.51/ credit and Rs. 6,018.55 billed yearly.
- One-time payment: Rs. 10.74/ credit and Rs. 2,148.93 billed once.
What are the test results?
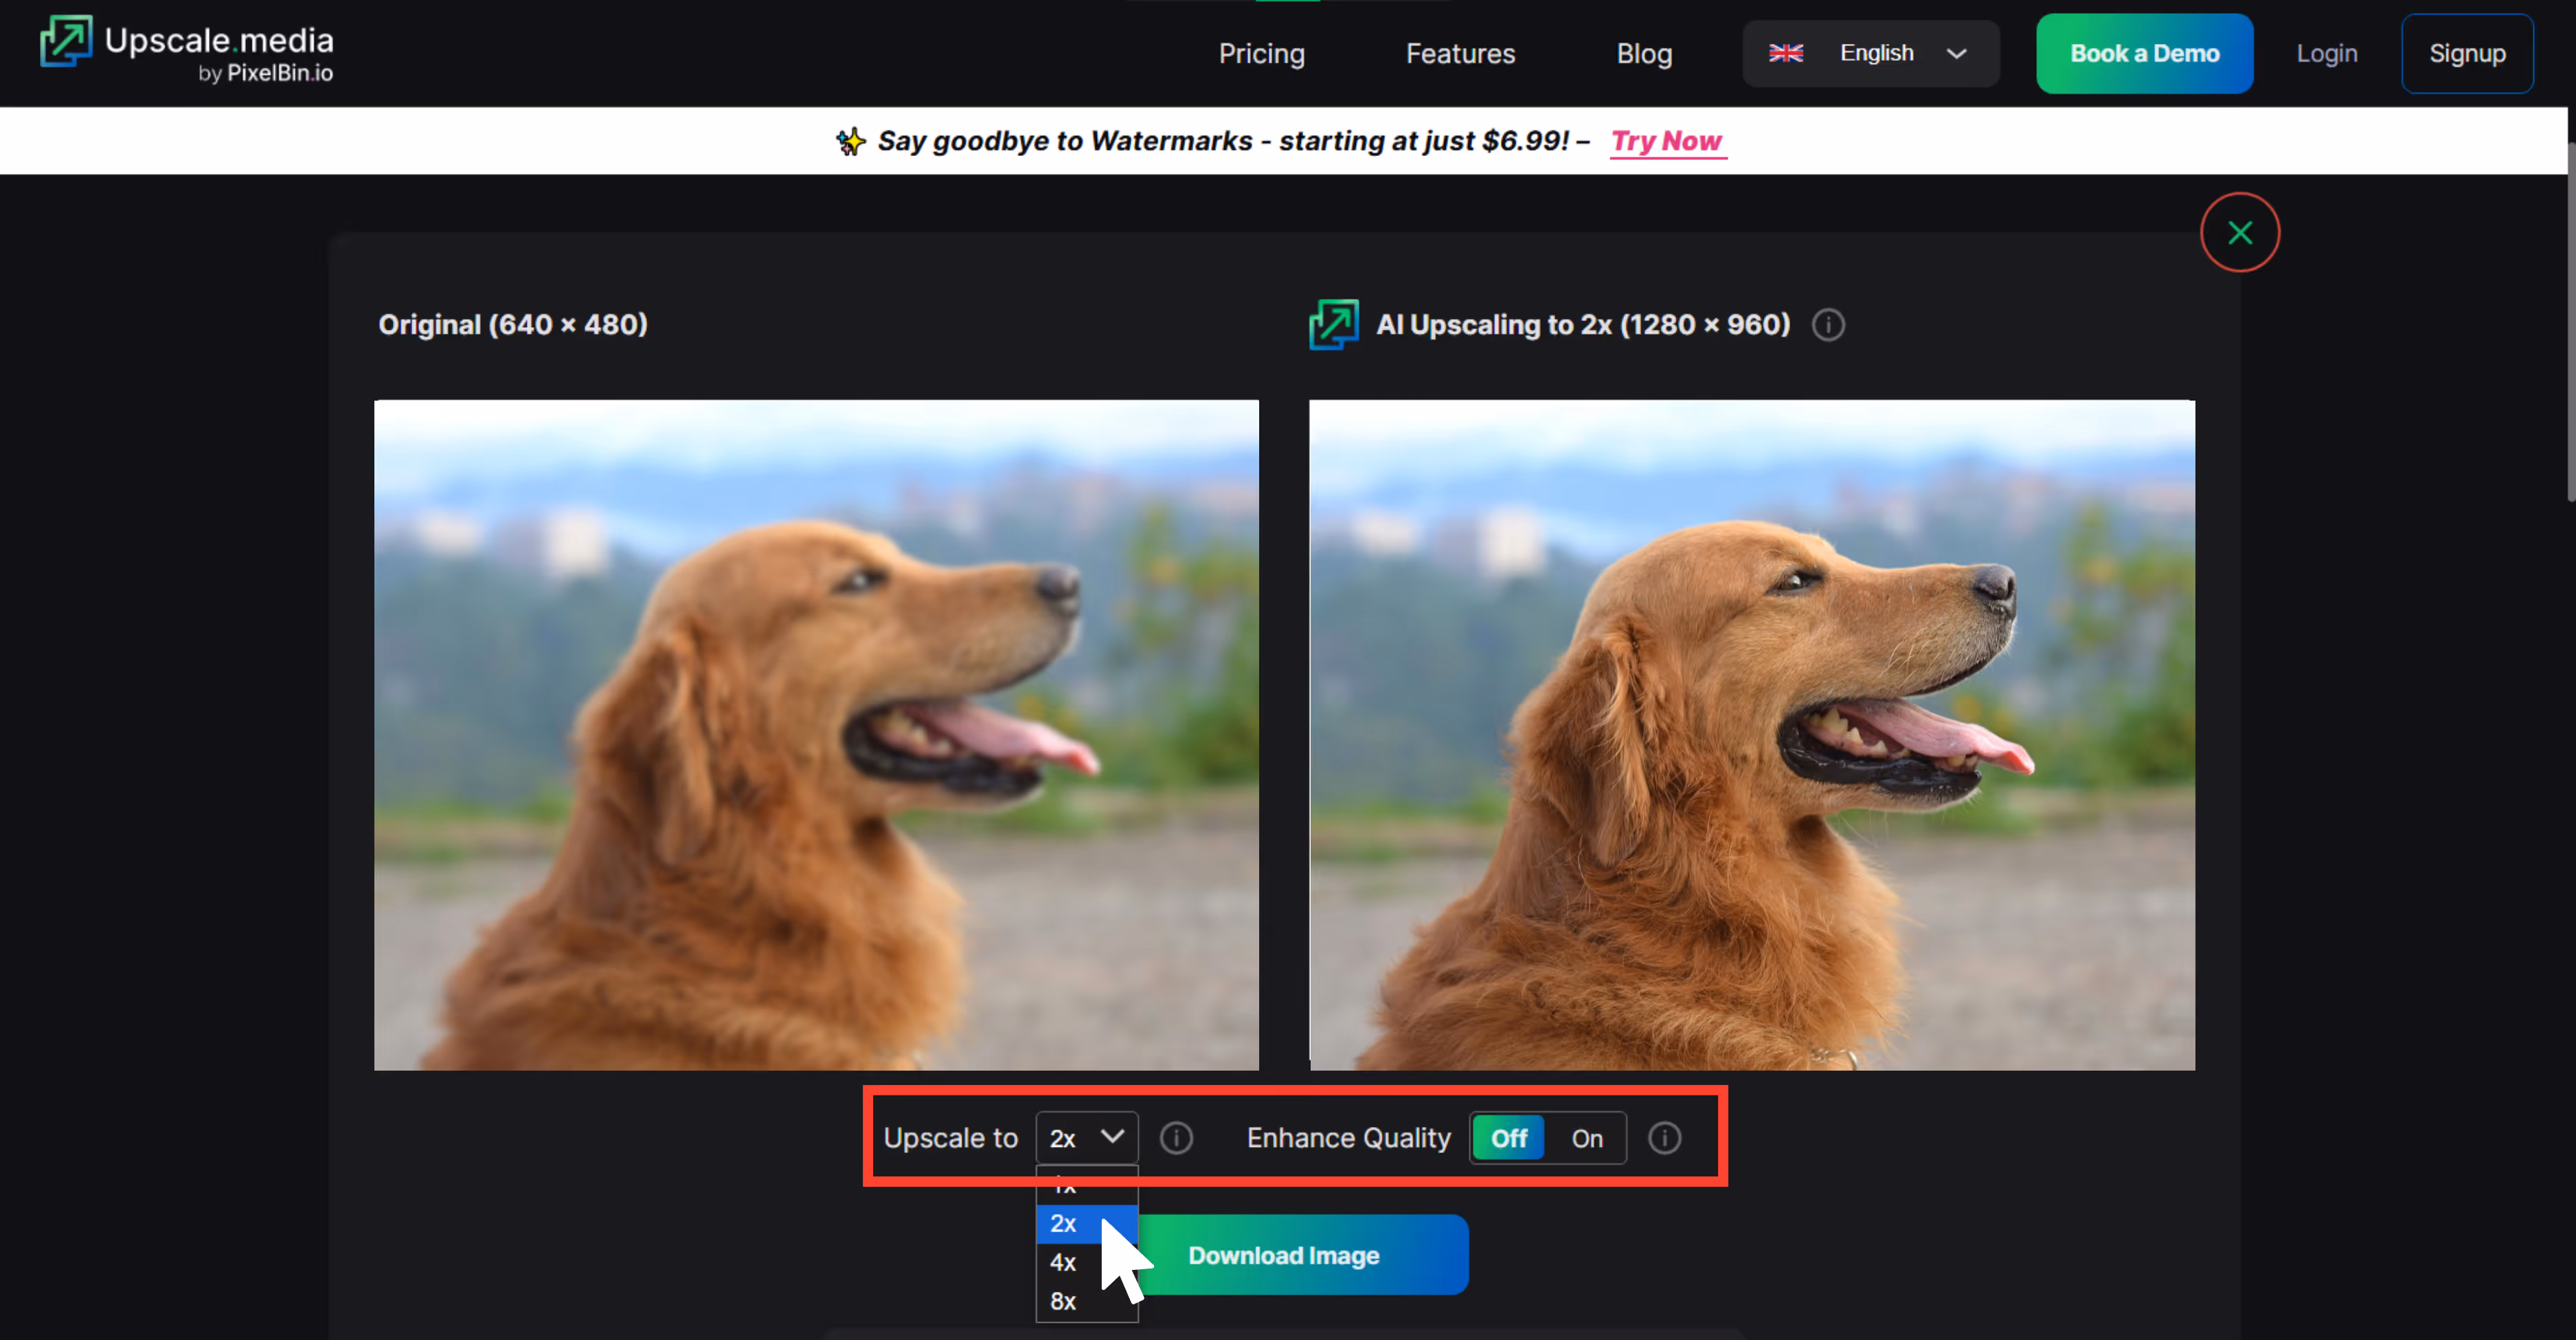
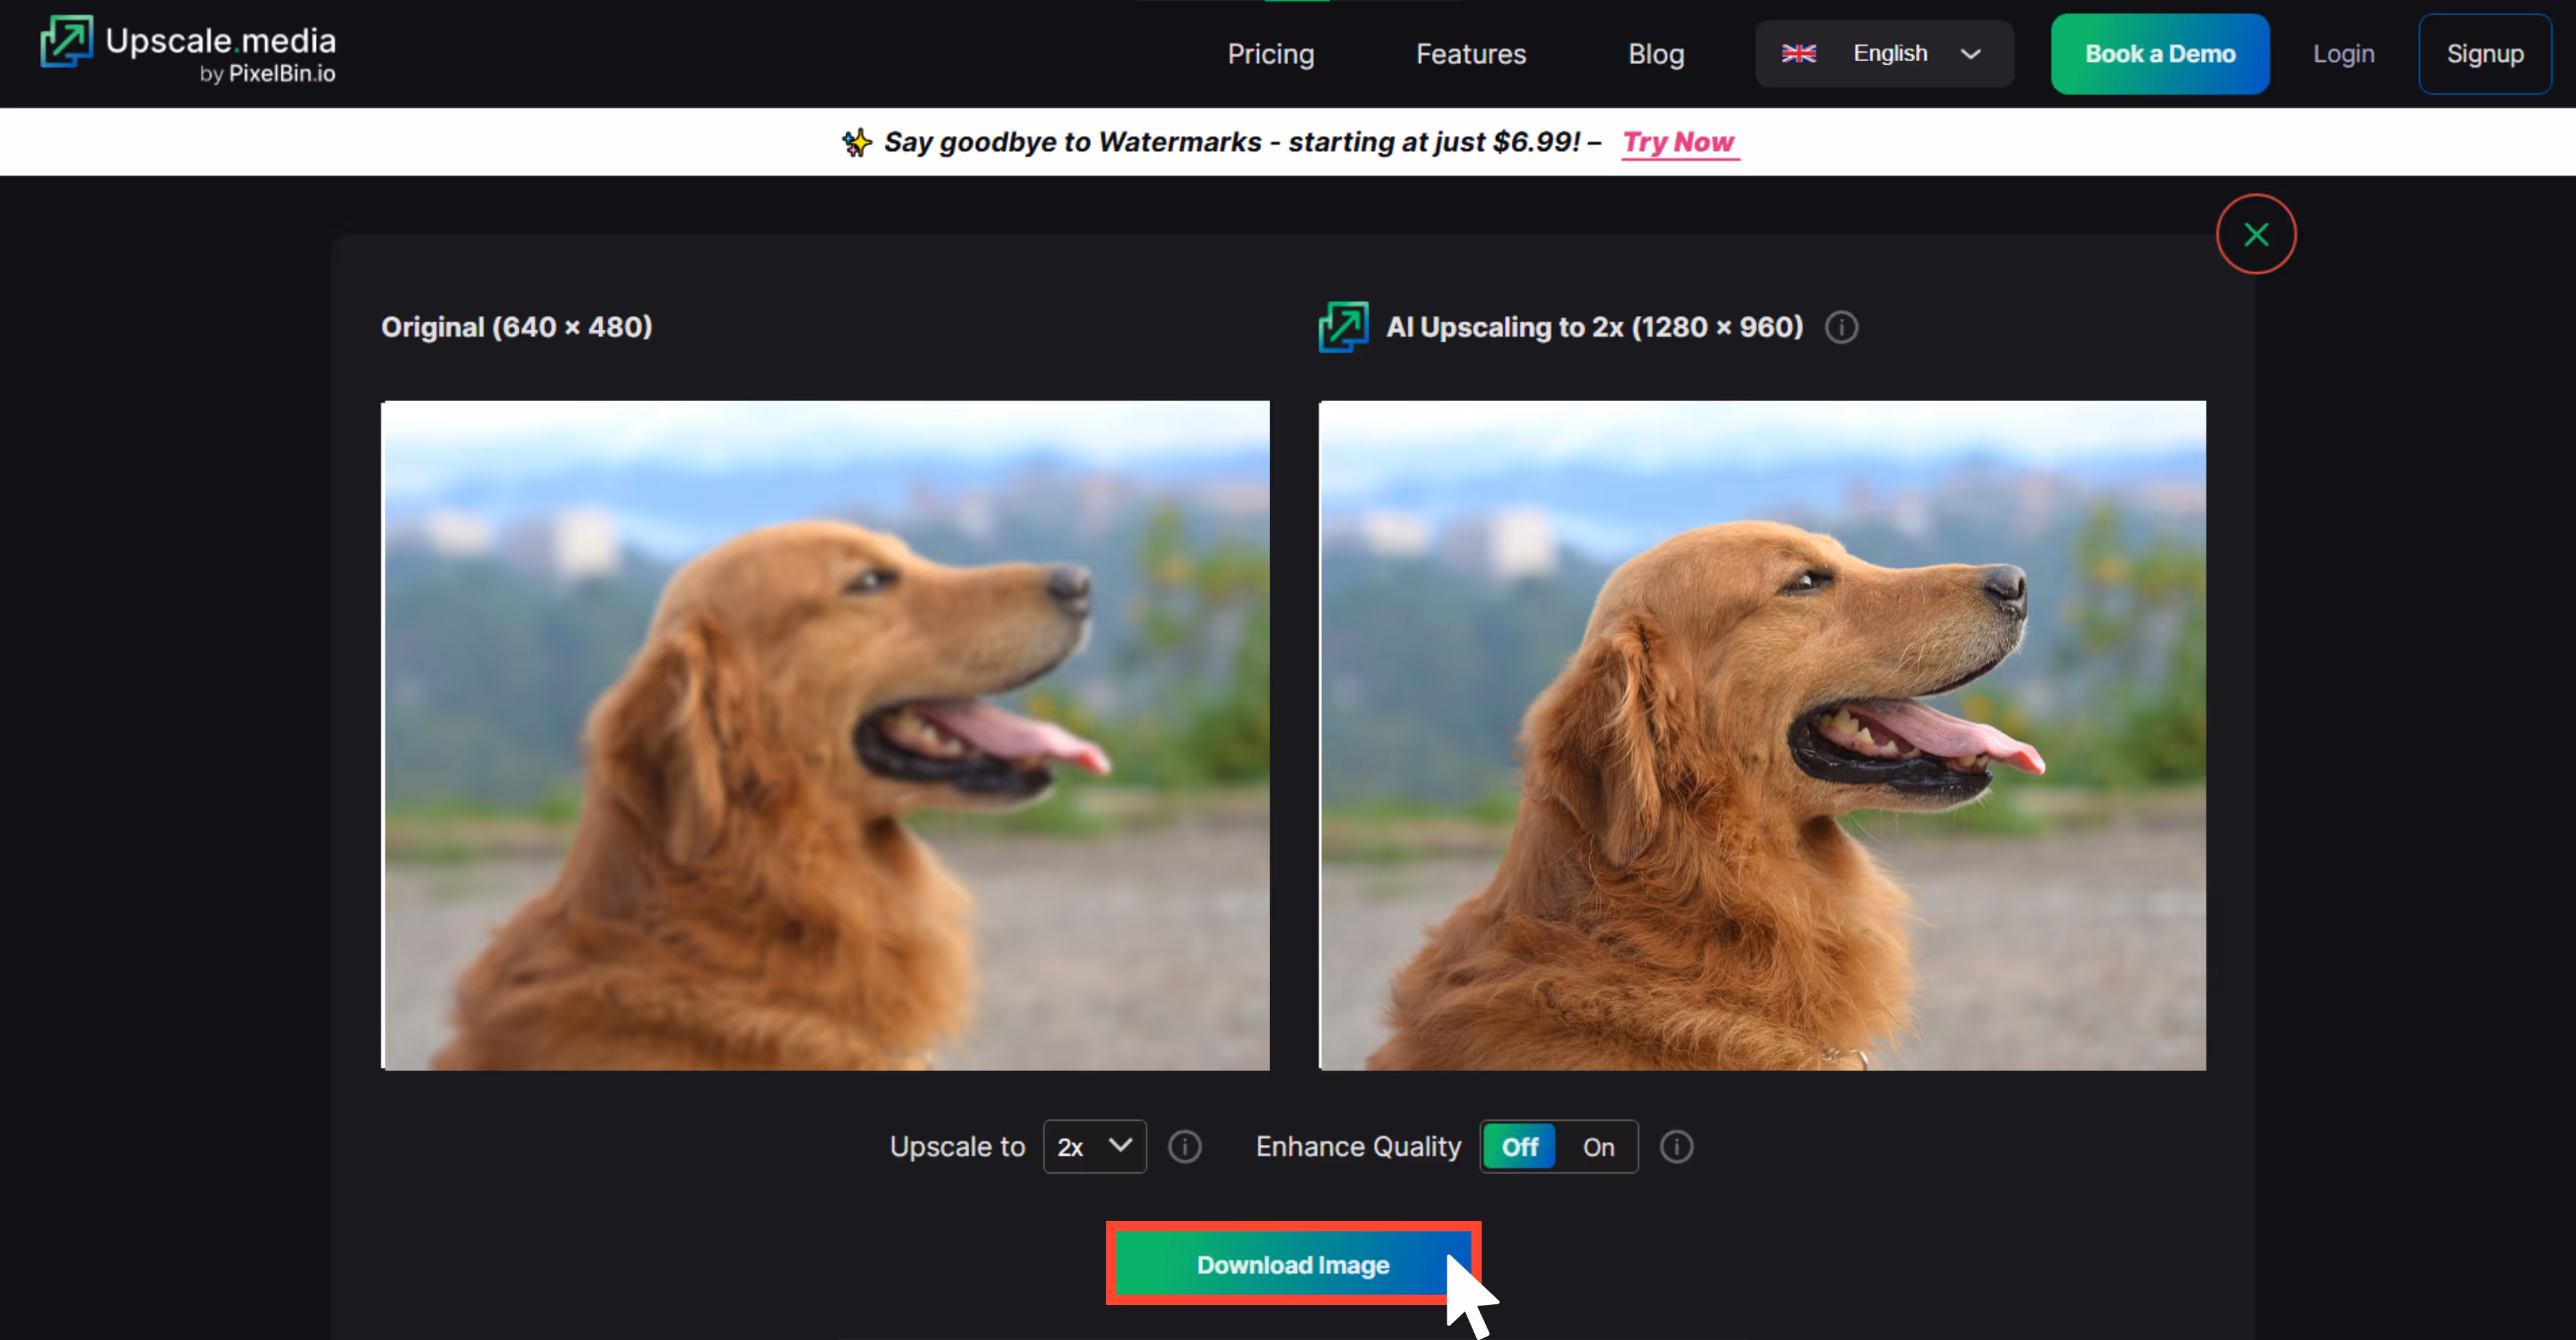
I tested Upscale.media using a low-resolution dog photo. At 2x, skin and eyes looked noticeably sharper. At 4x, it maintained detail without weird smoothening or pixelation. Turning on to 8x made the biggest difference—adding clarity and depth without making the image look fake. Quick, clean, and sharpening the edges.
- Size increase: 8x.
- Quality improvement: HD.
- Processing time: 10–12 seconds.
- AI artifacts: Minimal to none.
How to make an image bigger in Upscale.media?
Step 1: Go to Upscale.media.
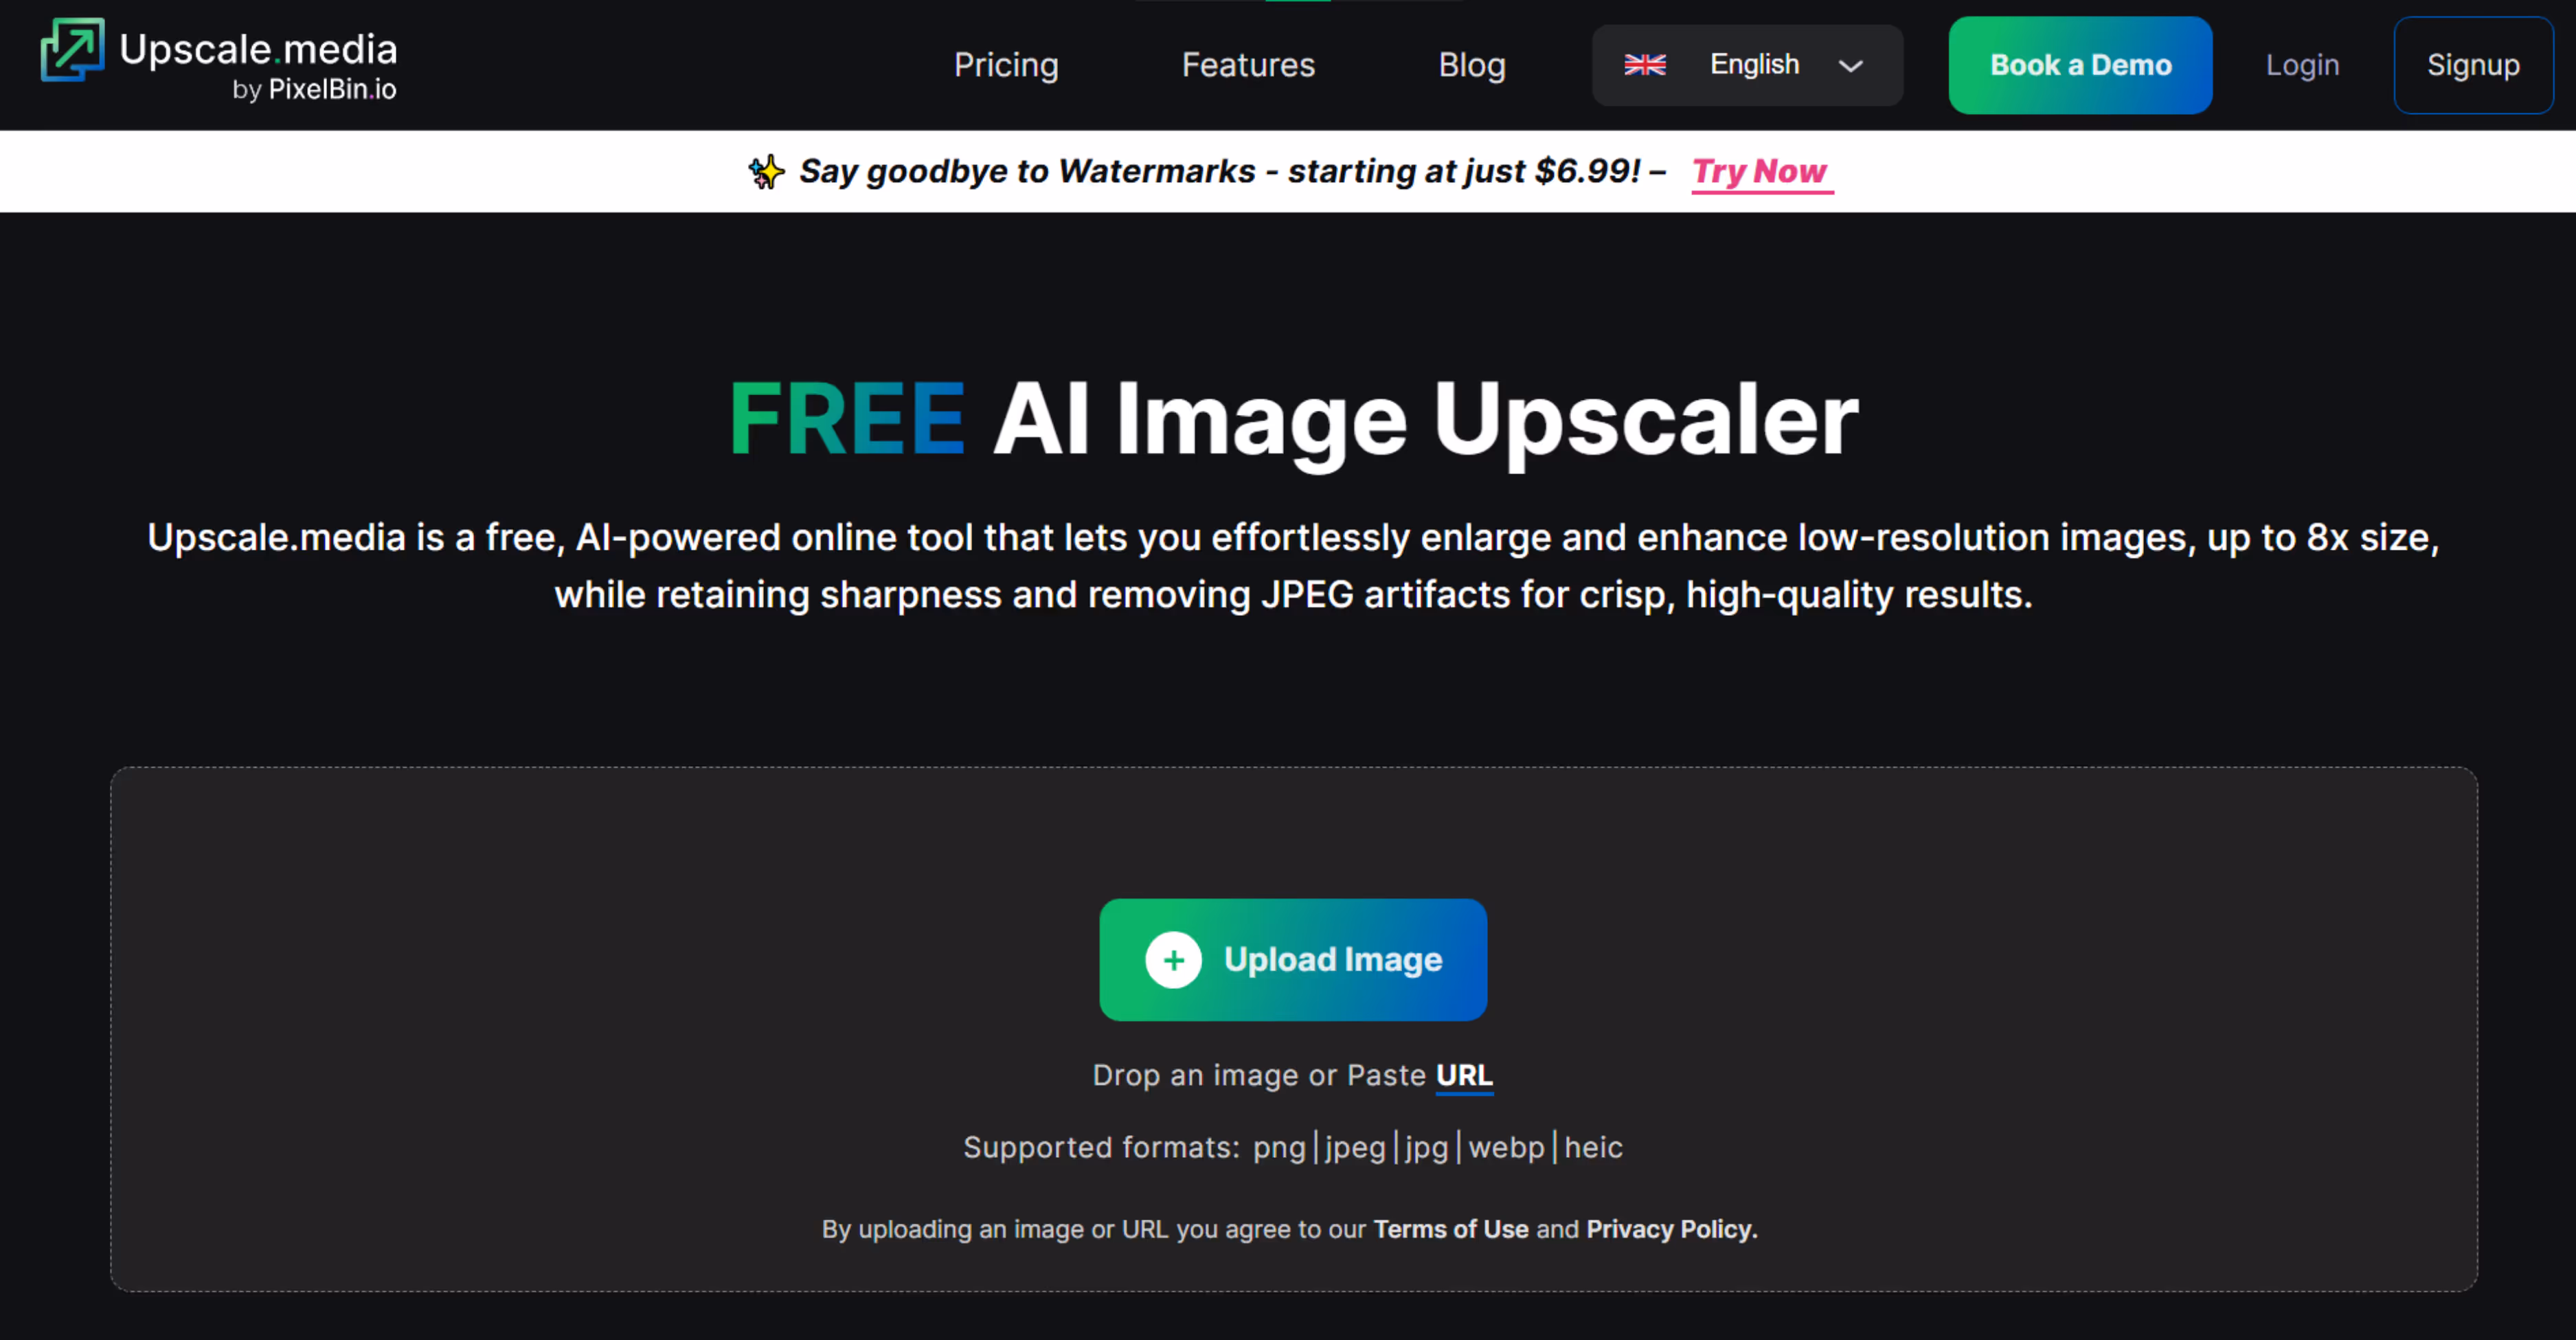
Step 2: Upload your image in PNG, JPG, WEBP, HEIC or JPEG formats.
Step 3: The AI algorithms automatically upscale the image in 2x, 4x, or 8x scale size.
Step 4: Download your upscaled image instantly.
3. Pixelcut
Pixelcut is one of the top tools for fixing the quality of a product image or social media visuals. I tested it on a blurry product image on a white background, and the difference was visible, clarity and sharpness became high.
At 2x, the skin looked more defined, and the image looked smooth naturally. At 4x, all jagged lines and blurry spots were removed. No over-sharpening was done, it was only simple, clean upscaling.
If you're seriously wondering how to fix low-quality images for your website or portfolio, Pixelcut is the perfect fit. It feels like a tool made for beginners where you can just upload, enhance, and download.
What I liked about the tool?
- No sign-up is needed to try it.
- Works great for product photography, posters, and clean visual assets.
- One-click, easy-to-understand interface.
- Mobile-friendly and fast.
- The output image doesn’t feel overly processed.
How much it costs?
Pro: $8 / per month, billed yearly.
Plan Benefits
- Unlimited AI edits.
- 300 daily generations.
- 600 credits monthly.
- 1 concurrent generation.
- Commercial license.
Pro+: $24 per month, billed yearly.
- Unlimited AI edits.
- 600 daily generations.
- 3600 credits monthly.
- 4 concurrent generations.
- Commercial license.
Max: $48 per month, billed yearly.
Plan Benefits
- Unlimited AI edits.
- 1200 daily generations.
- 9000 credits monthly.
- 8 concurrent generations.
- Commercial license.
What are the test results?
I used Pixelcut’s AI upscaler on my low-resolution dog image, testing both 2x and 4x. At 2x, the results were crisp and clean. It offered fast processing and a smooth interface made the whole experience feel effortless.
- Size increase: 4x.
- Quality improvement: Good.
- Processing time: Up to 5 seconds.
- AI artifacts: None.
How to make an image bigger in Pixelcut?
Step 1: Go to Pixelcut Image Upscaler.
Step 2: Click “Upload Image” or drag and drop your file.
Step 3: Wait a few seconds — it auto-upscales at 2x to upscale at 4x you need to get a subscription plan.
Step 4: Preview the result, then download the upscaled image.
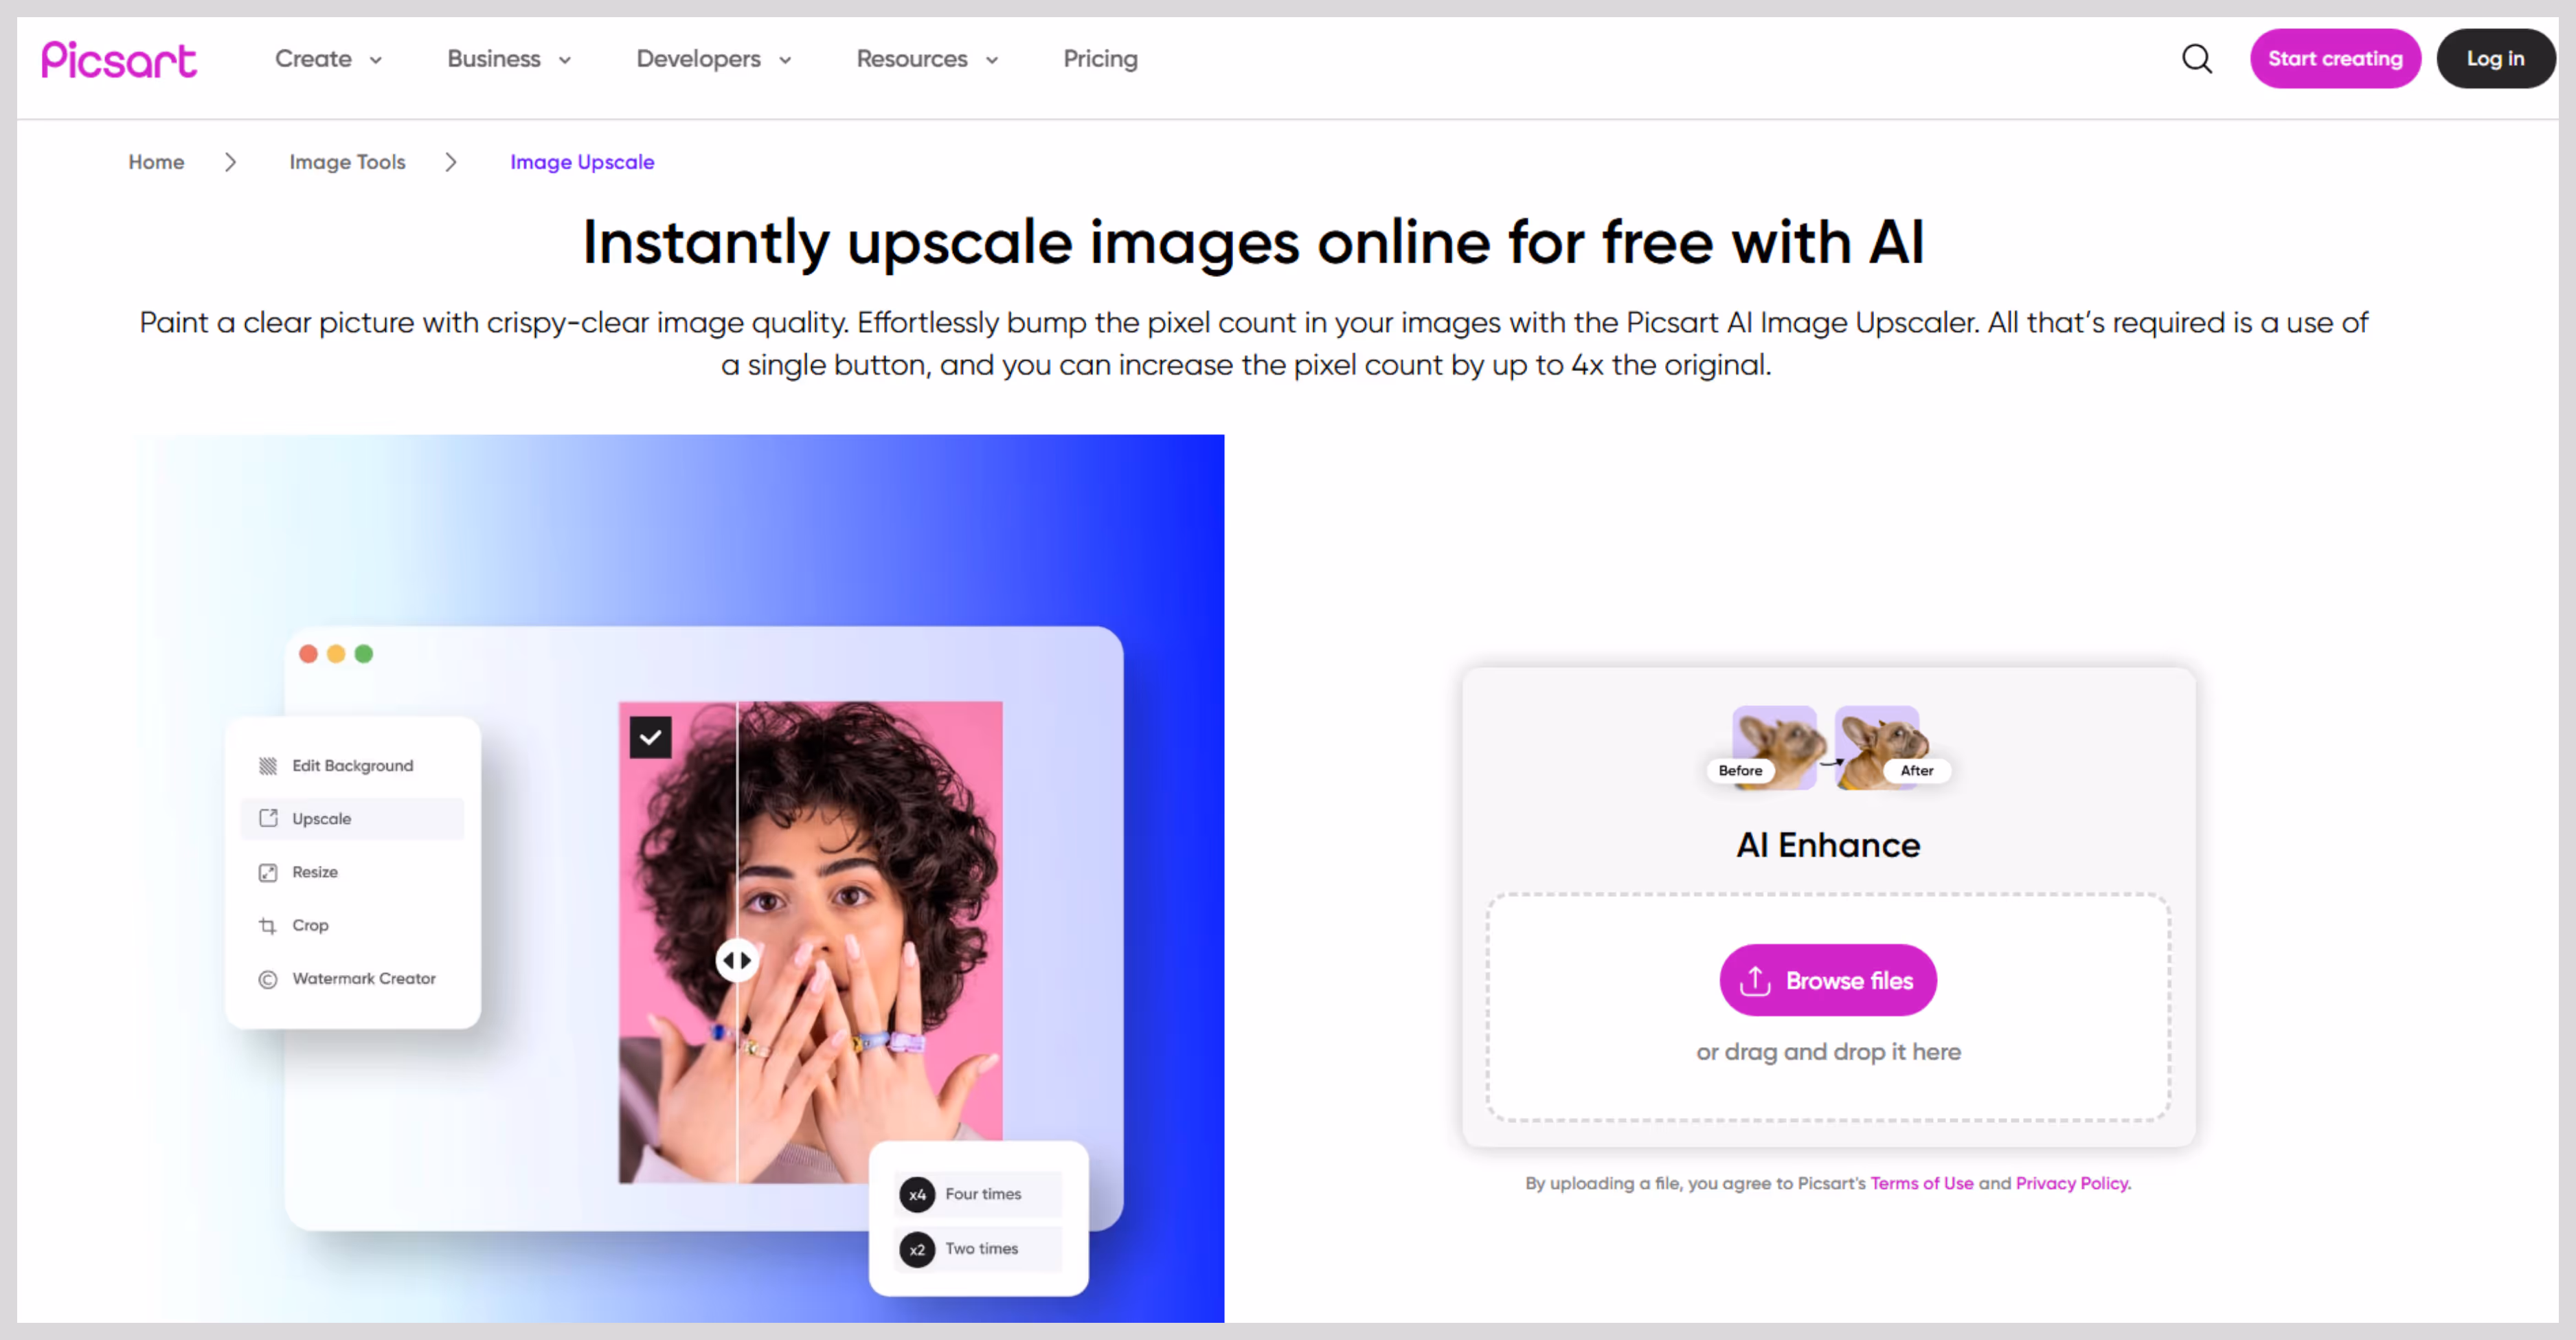
4. Picsart
Picsart’s AI Upscaler feels like its perfect for both casual use and professional use. It’s part of the larger Picsart suite, where you can edit and upscale images at one place. I used it to upscale my low-resolution dog test image and got solid results with minimal effort.
After upscaling my image through a 4x image scale, the result blew my mind edges looked cleaner, the texture was sharper, and the colors looked vibrant. This tool can upscale images to look crisp, which is perfect for content creators, marketers, and designers.
What I liked about the tool?
- Supports JPG and PNG image formats.
- Free use is available.
- Web-based, no software installation needed.
- Free upscaling is available for up to 4x.
- Easy and simple interface.
How much it costs?
Picsart Plus: Rs. 200/month or Rs. 2400/year
Plan Benefits
- Selection of face retouching tools.
- 200 credits per month to use with generative AI tools.
- Full range of premium templates, fonts, and stickers.
- Millions of stock photos and Getty video clips.
- Downloads as PNG, PDF and HTML.
- 5 GB of cloud storage.
Picsart Pro: Rs. 266.66/month or Rs. 3200/year.
Plan Benefits
- Increased use of 15+ cutting-edge AI tools, like AI Image Generator.
- Increased use of 1-tap background & object removers, and image enhancers.
- 500 credits per month to use with generative AI tools.
- Save brand colors and custom fonts tothe Brand kit.
- Bulk edit up to 50 images at once.
- Add additional team seats.
- 20 GB of cloud storage per seat.
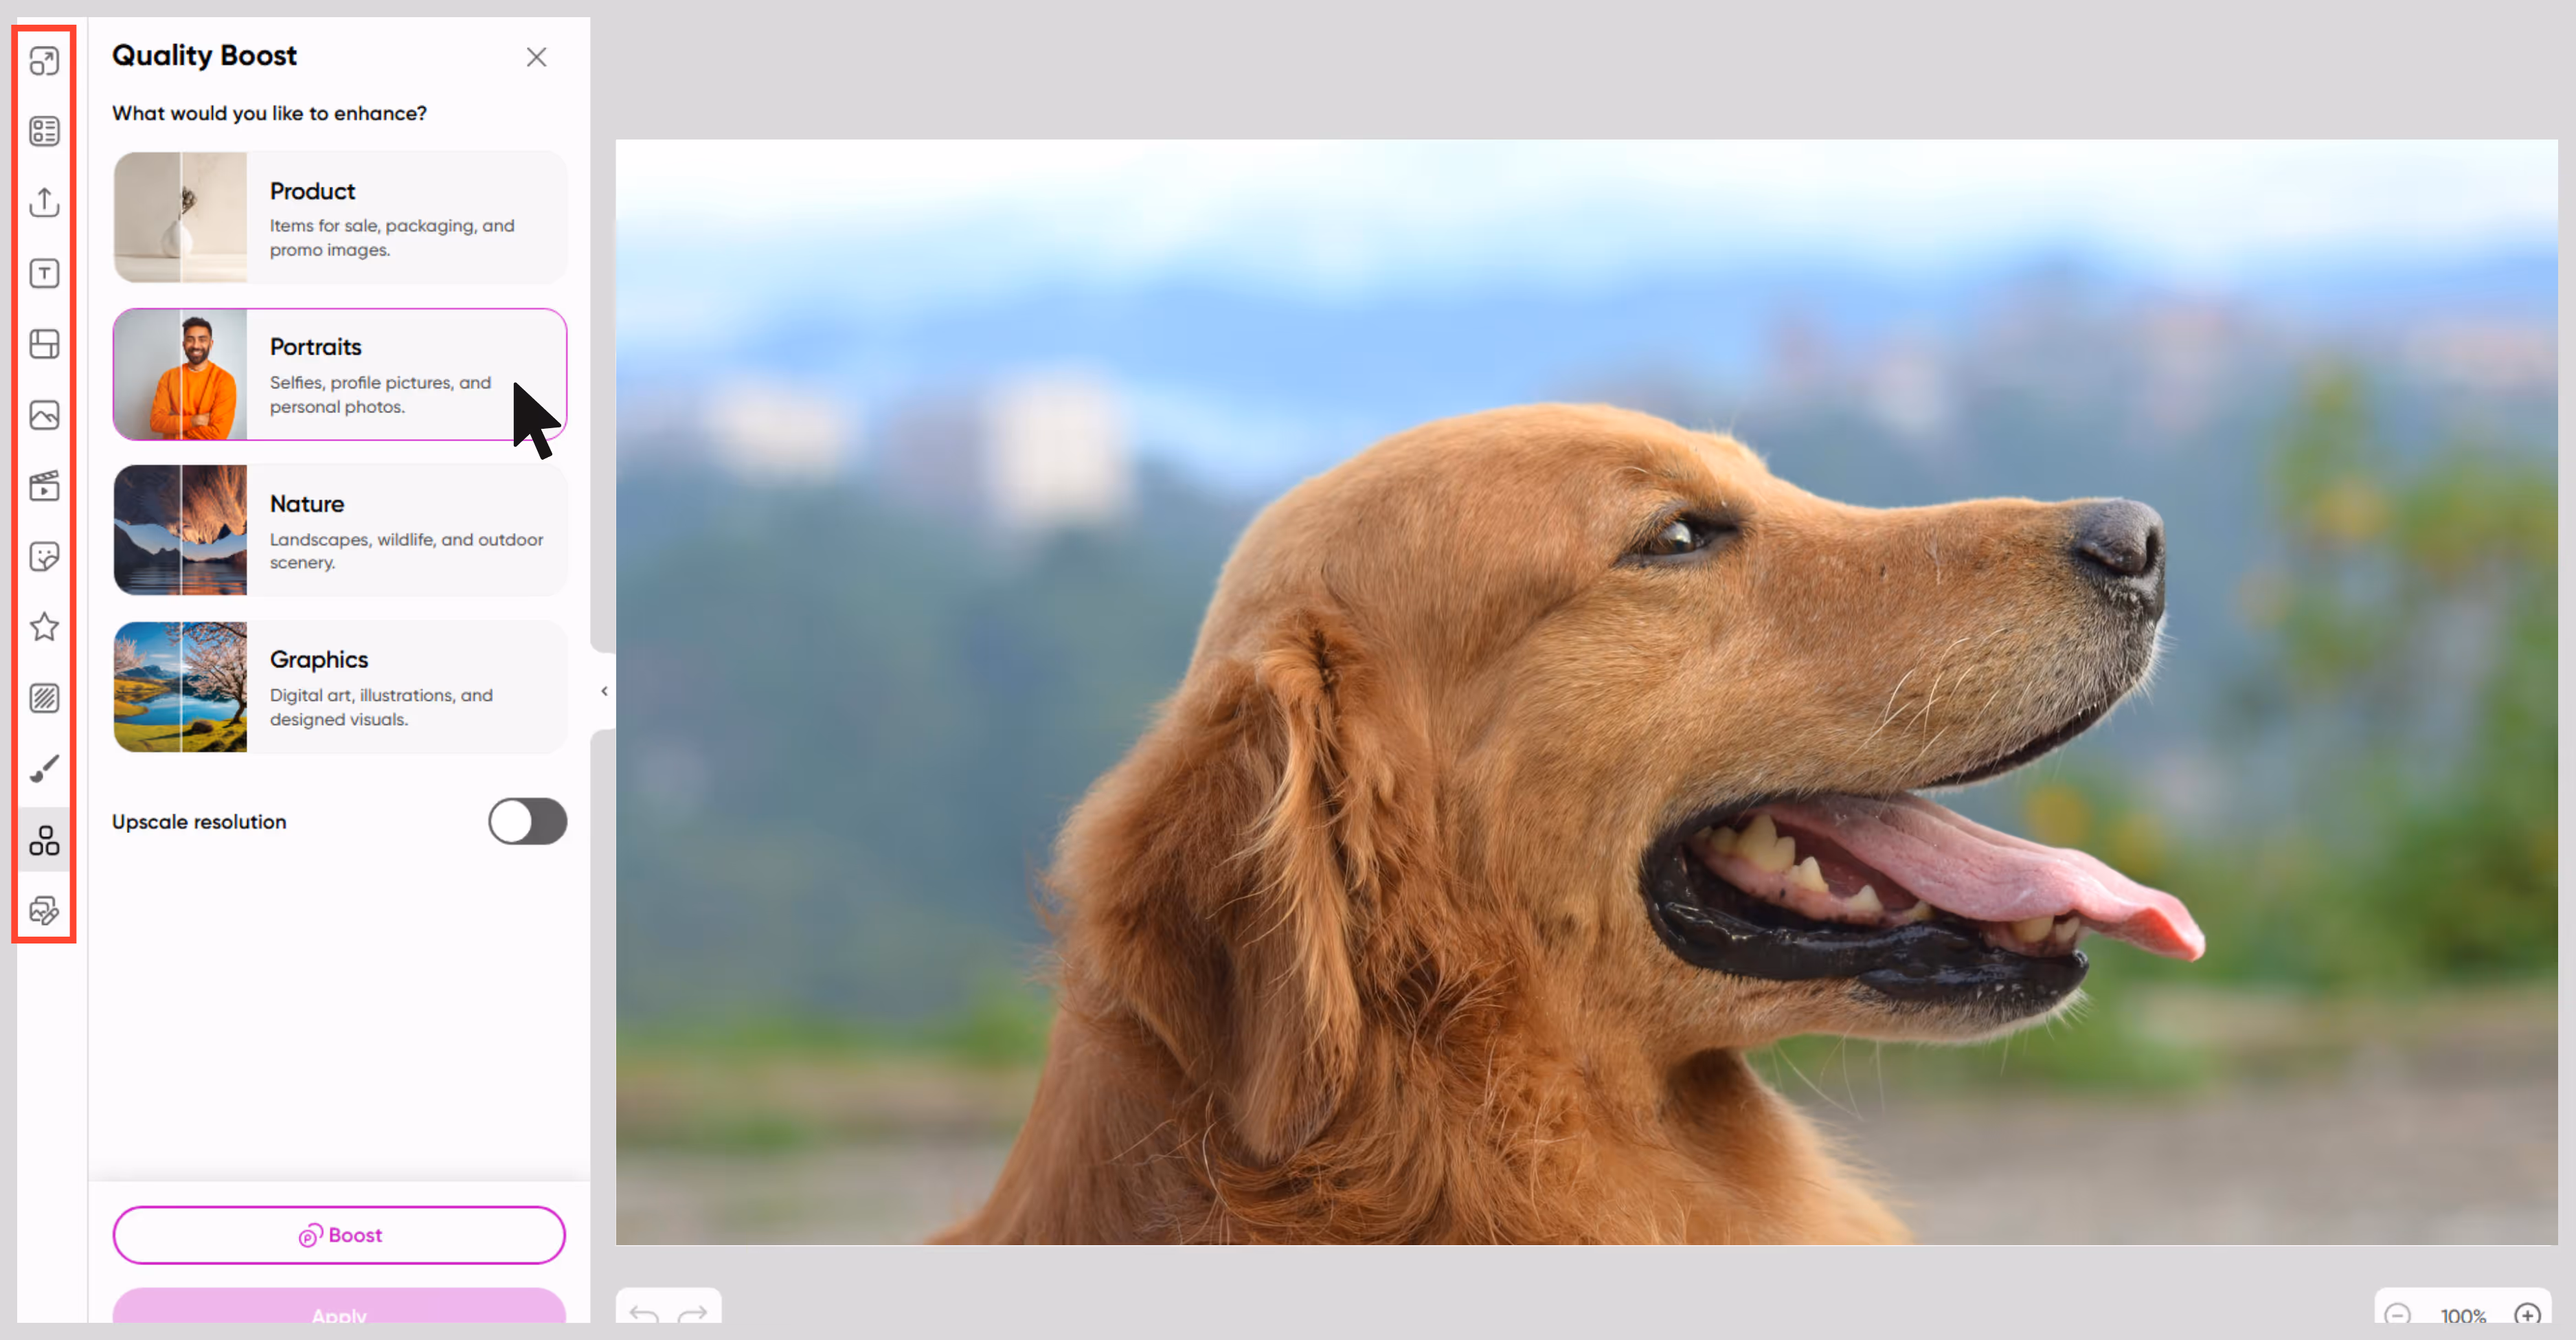
What are the test results?
I used Picsart on my low-resolution dog image, testing both 4x automatically. At 4x, the results were clean, and edges became sharp. Picsart’s upscaler is perfect if you want an upscaler as well as an editor in one place.
- Size increase: 4x.
- Quality improvement: Good.
- Processing time: up to 7 seconds.
- AI artifacts: None.
How to make an image bigger in Picsart?
Step 1: Go to the Picsart image upscaler.
Step 2: Upload your image by clicking on the “Upload an Image” button.
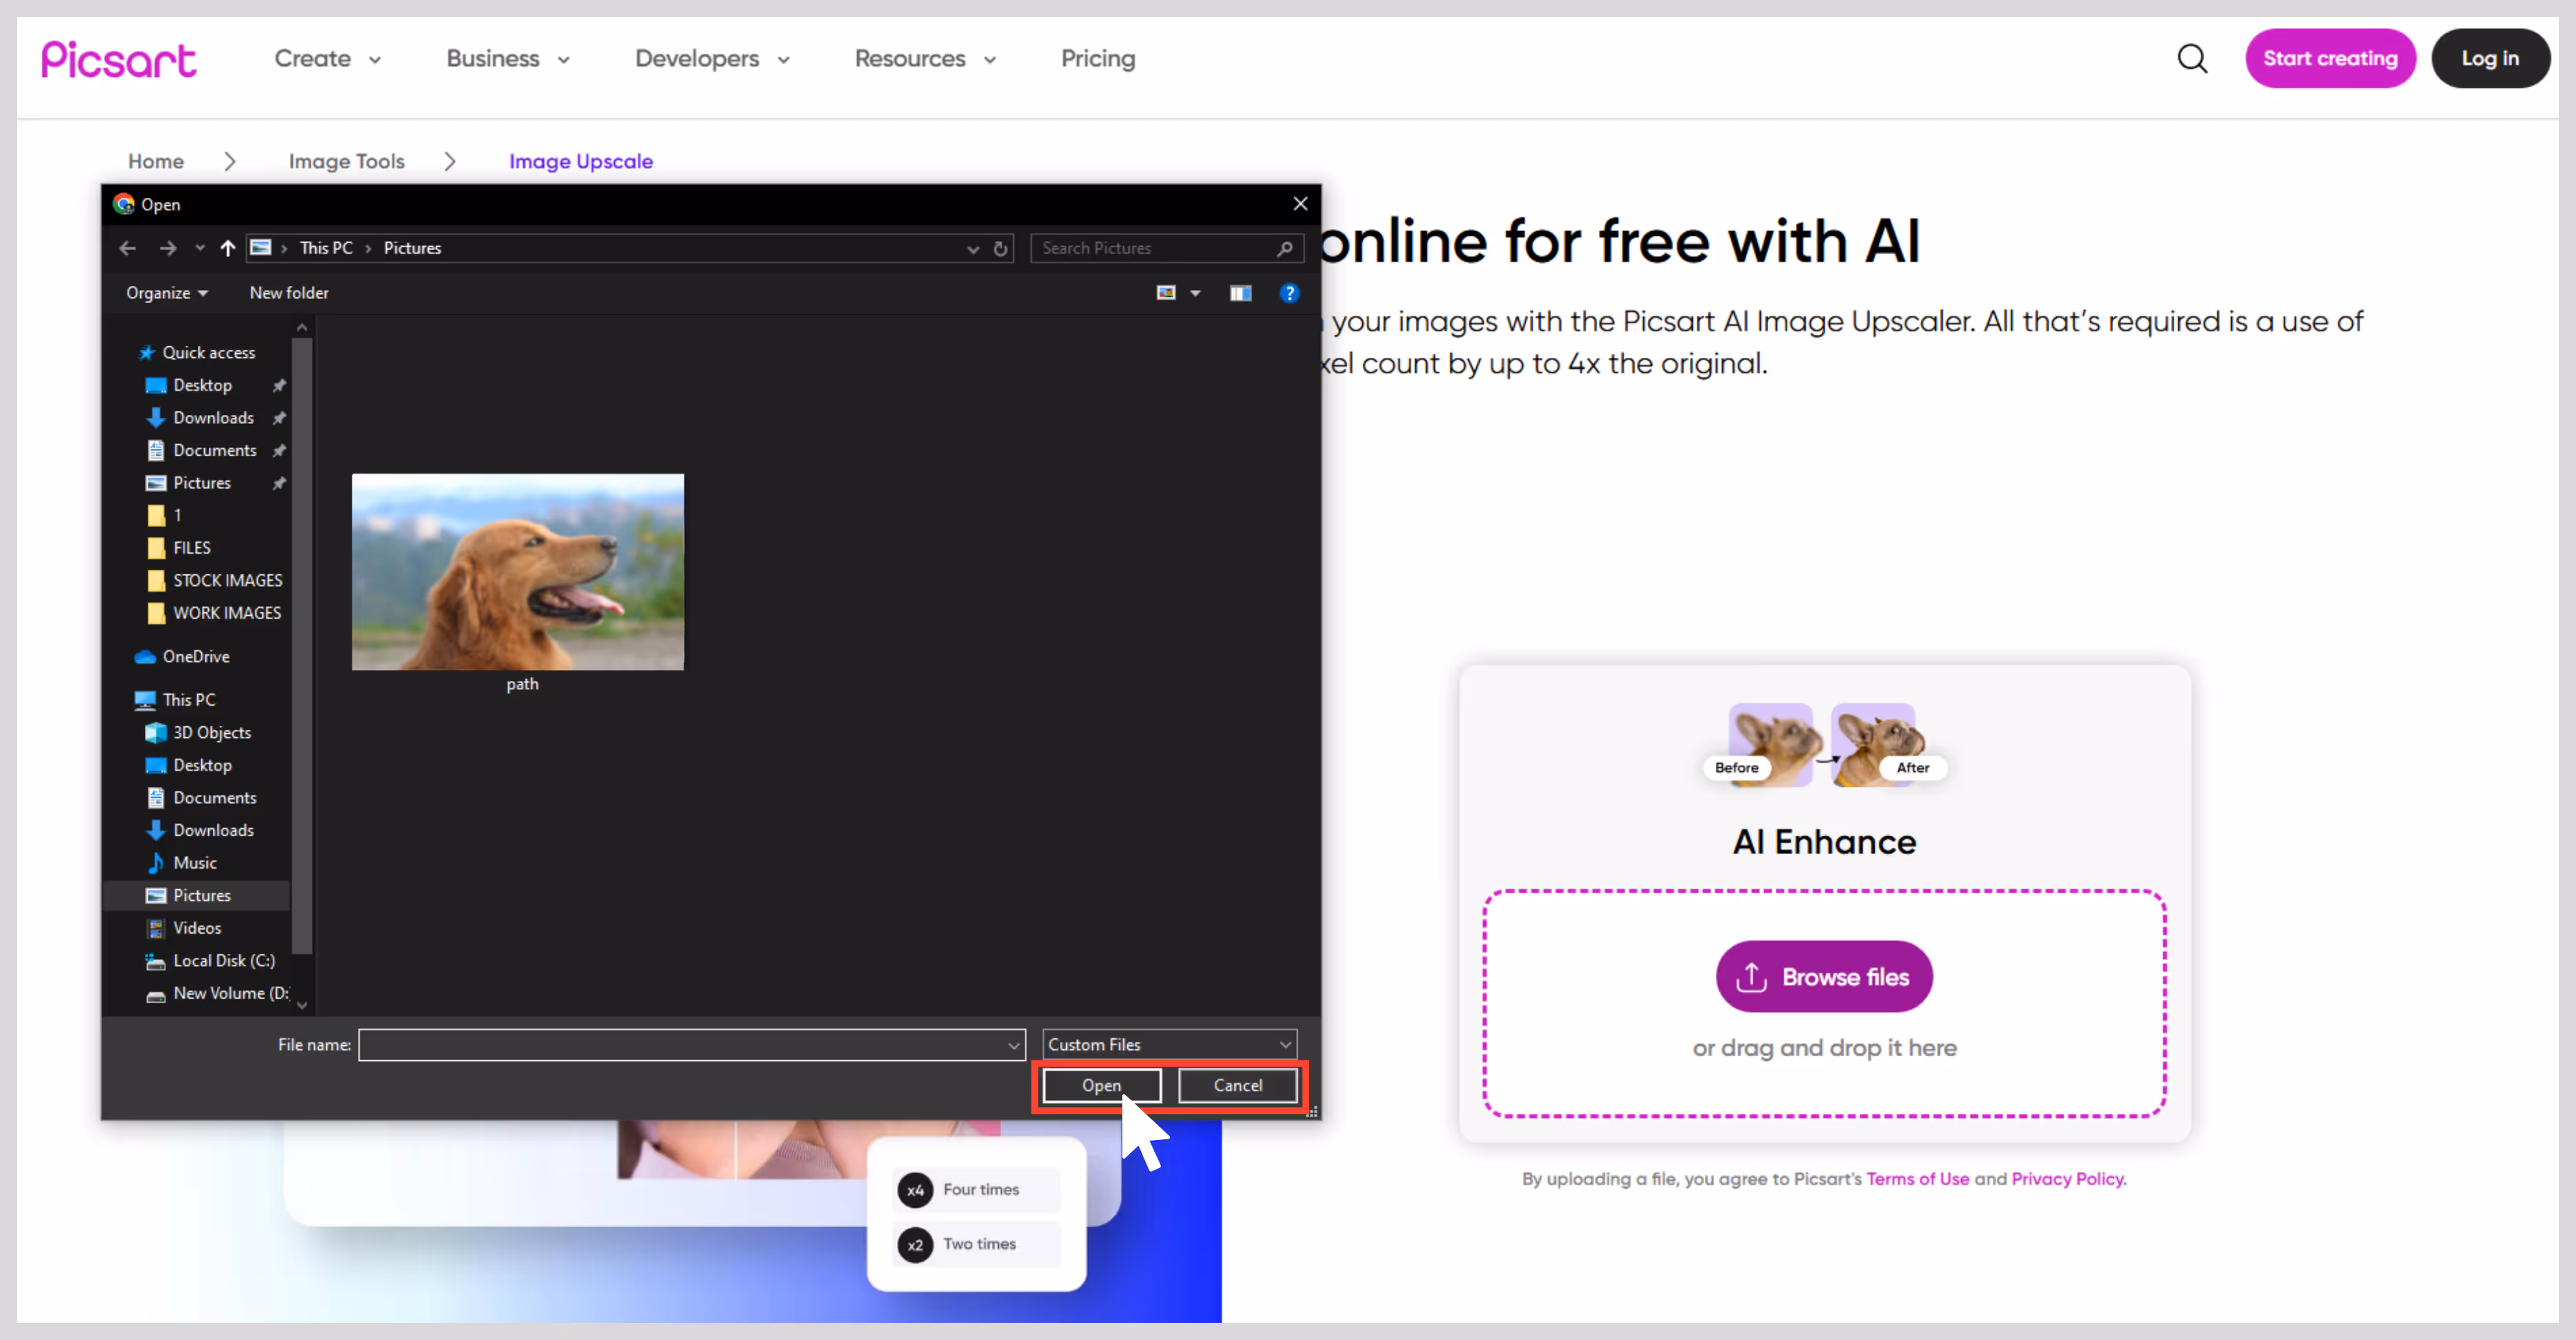
Step 3: After uploading, AI starts enhancing automatically and removes blur, sharpens the edges, and adds pixel count.
Step 4: Once done, just download it.

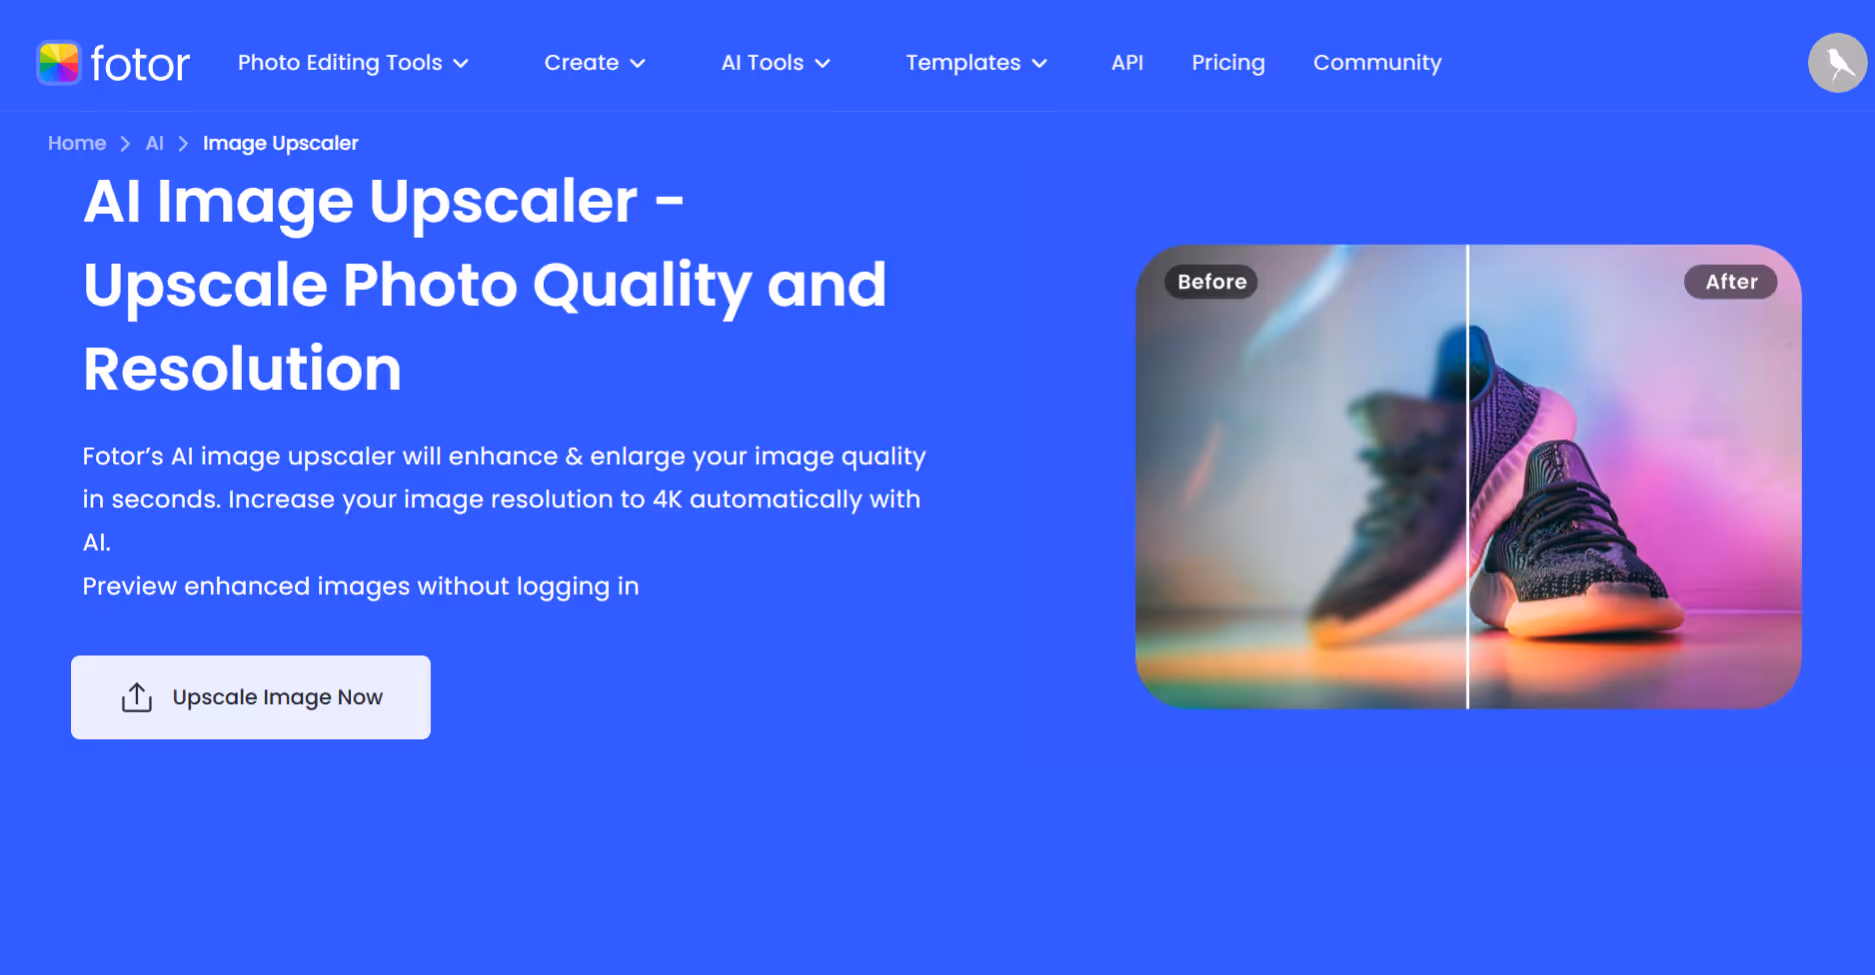
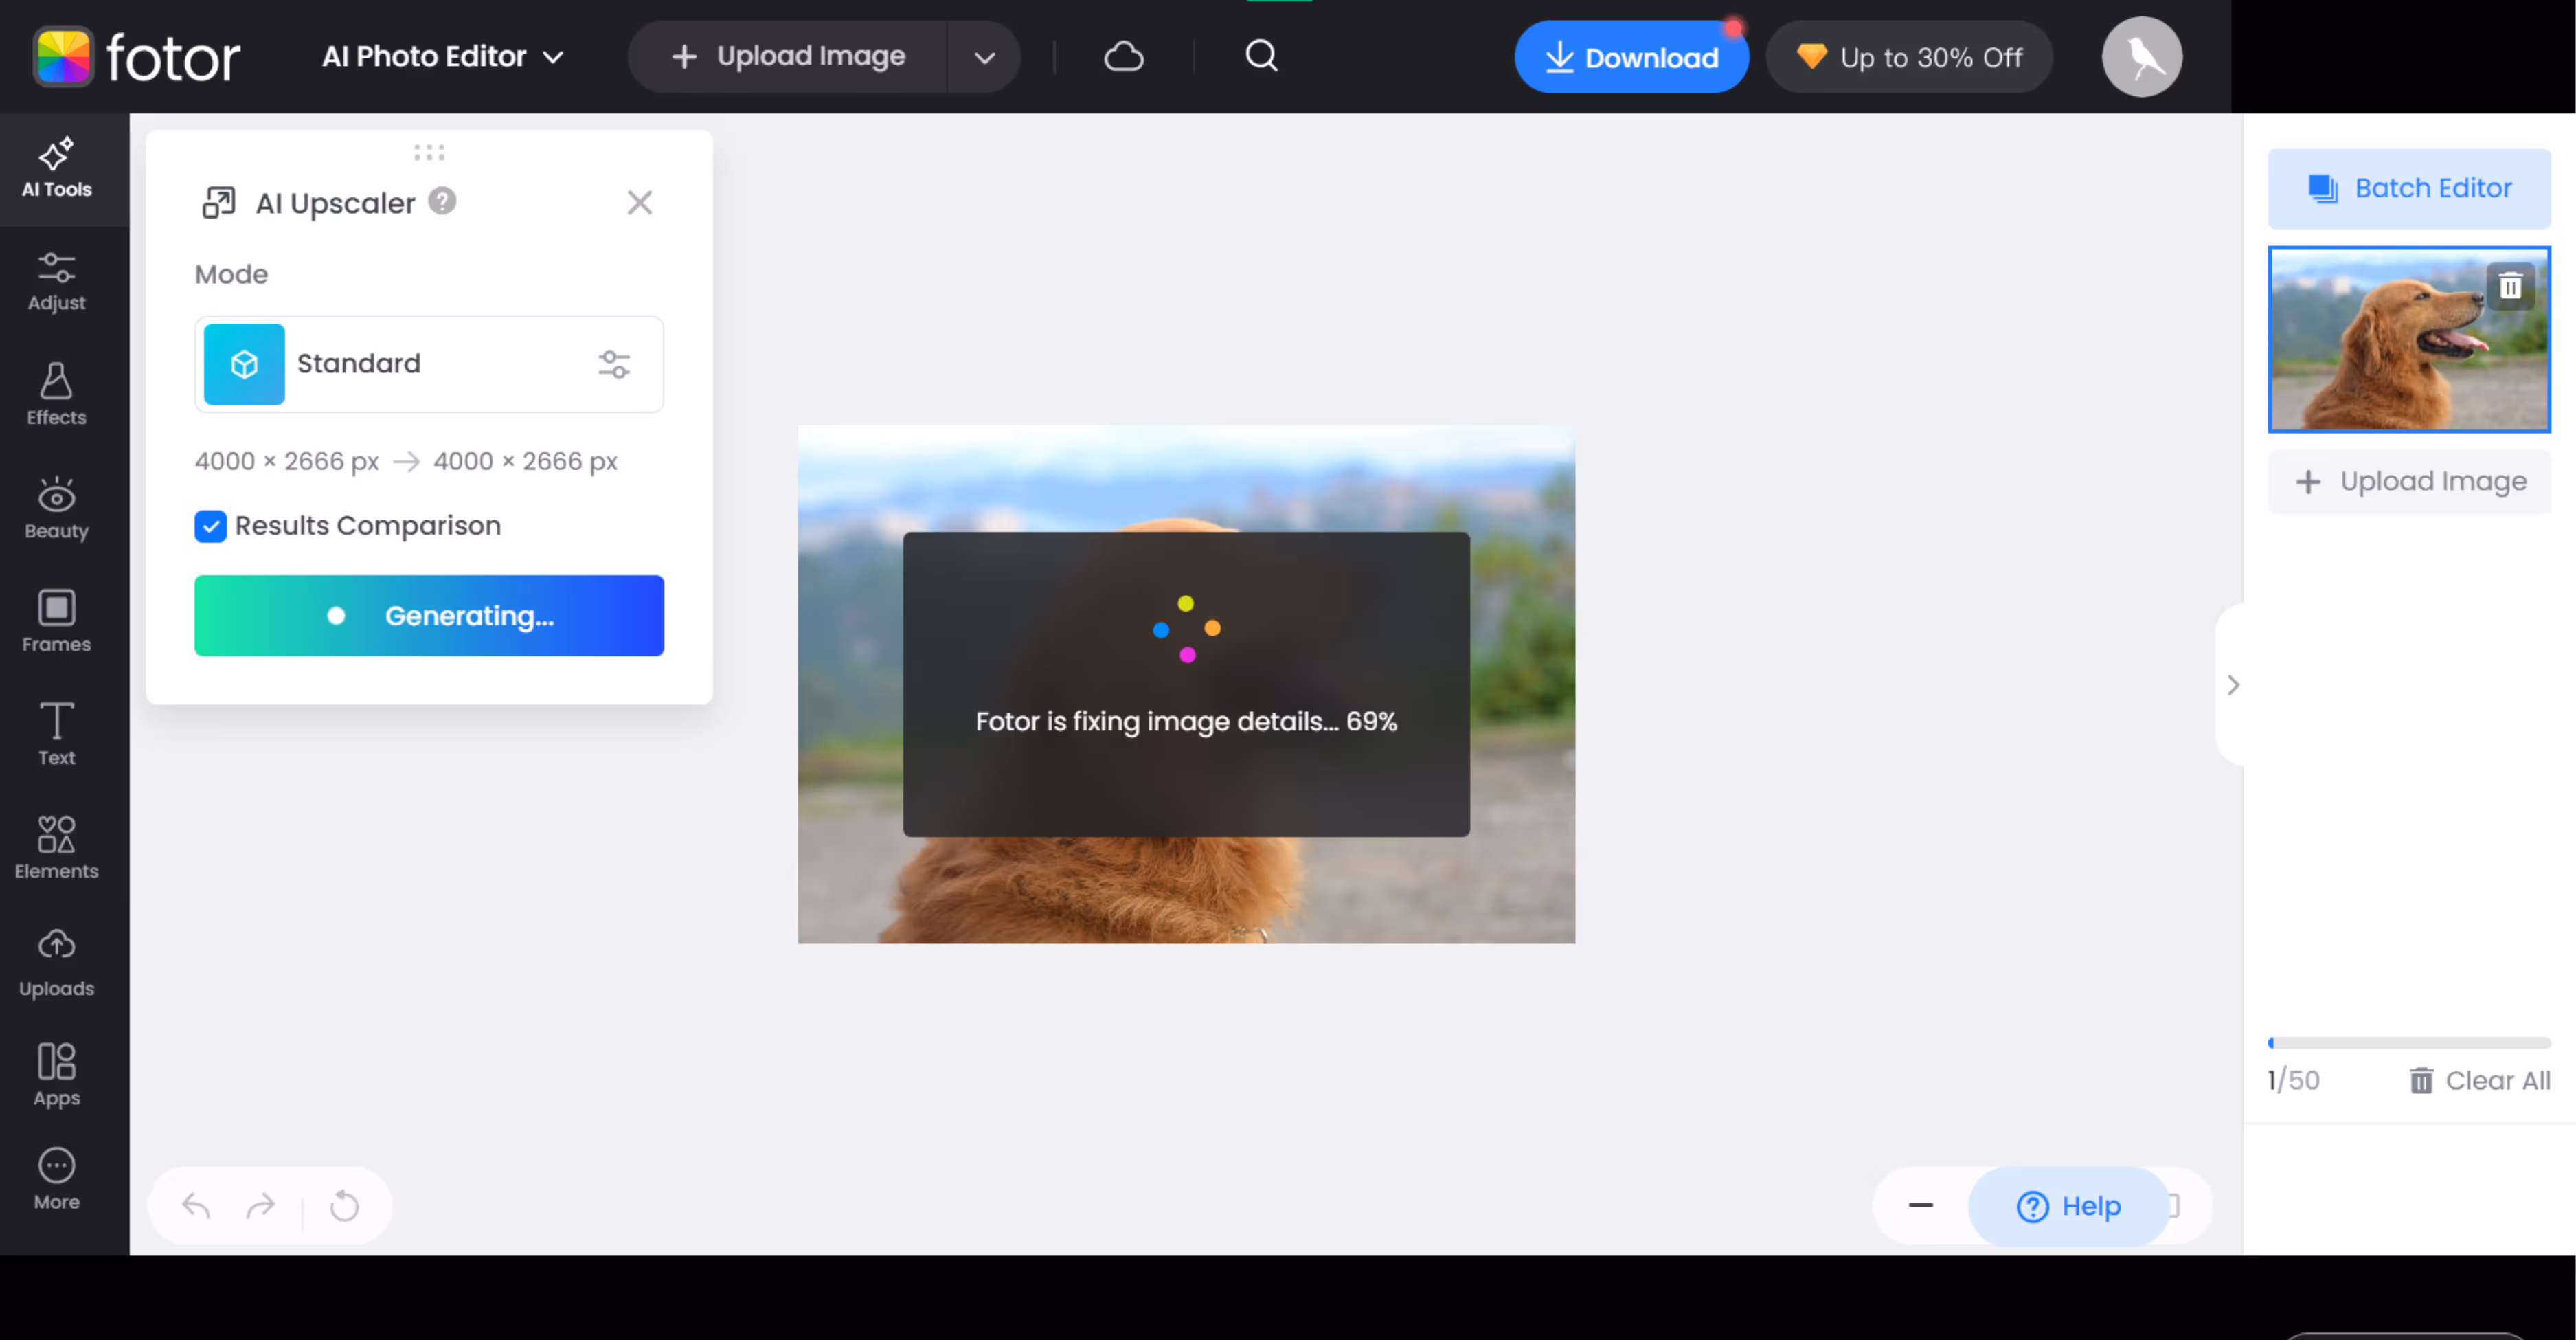
5. Fotor
It's a perfect tool for pixelated images and slightly blurred shots that you want to upscale. I had a soft-edged, slightly blurry image and wanted to sharpen it for my blog. After running it through Fotor, the upscaled image appeared noticeable.
The sharpness improved, and the textures improved without distortions. The tool supports upscaling up to 8x, but only 2x is a part of the free plan. After using that, my image went up to a high-quality one.
What I liked about the tool?
- You can upscale with a single click—just upload the image and the algorithms will do the rest.
- It includes built-in noise reduction, which helps reduce visual grain.
- There’s a preview window, so you can compare before and after before downloading.
- It processes quickly, even at higher scales.
How much it costs?
Fotor Pro: ₹66.6/month or 7992/year or 2999/year.
Plan benefits
- 100+ powerful editing tools.
- Al tools: Al enlarger, 1-tap enhance, magic eraser, background remover.
- Al portrait editing: Al skin retouch, face unblur, old photo restorer.
- Generative AI: text to image, AI filter, AI expand, AI replace.
- Remove the watermark of the Fotor logo.
- Al slides generating.
- 2GB Cloud storage.
Fotor Pro+: Rs.134.1/month or 1093/year or 2299/year.
Plan benefits
- 100+ powerful editing tools
- Al tools: Al enlarger, 1-tap enhance, magic eraser, background remover.
- Al portrait editing: Al skin retouch, face unblur, old photo restorer.
- Generative AI: text to image, AI filter, AI expand, AI replace.
- Remove the watermark of the Fotor logo.
- Al slides generating.
- 10GB Cloud storage.
What are the test results?
I tested Fotor on my low-quality image, testing the standard size (2x). At 2x, the results were quite impressive, the skin became clear and edges became sharp.
- Size increase: 2x.
- Quality improvement: Minimal.
- Processing time: up to 15 seconds.
- AI artifacts: Minimal visible.
How to make an image bigger in Fotor?
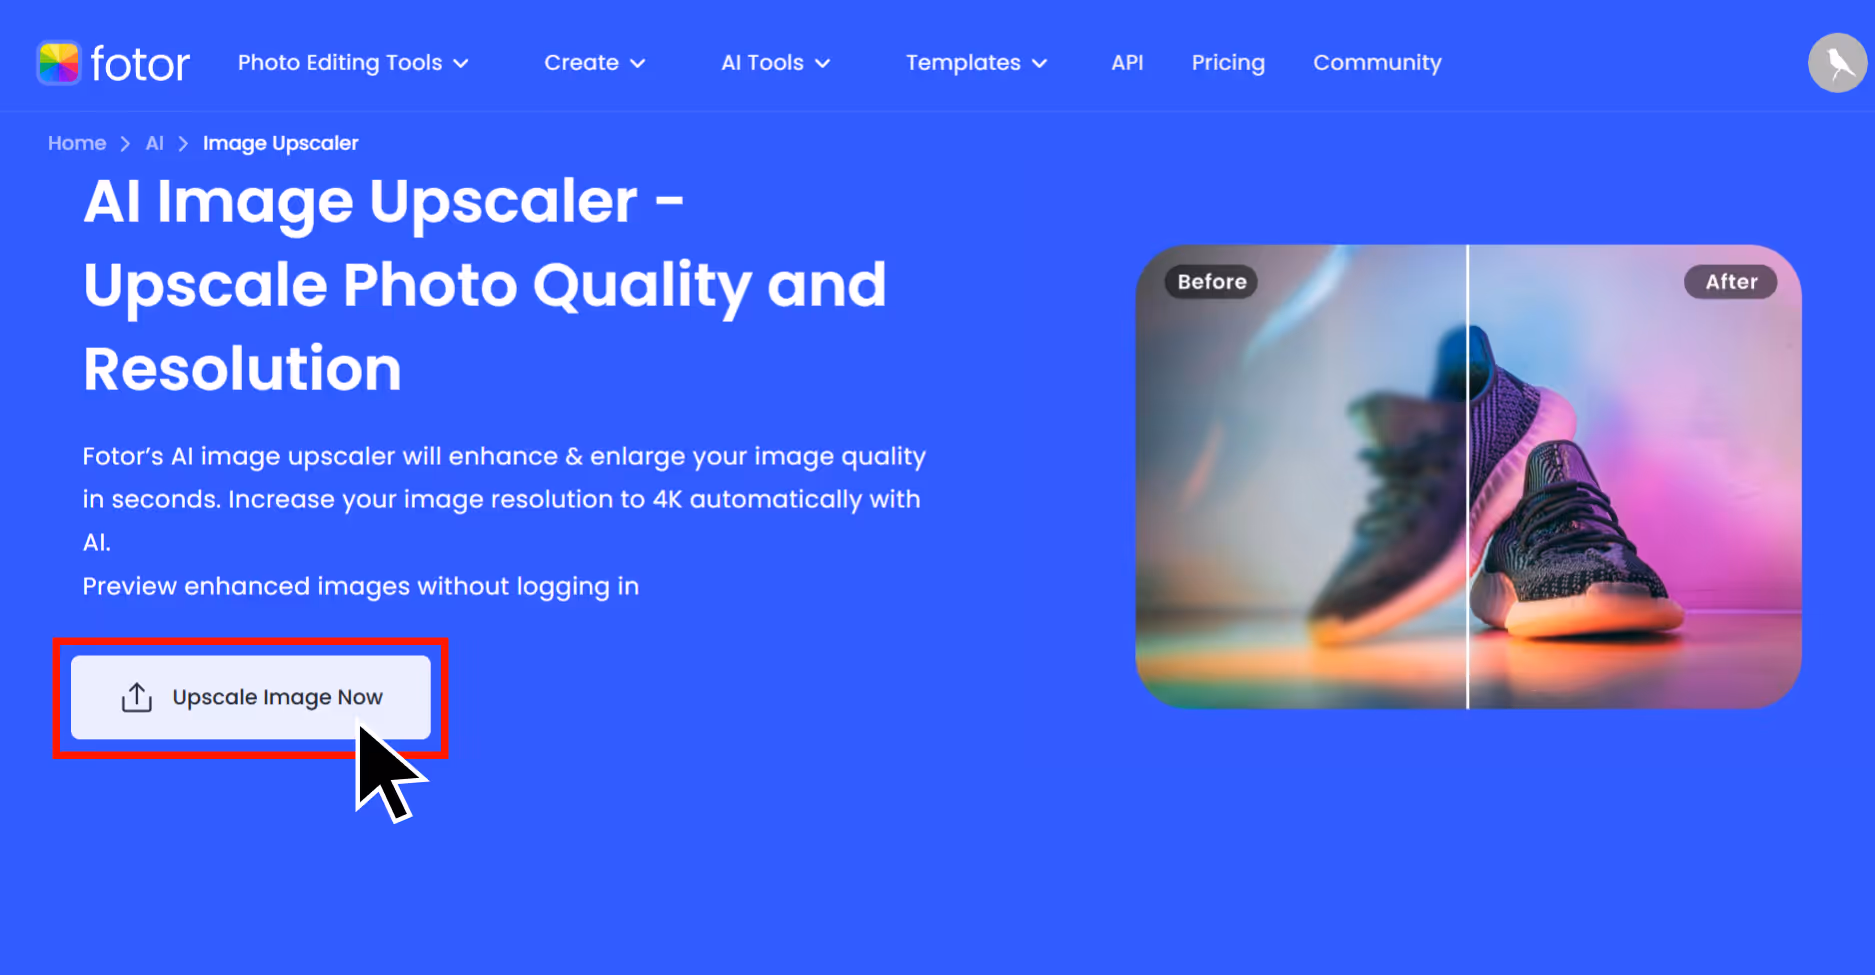
Step 1: Go to Fotor.
Step 2: Click on “Upscale Image" now.
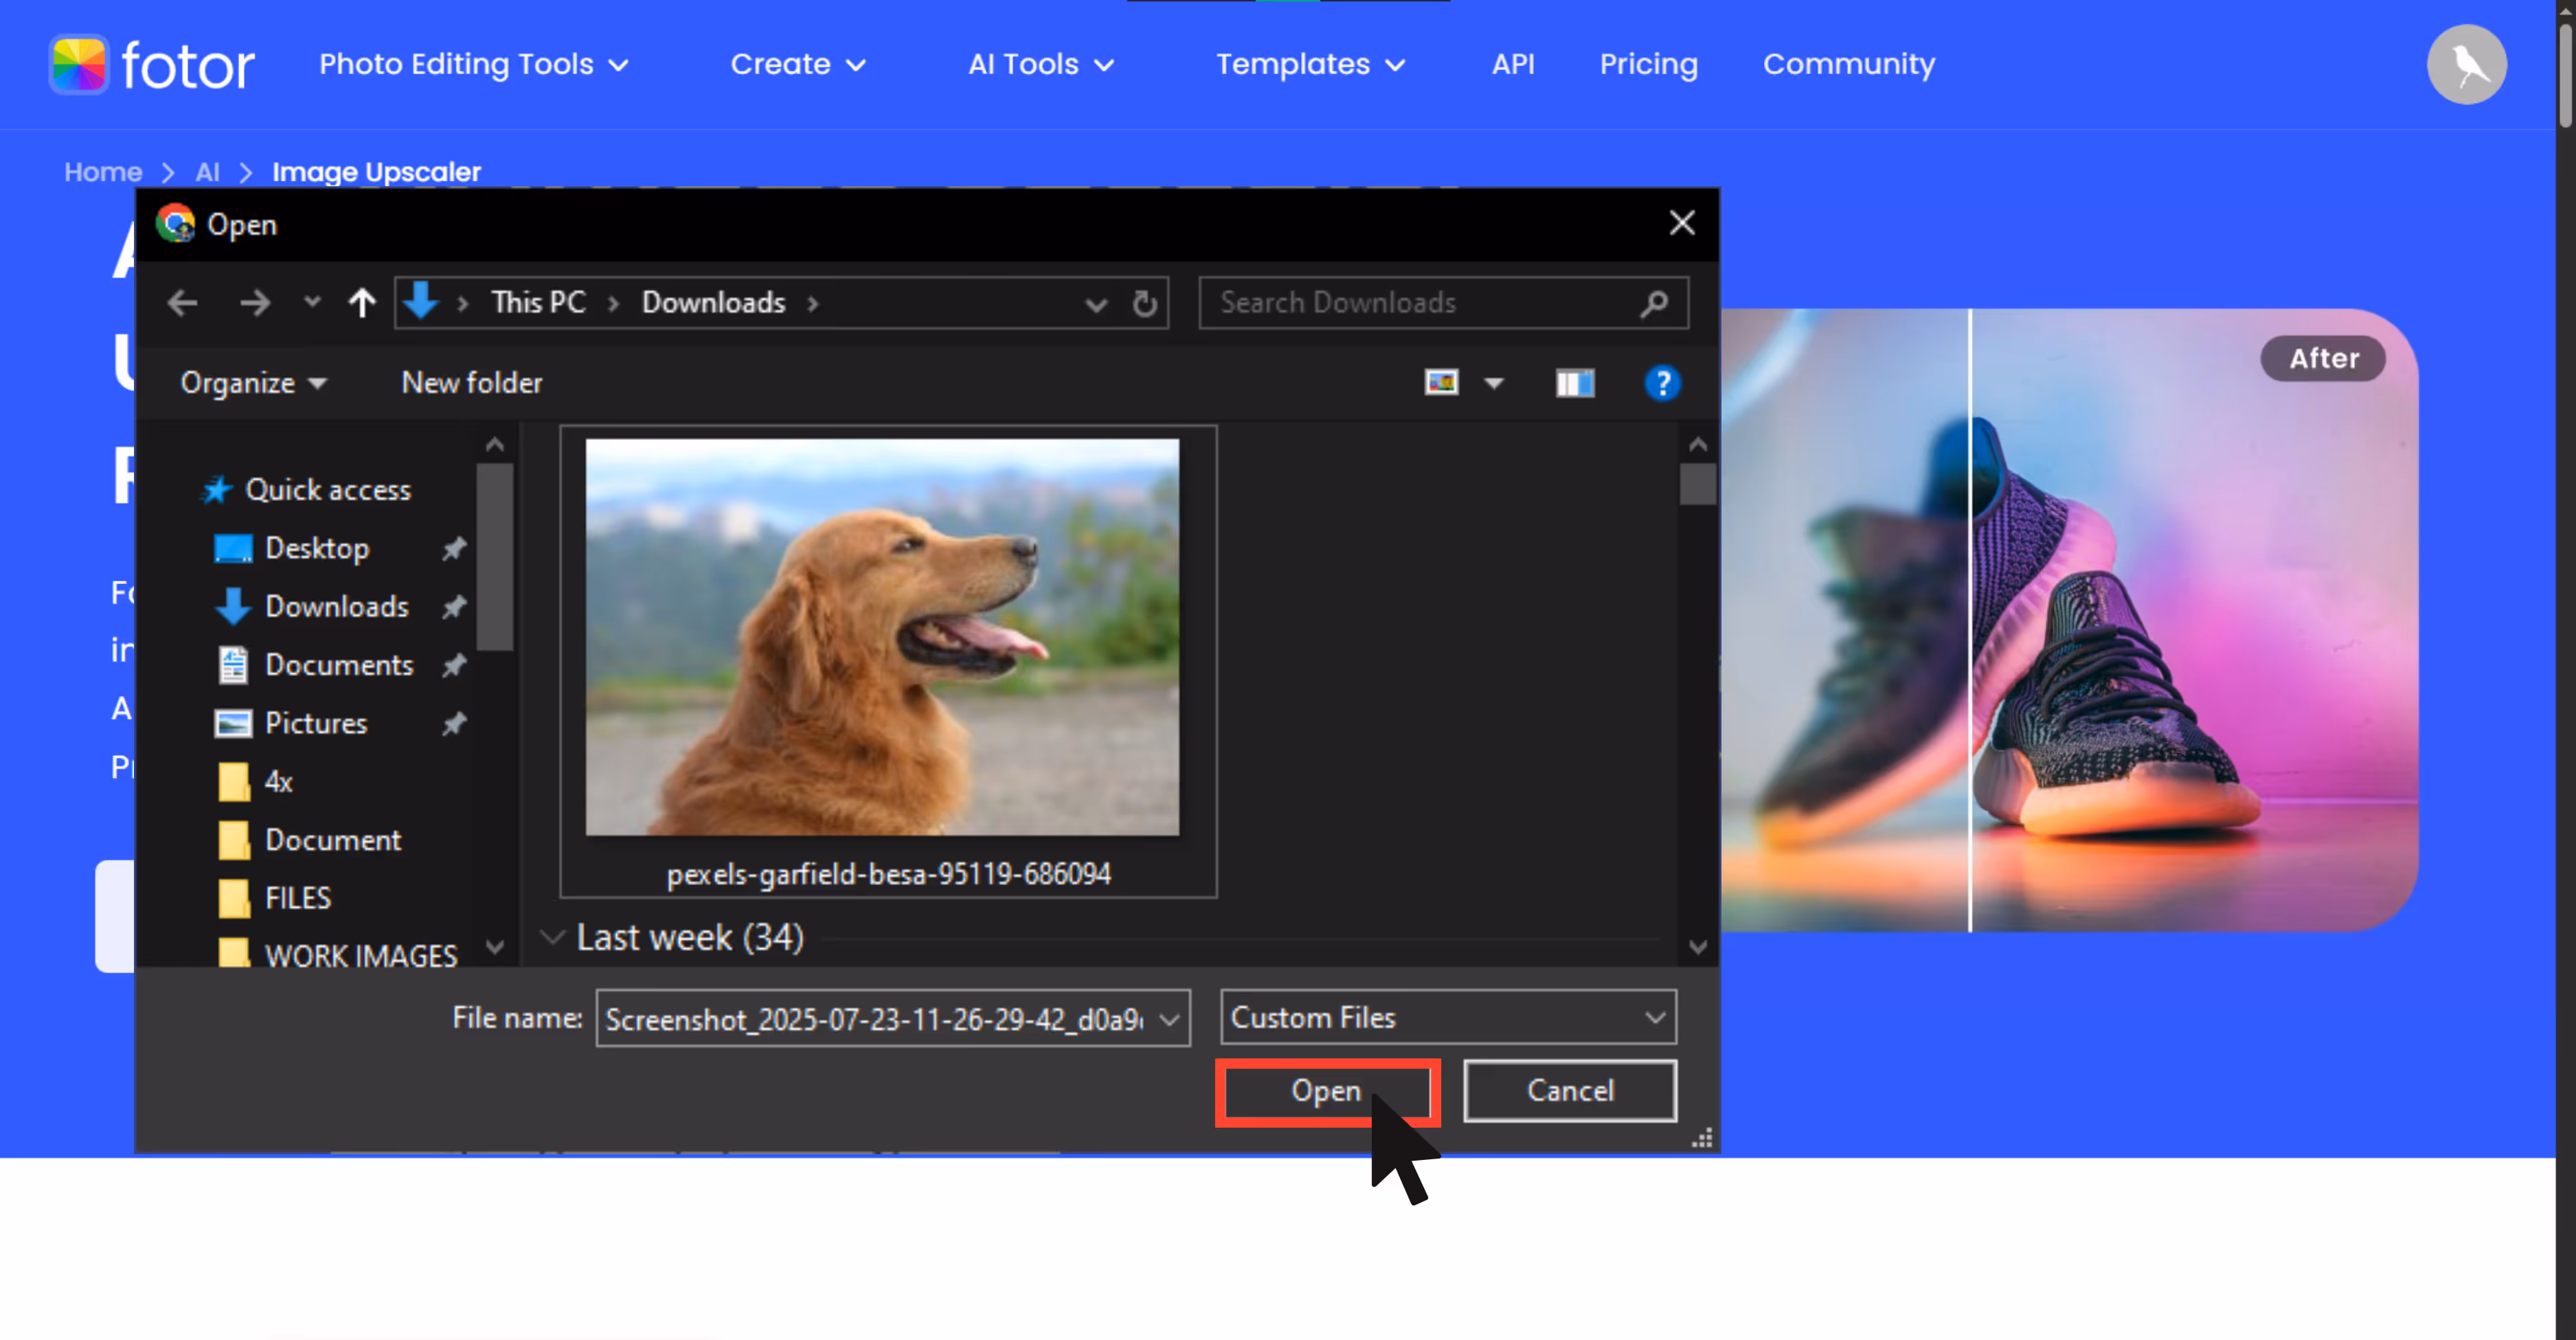
Step 3: Upload your image – I used a JPG that was of low resolution.
Step 4: Choose the upscale factor, usually, standard upscale size (2x) is for free, and 4x or 8x which are a part of advanced features are a part of the premium plan. For testing the tool, I used 2x, and my image went to high quality.
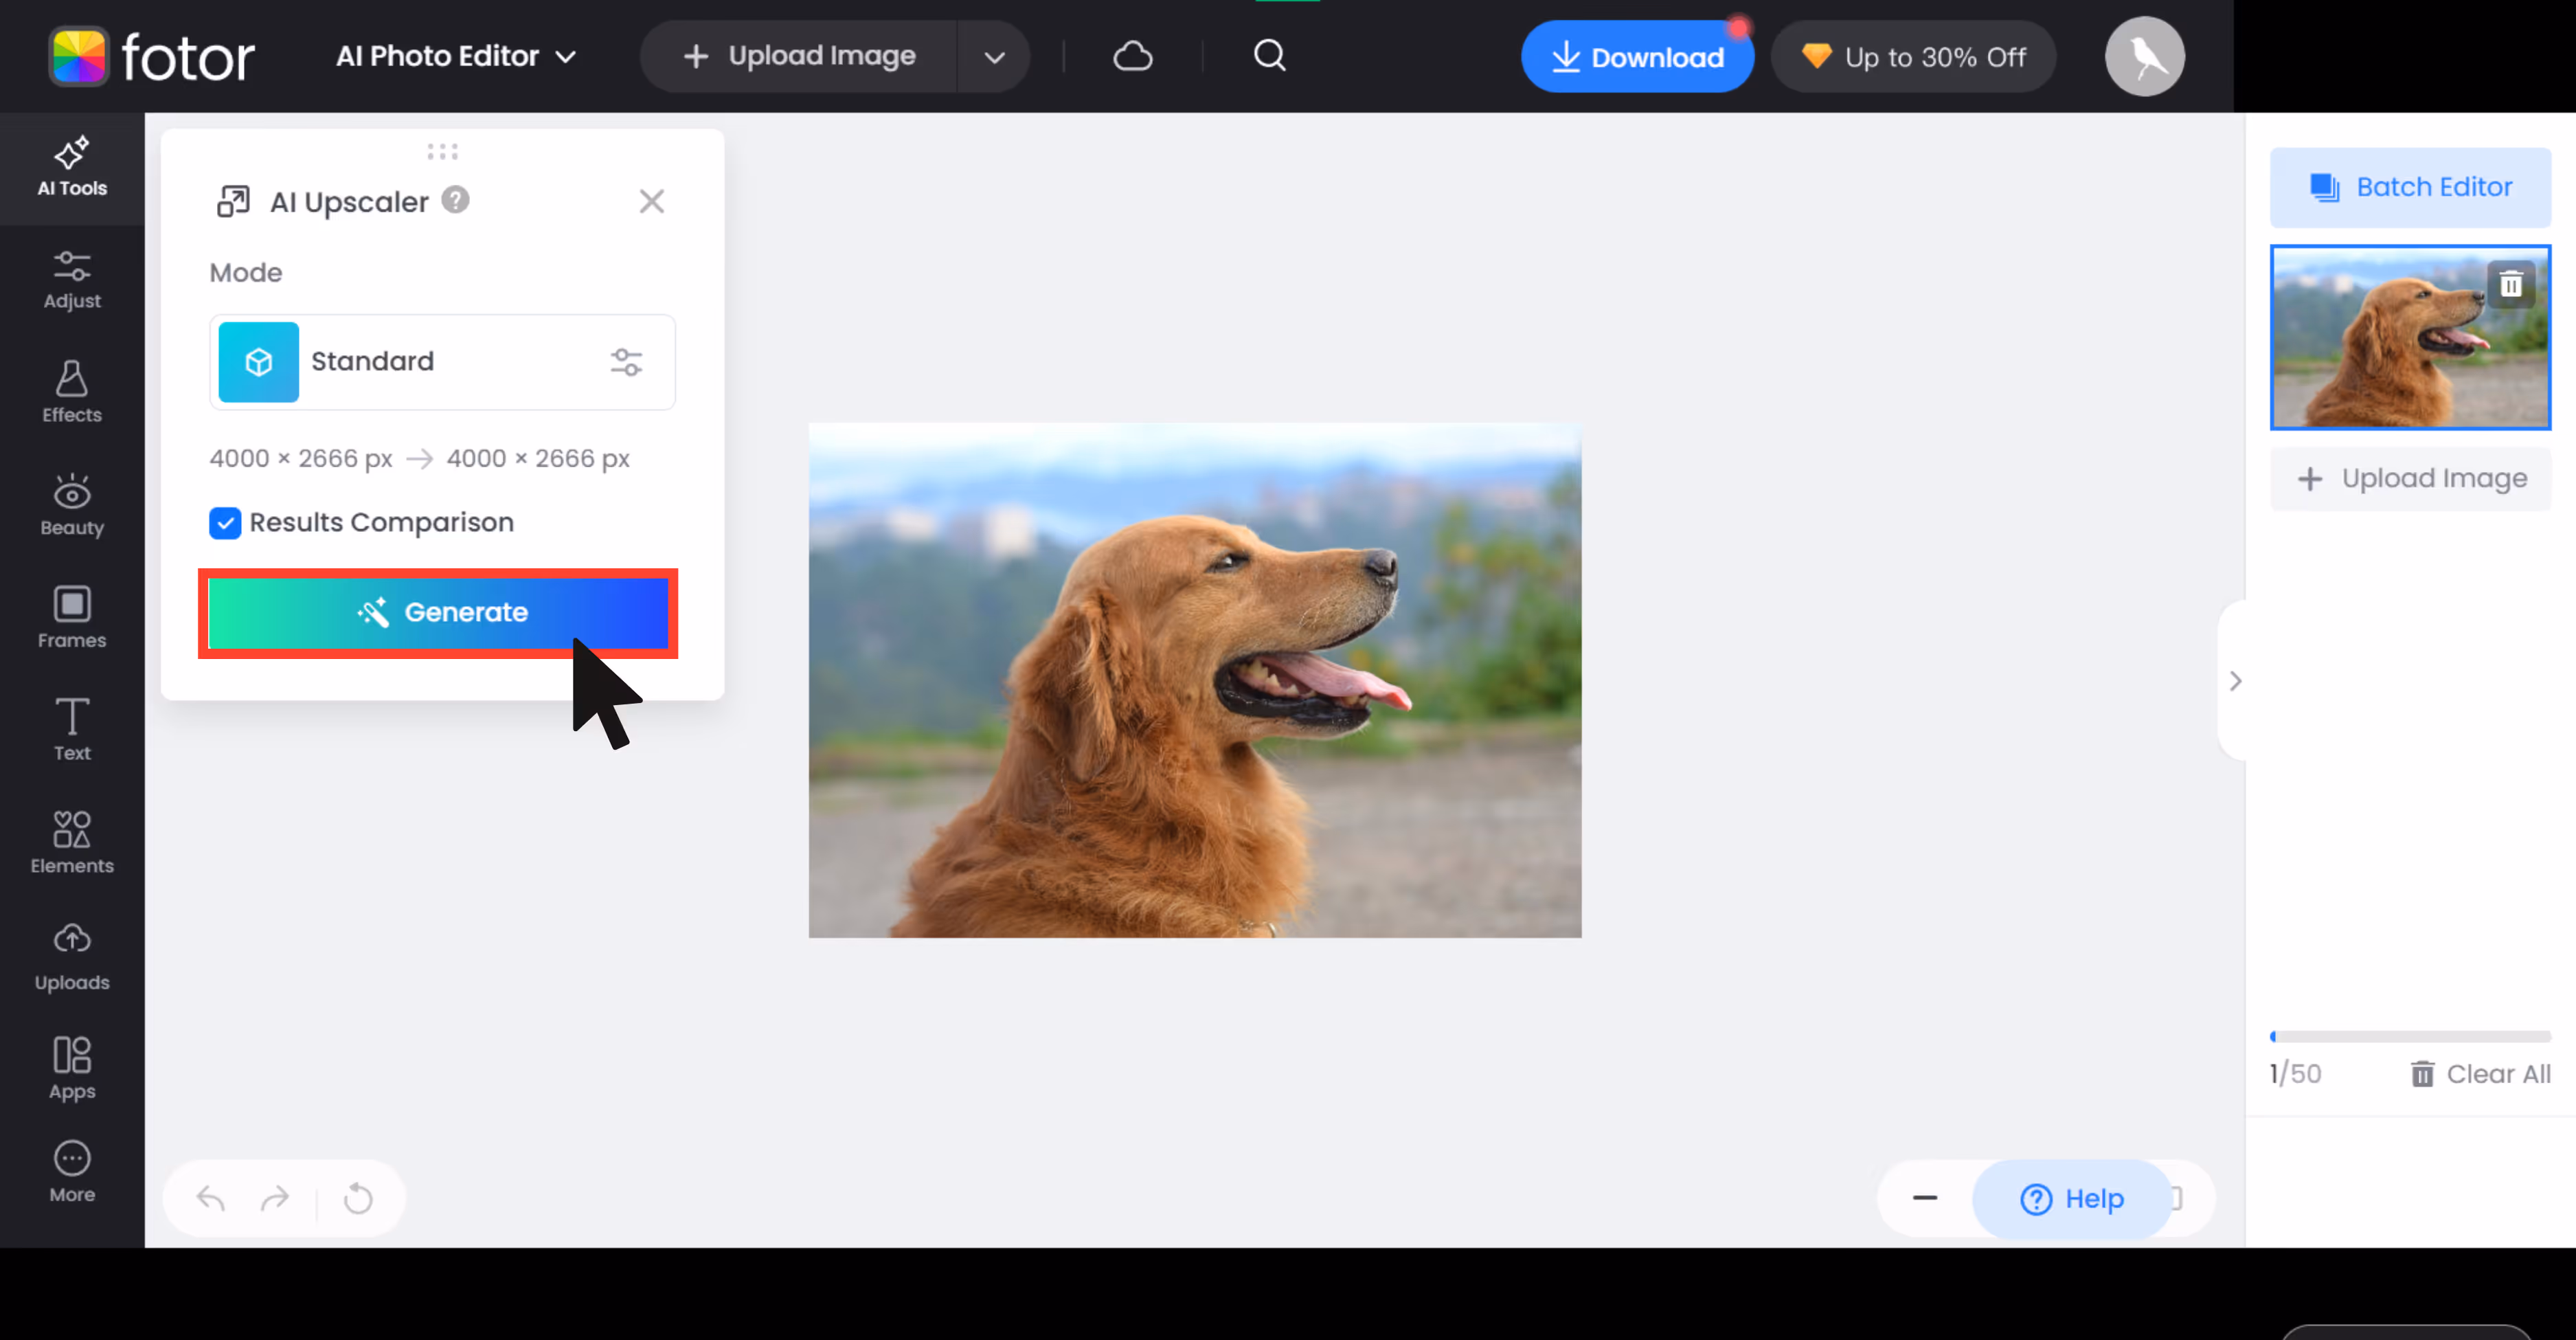
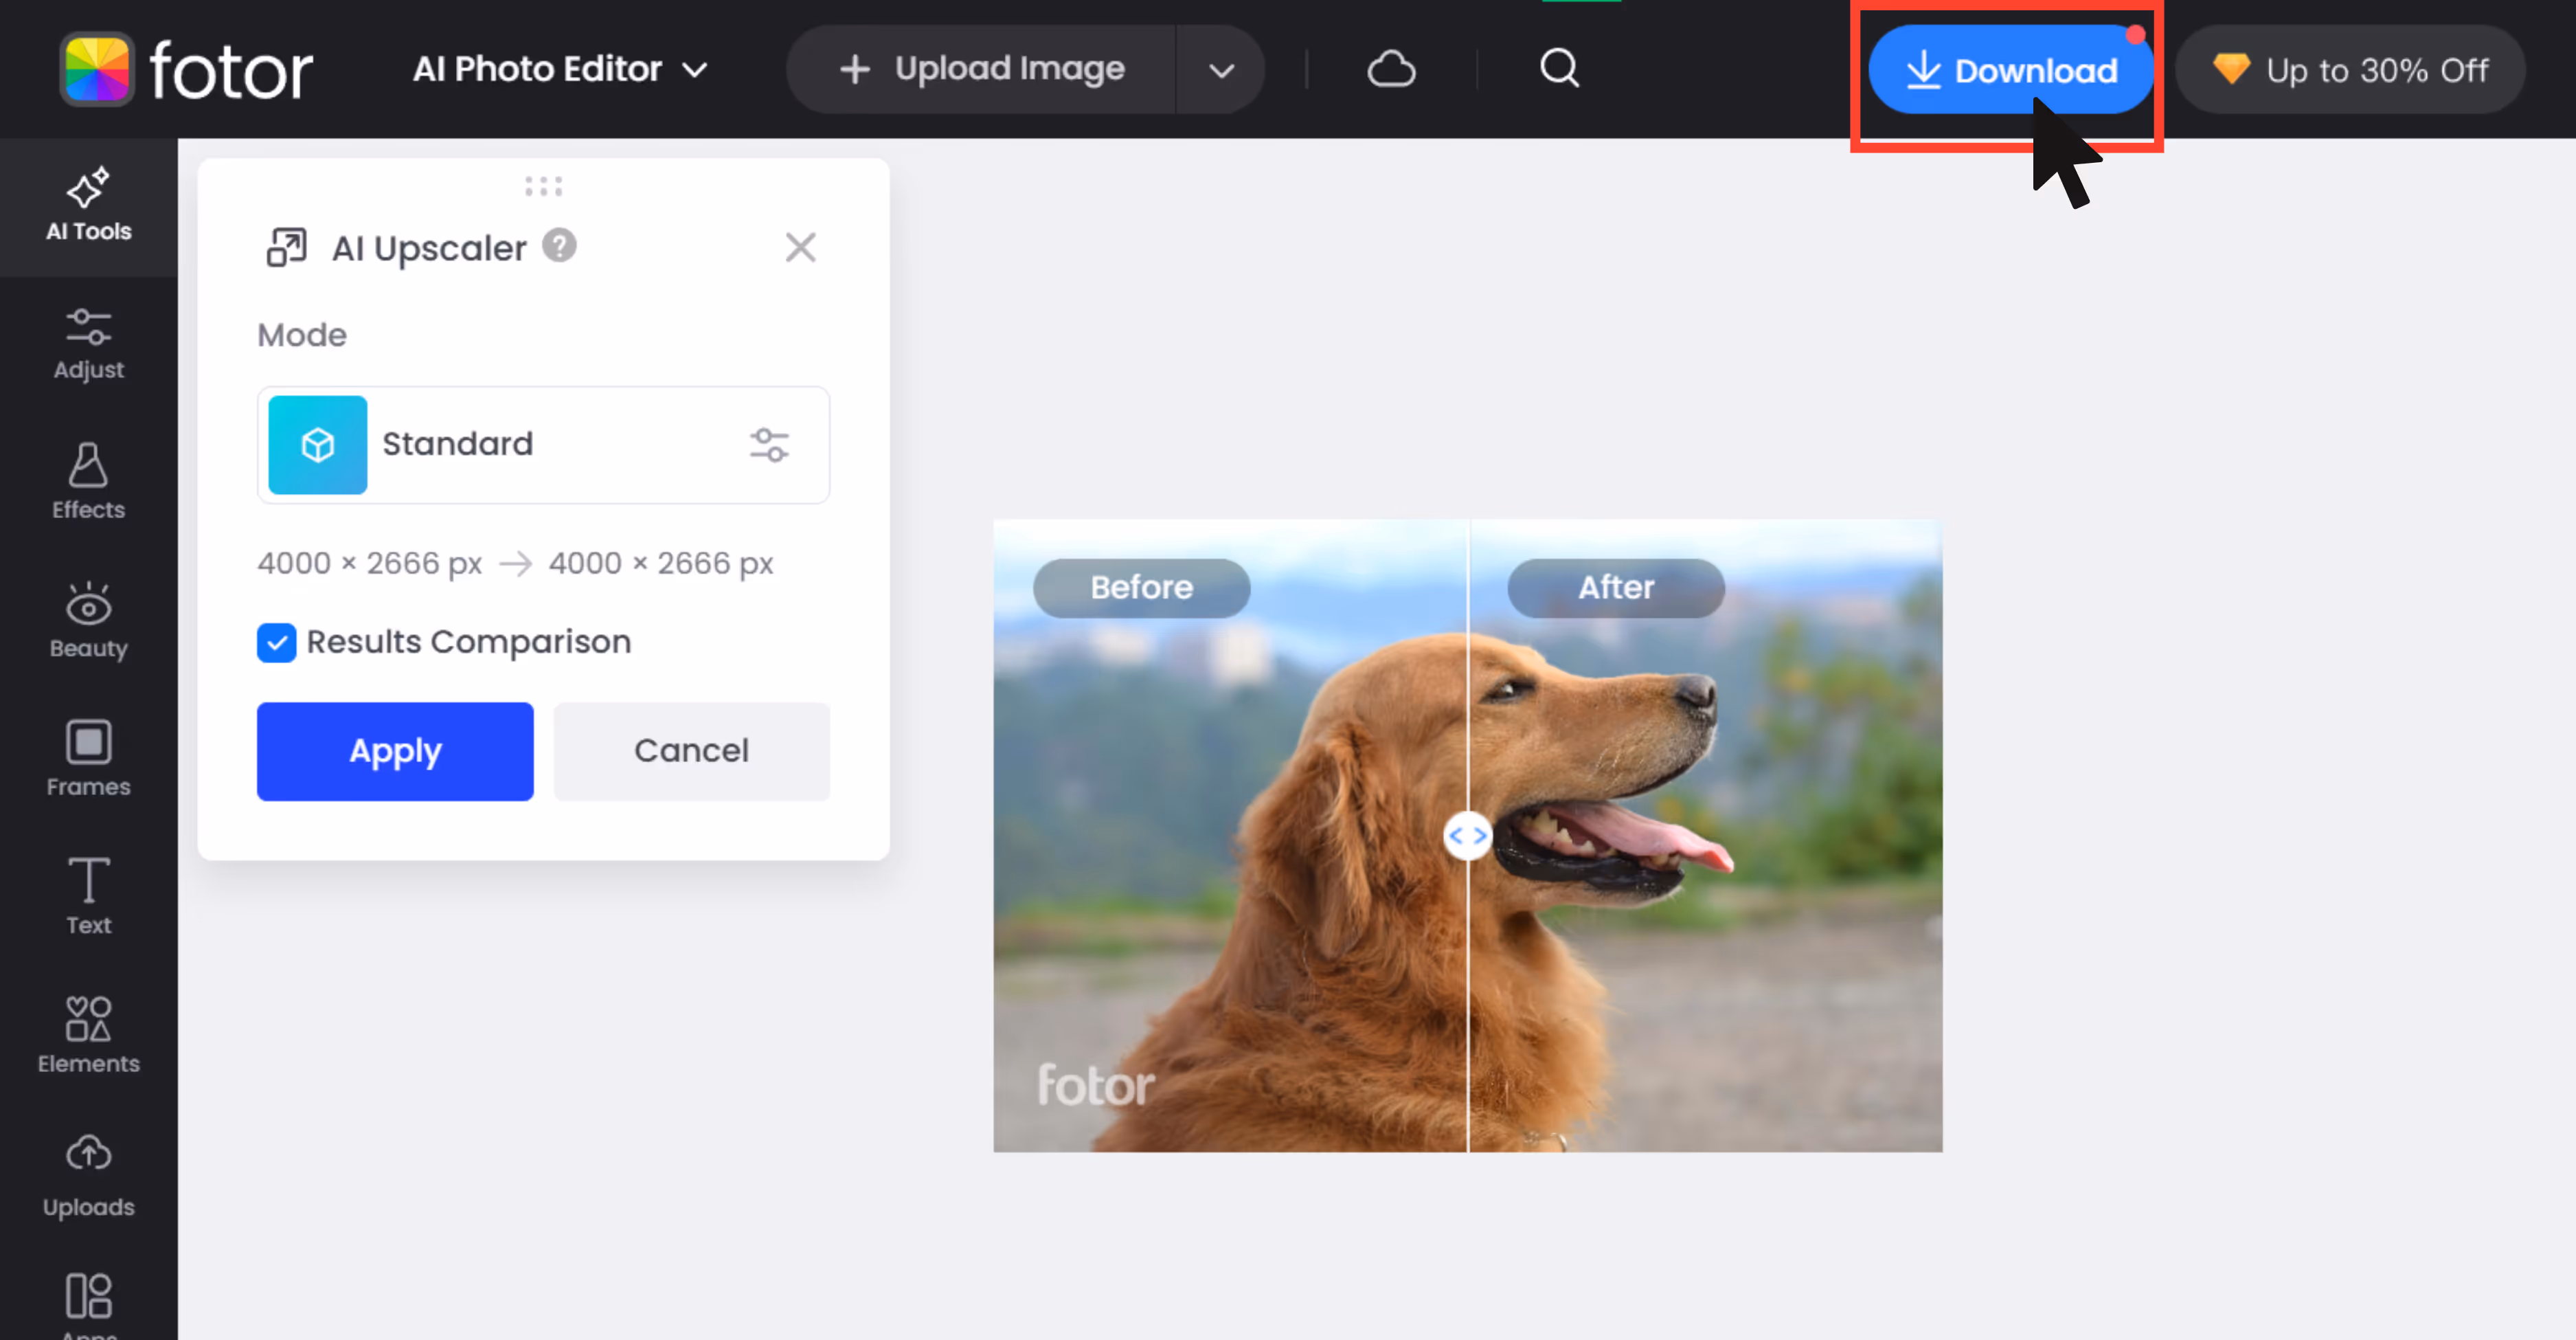
Step 5: Wait for the processing time, once done, preview and download.
Step 6: You can use the before and after sliders to compare.
Tips to make pictures bigger without losing quality
- Choose the right software or AI tool: All the above-mentioned AI upscalers perform better and in an easy way than traditional methods.
- Maintain the original resolution: Always upscale from the original file,don't upload a screenshot or compressed file.
- Avoid excessive upscaling in one go: Resize incremenPixelbintally (like 2x, then 4x) in tools like should be avoided, use any one scale size and you are good to go.
- Save in high-quality formats: Use PNG, TIFF, or WebP instead of JPEG to preserve the quality of the image.
- Experiment and compare: Try a few AI tools and traditional tools because both behave differently based on image type.
Final thoughts
Making images larger without losing quality is easier in 2026 with AI upscaling tools. While traditional tools are used by many, AI tools like Pixelbin offer faster and better-looking results, and are completely beginner-friendly.
The aforementioned AI tools don’t just stretch pixels; they predict the missing details and add pixels , which means you get sharper, refined textures, and minimal artifacts. Whether you're enhancing a selfie or preparing product images for print, AI-powered platforms now give you studio-level clarity in a few clicks.
Among the tools we tested, all stood out for their sharpness, simplicity, and batch-friendly API. It’s a worthy addition to any content creator or designer's toolkit.
FAQs
Yes! Most AI upscalers like Upscale.media and Pixelbin work perfectly with mobile images. Just ensure the photo isn’t overly compressed.
High-quality enlargements are needed for printing, design, or HD screens where low-res images look blurry or unprofessional.
AI reconstructs detail based on learned patterns. While some fine textures may be approximated, the result typically looks natural and realistic.
All the above mentioned AI upscalers are secure and privacy-conscious. Always review the tool’s privacy policy.
Preferably PNG or TIFF for lossless quality. Avoid re-saving in JPEG multiple times as it introduces compression artifacts.
Yes. AI tools can cleanly upscale screenshots, improving text sharpness and icon
.webp)
%20(1).webp)