
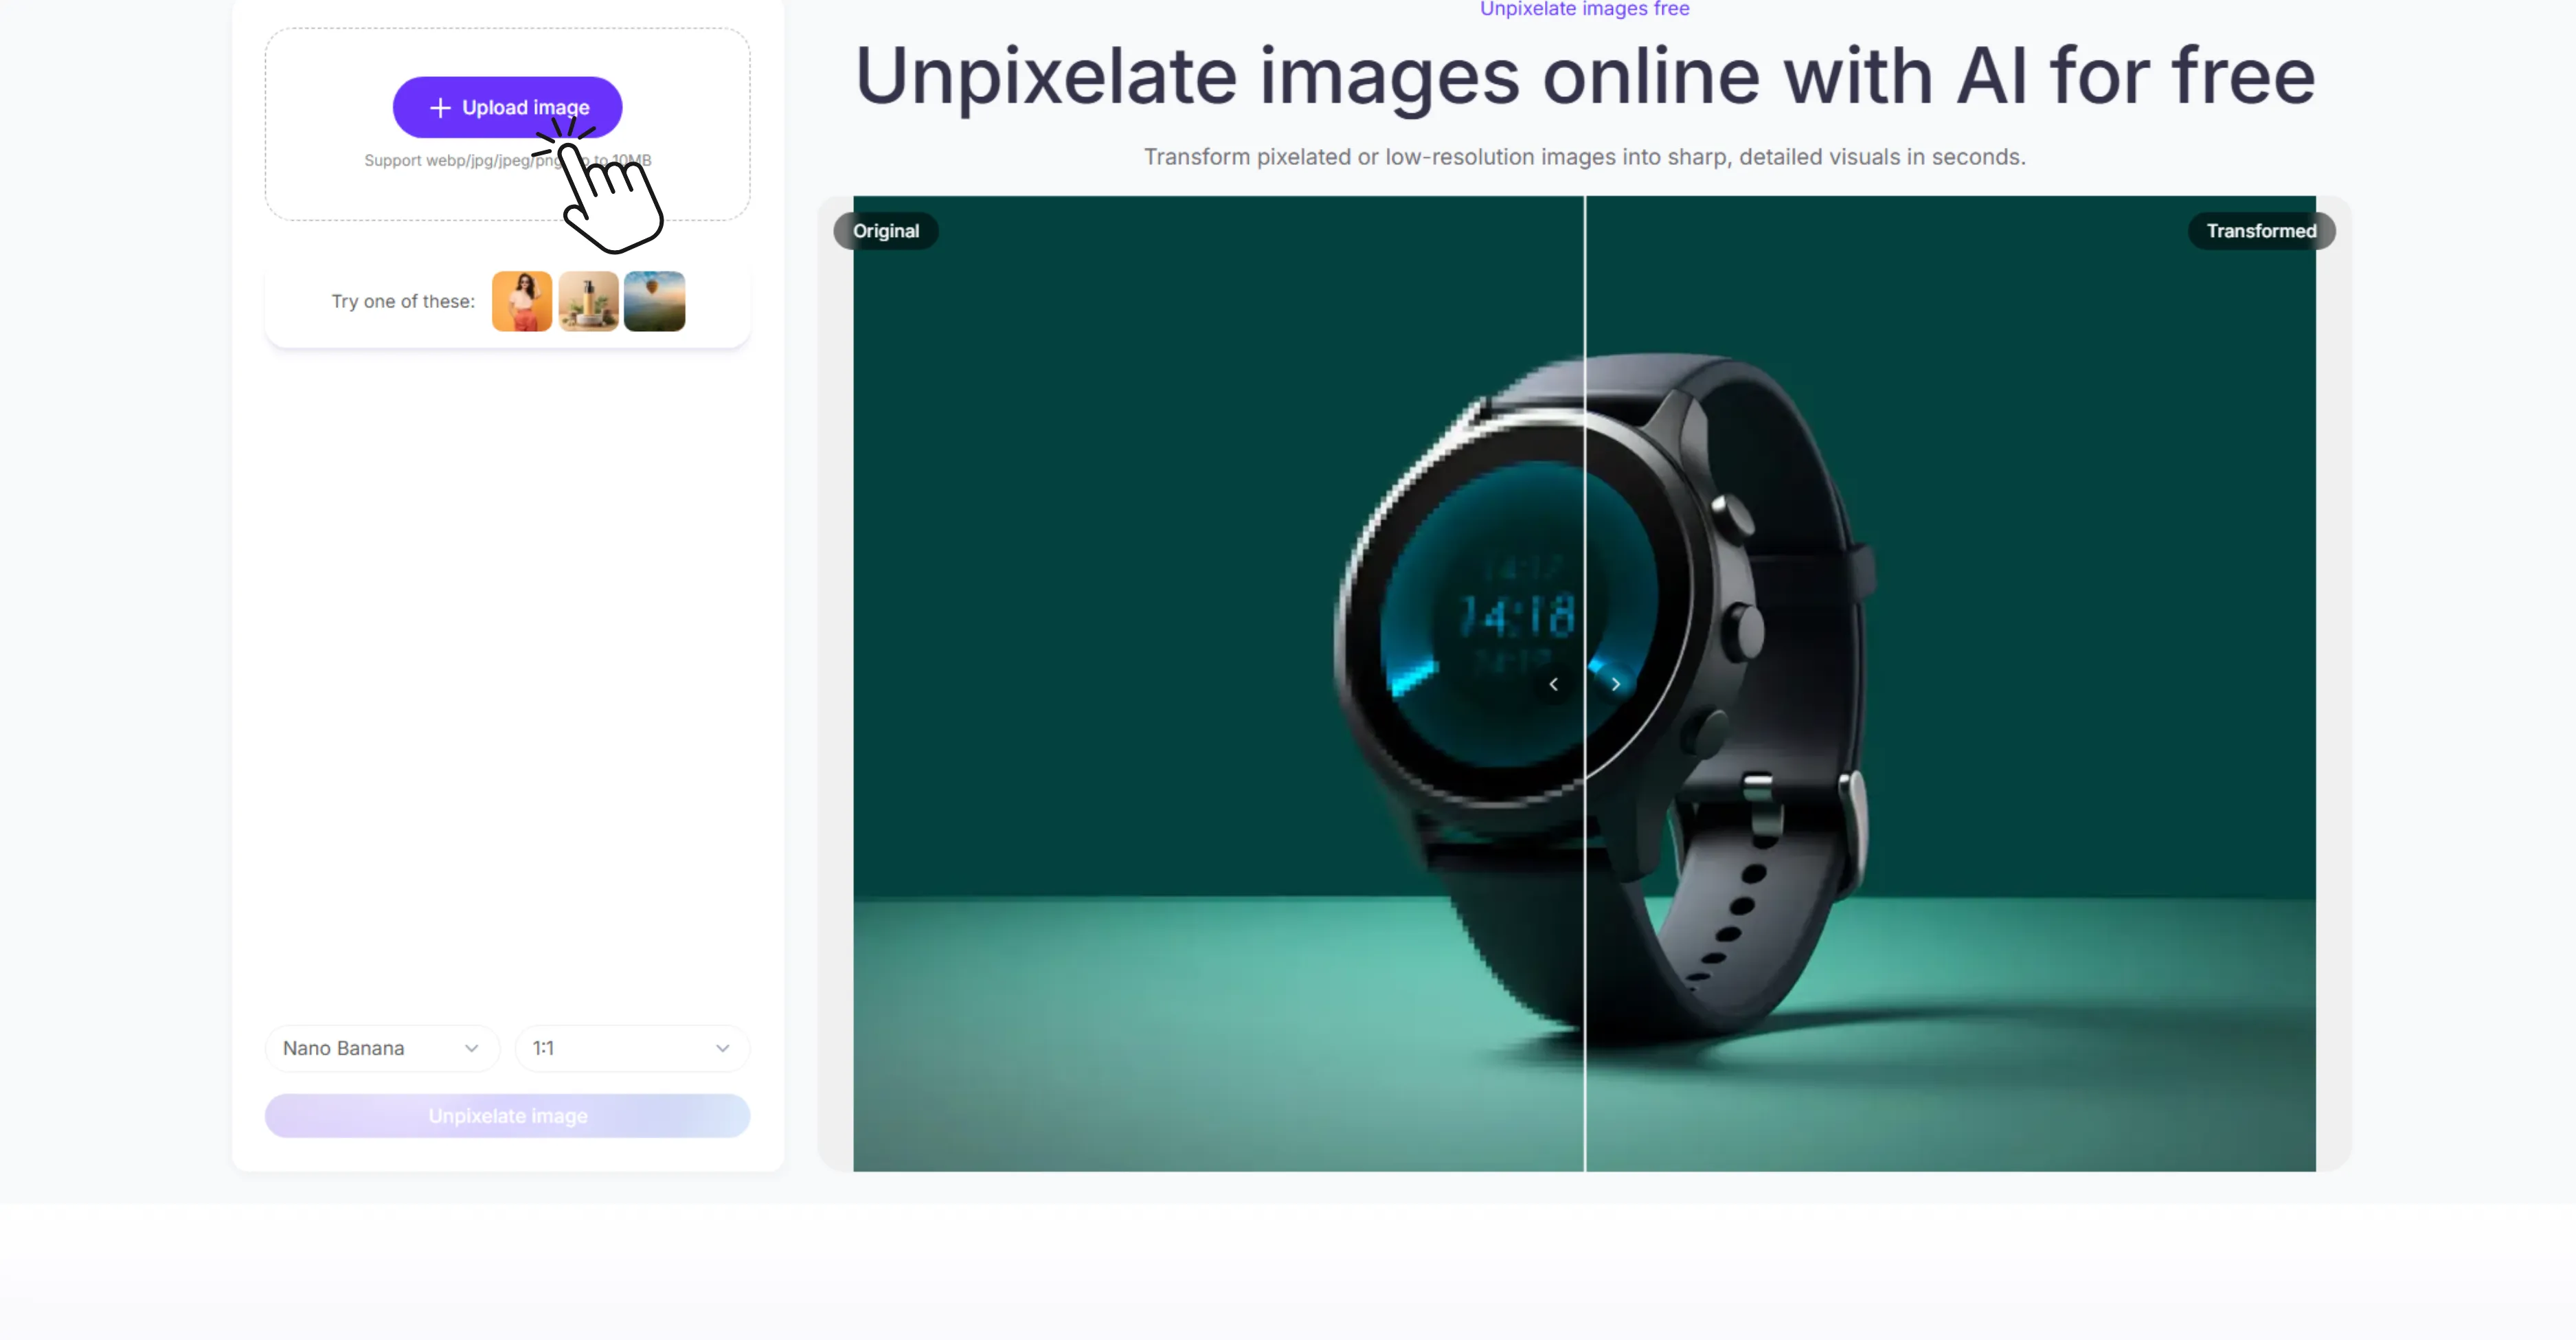
If an image looks blocky because it was enlarged, compressed, cropped too tightly, or saved at a low resolution, there is a good chance an AI tool can make it look noticeably better. Pixelbin's Unpixelate Image tool lets you upload a JPG, JPEG, PNG, or WEBP file, process it directly in your browser, compare the original and improved versions side by side, and download the result without any software installation.
Before diving in, it helps to understand what unpixelating actually does. AI can reduce visible pixel blocks, smooth rough edges, and produce a cleaner looking version of a low-resolution image. What it cannot do is recover detail that simply was not there in the original file. For product photos, social media graphics, screenshots, and old digital images though, the difference is often well worth it.
This guide covers everything you need to know about how to unpixelate images using an AI tool, what to expect from the results, and how to get the most out of the process.
What causes a pixelated photo?
Pixelation happens when an image does not have enough pixels for the size it is being displayed at. Each pixel gets stretched into a visible square block, and the whole image starts to look blocky and rough around the edges.
The most common cause is enlarging a small image. When you scale a 400-pixel-wide photo up to fill a 1200-pixel space, every pixel has to stretch to three times its original size and those squares become impossible to miss. Heavy compression is the second culprit. Saving a JPEG at very low quality or re-saving it multiple times strips out fine detail and creates blocky artefacts around edges.
Screenshots, images downloaded from messaging apps, and photos cropped too tightly are the usual offenders because all three reduce the number of pixels you have left to work with.
What Does It Mean to Unpixelate an Image?
To unpixelate an image means to reduce the blocky square pattern that appears when a picture does not have enough detail for its current display size. Pixelation usually shows up when a small image is enlarged, a photo is heavily compressed, or a screenshot is saved at low quality.
Traditional editing tools usually blur, sharpen, or resize the image. That can help a little, but it often leaves the photo looking soft or unnatural. AI unpixelation goes further by analyzing the visible shapes, edges, colors, and textures in the image, then generating a cleaner version with more natural detail.
That makes AI unpixelation useful for
- Low-resolution product photos
- Old family photos or scanned images
- Pixelated social media images
- Screenshots with rough edges
- AI-generated images that need cleaner detail
- Marketing graphics saved from compressed files
- Small web images that need to be reused at a larger size
Pixelation vs. Blur vs. Compression: What Are You Actually Fixing?
Not every low-quality image has the same problem. Identifying the issue helps you choose the right Pixelbin tool.
If the image is both pixelated and small, start with unpixelation, then upscale. If the image is not blocky but simply out of focus, start with sharpening instead.
Can you really fix a pixelated image using AI tool?
Pixelbin's Unpixelate Image tool is built for quick image cleanup. You do not need Photoshop skills, manual masks, or complicated sliders to get started.
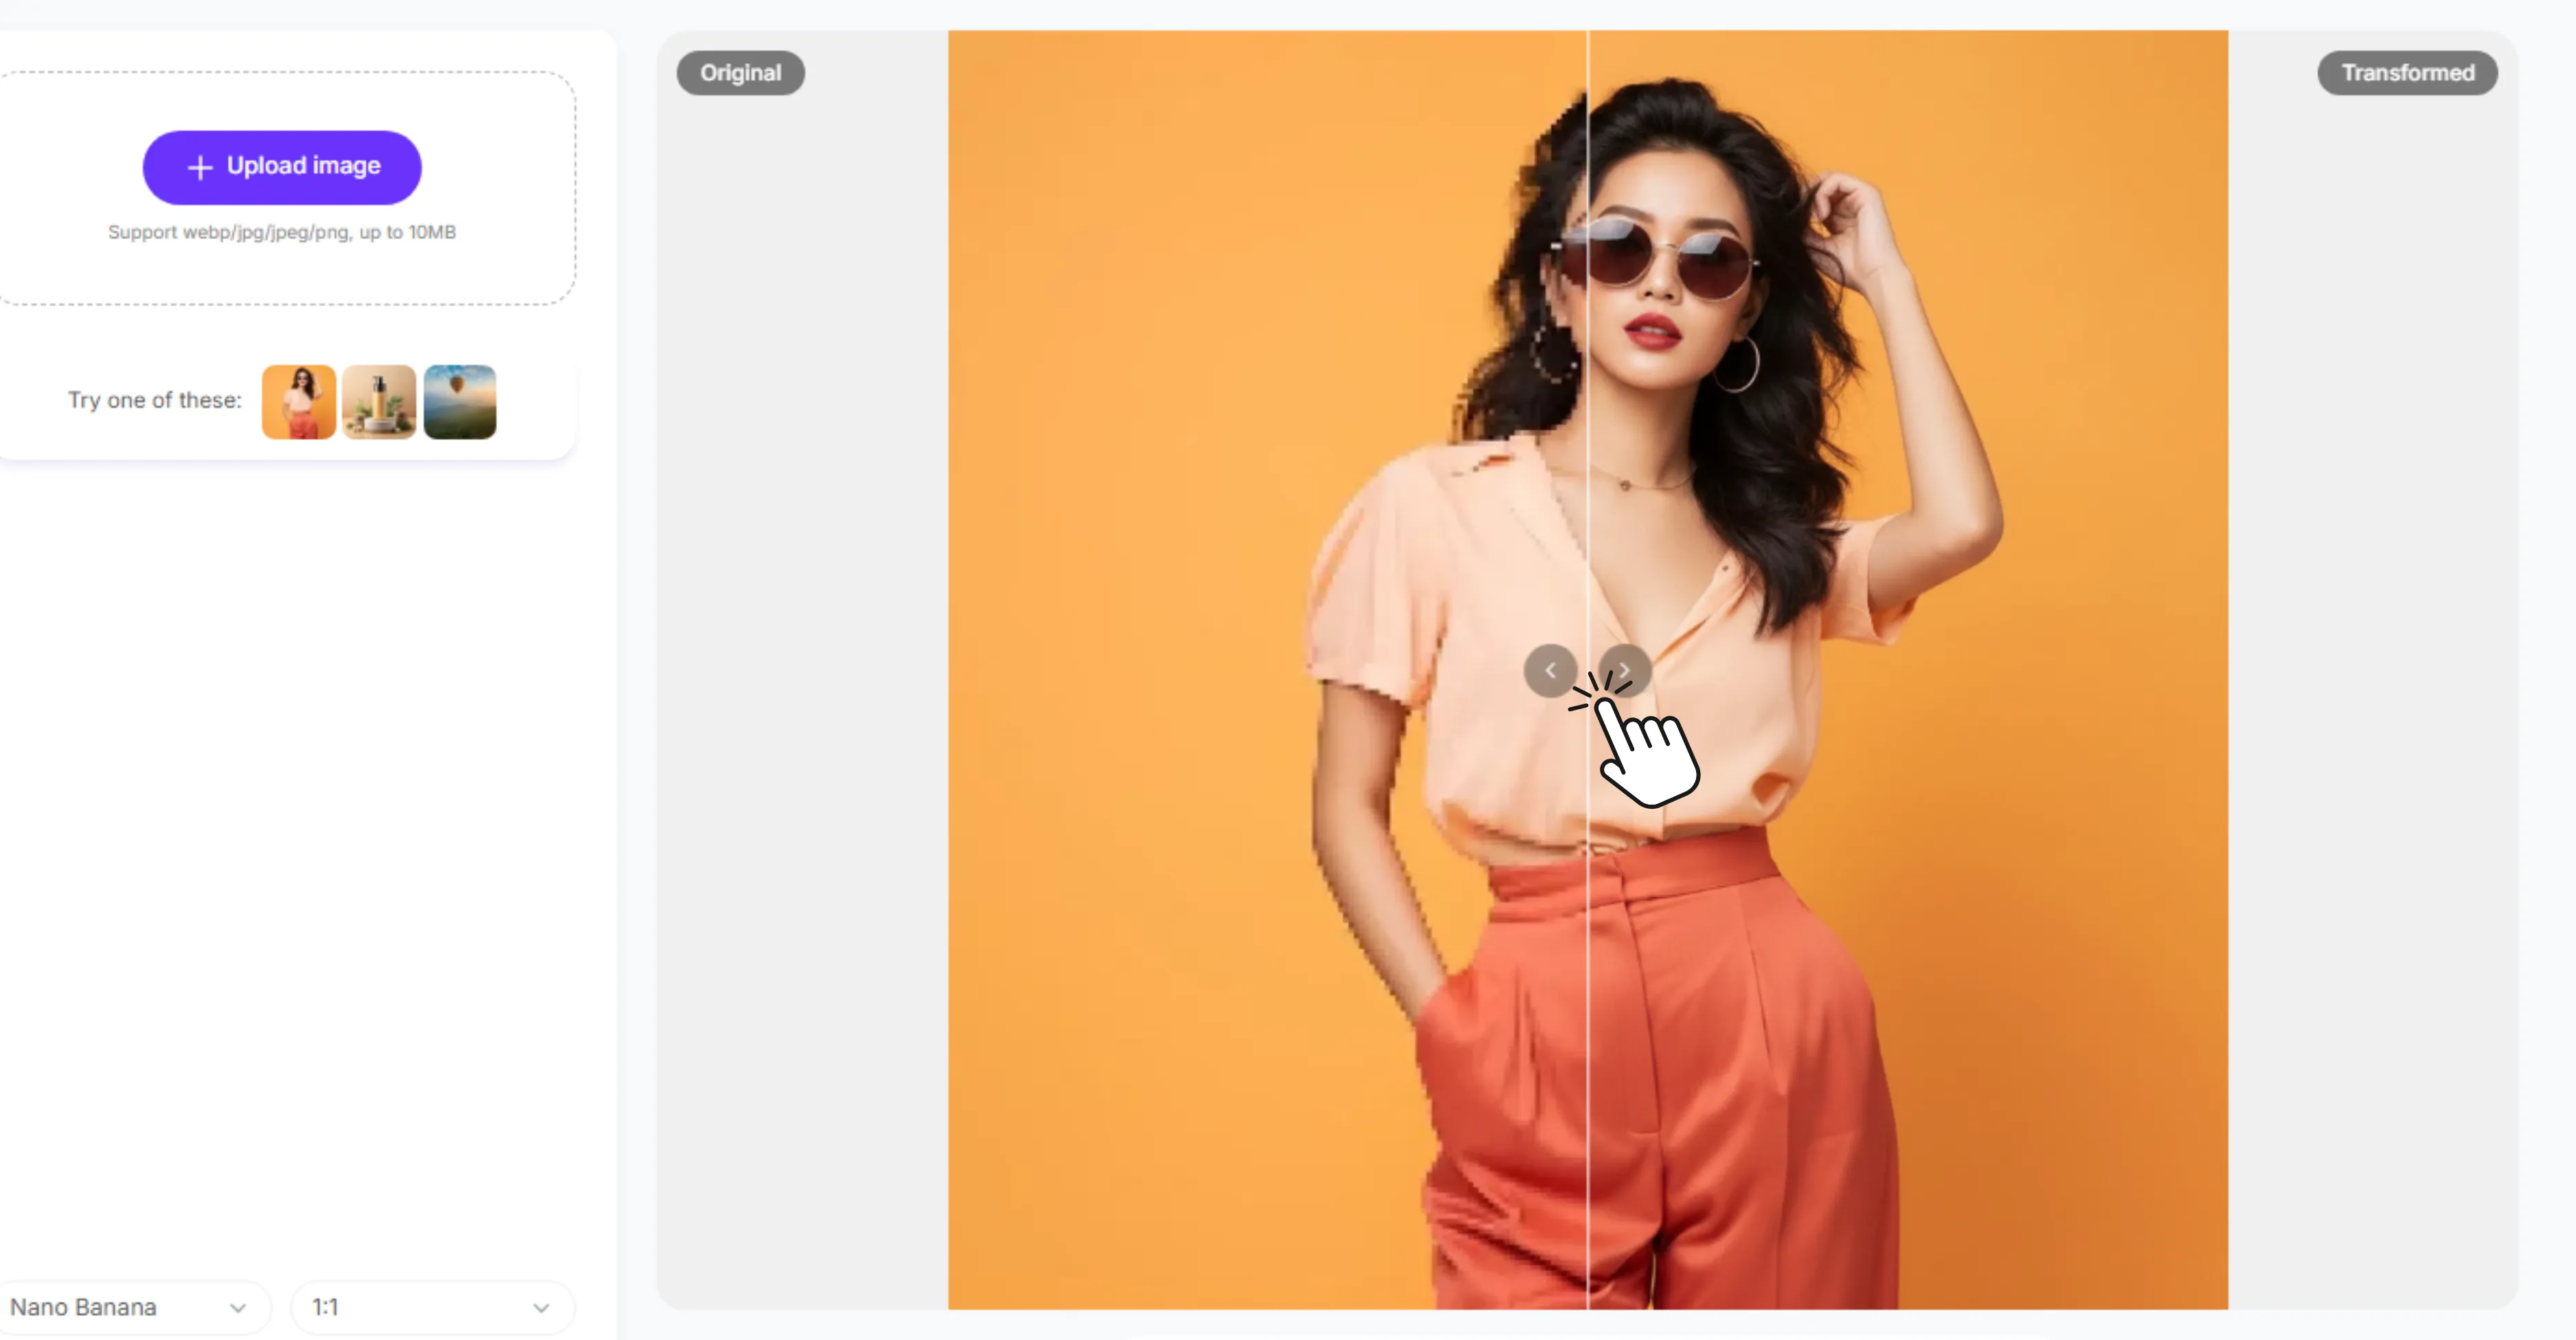
1. Open Pixelbin's Unpixelate Image Tool
Go to Pixelbin's Unpixelate Image tool and click the upload area. The tool supports common image formats including JPG, JPEG, PNG, and WEBP, with uploads up to 10 MB.
2. Upload the Pixelated Image
Choose the image you want to fix. For best results, upload the highest-quality version you have. If you have the same image from a camera roll, cloud backup, website download, and messaging app, use the least compressed file.
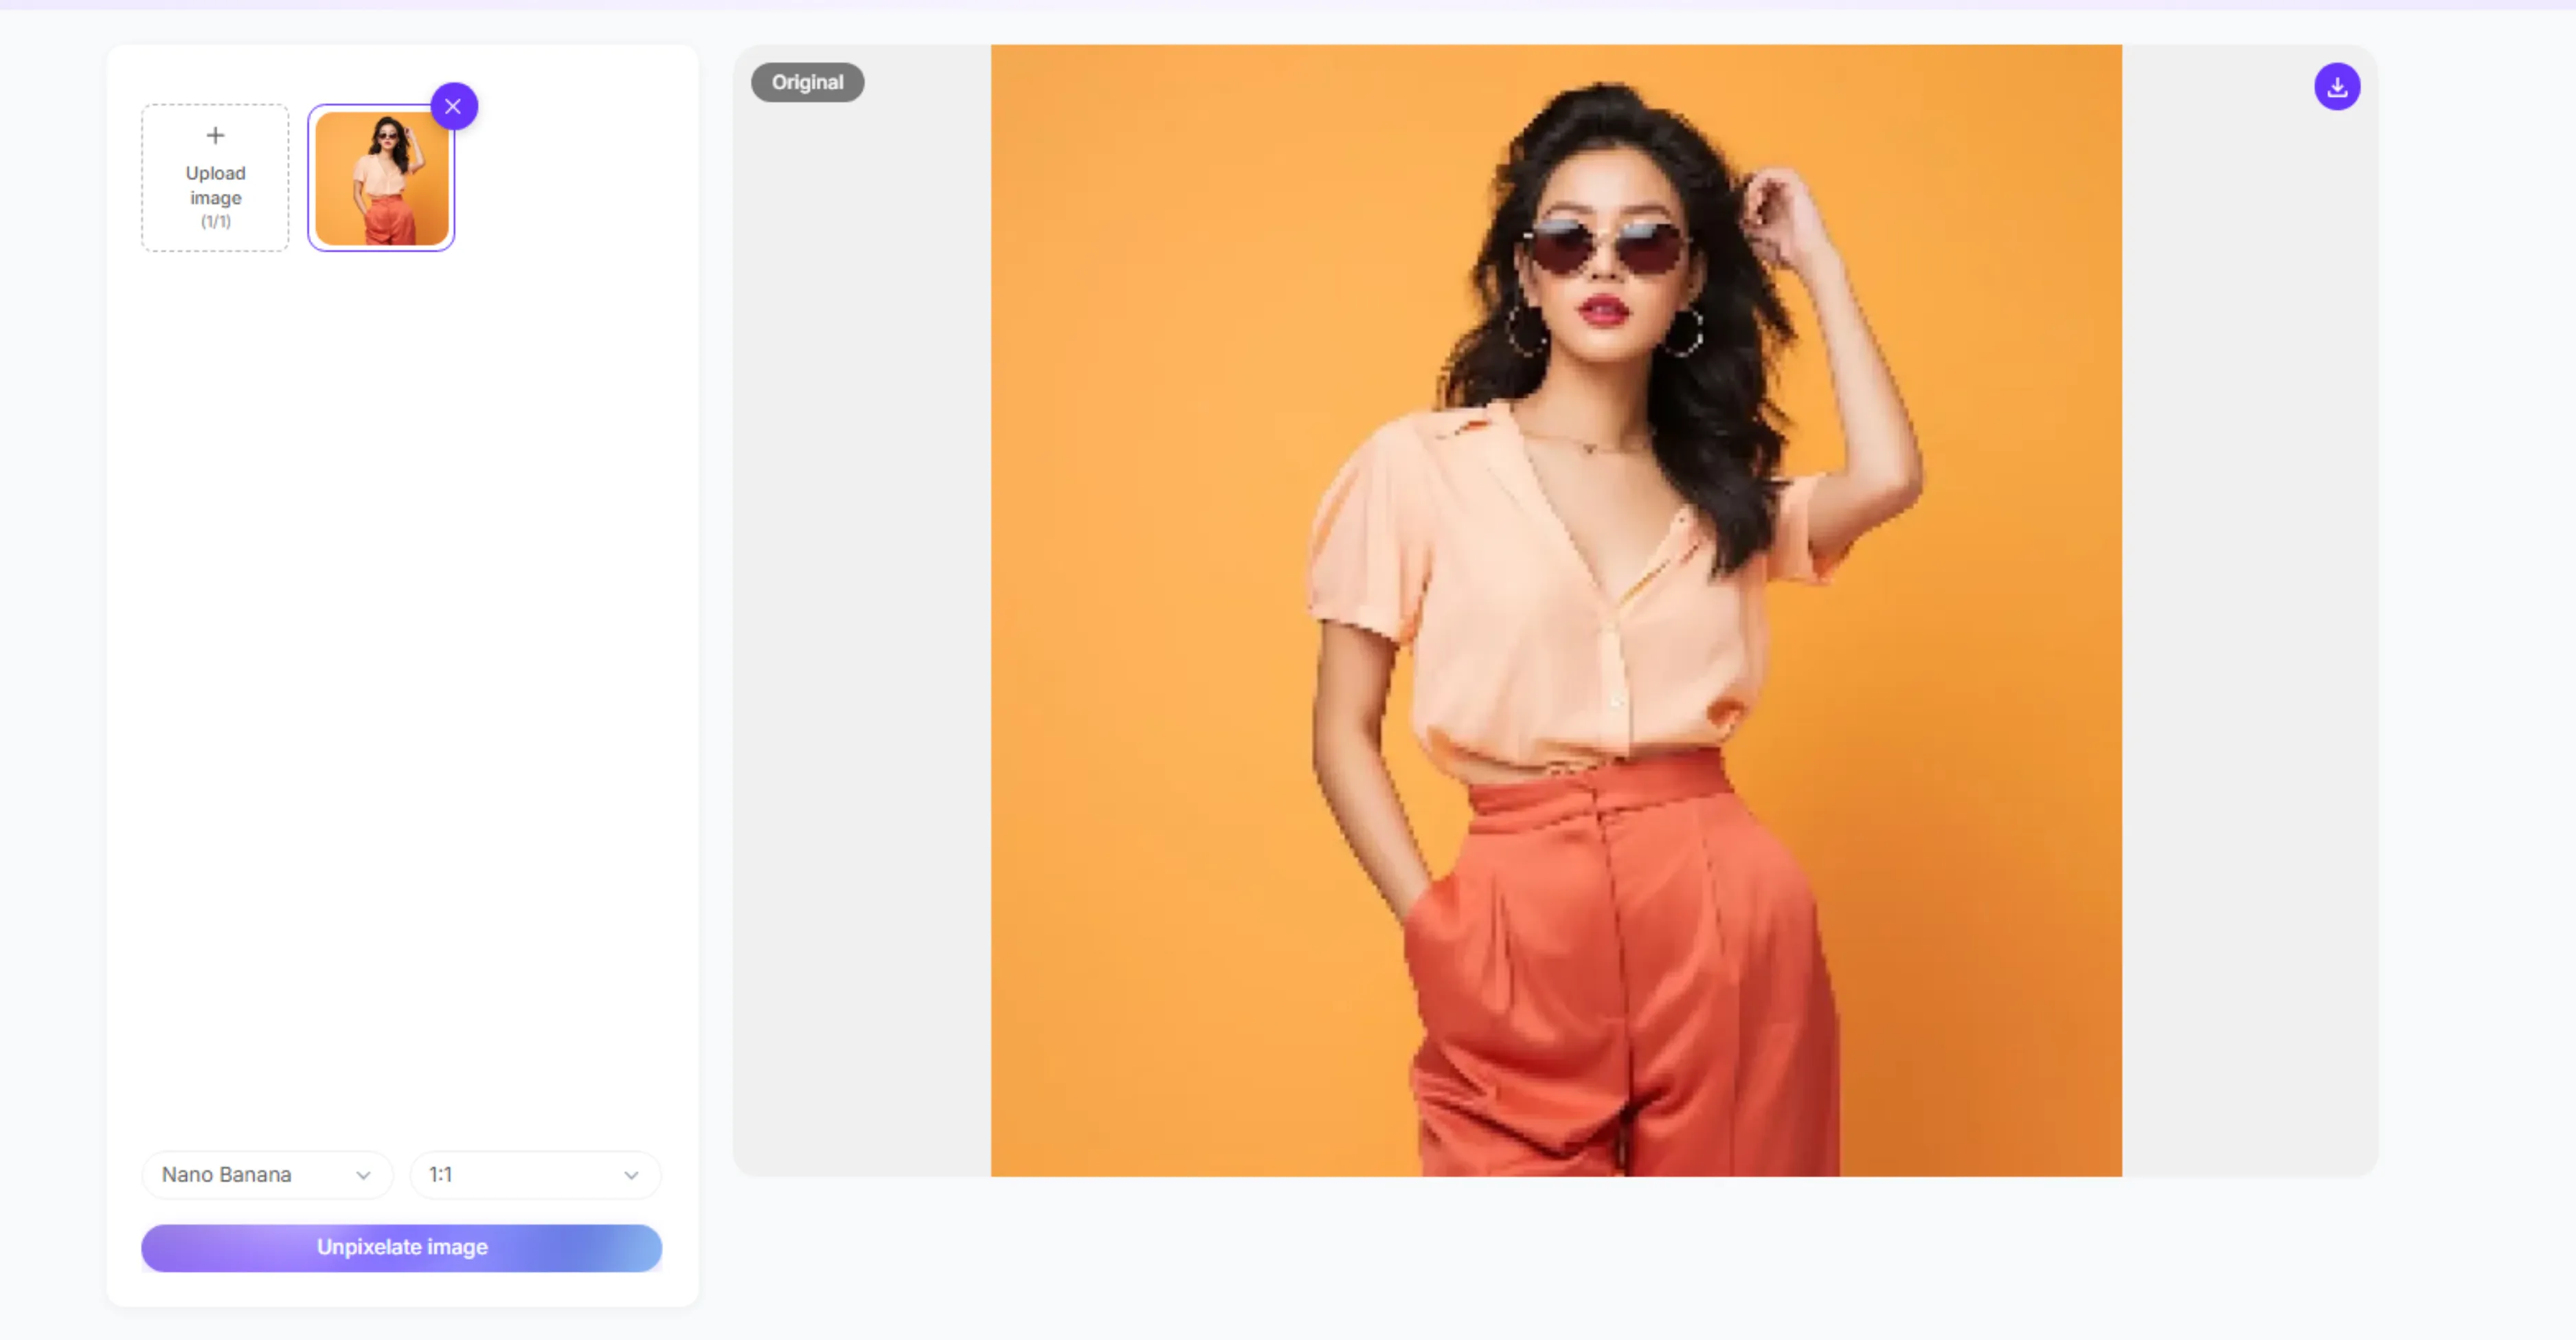
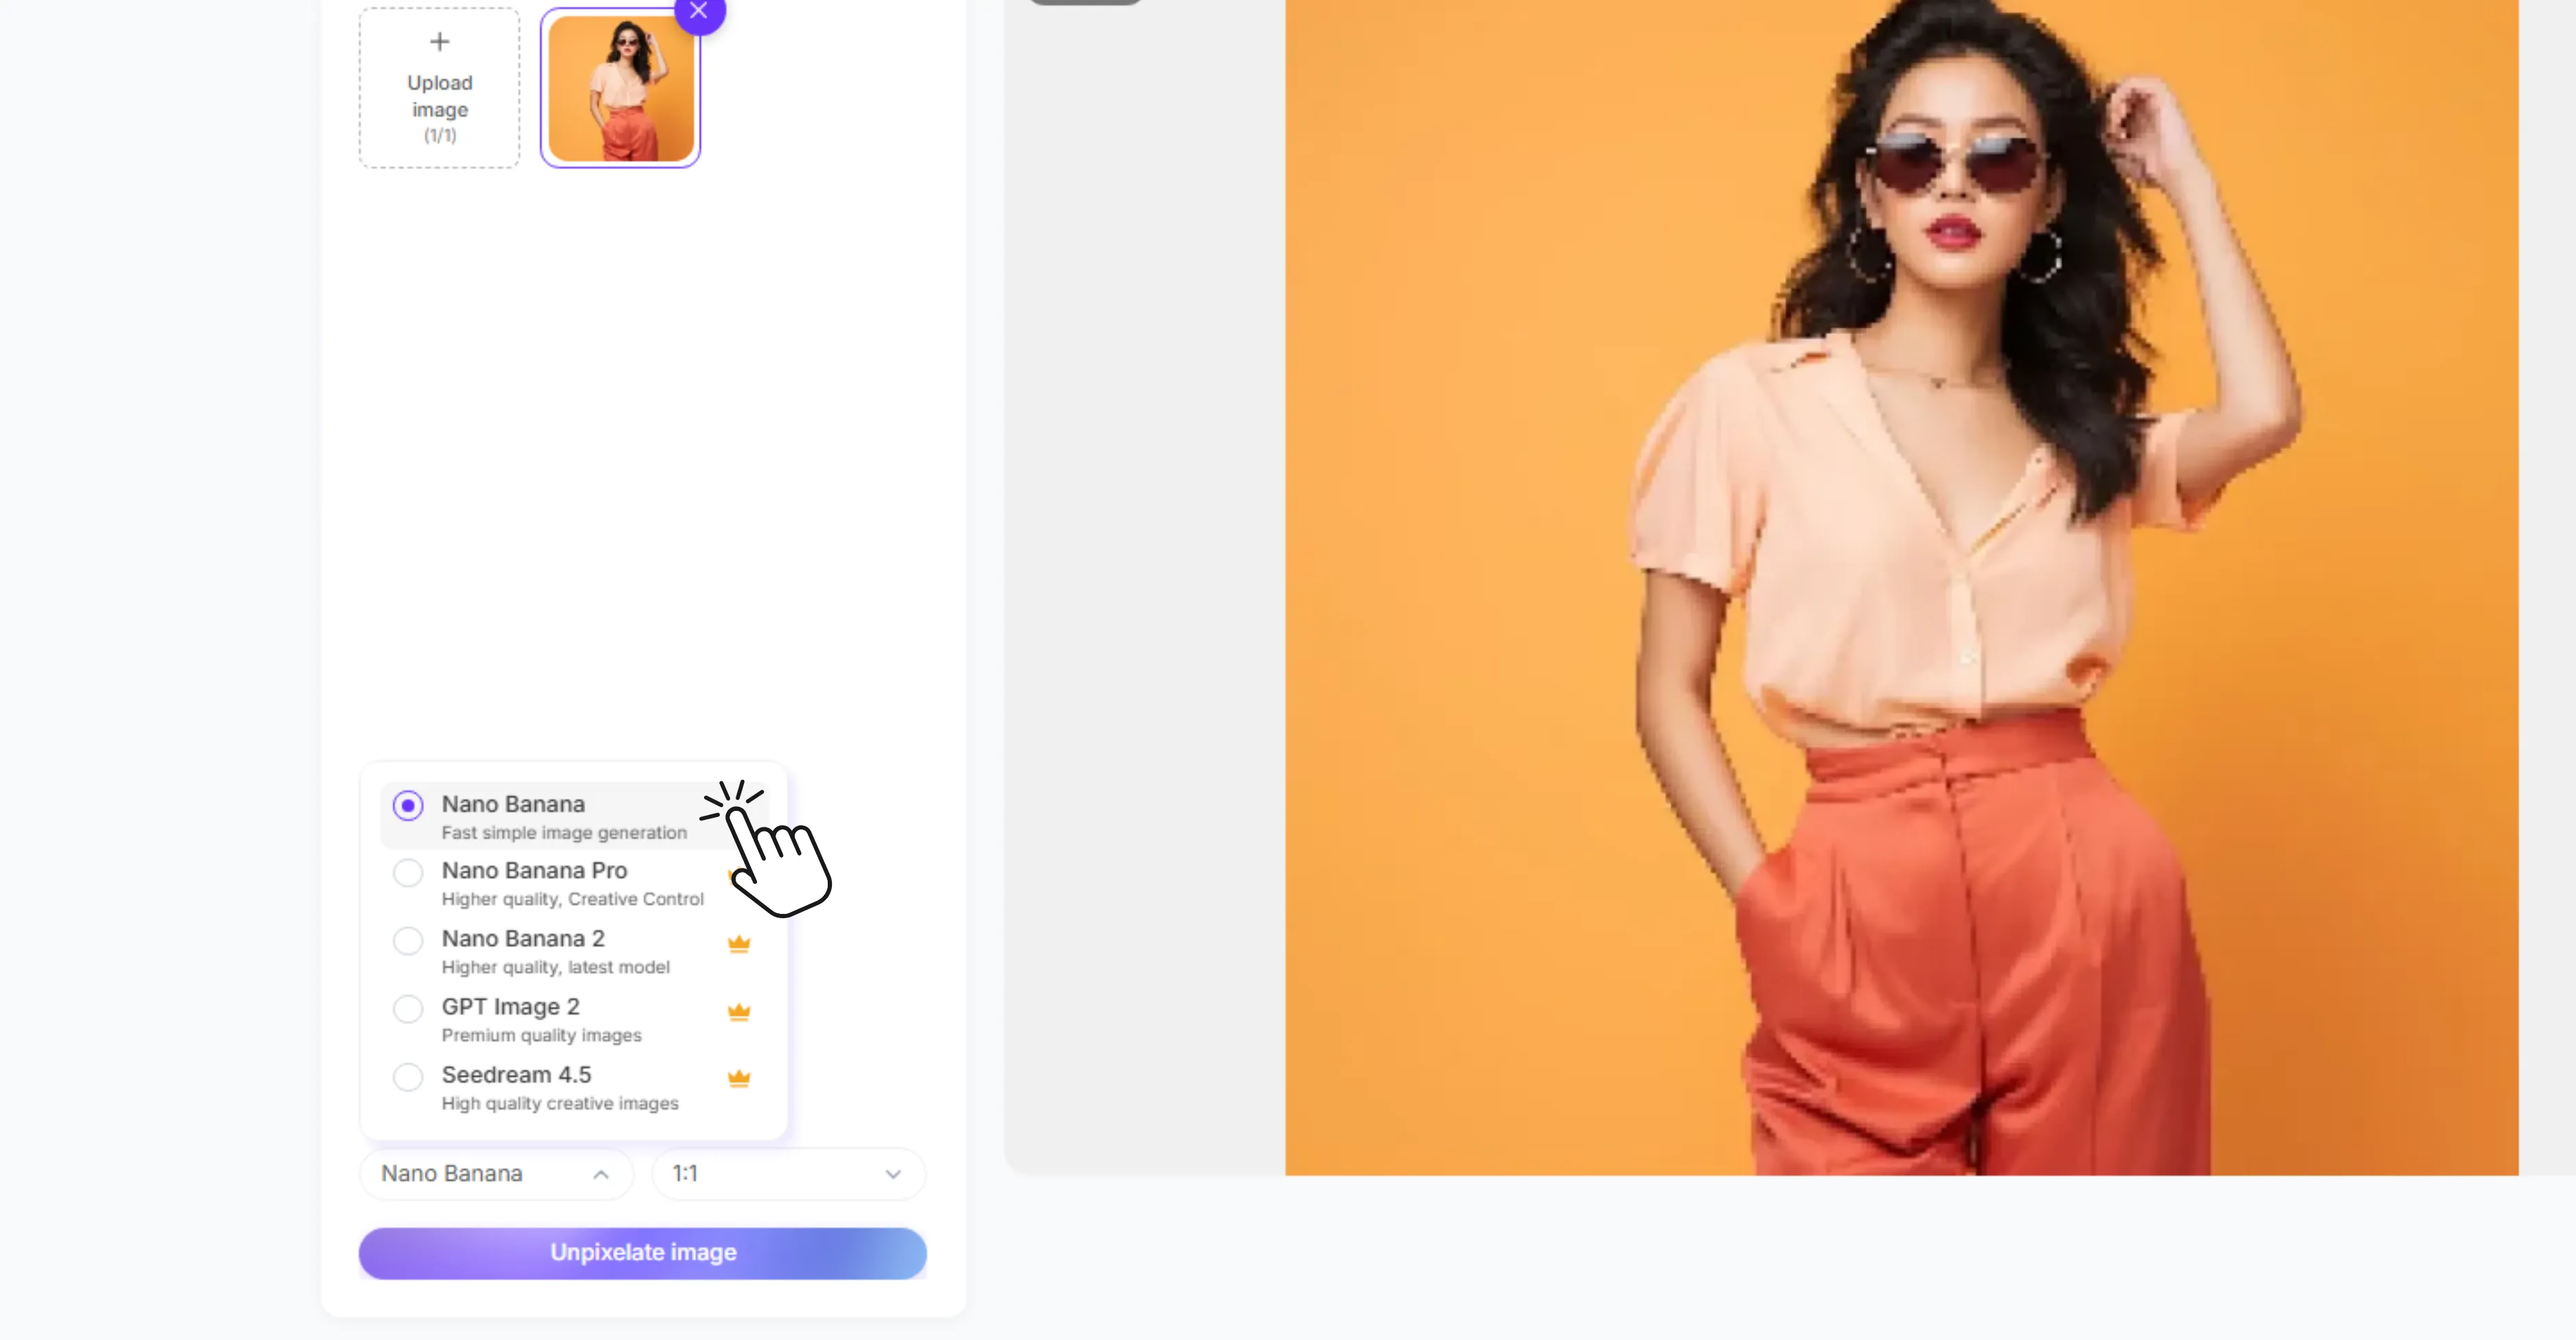
3. Choose the Available Settings
Depending on the current tool interface, you may see model and aspect-ratio options before processing. Keep the original ratio when you want to preserve the composition. Choose a different ratio only if you are preparing the image for a specific use, such as a square product photo, a vertical social story, or a wide banner.
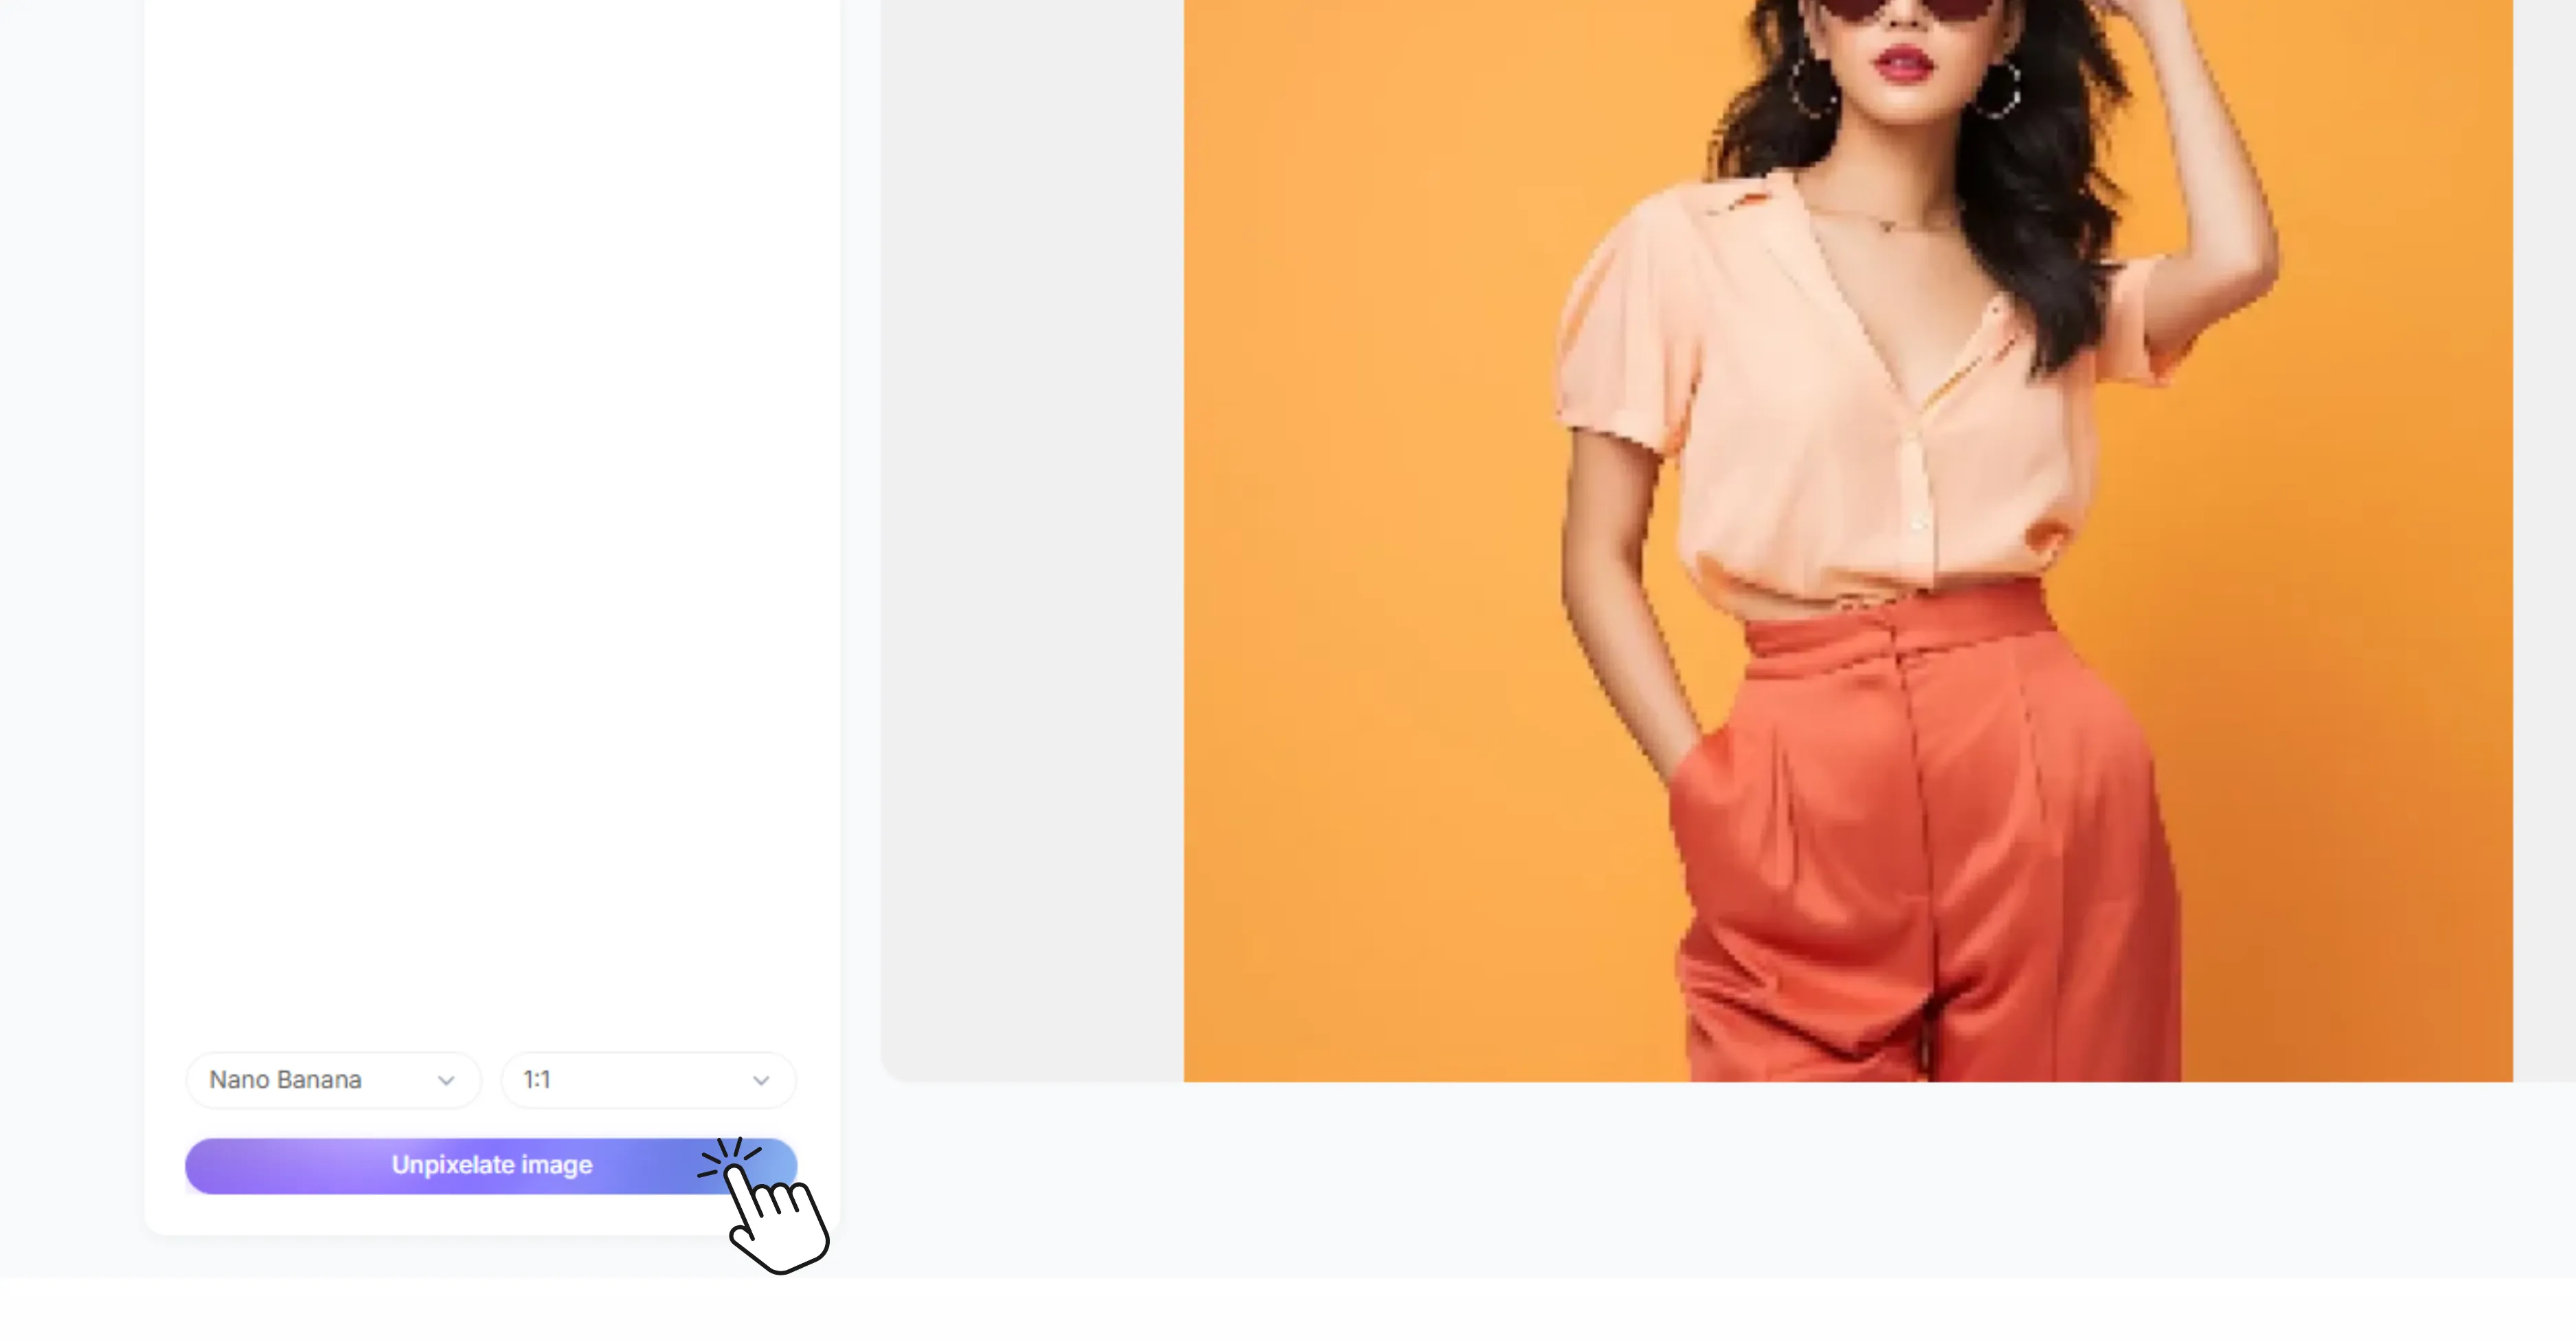
4. Click "Unpixelate Image"
Pixelbin processes the image automatically. The AI works to reduce blocky artifacts, smooth rough edges, and improve the overall clarity of the photo.
5. Compare the Original and Transformed Result
Use the side-by-side preview to check the result before downloading. Look closely at faces, product edges, text, logos, and fine textures. A good result should look clearer without looking plastic or over-sharpened.
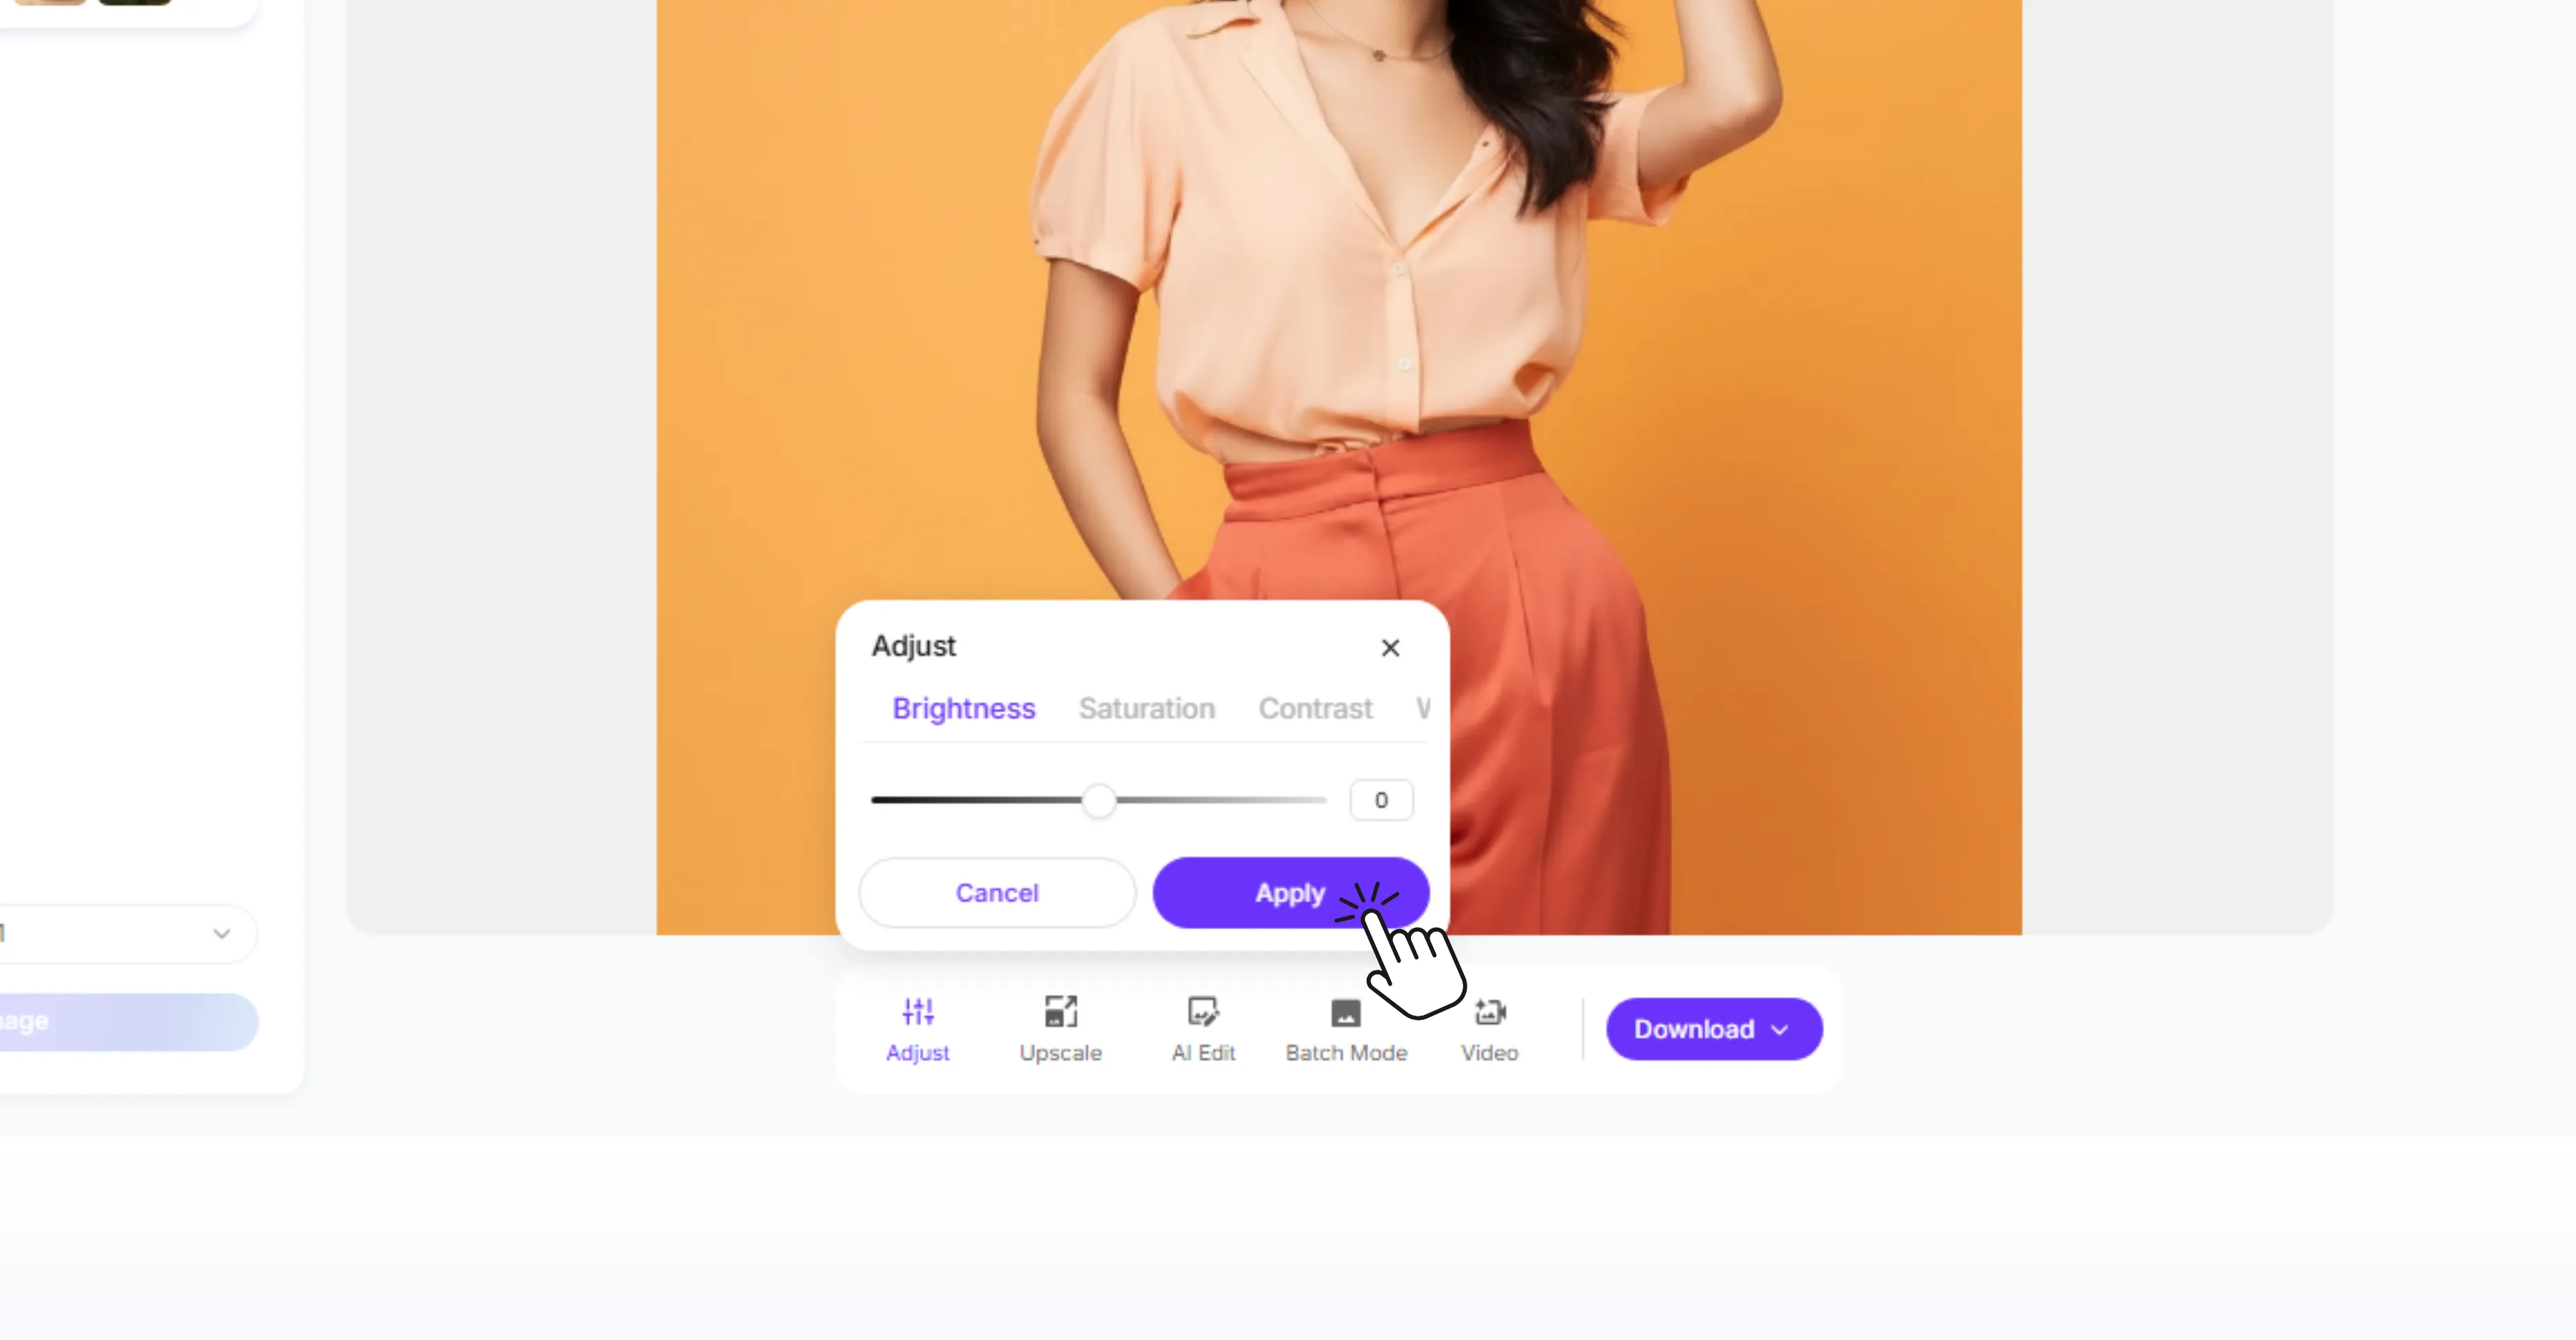
6. Refine the Image if Needed
After the image is processed, Pixelbin gives you options to continue improving the result. You can adjust brightness, saturation, and contrast, upscale the image for a larger output, use AI Edit for more specific changes, or prepare related creative assets from the same workflow.
For teams working with many images, Pixelbin also supports batch-oriented and API-led image workflows, which are useful for catalogs, marketplaces, marketing teams, and developers.
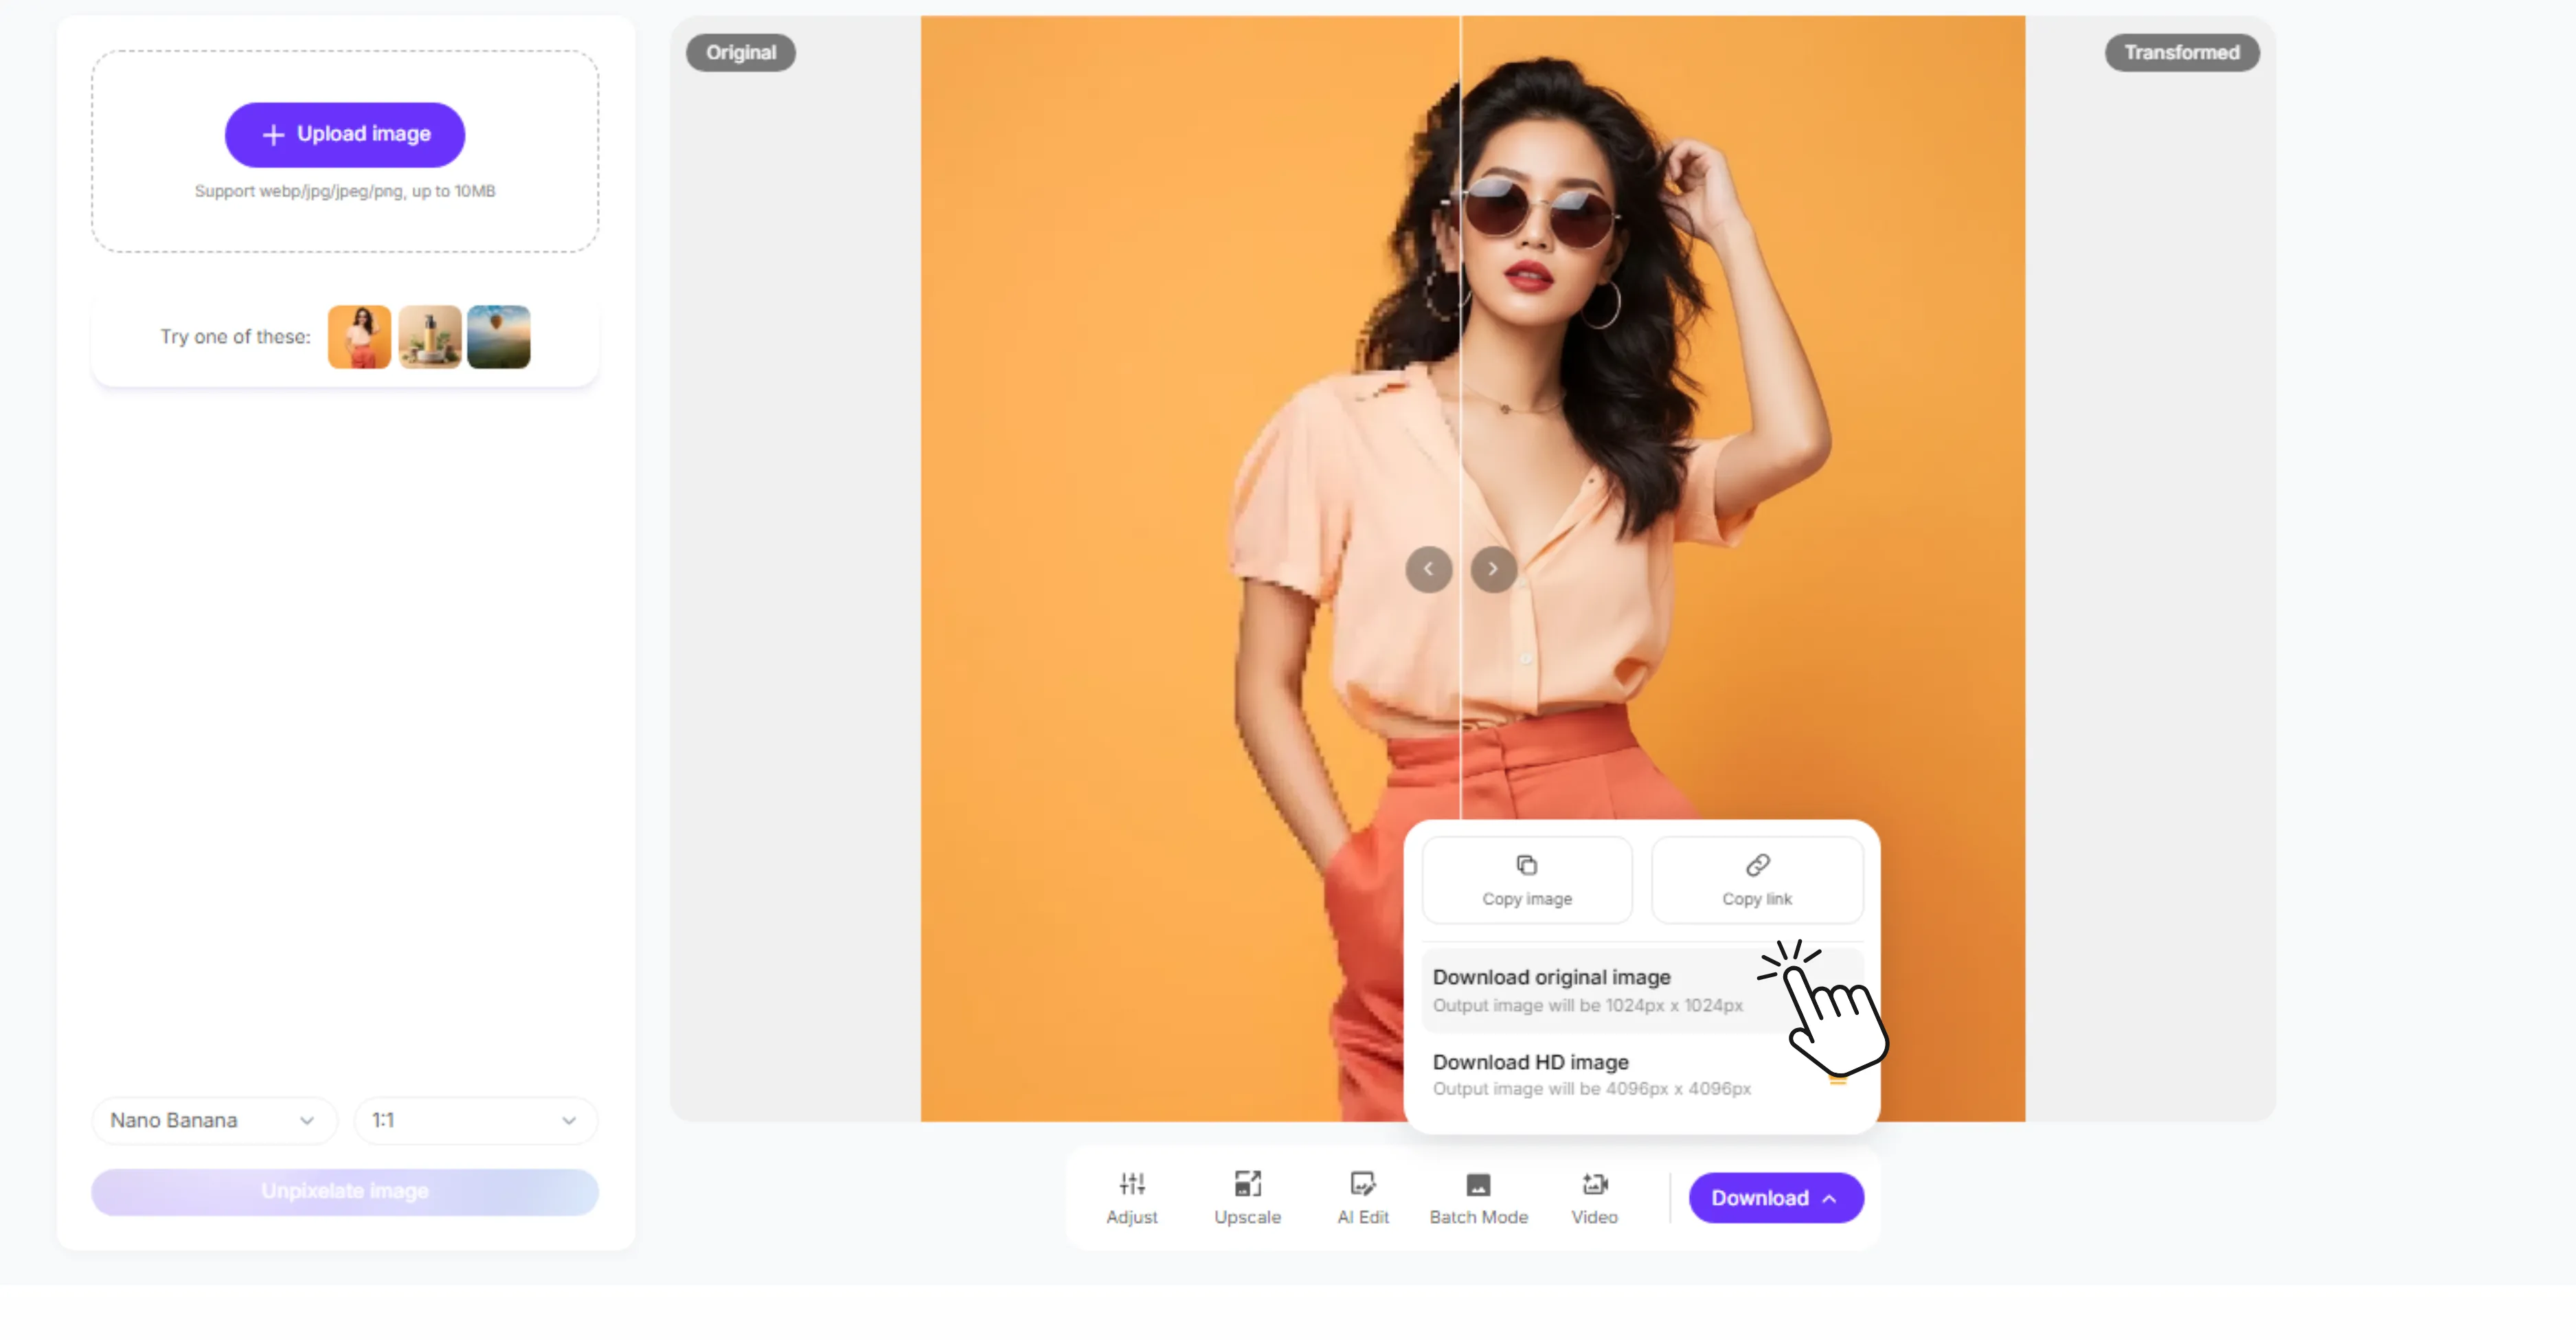
7. Download the Finished Image
Once the preview looks right, download the enhanced image. Use it for your product page, social post, presentation, print draft, personal archive, or design workflow.
Why Use Pixelbin to Fix Pixelated Images?
Pixelbin isn’t just a one-off depixelizer. It’s part of a full image and video editing suite, letting you enhance an image and continue editing it in the same ecosystem.
That integration is important because you can upload common web formats with no file conversion, preview the original and transformed images side-by-side, and apply additional tools such as upscaling, sharpening, AI editing and adjustments after the initial enhancement. You can prepare images for social media, eCommerce, creative campaigns and presentations. Teams can also look at batch processing and API workflows for larger image libraries.
That scaling ability is key for businesses. Fixing one personal photo requires a simple upload-and-download tool. But managing hundreds or thousands of product photos, marketplace images, thumbnails, or campaign assets requires a workflow that scales efficiently.
Best Situations to Fix a Pixelated Image With AI
AI unpixelation works best when the image still contains enough visual information for the model to understand the subject. You will usually get better results when the main object is visible, the image is not extremely tiny, and the original colors and shapes are still recognizable.
Images where AI delivers good results
- Product photos that turned blocky after resizing for a website or marketplace listing
- Social media images compressed by WhatsApp, Instagram, or messaging apps
- Old phone photos where the subject is still clearly visible despite low resolution
- AI-generated images with rough or jagged edges that need cleaning up
- Screenshots with pixelated icons, text, or UI elements
- Scanned photos that need tidying up before printing or sharing
Images where AI unpixelation has limitations
- Subjects that are only a few pixels wide in the original file
- Faces that are heavily obscured or intentionally blurred
- Text that is too small to read in the original image
- Logos that require exact brand colours and sharp vector accuracy
- Images with both severe blur and heavy pixelation combined
When to use the original file instead
- Legal documents where accuracy is non-negotiable
- Identity verification files that require source quality
- Medical images used for diagnosis or records
- Packaging and compliance-sensitive assets where every detail matters
- Brand logos where AI enhancement may alter proportions or colours slightly
AI unpixelation is genuinely useful for everyday images but it should never replace a high-resolution source file when accuracy and precision are critical to the end use.
How to fix pixelation in Photoshop (Additional tip)
1: Open your image in Photoshop
Go to File, then Open, and select the pixelated image you want to fix. Once it is open, go to Image and then Image Size to check the current resolution and dimensions before making any changes.
2: Increase the resolution
In the Image Size panel, increase the resolution to 300 PPI for print or 72 PPI for web. Make sure the Resample option is checked and select Preserve Details 2.0 from the dropdown menu for the best upscaling result.
3: Apply the Reduce Noise filter
Go to Filter, then Noise, then Reduce Noise. Adjust the Strength, Preserve Details, Reduce Color Noise, and Sharpen Details sliders until the pixelation visibly smooths out. Click OK when you are satisfied with the preview.
4: Use the Smart Sharpen filter
Go to Filter, then Sharpen, then Smart Sharpen. Increase the Amount gradually and keep the Radius low to recover edge detail without making the image look over-processed. This step brings back definition that the noise reduction may have softened slightly.
5: Save your file correctly
Go to File, then Export, then Export As. Save the file as a PNG for the highest quality output or as a JPEG with a high quality setting. Avoid re-saving as a low-quality JPEG as this will reintroduce compression artefacts and undo your work.
How to Avoid Pixelated Photos in Future
- Always use the original image file instead of screenshots, WhatsApp downloads, or copied versions.
- Take photos in the highest resolution your camera or phone allows.
- Avoid zooming in too much while taking a photo. Move closer to the subject instead.
- Don’t crop an image too tightly. Cropping removes pixels and can make the final photo look blocky.
- Save images in the right format. Use PNG for graphics, logos, and screenshots. Use JPG or WEBP for photos.
- Avoid repeatedly editing, saving, and re-uploading the same image. Each save can reduce quality.
- Don’t enlarge small images beyond their actual size. A tiny image will usually look pixelated when stretched.
- Use proper export settings when saving from design tools. Choose high quality or 2x export when available.
- Upload images in the recommended size for each platform, such as Instagram, Shopify, Amazon, or your website.
- Keep backup copies of original photos before resizing, compressing, or editing them.
- Use a good image compressor instead of random online tools that reduce quality too much.
- For product photos, ask suppliers or photographers for high-resolution files.
- For logos and icons, use vector files like SVG, AI, or EPS whenever possible.
- Check the image at 100% size before publishing. If it already looks blocky there, it will look worse after upload.
- If you need a larger version of a small image, use an AI image upscaler before posting or printing it.
Conclusion
Most pixelated photos are not as hopeless as they first appear. A good online unpixelate tool can clean up blocky edges, improve clarity, and make an old or low-quality image usable again. If the file is also too small, follow it up with image upscaling for a sharper, larger result.
For best results, always begin with the highest-quality version you have and avoid saving the same image again and again. Keep your original files safe so you do not run into the same issue later. To test it yourself, upload your photo to Pixelbin’s unpixelate image tool.
FAQs
Upload your image to Pixelbin's Unpixelate Image tool, click the unpixelate button, wait for the AI to process the file, compare the before-and-after preview, and download the improved image. For best results, start with the highest-quality version of the image you have.
Pixelbin offers a free way to try the Unpixelate Image tool online. Availability, credits, and download options can vary by plan or account status, so check the current tool page and pricing page before publishing exact limits.
Pixelbin's Unpixelate Image tool supports common web image formats including JPG, JPEG, PNG, and WEBP. The current tool page lists uploads up to 10 MB.
No. Unpixelating focuses on reducing blocky pixel artifacts and improving visible clarity. Upscaling increases the image's dimensions, such as 2x, 4x, or 8x. If an image is both pixelated and too small, you may need both steps.
AI may make a pixelated face look clearer, but it cannot guarantee an accurate reconstruction of the real person. Use AI-enhanced faces for personal or creative restoration, not for identification, verification, or evidence.
Yes. Pixelbin can help clean low-resolution or pixelated product photos before they are used in eCommerce listings, ads, catalogs, or marketplace content. For the most accurate product detail, start from the original supplier or studio file whenever possible.

.webp)

.webp)


