
Summary
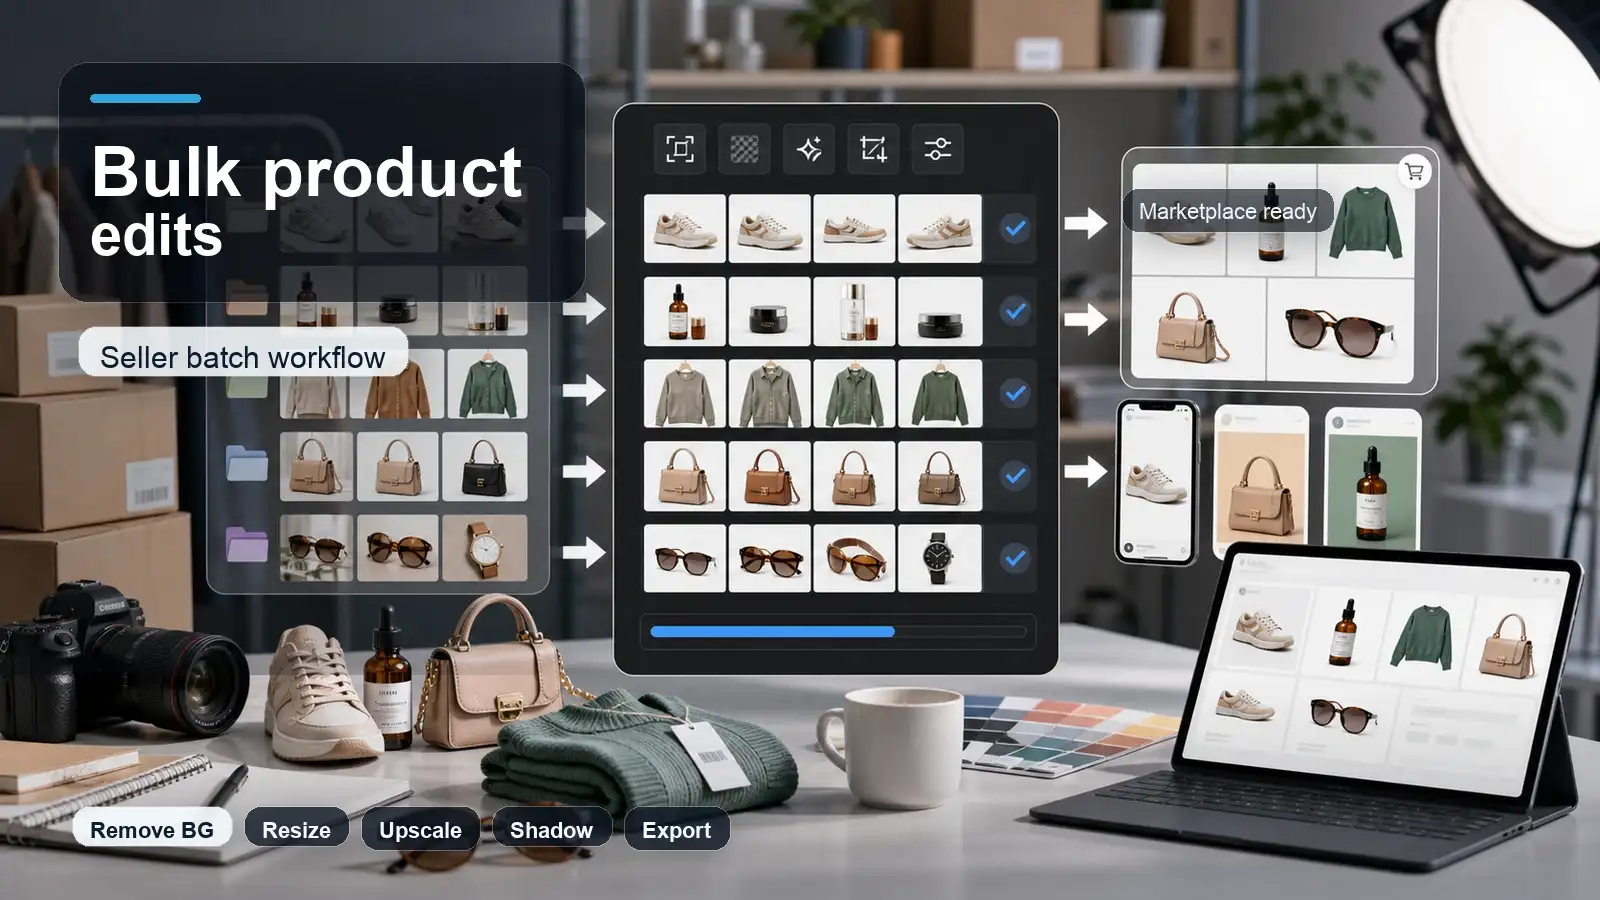
Tired of editing product photos one by one? Implementing a bulk editing workflow is the ultimate time-saver for online sellers. Instead of wasting hours on repetitive tasks, you can easily batch edit product images, including background removal, resizing, and upscaling in just a few clicks. With Pixelbin, you simply upload your product photography, apply consistent transformations, and download the entire batch instantly. This fast, streamlined process ensures a professional, cohesive storefront that builds customer trust. Stop editing manually and scale your e-commerce business with efficient bulk image processing today!
Introduction
If you sell online, you already know that image editing rarely stops at one photo. A new arrival, a seasonal refresh, or a marketplace expansion can dump dozens of product images on your desk at once, and editing them one by one is slow, repetitive, and easy to get wrong. This guide walks you through a bulk editing workflow for sellers from start to finish, using the same logic whether you sell on one marketplace or ten. By the end, you will know what this workflow actually is, why it matters for your catalog, the exact steps to follow, the common tasks worth batching, the mistakes to avoid, how to pick a tool for the job, and how Pixelbin puts all of it into practice. Let's start with the basics.
What is a bulk editing workflow?
A bulk editing workflow is a step-by-step process for editing multiple images or listings together instead of one at a time. Instead of opening each photo in its own editing session, you group similar images, apply the same transformation across all of them, and export the finished set in one pass.
For example, you have fifty product photos from a recent shoot, and every one of them needs a plain white background and a resize to fit a marketplace's image guidelines. Editing each photo individually means fifty separate rounds of cropping, resizing, and background work, done one after another until the whole batch is finally ready. A bulk image editing tool removes that repetition. You upload all fifty at once, apply the background and resize settings across the entire group, and download the finished batch in a fraction of the time manual editing would take.
Batch editing vs. bulk editing
Before going further, clear up two terms that get used interchangeably throughout this space, since understanding the difference makes the rest of the workflow easier to follow.
In short, batch editing is usually how sellers achieve bulk editing. You break your larger catalog into manageable batches, and each batch gets processed together using the same set of transformations. From this point on, we will use both terms closely, since in day-to-day seller workflows, they point to the same practical outcome of editing many images efficiently instead of one at a time.
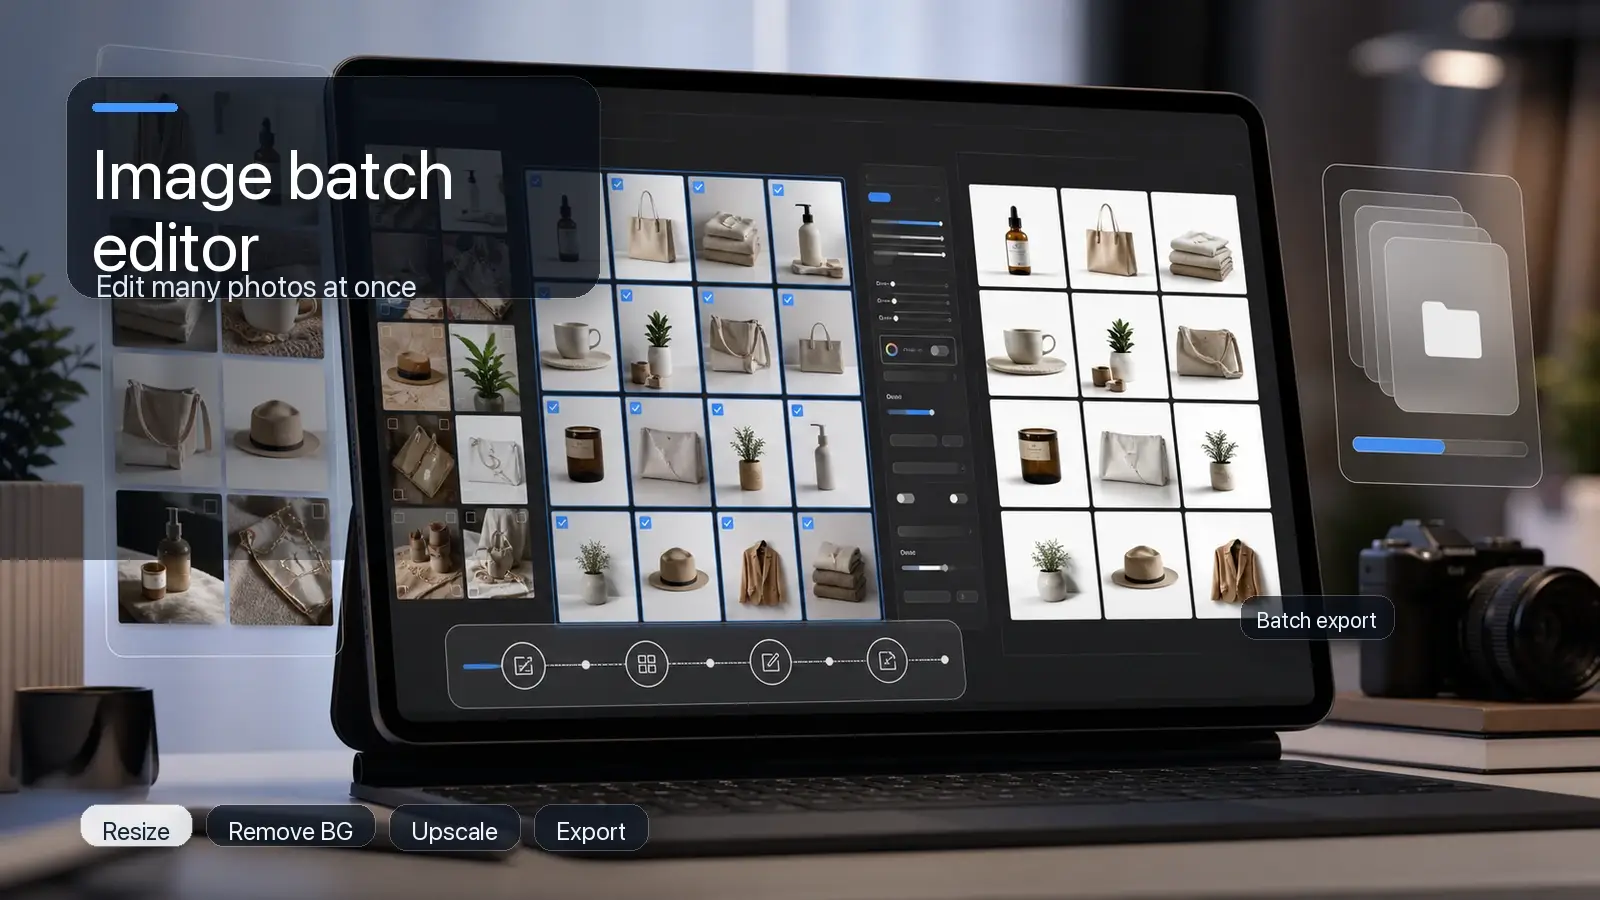
Steps to edit product images faster in batches (with Pixelbin)
Follow the process below to run a bulk editing workflow with the help of Pixelbin's Batch Editor, built for exactly this kind of task. But before that, spending a few minutes organizing your files helps prevent inconsistent results and reduces the chances of having to repeat the process later.
Before creating your first batch:
- Organize images into folders based on product category, campaign, or marketplace.
- Group together photos with similar lighting, angles, and backgrounds so the same transformations work consistently across every image.
- Rename files using meaningful names or SKU numbers to make them easier to identify after editing.
- Remove duplicate or unwanted images before uploading.
- Keep an untouched backup of the original files in case you need to apply different edits later.
- Confirm your target marketplace's image requirements, including dimensions, file format, and background specifications.
If your images will appear in Google Search, it is also worth reviewing Google's image best practices for creating high-quality visuals that load efficiently and provide a better user experience. A little preparation upfront leads to a smoother workflow and more consistent results once editing begins.
1. Log in to your Pixelbin account and open the dashboard. This is your starting point before any editing begins, and it sets up everything that follows.
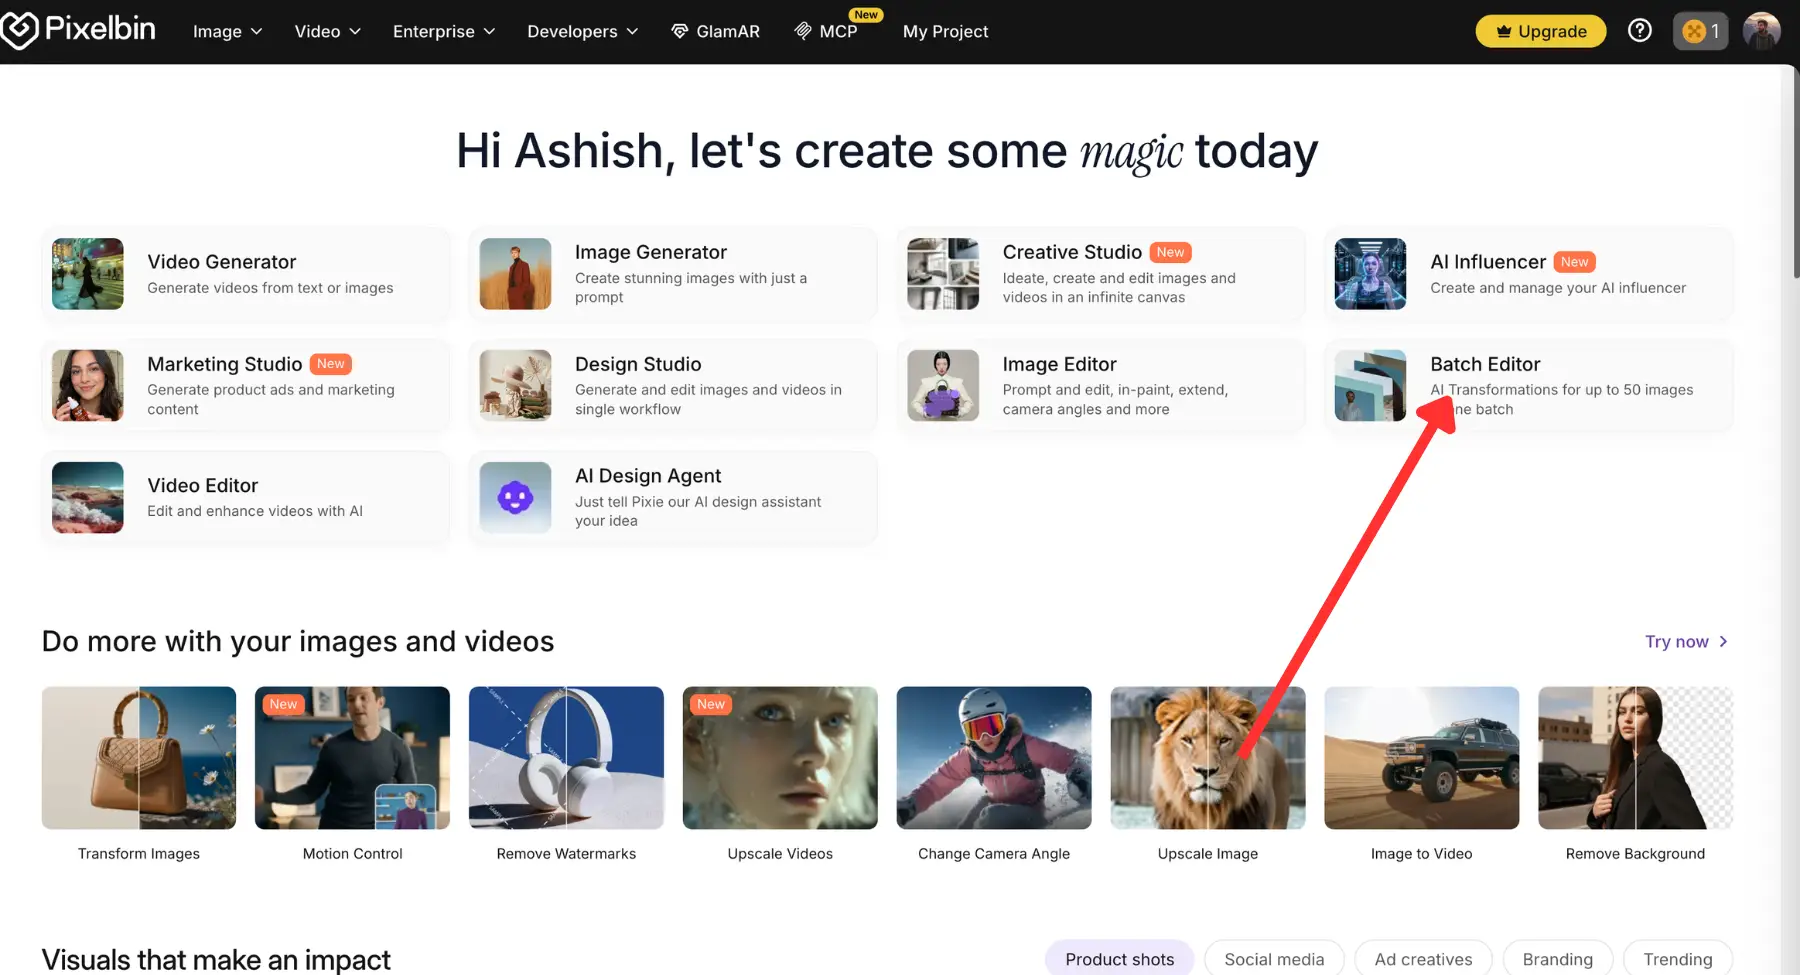
2. Upload files/folder. Upload your files or an entire folder, or simply drag and drop your images into the upload area. The batch image editor in Pixelbin supports up to fifty photos in one batch, and it accepts common formats including JPEG, PNG, and WEBP. Once uploaded, the editor displays a running count, such as 13 out of 50, so you always know how many images are currently in your batch. In this example, we have used 11 images at a time:
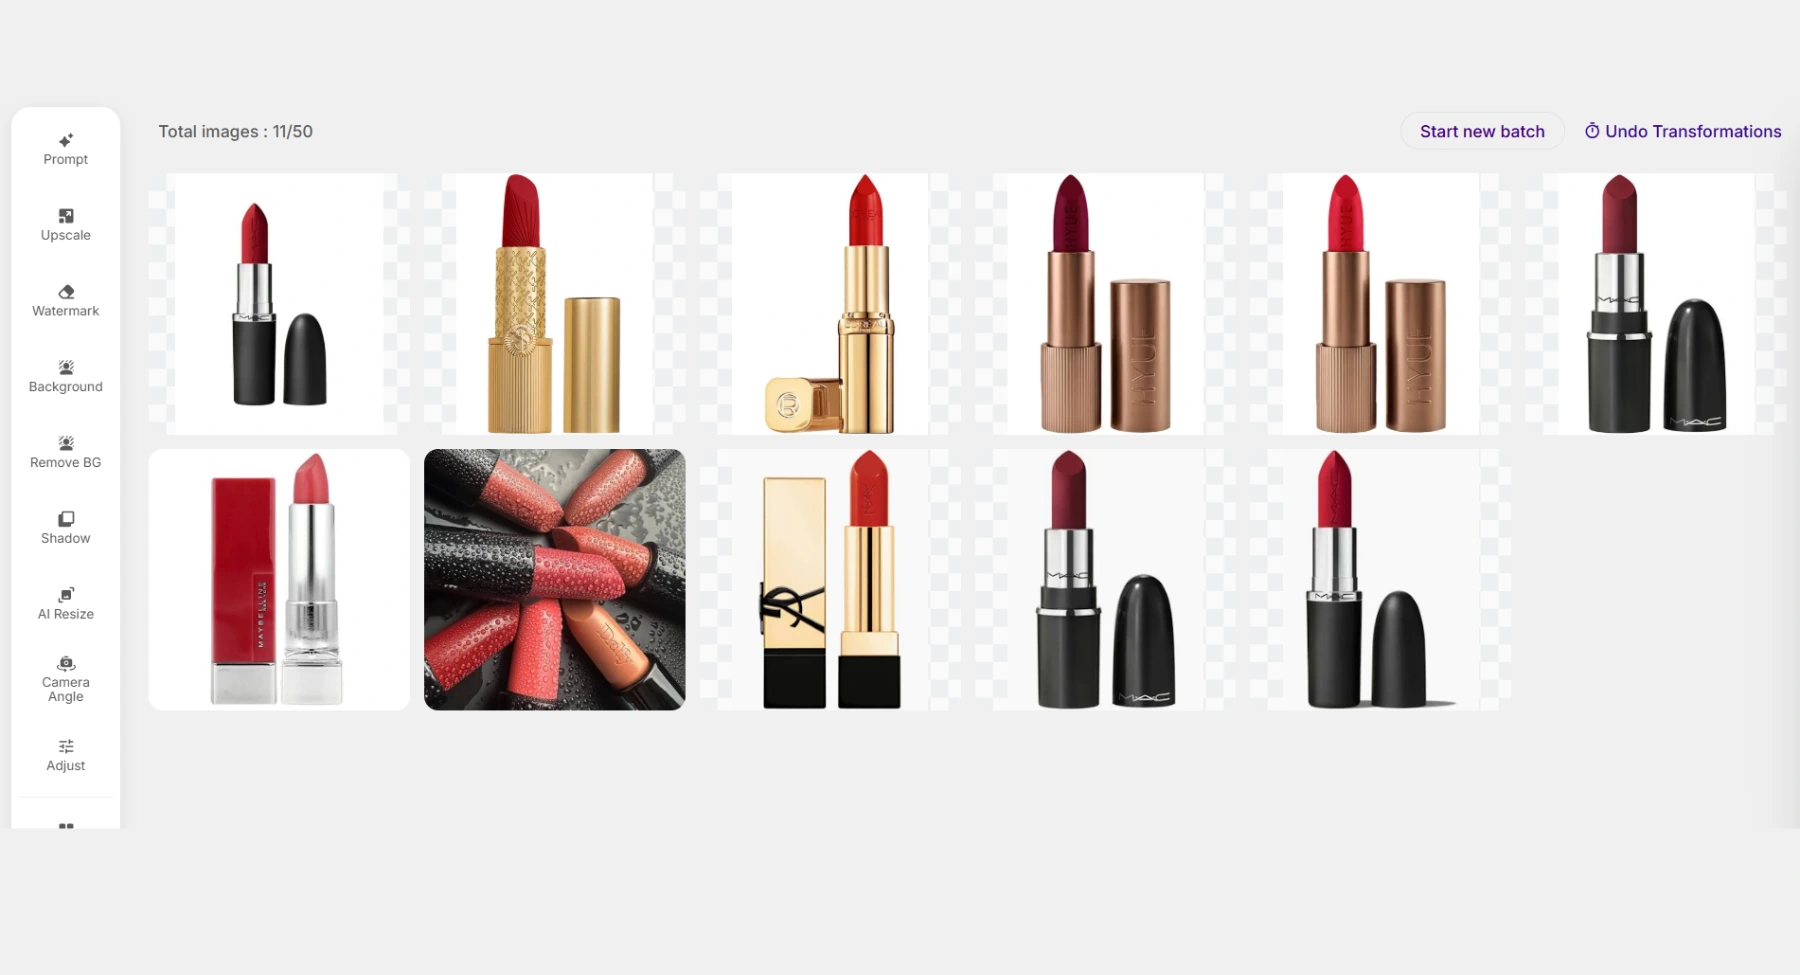
Figure out exactly what needs to happen, whether that is a resize, a background removal, an upscale, a watermark addition, a shadow effect, or a template change. This decision determines which option you will select once your images are uploaded, so it helps to know your target edit before you begin uploading anything.
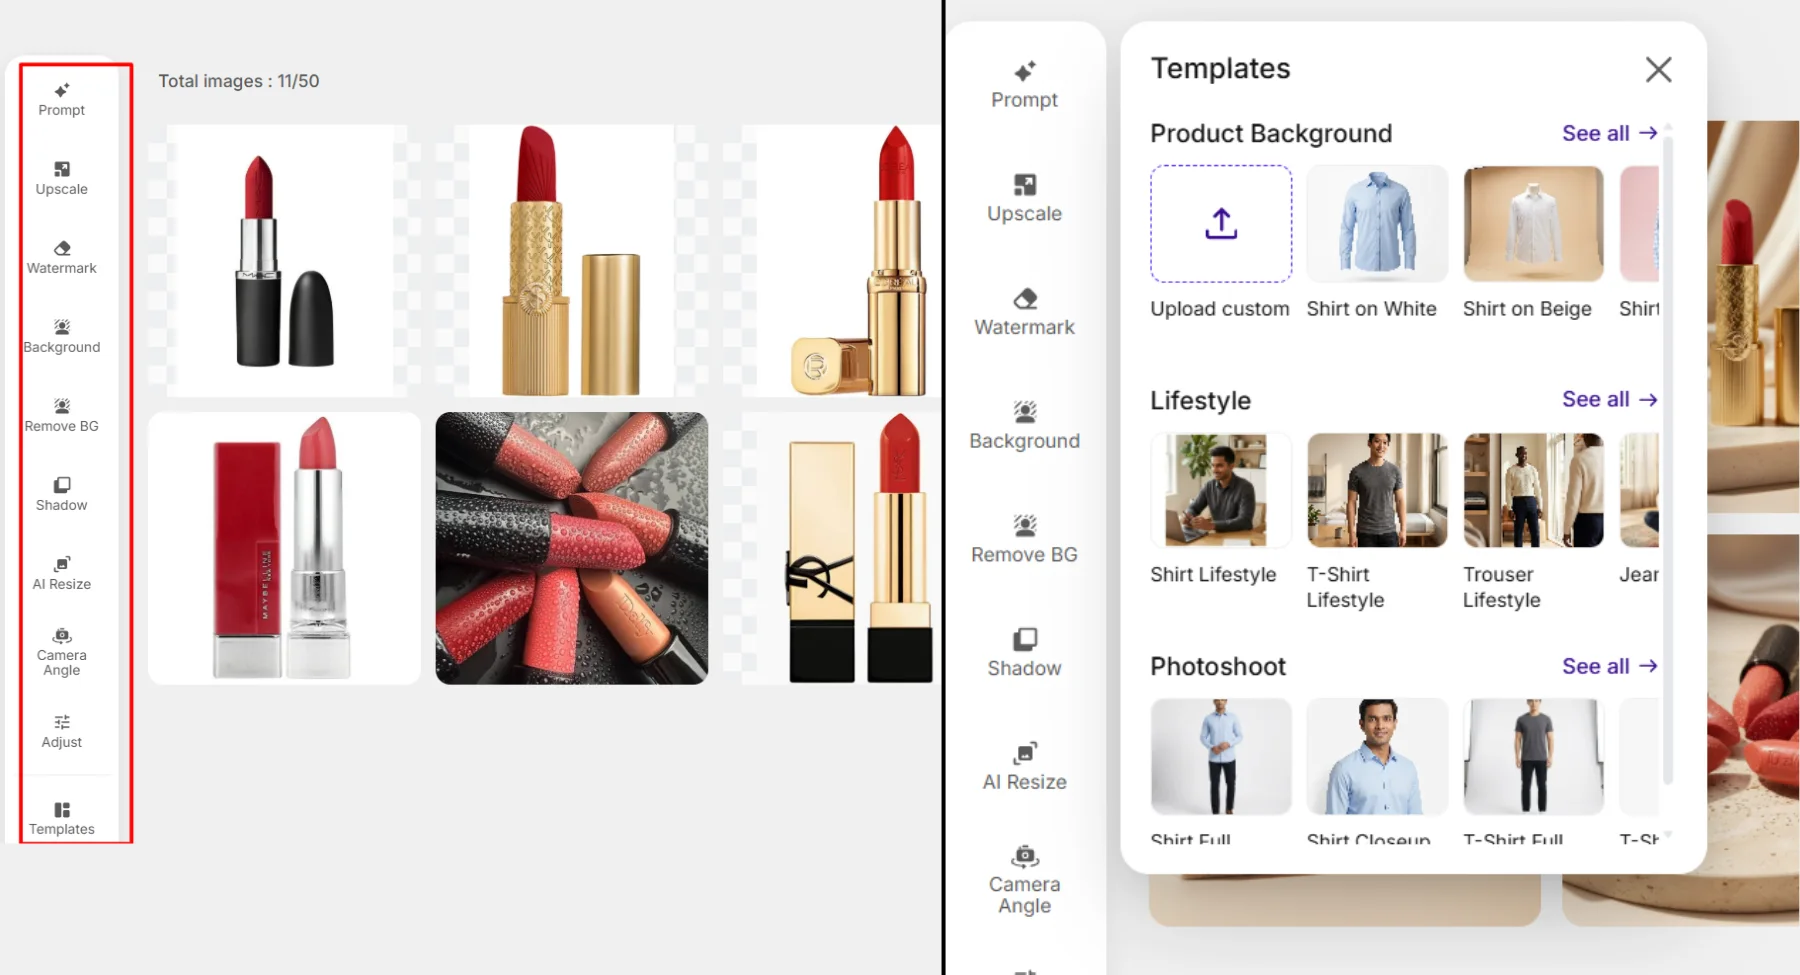
3. Apply the transformation to all images in the batch. This is where the real-time savings happen. Instead of repeating the same steps fifty times, you set the transformation once and apply it across the entire group. From the left panel, choose from options including Prompt, Upscale, Watermark, Background, Remove BG, Shadow, AI Resize, Camera Angle, Adjust, Templates, and Upload.
If you want a styled look rather than a plain edit, the Templates option includes choices like product background templates, lifestyle looks, and photoshoot-style settings, all of which can be applied across the whole batch in a single step.
In our example, we have used a prompt to change the background. Once you’ve added the prompt, click on “Apply” and wait for the AI to add the new changes:

4. Preview the output to check quality, alignment, background, and consistency. Always take a moment to review the results before moving forward. Batching saves time, but a quick check catches anything that might need a second pass before you commit to the final export. Review the processed images directly in the Batch Editor interface before downloading, checking that backgrounds, alignment, and quality look consistent across the set. Here’s how the final image looks:
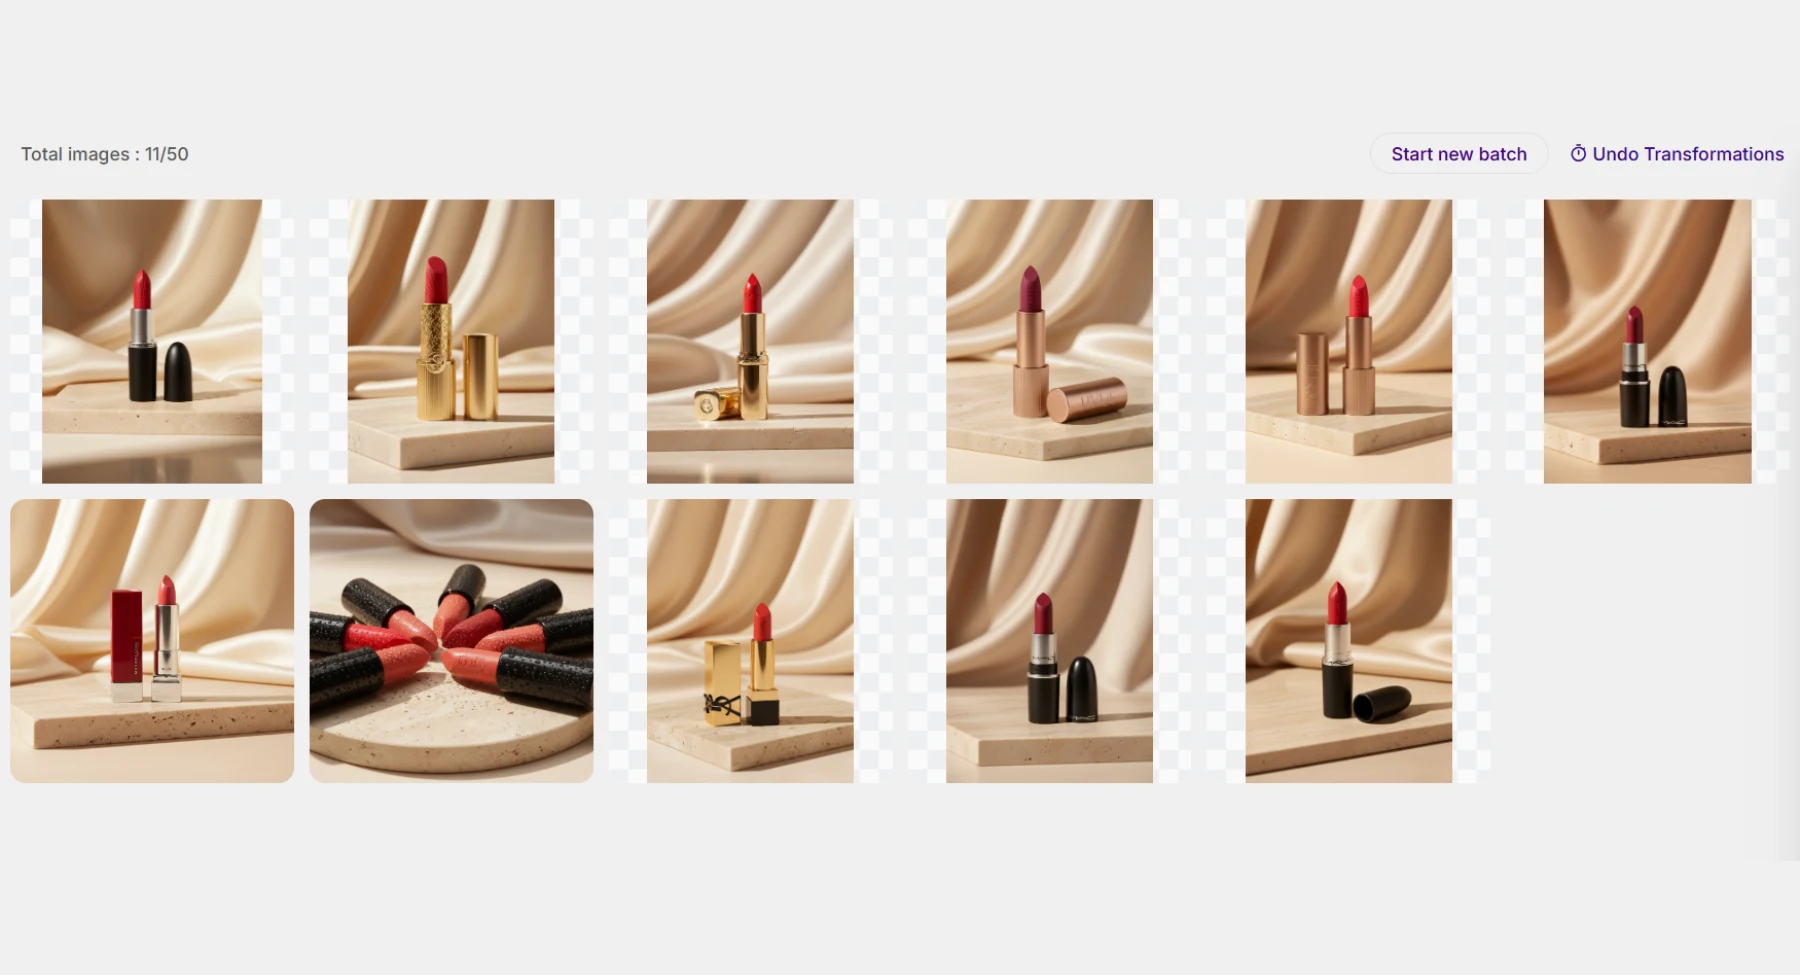
5. Use the Undo Transformations option, available at the top of the interface alongside Start New Batch and Download, to reverse a step and reapply settings if needed. If something is off, such as an alignment issue or a background that did not process correctly, adjust and reapply rather than starting the entire batch from scratch.
6. Download the final images and organize them by campaign, SKU, product type, or marketplace. Keeping your files organized at this stage saves confusion later when you are ready to upload them somewhere.
7. Upload the edited images to the marketplace, website, ad platform, or content calendar. This is the final step, where your prepped images actually go live wherever they are needed, whether that is a marketplace listing, your own website, an ad set, or a scheduled social post.
You can see from the above how the bulk editing workflow for sellers moves from a general concept into something you can actually execute in a few clicks, without needing separate mental models for the workflow and the tool. Once this sequence becomes routine, the next thing worth protecting is the quality of the output itself, which is where a few common mistakes tend to creep in. We will discuss this later in this article.
Why sellers need bulk editing: benefits & advantages
Now that the terminology is out of the way, it is worth asking what this workflow actually changes for a seller day to day. If you manage even a modest catalog, a bulk editing workflow is not a nice-to-have. It directly affects how much time you spend on image prep and how consistent your storefront looks to shoppers browsing your listings.
Time savings are the most obvious benefit, and usually the reason sellers look into this workflow in the first place. Editing one photo at a time, even quickly, adds up fast once you are dealing with dozens or hundreds of SKUs. A workflow that applies the same edit across a whole group cuts that time down significantly, which frees you up for tasks that actually grow the business, like sourcing, pricing, or customer service.
Consistency matters just as much as speed, and it is the benefit shoppers actually notice, even if they cannot name it. When every product photo in a category shares the same background, the same lighting adjustment, and the same crop ratio, your storefront looks organized and professional. That impression forms before a shopper ever reads a product description, which is exactly why consistency deserves as much attention as speed.
Faster marketplace uploads happen naturally once your images are pre-formatted to spec. Many marketplaces enforce specific size, format, and background requirements, and a bulk workflow lets you prepare an entire batch to meet those requirements before you even start the listing process, instead of getting flagged and having to redo individual images later.
Campaign readiness is another practical benefit that connects directly to time savings. When a sale or seasonal campaign comes up, you often need a fresh batch of images with a specific look, such as a holiday background or a promotional banner treatment. A bulk workflow means you are not scrambling to edit each asset one by one under a tight deadline right before launch.
Fewer manual mistakes round out the list, and this one ties back to consistency. When you edit image by image, it is easy to miss a step on one photo or apply a slightly different setting by accident, especially late in a long editing session when attention starts to slip. A batch process reduces that risk because the same transformation logic is applied uniformly across the whole set, cutting down on the small inconsistencies that quietly add up over a large catalog and often only get noticed once a customer points them out.
This workflow is useful across a wide range of roles, including ecommerce operators, D2C brands, marketplace sellers, catalog teams, and independent designers, all of whom deal with repetitive image tasks on a regular basis. With the reasons for using this workflow clear, the next logical question is which specific tasks actually benefit from batching.
When should you use a bulk editing workflow?
A bulk editing workflow becomes valuable the moment repetitive image tasks begin slowing down your business. Instead of treating image editing as something you do after every product shoot, think of it as a repeatable process you can apply whenever large numbers of images need the same treatment.
You will benefit most from a bulk editing workflow when:
- Launching a new product collection with dozens or hundreds of SKUs.
- Refreshing existing product images to match updated brand guidelines.
- Preparing images for seasonal campaigns such as Black Friday, Diwali, or holiday sales.
- Expanding to multiple marketplaces with different image specifications.
- Replacing backgrounds, adding watermarks, or resizing an entire catalog at once.
- Updating older product photos to improve consistency without manually editing each image.
The more frequently you perform the same edits across multiple files, the greater the return you will see from a structured bulk editing workflow.
Common bulk editing tasks
Not every edit needs to happen one photo at a time, and knowing which tasks are good candidates for batching can save a meaningful number of hours every month.
Here are the tasks sellers batch most often:
Background removal is probably the single most requested task. Whether you need a clean white background for a marketplace listing or a transparent background for use across multiple platforms, this is something you can apply across an entire batch using a tool built to remove the background from image files automatically, without manually tracing edges on each photo.
Resizing comes up constantly, since images often need to meet different specifications across platforms. A single product photo might need one size for your website, another for a marketplace listing, and a third for social media posts. An image resize tool that works across batches means you are not manually resizing the same photo three separate times for three separate destinations.
Upscaling matters when your source images are lower resolution than what a platform requires, or when you want to bring older product photos up to a sharper standard without reshooting. An AI image upscaler applied across a batch lets you improve quality across dozens of images at once, which is especially useful for sellers working with an older photo library.
Watermark handling is useful for sellers who want their branding visible across product images or who need to add or remove watermarks depending on where an image is being used, such as a marketplace that does not allow visible branding on listing photos.
Shadow adjustments help product photos look more grounded and realistic, especially for apparel, footwear, and accessories, where a soft shadow beneath the item adds depth without requiring a full reshoot under studio lighting.
Color and brightness adjustment ensures photos taken under slightly different lighting conditions still look consistent once they sit next to each other on your storefront, which matters a lot when a shoot spans multiple days or locations.
Templates speed up the process even further by letting you apply a pre-built look, such as a lifestyle background or a photoshoot-style setting, to a whole batch at once, giving your listings a polished feel without custom design work for every single item.
Marketplace format compliance wraps a lot of the above together. Many platforms have exact requirements for dimensions, file type, and background color, and batching lets you meet those requirements across your entire catalog in one pass instead of checking each photo individually against a specification sheet.
With these tasks in mind, the next step is putting them into an actual sequence you can follow every time you sit down to edit a batch.
Common mistakes to avoid while bulk editing your images
Even with a solid workflow in place, a few missteps can slow things down or create extra work later, and most of them are easy to prevent once you know to look for them.
- Skipping backups of your original images is one of the most common mistakes sellers make. Always keep a copy of your unedited photos before running any batch process, in case you need to start over or apply a different edit later.
- Mixing inconsistent image types in one batch can lead to uneven results. If you combine product shots taken under different lighting or at different angles into a single batch, the same settings might not work equally well across all of them, and you may end up needing a second round of edits.
- Ignoring marketplace size specifications before editing means you might end up reprocessing your entire batch a second time. Check the exact requirements for your platform before you start, not after you have already downloaded and uploaded a full set.
- Not previewing before bulk-downloading is an easy trap to fall into when you are in a hurry. A quick preview of a few images from the batch can catch an issue before it spreads across your entire set and costs you an extra round of edits.
These mistakes are really just the flip side of good habits, which is exactly what the next section covers.
Best practices for bulk image editing
A few habits make bulk editing smoother and help you avoid rework down the line, and most of them are simple enough to build into your process from day one.
Batch similar images together rather than mixing different product types or lighting conditions in one group. This keeps your settings consistent across the batch and reduces the need for manual fixes afterward.
Check previews before finalizing your edits. A quick scan through a sample of the batch can catch alignment issues, background inconsistencies, or resize problems before they affect your entire set.
Keep original backups of every image before you run a batch edit. This gives you a safety net if you need to reprocess with different settings later, without having to reshoot anything.
Follow marketplace guidelines for image size, format, and background requirements before you start editing, so you are not reworking the same batch a second time after a listing gets flagged.
A quick checklist to run through before you finalize any batch:
With the habits and pitfalls covered, it helps to zoom out and look at exactly who this workflow serves, since the answer is broader than most sellers expect.
Who can use this workflow?
A bulk editing workflow is not limited to any single type of seller. It applies across a wide range of roles that deal with product visuals on a regular basis, often for very different reasons.
Ecommerce sellers use this workflow to prepare product photos for marketplace listings and seasonal campaigns, keeping their storefronts consistent and ready during high-traffic periods like sales and holiday launches.
Graphic designers rely on batching to apply repeatable edits across many visual assets without starting from scratch on each one, which is especially useful when working across multiple client accounts or product lines at the same time.
Product photographers use bulk editing to clean, resize, and enhance shoot outputs before delivering final files to clients, which saves significant post-production time on every project.
Marketing teams depend on this process for creating consistent product visuals across ads, social posts, and landing pages, where a unified look across many images matters for brand recognition and campaign cohesion.
Catalog managers use bulk workflows to standardize product images across SKUs, categories, and marketplaces, which is essential when managing large or fast-growing inventories. This is a core part of good ecommerce image editing practice, especially for teams handling hundreds of listings at once.
Small businesses benefit from this workflow because it lets them improve product visuals without needing a heavy manual editing process or a dedicated design team, making a product photo editor approach accessible even without deep design experience.
Whichever of these roles fits you, the underlying process stays the same, which brings up one more practical question: how do you actually pick the right tool to run this workflow on?
How to choose the right bulk editing tool
Not every editing tool is built to handle batches well, so it helps to know what to look for before you commit to one for your regular workflow.
Batch size limits are the first thing to check. Some tools only allow a handful of images per batch, which defeats the purpose if your catalog runs into the hundreds. Look for a bulk image editing tool that can comfortably handle the volume you actually work with, rather than one built mainly for single-image edits with batch support added on as an afterthought.
Supported file formats matter just as much. JPEG, PNG, and WEBP cover most sellers' needs, but if you regularly work with a specific format for a particular marketplace, confirm the tool supports it before you build your workflow around it.
The range of editing options is worth comparing. A tool that only handles resizing is fine if resizing is all you need, but most sellers eventually need background removal, upscaling, watermarking, and template application in the same workflow. A tool that covers all of these in one place, the way an AI image editor typically does, saves you from juggling multiple platforms for a single batch of images.
Preview and undo functionality should not be optional. Since you are applying one transformation across many images at once, the ability to review results and reverse a step if something goes wrong is what keeps a bulk workflow safe rather than risky.
Ease of use rounds out the list. A tool with a cluttered or overly technical interface slows down exactly the process you are trying to speed up. The best batch editors, Pixelbin included, keep the interface simple enough that a seller without design experience can pick it up in a single session.
Once you have a tool that checks these boxes, the workflow itself becomes mostly about discipline: grouping images correctly, applying the right edit, and previewing before you download. The tool handles the repetition, and you handle the judgment calls.
Conclusion
A bulk editing workflow gives sellers a faster way to prepare product visuals without editing every image one by one. By grouping images, applying the right edit, previewing results, and downloading final assets, sellers keep catalogs consistent and campaign-ready, batch after batch, without the manual grind that used to eat up hours every week.
FAQs
With Pixelbin's Batch Editor, you can batch edit up to 50 images in a single batch, which covers most sellers' needs for a typical product shoot or catalog update.
Not if the tool is built for it. A good bulk image editing tool applies the same transformation logic to each image individually within the batch, rather than compressing or altering quality across the group as a whole. Always preview your results to confirm quality holds up before finalizing.
Yes, you can undo the edits with the undo option. This lets you reverse a transformation and adjust settings before reapplying, which is why previewing before you download the final set is such an important step in the process.
JPEG, PNG, and WEBP are the most commonly supported formats across batch editing tools. PNG is generally preferred when you need transparent backgrounds, while JPEG and WEBP work well for standard marketplace listings.
No. With Pixelbin’s batch editing tool, you do not need any design experience. It is built with straightforward controls, so sellers without a design background can apply resizing, background removal, or template changes without needing specialized design skills.
A regular photo editor is built around working on a single image at a time, so any repeated edit has to be manually redone on every file. A batch image editor applies the same transformation across an entire group in one action, which is the main reason sellers switch to a bulk workflow once their catalog grows past a small handful of products.