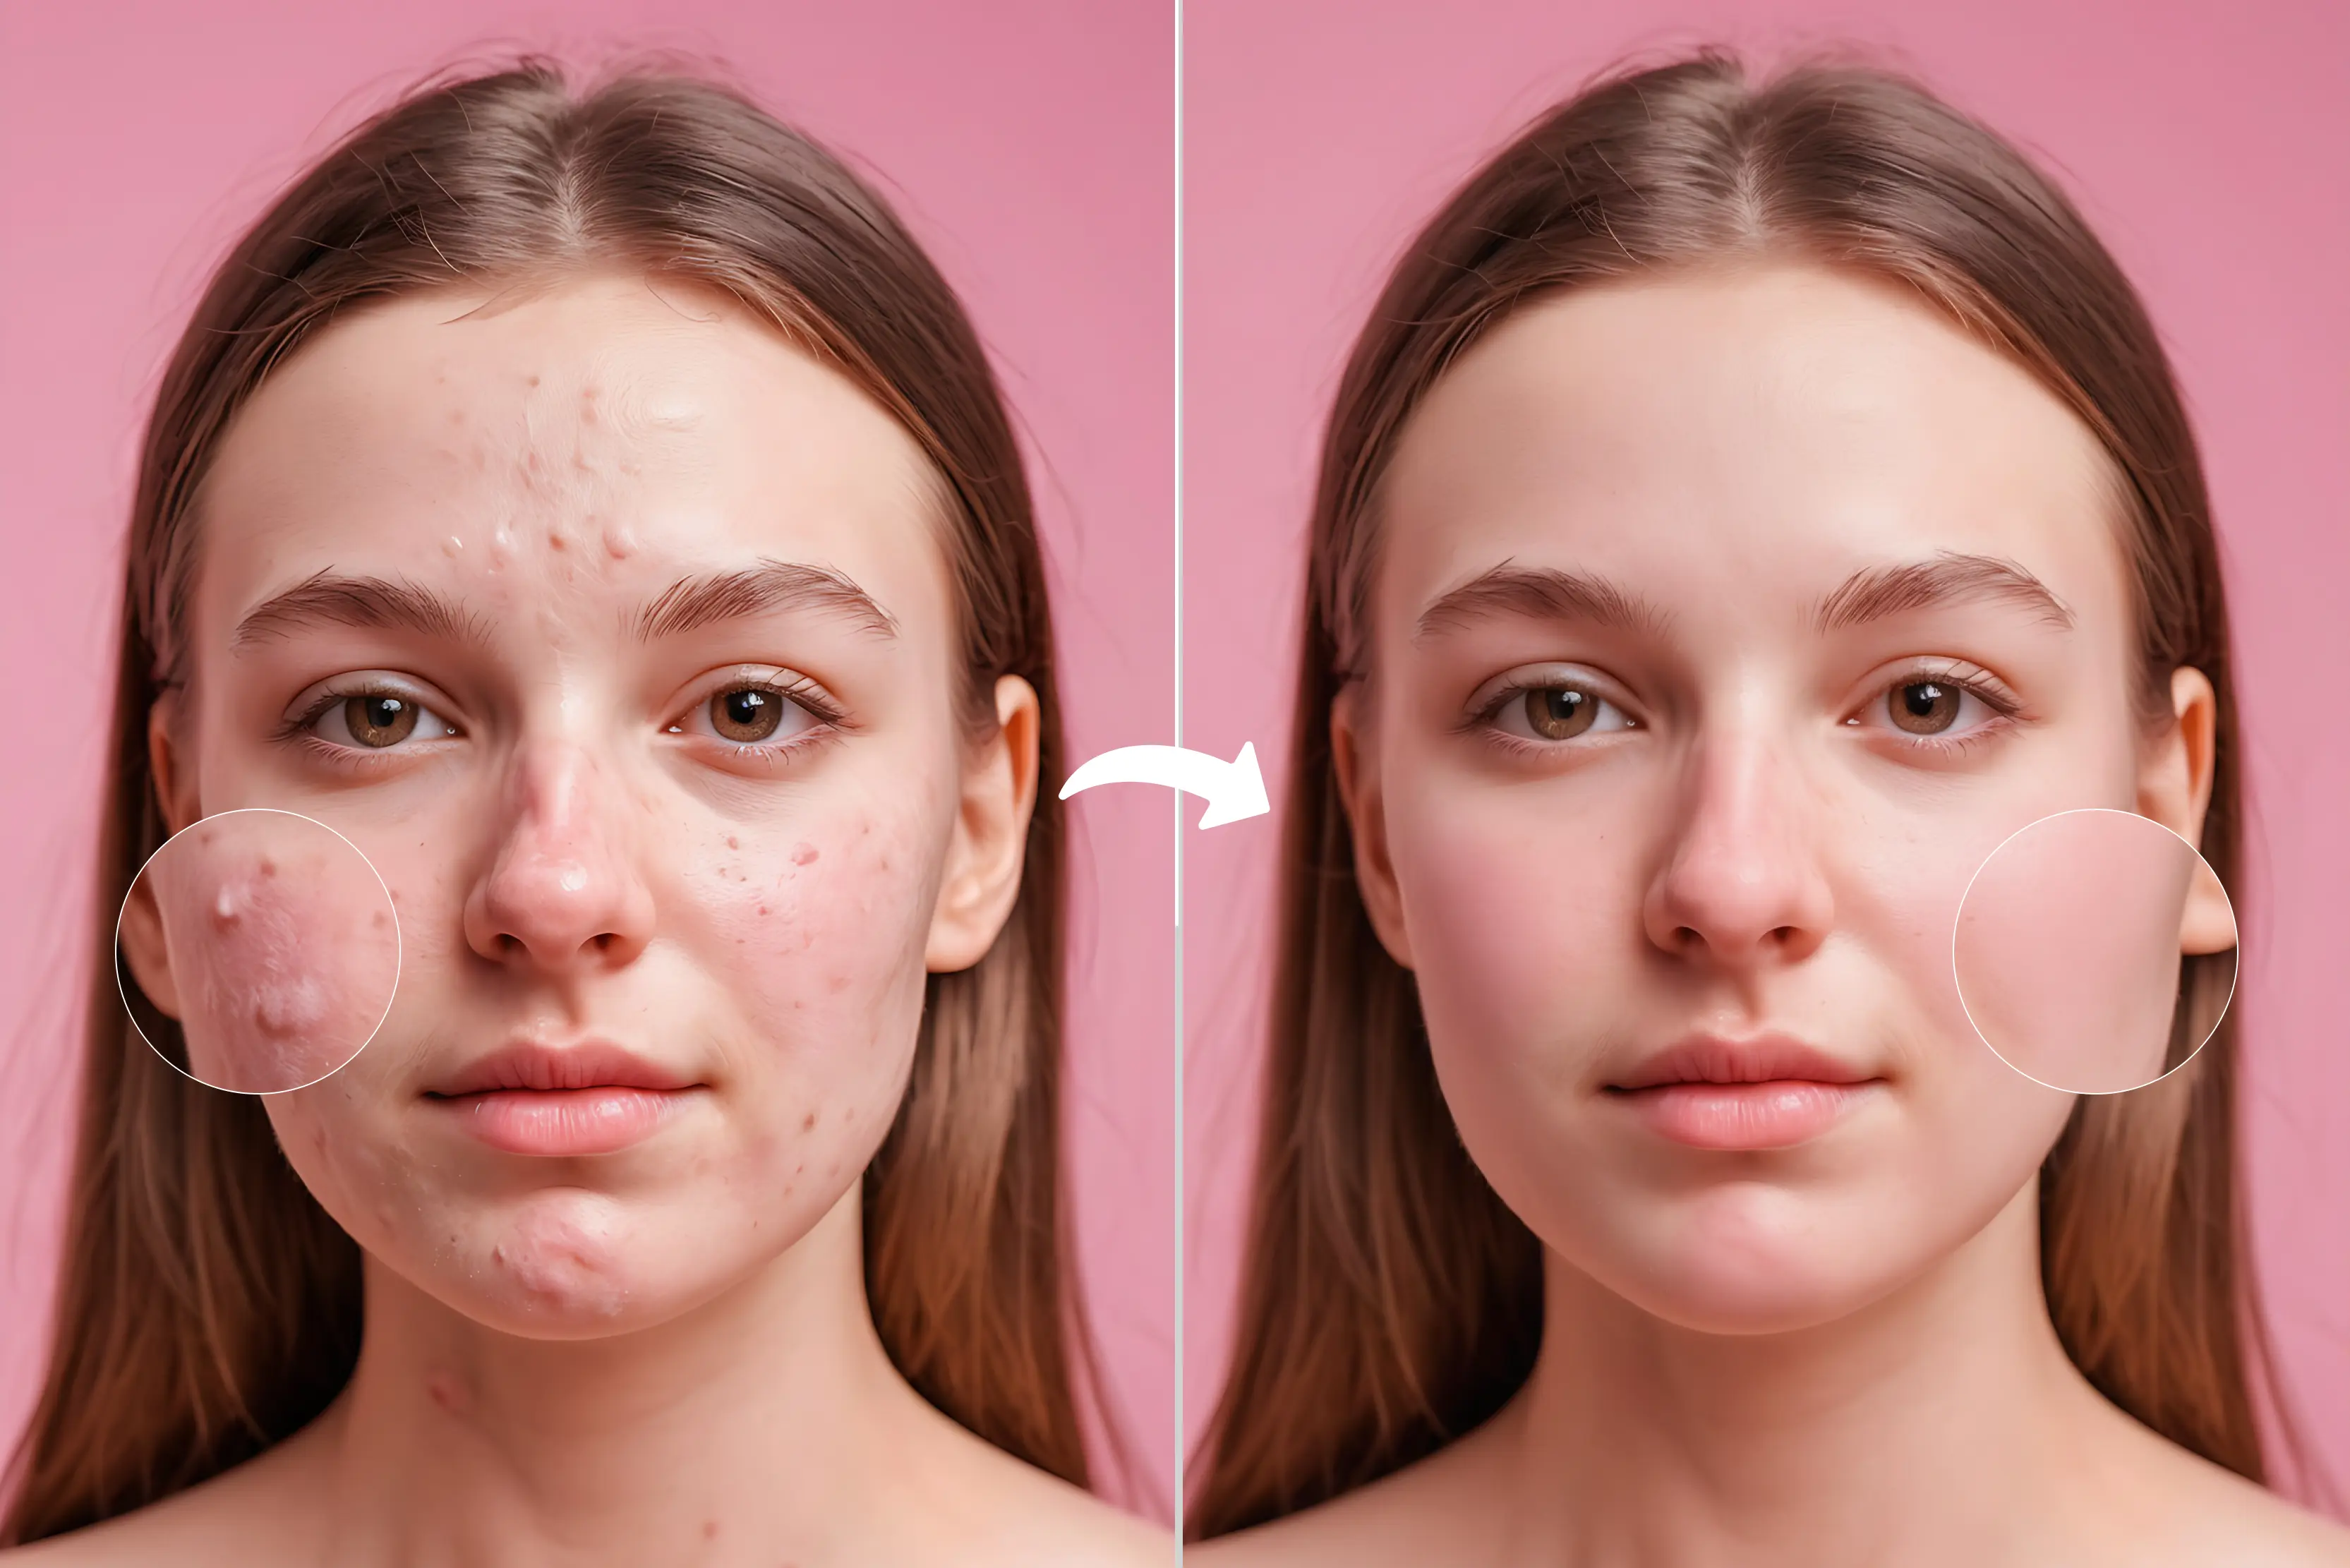

I was going through my camera roll recently and realized how many photos I had deleted simply because of small imperfections. Tiny pimples, dark spots, or stray marks that made an otherwise great selfie feel “off.”
Retaking pictures over and over can be exhausting, but that’s when I started exploring blemish remover tools, and they completely changed the way I edit photos. Not only for selfies, but also for professional portraits, product photography, and social media content, using a blemish remover has become popular and essential.
A small mark can make an image look unpolished or distract people. For example, product pictures often have dust or tiny scratches on them that make them less appealing.
Blemish removers can fix these in seconds. Influencers and content creators also use these tools to keep their visual style clean and consistent without having to spend hours editing by hand. In this blog, I will walk you through some of the best tools that can help you remove blemishes from images, how to use them, best tips, and much more. So stay tuned.
How does a blemish remover tool work?
Some blemish remover tools use AI technology, while others use traditional pixel-based “Healing” or “Clone stamp” tools to remove any scars from the skin easily. AI inpainting or pixel reconstruction is the main idea behind them.
In short, the tool looks at the pixels around a blemish and fills in the spot in a way that makes it look like it belongs on your skin. This means it can get rid of flaws without leaving any obvious marks.
AI-based blemish removal is much faster and smarter than manual retouching, where you have to carefully edit each spot with Photoshop or a similar program.
You just click or choose the area, and the tool automatically puts the pixels back together to cover up the blemish. AI can do retouching in seconds and get almost professional results, while manual retouching can take a lot of time and skill.
Best tools for blemish removal
In the section, I have mentioned the ten online AI tools that remove blemishes and acne. Some tools have a click option; some remove using a prompt, whereas some tools require manual erasing of the blemish using an eraser or a brush. Explore them one by one.
1. Pixelbin

Pixelbin makes blemish removal simple with its one-click AI tool that automatically detects and clears acne, spots, and small marks while keeping the skin’s natural texture intact.
You don't need to know how to edit photos; upload yours, and Pixelbin will do the rest in a few seconds. It has other useful features like removing backgrounds, upscaling images, cleaning up artifacts, smart cropping, and editing multiple images at once.
It is an online platform, so a user does not have to worry about the installation process. Formats like JPG and PNG are supported by it, provide fast processing, and even give free credits to try its tools.
Steps to remove a blemish using Pixelbin
Step 1: Visit the official website and sign up. Click on AI tools > see all.
Step 2: Search for the Blemish tool.
Step 3: Upload the image.
Step 4: Below, you can see the before and after of the uploaded image.
2. SnapEdit
SnapEdit is an online photo editor that lets you remove blemishes such as acne and spots with just one click. Its AI skin-retouching tool finds imperfections and smooths them naturally, so you look polished but not fake. You can also remove unwanted objects or people, erase text, and clear wirelines from your photos.
It lets you change or delete backgrounds using 100+ templates. Plus, it can enhance blurry pictures, restore old photos, and even upscale them in high resolution. SnapEdit works on web and mobile, and your photos are handled securely and deleted after editing.
Steps to remove a blemish using SnapEdit
Step 1: Visit the official website and sign up. Click on AI products > All tools.
Step 2: Scroll down and click on “AI skin.”
Step 3: Upload the image.
Step 4: Once you upload the image, tap on “Edit,” and you can see the before and after of the image.
3. Cleanup.pictures
Cleanup.pictures is a simple web tool that uses AI to remove blemishes like pimples, wrinkles, or skin marks in just a few clicks. You paint over the area you want to fill, and the tool erases it naturally by filling in the background. It can also remove objects, people, text, watermarks, or any unwanted things from your photos.
The free version lets you export up to 720px resolution. If you go Pro (around $5/ 5/month), you get full-resolution exports and a high-quality “Refiner” for better detail. There’s also an API for developers.
Steps to remove a blemish using Cleanup.pictures
Step 1: Visit the official website and upload the image.
Step 2: Select the eraser and apply it over the area where a blemish or pimple is present on the face.
Step 3: The tool will process and make the face clear within a few seconds.
4. Picsart
Picsart can remove blemishes fast. You can use its spot-healing blemish tool to tap or paint on pimples and spots, and they fade away.
You can also use Picsart’s AI Photo Editor to give text prompts like “Remove blemishes” and let the AI retouch the face automatically. The app keeps skin looking natural, not plastic. In the steps shown below, I have used the prompt method.
Picsart also offers background removal, AI replace, image upscaling, and old-photo restoration. It works on the web and mobile. Some tools are free. Premium gives more exports and templates.
Steps to remove a blemish using Picsart
Step 1: Visit the official website and sign up. Click on Create > More tools.
Step 2: Now, tap on “AI image editor.”
Step 3: Upload the image and write the prompt for what you want to do with the image.
Step 4: Once you upload the image and write the prompt, click on “Generate.”
Step 5: The tool will edit the image and make the face clear.
5. Kaze.ai
Kaze.ai helps remove blemishes using prompts. You simply upload your photo and type a prompt like “Remove acne” or “Fix skin blemishes,” and the AI cleans the skin while keeping it natural. It also offers background removal, unblur tools, logo and sticker erasing, and AI upscaling for sharper images. You can even create AI headshots.
Kaze.ai supports common image formats and works fully online, so no app download is needed. Edits are fast, and the platform uses a credit or subscription model. It is easy to use and helpful for both personal and professional photos.
Steps to remove a blemish using Kaze.ai
Step 1: Visit the official website and sign up. Click on Toolkit > Explore all tools.
Step 2: Scroll down and tap on “ Blemish Remover. ”
Step 3: Upload the photo and write the prompt on what changes you want in the image.
Step 4: Below, I have uploaded the image and written the prompt.
Step 5: The tool has removed blemishes and acne and made the face clear.
6. ChatGPT
ChatGPT can also be used to remove blemishes or acne from the face with the help of a written prompt. You can upload a picture and type something like "Remove pimples" or "Fix skin marks." The AI will clean that part of the picture while keeping the rest of it the same.
Besides blemish removal, ChatGPT can change backgrounds, adjust lighting, add objects, or create different styles. Some tools may need a paid plan. It works best when you give clear instructions. Everything happens inside the chat, so you do not need any extra apps.
Steps to remove a blemish using ChatGPT
Step 1: Visit the website and click on “+” to upload the image. Also, write the prompt for what changes you want to make to the image.
Step 2: Below, you can see I have uploaded the image and written the prompt.
Step 3: The tool will process the image and remove blemishes and acne from the face. Here, I haven’t achieved a 100% accurate result. I think with refining the prompt, I will get the accurate result in the second trial.
7. Google Gemini
Google Gemini helps remove blemishes through its AI image-editing feature. You can upload a photo and type a prompt like “remove acne” or “clear skin spots,” and Gemini smooths the skin while keeping your face looking real. Its advanced model also keeps facial details consistent, so the photo still looks natural.
Gemini can also remove objects, change backgrounds, restyle clothes, or blend images using simple text prompts. It supports many languages and works on both mobile and web. Edited images get an invisible AI watermark for safety. Results depend on clear prompts, but the tool is fast and easy to use.
Steps to remove a blemish using Google Gemini
Step 1: Visit the official website and click on the “+” icon to upload the image.
Step 2: Once you upload the image, write the prompt.
Step 3: After processing the image and the prompt, the tool will edit the image accordingly.
8. Pixlr
The Heal tool in Pixlr can help you get rid of blemishes. You have to brush over pimples or marks, and the tool blends the skin so it looks smooth and natural. You can use the Clone tool to copy clean parts of the skin and cover up flaws on bigger spots. You can also use the Blur and Sharpen tools in Pixlr to make the picture look even better.
You don't have to install anything because it works online. You can save pictures in JPG or PNG format, and many tools are free. You can make the brush bigger or softer to have more control. It is easy to use and great for quick changes.
Steps to remove a blemish using Pixlr
Step 1: Visit the official website and scroll down to click on “Pixlr editor.”
Step 2: Click on “Open image” to upload the image.
Step 3: Choose the size of the image.
Step 4: Select the “Heal” tool and tap on the brush and apply it over the pimple area on the face.
Step 5: Below, you can see the changes in the image. However, I was not satisfied with the result.
9. Evoto
Evoto is an AI photo editor that helps remove blemishes and acne using its Freckle & Acne controls. You can slide bars to reduce freckles or acne separately, giving you smooth skin without losing natural texture.
It also has a manual tuning pen to precisely brush areas you want to fix or keep. Beyond blemishes, Evoto offers dodge-and-burn skin smoothing, wrinkle reduction, and dark-circle removal.
It works on both face and body to remove marks, stretch marks, or shine. Evoto uses AI to find faces and add tags to each one so that all of the photos look the same. It supports batch processing.
Steps to remove a blemish using Evoto
Step 1: Visit the official website and sign up. Click on the Feature > AI blemish remover.
Step 2: Upload the image.
Step 3: The tool has processed the image and removed the pimples and blemishes.
10. Aragon.ai
Aragon.ai helps you remove blemishes and acne quickly with its AI tool. You upload your photo, and the blemish remover clears pimples, marks, and dark spots while keeping your skin looking real. It does not make the face look too smooth or fake.
Aragon also has a Magic Eraser to get rid of things or text you don't want, a Background Changer, an Unblur tool to fix blurry pictures, and a Photo Enhancer to make pictures look better. It works on the web and with most image types. Paid plans give you more credits and don't put watermarks on your work. Strong security keeps your photos safe.
Steps to remove a blemish using Aragon.ai
Step 1: Visit the official website and sign up. Click on Product > Blemish Remover.
Step 2: Upload the photo.
Step 3: After uploading the image, click on “Edit.”
Step 4: The tool has processed the image and cleared the blemishes and acne.
11. Freepik
Freepik also lets you remove blemishes using its AI editing prompt feature. You upload your photo, choose the “AI Edit” or “Generative Fill” option, and then type a simple prompt like “Remove blemishes” or “Clean skin.” The tool reads your prompt and fixes acne, marks, and small spots while keeping the face natural.
It also has other AI tools, such as removing backgrounds, cleaning up objects, and making images. The tool is easy to use. The result depends on prompts and the photo quality. You should try a few times to get the best result.
Steps to remove a blemish using Freepik
Step 1: Visit the official website and click on All tools > Image editor.
Step 2: Upload the image.
Step 3: Enter the prompt for the change you want in the image.
Step 4: The tool has processed the image and prompt and removed all blemishes and acne from the face.
12. AI Ease
AI Ease uses AI-powered retouching to quickly remove blemishes, acne, small marks, and uneven spots from photos. It detects problem areas on the skin and smooths them without making the face look fake or overly edited. The tool also keeps natural texture, so your skin still looks real.
Along with blemish removal, AI Ease offers features like skin smoothing, tone correction, and automatic lighting adjustments to enhance the whole picture. Users can edit images in one click, adjust intensity, and get clean, natural-looking results. It is simple to use, works online, and is great for beginners who want fast, polished photos.
Steps to remove a blemish using AI Ease
Step 1: Visit the official website. Scroll down and tap on “Retouching” under all tools.
Step 2: Upload the image of which you want to remove the blemishes and acne.
Step 3: Once you upload the image, it will remove all the blemishes and generate a clear image.
Mobile vs desktop: Which is better for blemish removal?
You can use either mobile apps or desktop/web tools to get rid of blemishes. It all depends on what you need, as both have their pros and cons.
Mobile Apps
Pros:
- Quick and convenient for on-the-go editing
- Easy to use with simple tap or swipe controls
- Often come with extra filters and beauty effects
Cons:
- Limited editing precision compared to desktop tools
- May reduce image quality if overused
- Fewer advanced options for professional retouching
Web/Desktop Tools
Pros:
- Offer precise control over every detail
- Can handle high-resolution images without quality loss
- Advanced AI features for professional-grade edits
Cons:
- Less convenient for casual, quick edits
- Require a computer and sometimes a stable internet connection
- Learning curve can be slightly higher for beginners
To sum up, mobile apps are great for quick fixes, and desktop tools are great for detailed, high-quality changes. If you want speed and convenience, or if you want professional-level results, you need to choose the right option.
Tips to get the best result
It's easy to use a blemish remover tool, but you have to be careful if you want the results to look natural. Below, I have mentioned some ways to make your changes look professional:
- Don’t overdo it: Smoothing too much can make your skin look unnatural. It’s better to keep edits simple.
- Maintain natural texture: Keep the skin's natural texture by leaving some of its lines and pores. This makes your picture look more real and less like it was edited too much.
- Remove only what’s necessary: Focus on actual blemishes, scars, or marks. Don’t try to perfect every tiny imperfection—it keeps your photo authentic.
- Use retouching with proper lighting adjustments: Correcting brightness, contrast, and shadows, along with blemish removal, gives a balanced, polished look. Good lighting helps your edits look natural and smooth.
Conclusion
Tools for removing blemishes have made it much easier for everyone to edit photos. AI can help you get rid of acne, scars, dark spots, and little marks in just a few seconds. You don't need any special skills to use these tools to get clean, natural-looking photos quickly.
But you need to be careful when you edit because taking out too much can make the picture look fake. Pick the right tool, make small changes, and don't change how the skin looks. If you use blemish removers correctly, they can help you make clear, confident, and beautiful pictures without changing the way the photo looks.
FAQs
Most AI blemish remover tools maintain the original image quality while fixing imperfections. However, using very low-resolution images or over-editing can cause slight blurring or unnatural patches. High-resolution photos always give the best results.
Blemish removers work well for small scars, acne marks, and minor skin imperfections. Large or detailed tattoos may require more advanced editing tools to make the area look seamless.
Many tools offer free blemish removal with limited features, such as low-resolution export or restricted daily use. Paid versions unlock advanced AI tools, higher-quality output, and unlimited edits.
Yes, most blemish remover tools are beginner-friendly. You usually just select, brush, or tap the area, and the AI automatically fixes it, making professional-looking edits accessible for everyone.
Edited skin can look very natural if over-editing is avoided. Modern AI blends the removed blemishes with the surrounding skin, keeping texture intact and preventing an overly smooth or artificial appearance.