

Summary
This guide outlines how to generate realistic AI images by writing prompts like a photographer rather than relying on generic quality buzzwords. Realism requires balancing a clear subject, natural lighting, and camera-aware framing with real-world imperfections like skin textures or blurred backgrounds. The article breaks down technical camera settings—such as lens focal lengths, framing styles, and depth of field—and details natural lighting strategies like golden hour. Finally, it provides a step-by-step workflow, actionable prompt examples, common pitfalls to avoid, and demonstrates how to utilize the Pixelbin AI Image Generator to effortlessly produce high-definition, professional-grade visuals.
Introduction
Most AI images fail in small, quiet ways. The face is almost right, but the skin looks too smooth. The cafe looks pretty, but the shadows do not make sense. The product is sharp, but the label is warped. At first glance the image feels impressive, then one detail gives it away.
That is why crisp photorealistic AI images need more than a few quality words in a prompt. You have to direct the image like a real photo shoot. A believable image needs a clear subject, real-world light, natural texture, camera-aware framing, and a final check before you publish it.
Short answer: To create crisp photorealistic AI images, write prompts like a photographer. Describe the subject, setting, light, lens or framing, texture, natural imperfections, and what to avoid. Generate a few options, fix the obvious artifacts, then upscale only after the image already looks believable.
Below is a practical workflow you can use for portraits, product shots, interiors, food images, lifestyle scenes, and social content.
Start with what photorealistic actually means
Before you spend time generating anything, you need to know what you're actually chasing. Photorealistic doesn't mean "looks like a photograph." It means "looks like it could be a photograph." There's a difference.
A photorealistic AI image should hold up for two or three seconds of real scrutiny. The lighting should make sense. The materials should feel right - glass should look like glass, fabric should look like fabric, skin should look like skin. The shadows shouldn't be floating in impossible places. The hands shouldn't have too many fingers or weird proportions that make you immediately know it's fake.
What photorealistic doesn't mean: perfect detail on everything. Real photographs have blur. They have areas that are out of focus. They have imperfect framing. They have grain, especially in lower light. If your AI image is too perfect, if everything is in focus and pristine, it actually looks less real.
This matters because a lot of people chase the wrong thing. They think more detail equals more realism. It doesn't. Sometimes the opposite is true. A softer focus with good lighting and correct shadow placement reads as more real than a hyperdetailed image where the shadows make no sense.
Understanding camera settings before you write your prompt
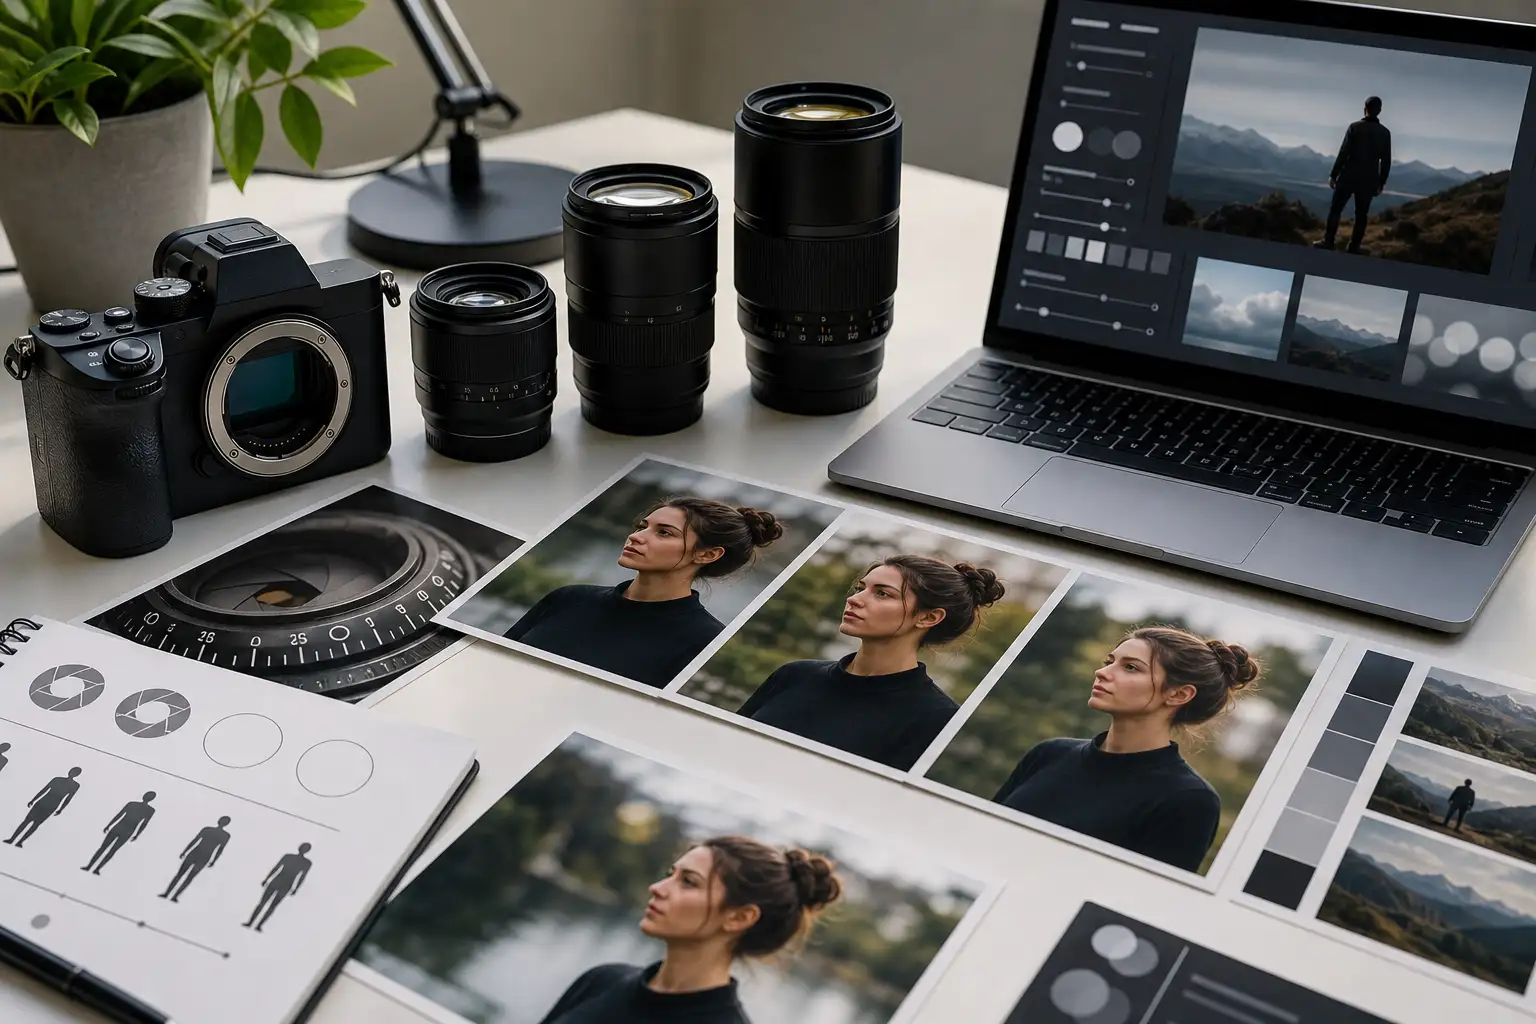
Here's what most people miss: you need to understand actual camera settings before you can write good photorealistic AI image prompts.
When you're describing a shot, you're describing what a camera does. The AI models were trained on millions of professional photographs. They understand camera language. But most prompts don't speak camera language. They speak what social media wants.
A real camera has a lens. That lens has a focal length. Focal length determines perspective. A 35mm lens looks wide and natural. A 85mm lens compresses space and looks more flattering for portraits. A 24mm lens exaggerates depth. These aren't just aesthetic choices - they change how the image looks fundamentally.
Depth of field is what separates professional photos from amateur ones. Depth of field is how much of the image is in focus. If everything is in focus, it looks like a snapshot. If the background is blurred and the subject is sharp, it looks intentional and professional. When you're writing photorealistic AI image prompts, you're specifying depth of field.
Framing is how you position your subject in the frame. Center framing is static. Off-center framing is more interesting. The rule of thirds - dividing the frame into a three-by-three grid and placing important elements along the lines - this is how professional photographers frame.
These aren't just technical details. They're how you make images look real. An AI that understands you want "85mm lens, shallow depth of field, rule of thirds framing" can generate something that looks professionally shot. An AI that hears "beautiful portrait" is guessing.
Writing photorealistic AI image prompts that actually work
The way you write your prompt determines everything. Most prompts fail because they're vague or contradictory.
Start with specificity. Not "a person" but "a woman in her late twenties, South Asian, wearing a cream linen shirt, looking toward the window." The more specific your subject, the better the result.
Then natural lighting. This is critical for realistic AI photos. Lighting is seventy percent of realism. You can have the perfect subject and the wrong light ruins it.
Specify where light is coming from. "Golden hour light coming from the left" is different from "bright midday sunlight" or "soft window light at dawn." Each creates a different mood and shadow structure.
If you're shooting indoors, say it. "Soft window light, overcast day, warm interior." If you're shooting outside during golden hour, say that. Golden hour is morning light or late afternoon light when the sun is low and warm. It's the easiest light to make look good in realistic AI photos.
Avoid fantasy lighting. Neon-colored light, dramatic side lighting that doesn't exist in nature, lights coming from impossible directions. These immediately flag the image as generated.
Here's a real example.
Bad prompt:
"A beautiful woman holding a coffee cup, warm lighting, professional photo"
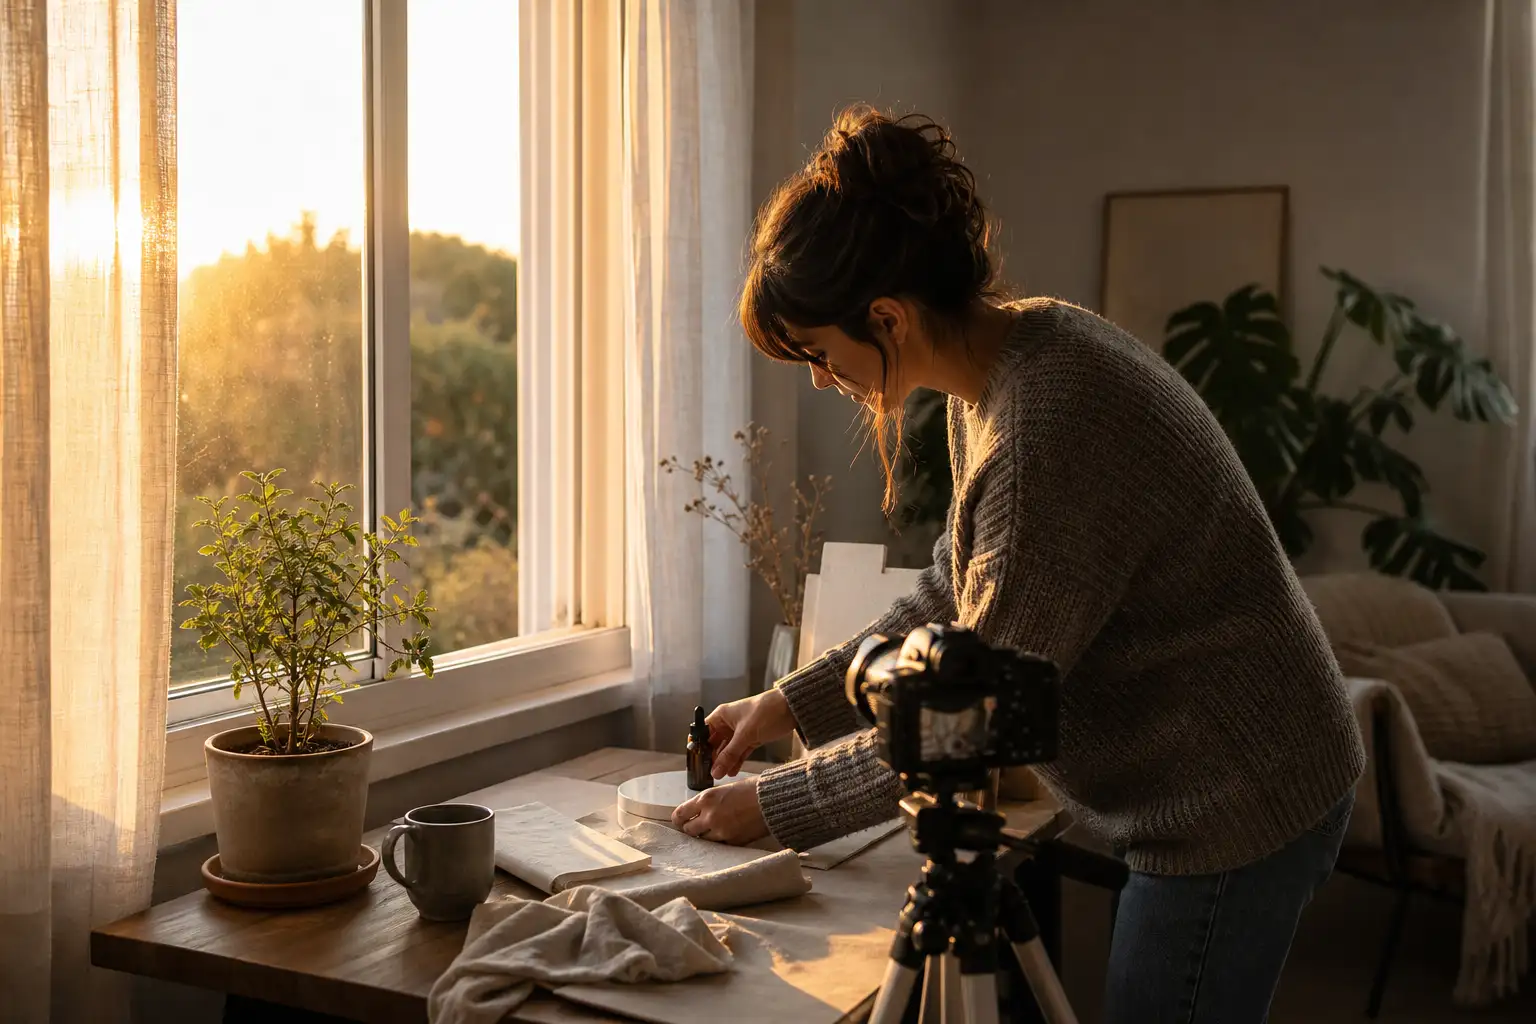
Good prompt:
"A woman in her early thirties, warm brown eyes, natural makeup, wearing a soft gray sweater. She's holding a white ceramic mug. The scene is a home kitchen with warm window light coming from the left side, creating soft shadows on her face. Shot at 50mm, f/2.0 aperture, shallow depth of field. Golden hour light, early morning. Photorealistic, commercial quality."
The actual process for making AI images look real
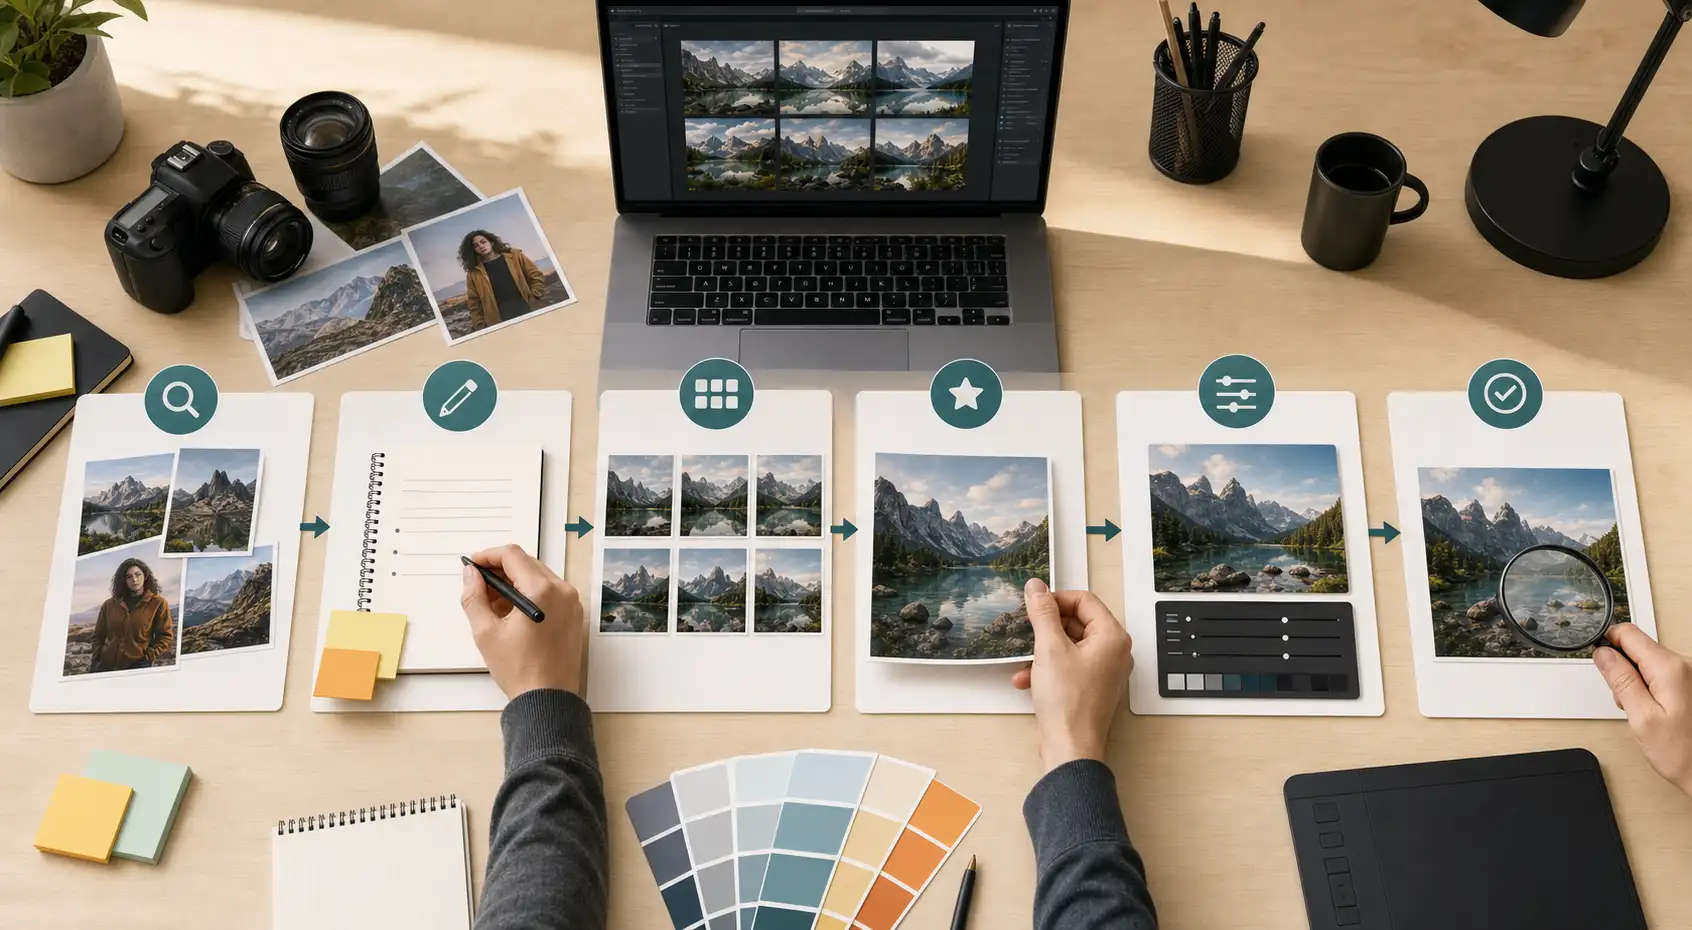
Step 1: Reference study
Find real photographs in your category. Understand the lighting, framing, and camera settings.
Step 2: Write your photorealistic AI image prompts
Start with subject details. Add camera settings - lens, aperture, depth of field. Add light direction and quality. Specify time of day. Add negative prompts. Be specific.
Step 3: Generate three to five variations. Don't judge the first frame only. Watch the entire image. Look for AI image artifacts - weird hands, glassy eyes, unnatural textures.
Step 4: Select your best result.
Add your results which are not perfect, but best.
Step 5: Color correction.
Open the image in Lightroom or Photoshop. Add subtle contrast. Adjust shadows and highlights. Make sure the white balance looks natural. Add a tiny bit of film grain - this makes AI images look more photorealistic.
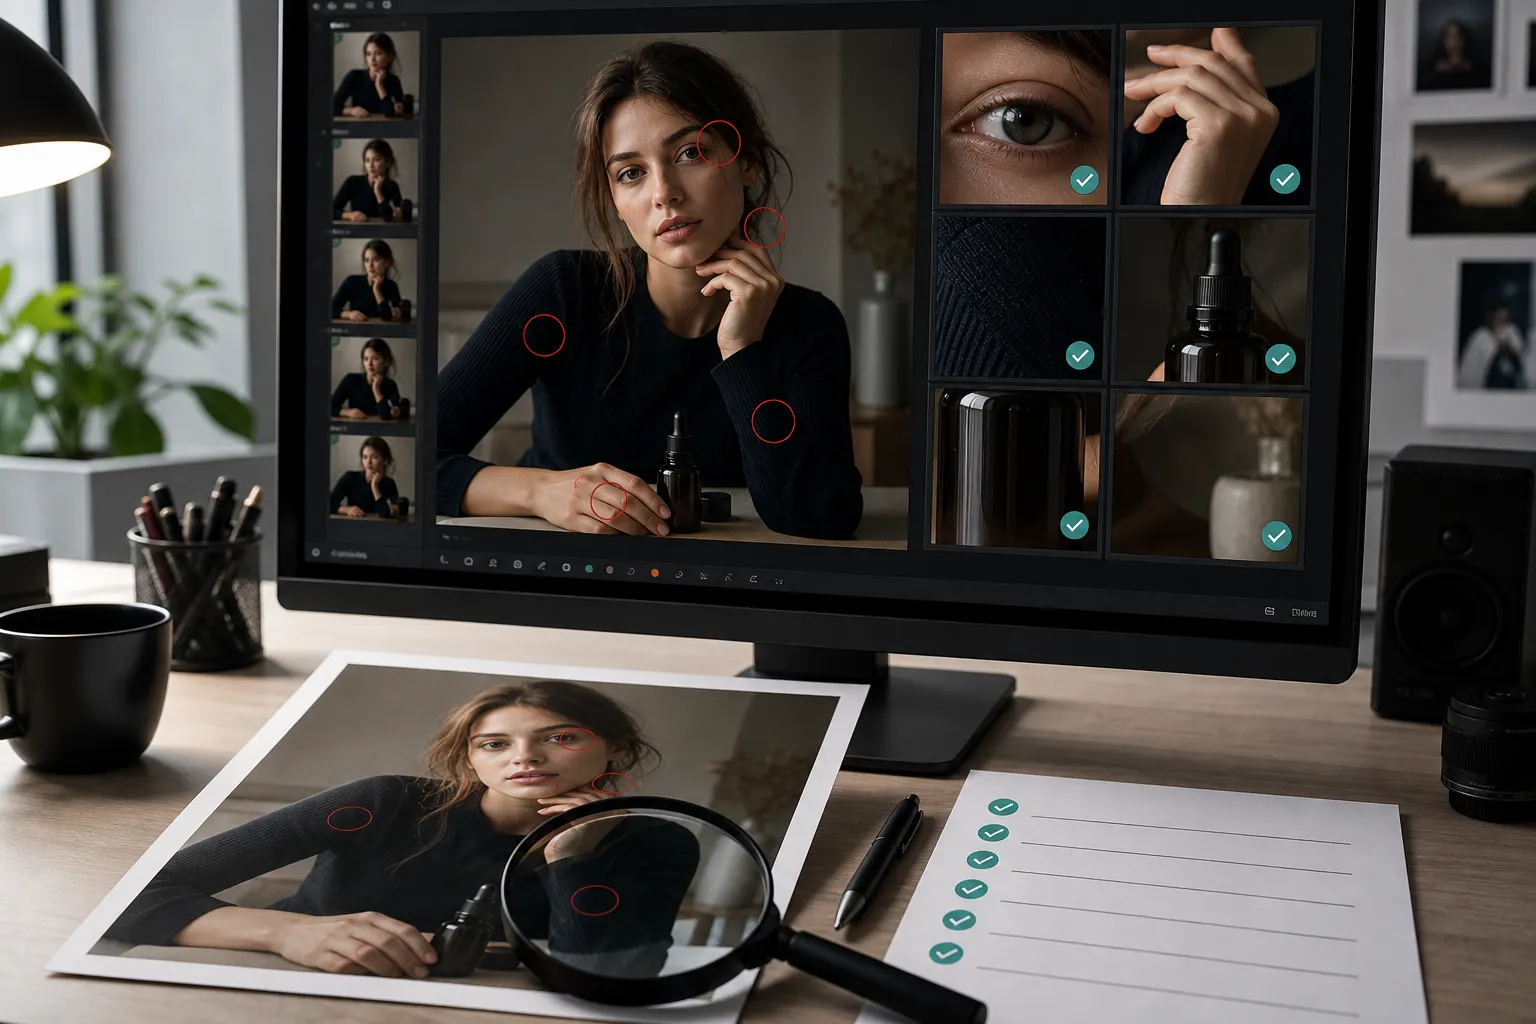
Step 6: Final image quality check.
Zoom in. Look at the hands, eyes, teeth, hair. Look at reflections. Look at shadows. If there are AI image artifacts you can't live with, regenerate or use Inpaint to fix the specific area.
This workflow takes time but it's how you get results that actually hold up.
How to make the natural skin texture
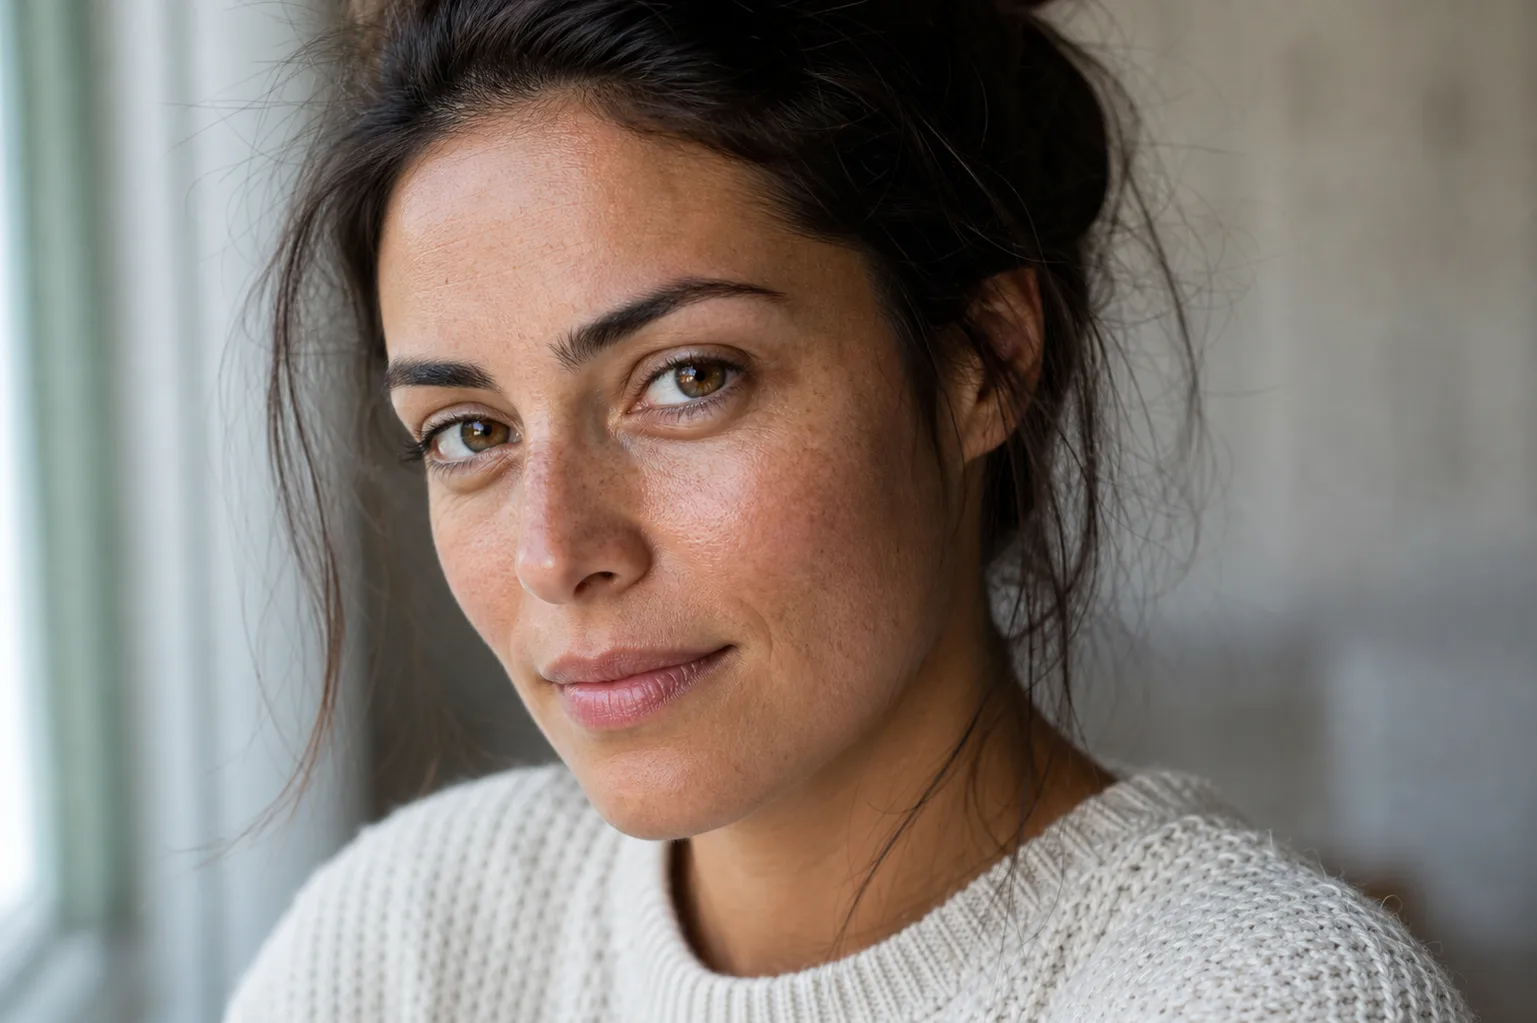
When you're creating realistic AI photos of people, natural skin texture is the biggest giveaway. AI-generated skin usually looks either too plastic or too blotchy.
The problem is that realistic skin is complicated. It has pores, subtle color variation, fine hairs, small imperfections. Some tools handle this better than others.
Leonardo AI handles natural skin texture better than most. When you're writing portrait prompts for realistic AI photos, specifying skin tone, age, and lighting helps. "Warm medium skin tone, subtle freckles, fine pores, soft natural light" gets better results than just "skin."
The bigger strategy is post-processing. After you generate, after you upscale, open the image in Photoshop. Use the camera raw filter. Add just a tiny bit of texture. Use the clarity slider carefully - too much looks fake. Add subtle grain. Real skin has grain, especially when light hits it.
If the skin still looks off, you can use Photoshop's healing brush on obvious problem areas. But don't overdo this. Perfect skin looks fake. Skin with minor imperfections looks real.
Lens, framing, and depth of field in your prompts
The most professional-looking realistic AI photos specify lens, framing, and depth of field.
35mm lens: Natural perspective, good for wide shots and lifestyle images.
50mm lens: Standard, natural looking, good for everything.
85mm lens: Flattering for portraits, compresses background, beautiful for close-ups.
24mm lens: Wide, exaggerated depth, good for environmental shots.
Depth of field descriptions matter:
- f/1.4 to f/2.0: Very shallow, only a tiny part is sharp. Used for dramatic portraits.
- f/2.8 to f/4: Shallow, subject is sharp, background is blurred. Professional look.
- f/5.6 to f/8: Medium depth of field. More of the image is in focus. Used for product shots.
- f/11 to f/16: Deep depth of field. Most of the image is in focus. Landscape photography.
Framing terminology:
- Close-up or macro: Very tight on the subject.
- Medium shot: Shoulders and up for portraits, or a product with space around it.
- Wide shot: Full environment visible, subject is one element.
- Over-the-shoulder: Camera positioned behind one person looking at another.
- Bird's eye view: Camera looking straight down.
When you're writing photorealistic AI image prompts, use these terms. "85mm lens, f/2.8 aperture, shallow depth of field, medium shot" tells the AI exactly how to frame.
Golden hour and natural lighting strategies
Golden hour light - the hour after sunrise or the hour before sunset - is the easiest light to make look good in realistic AI photos. The light is warm, directional, and forgiving.
When you're writing prompts for realistic AI photos shot in natural lighting, specify:
"Golden hour light, warm color temperature, side lighting, soft shadows"
Versus:
"Bright midday sun, harsh shadows, high contrast"
The first reads as professional. The second looks like a snapshot.
Window light is another easy one. "Soft window light, overcast day, diffused" is always going to look better than "bright direct light."
The worst light for AI images is indoor artificial light. Fluorescent light, bright overhead lights, mismatched color temperatures - these are hard for the AI to get right. If you're describing an indoor scene, specify "warm lamplight" or "soft overhead diffused light" rather than leaving it vague.
Light direction matters. Backlighting creates rims around hair and makes images feel three-dimensional. Side lighting creates interesting shadows. Front lighting is flat. When you're writing your prompts, specify where the light is coming from relative to the subject.
Prompt examples you can use
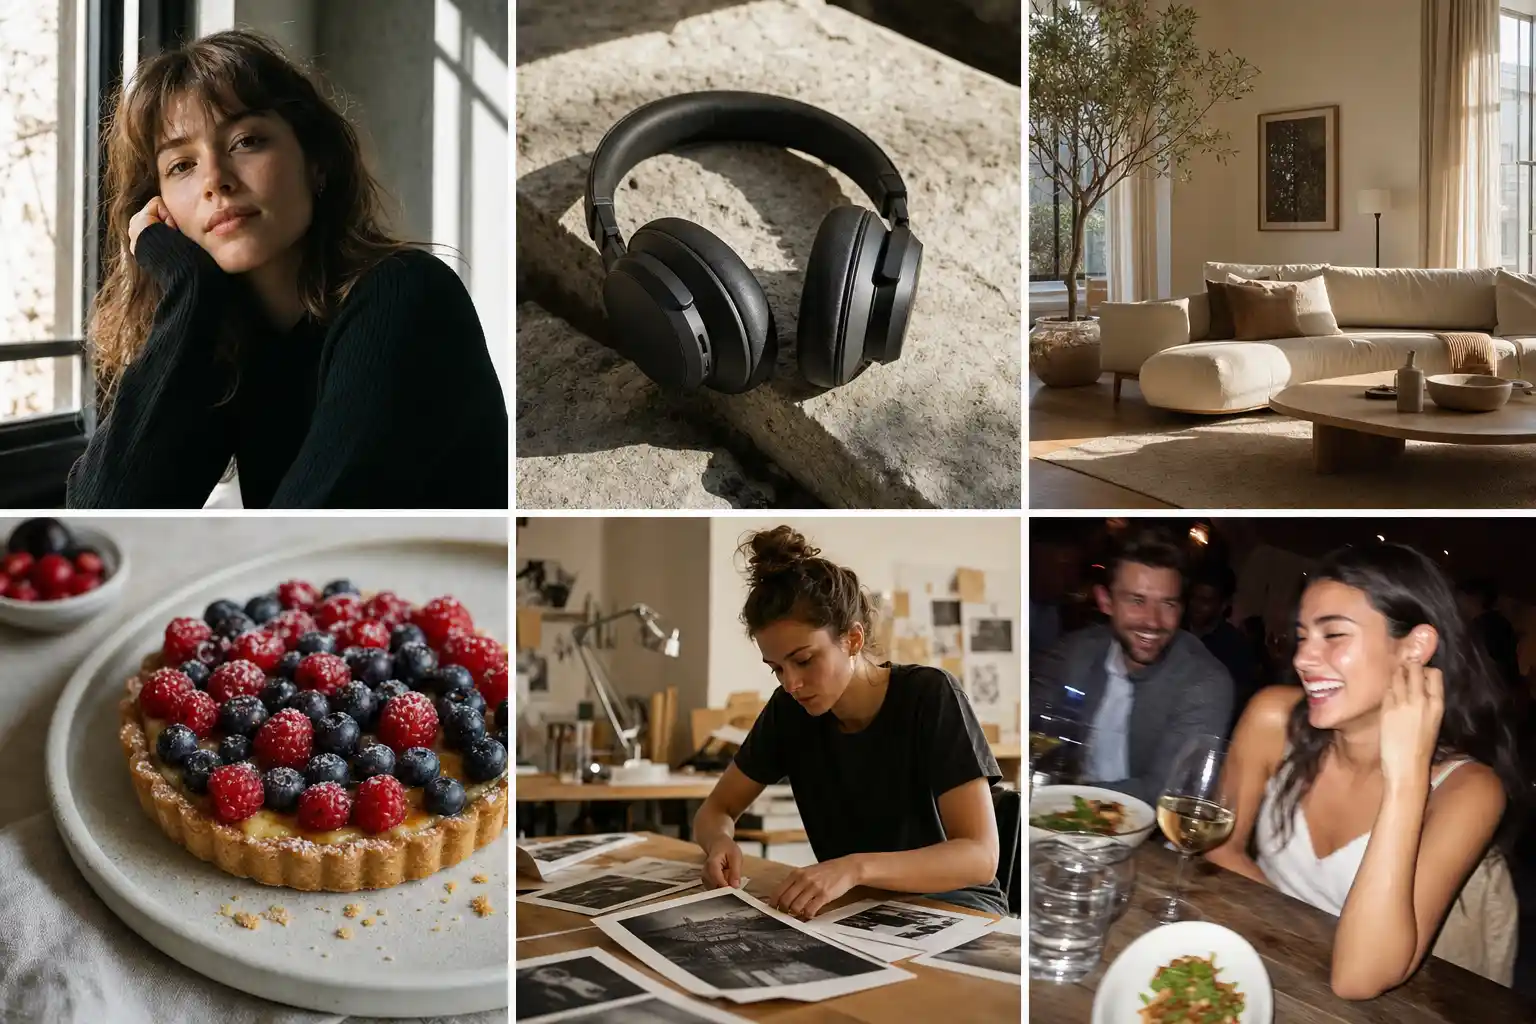
Portrait prompt
Editorial portrait photo of a woman in her early 30s sitting by a large apartment window, looking down while holding a coffee cup, soft window light from camera left, 85mm portrait lens look, shallow depth of field, natural skin texture, fine flyaway hair, calm morning mood, avoid plastic skin, distorted hands, fake teeth, blurry eyes
Product photography prompt
Studio product photo of a matte black wireless headphone set on a dark stone surface, softbox reflection on the ear cups, 70mm lens look, clean shadow under the product, realistic fabric texture on the headband, premium minimal mood, avoid warped logo, fake text, duplicated ear cup, harsh glare
Interior design prompt
Wide interior photo of a small modern living room with a linen sofa, oak coffee table, books stacked casually, late afternoon sunlight through sheer curtains, realistic shadows under furniture, natural fabric wrinkles, warm lived-in mood, avoid floating furniture, distorted window frames, over-bright highlights
Food prompt
Close-up food photo of a handmade berry tart on a white ceramic plate, natural window light, shallow depth of field, glossy berries, uneven pastry edges, a few crumbs on the plate, real cafe table texture, avoid plastic fruit, melted crust, fake reflections, oversaturated colors
Lifestyle prompt
Documentary-style photo of a young designer packing prints into a cardboard mailer at a small studio desk, overhead lamp and soft daylight mix, casual composition, paper texture, tape dispenser, slightly messy workspace, natural hand position, avoid extra fingers, fake text, warped paper, overly perfect lighting
Smartphone-style prompt
Casual phone photo of friends sitting around a small restaurant table at night, direct flash, slight motion blur, warm indoor lighting, plates and glasses in the foreground, candid smiles, realistic skin texture, imperfect framing, avoid plastic faces, extra hands, warped cutlery, fake menu text
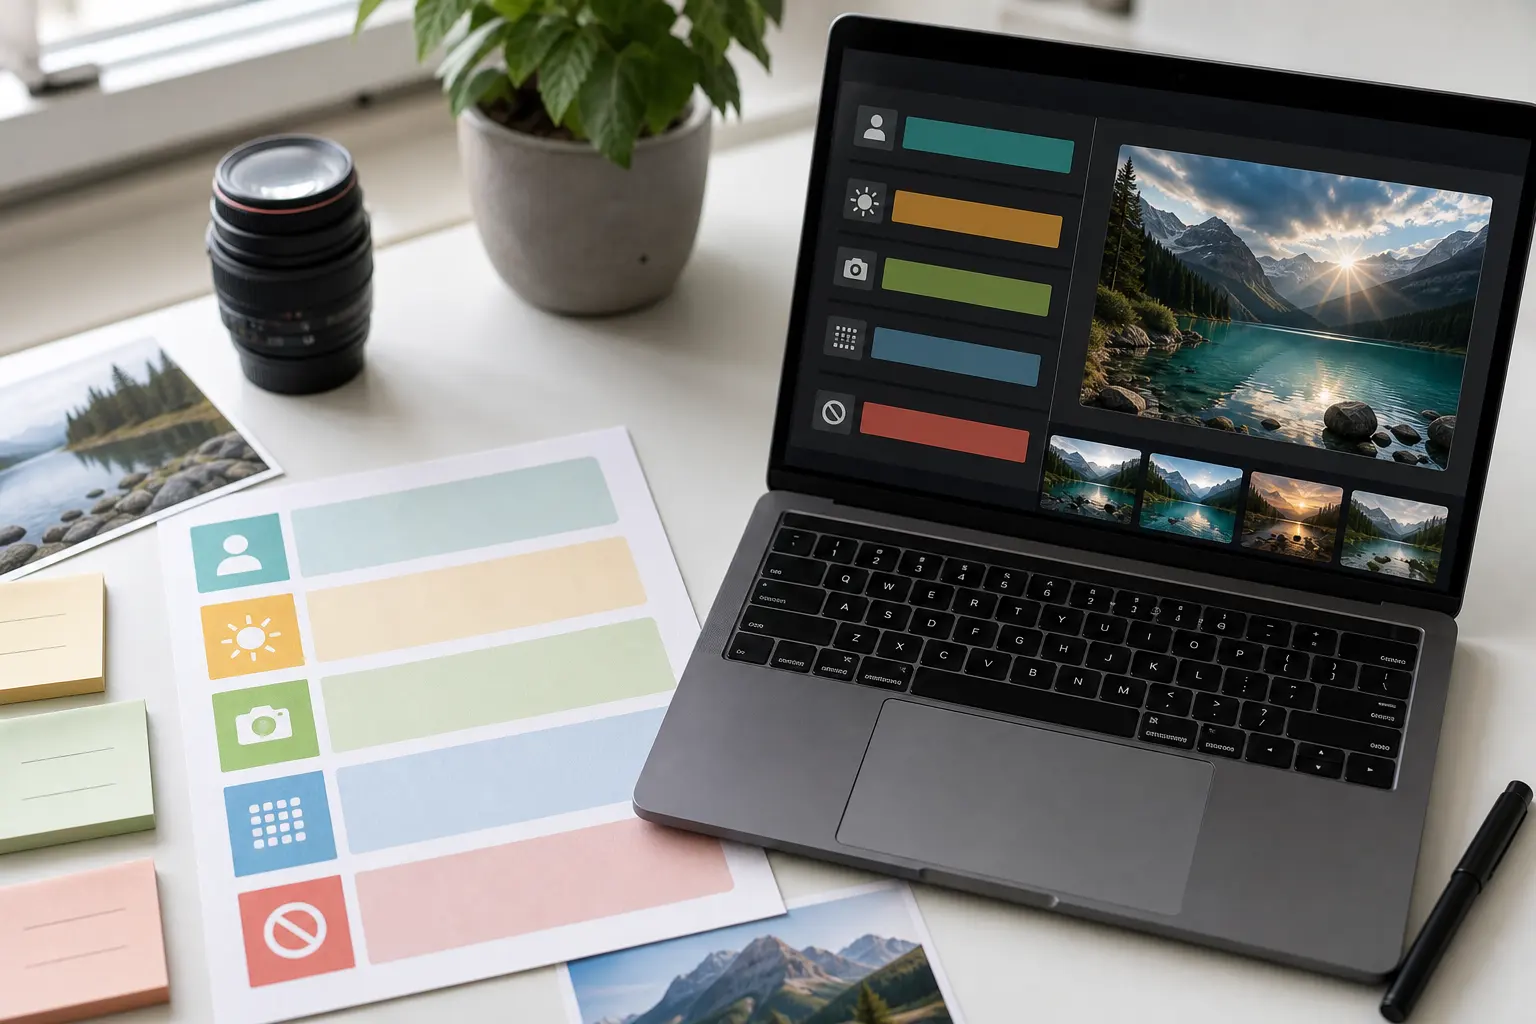
How to make photorealistic images using Pixelbin AI image generator
Pixelbin AI image generator transforms text prompts into studio-quality, high-definition visuals instantly. No login or downloads required just create photorealistic photos, anime, or 3D renders directly in your browser.
Powered by advanced AI models including Google Veo, Kling, and Seedance, the tool generates images in seconds with multiple options to choose from. Select between Nano Banana for quick social content and Nano Banana Pro for professional-grade, 4K outputs. Download stunning, watermark-free images immediately and enhance them with built-in editing tools, upscaling, and video generation features. Perfect for marketers, creators, and businesses seeking affordable visual content production.
Must known features
- Text to Image: Converts your basic written sentences into highly detailed, custom-tailored visual assets within seconds. (15 words)
- Style Presets: Offers a diverse collection of ready-made artistic filters to instantly alter your graphic's look. (15 words)
- Resolution Scaling: Enhances the overall sharpness and dimensions of your outputs to ensure clean printing quality. (15 words)
- Batch Generation: Allows creators to produce multiple distinct image variations simultaneously from a single descriptive prompt. (15 words)
- Aspect Ratio Control: Provides flexible canvas dimensions so your creations fit perfectly across various social media platforms. (15 words)
- Prompt Assistance: Suggests helpful photographic modifiers to optimize your descriptions and ensure much more realistic results.
Steps to know
Step 1: Add a prompt Specify your subject, colors, style, and details in the prompt box (e.g., you can use or test with sample prompts like "Generate a magical fantasy castle above the clouds" or "Create a majestic dragon flying over snowy peaks"). You also select your desired AI model and aspect ratio (such as 1:1 or Portrait).
Step 2: AI generates image automatically Click the "Generate" button and wait about 30 seconds while the system processes your request to turn the text into an image.
Step 3: Download & share Preview the final generated image. From here, you can choose to adjust upscale settings or apply further AI edits, then instantly download the HD image for free.
Common mistakes that make AI images look fake
Mistake 1: using only quality words Words
"High quality, 8K, realistic, ultra detailed" is not enough. These words may improve surface polish, but they do not create believable light, framing, or texture.
Fix it by adding subject, setting, lighting, camera look, and real-world details.
Mistake 2: mixing too many styles
If you ask for cinematic, editorial, documentary, luxury, vintage, and smartphone realism in one prompt, the image may feel confused.
Fix it by choosing one main photography style.
Mistake 3: making everything perfect
Perfect skin, perfect room, perfect food, perfect lighting, and perfect symmetry can feel artificial.
Fix it by adding one or two natural imperfections.
Mistake 4: ignoring hands and text
Hands and text are still common failure points. Do not assume they are fine.
Fix it by checking at full size and using targeted edits if your tool supports them.
Mistake 5: upscaling too soon
Upscaling a flawed image makes flaws easier to see.
Fix it by correcting composition, anatomy, lighting, and labels first.
Quick checklist for crisp photorealistic AI images
Use this before downloading the final image:
- The subject is clear.
- The scene could exist in real life.
- The light source is obvious.
- Shadows match the light direction.
- Skin, fabric, glass, food, or product texture looks natural.
- Hands, eyes, teeth, and hair look correct.
- Text and logos are not warped.
- The background has no melted objects.
- The image looks good at full size, not only as a thumbnail.
- Upscaling improves the image without making it harsh.
- The final export is sized and compressed for the page.
Conclusion
To make AI art look truly human, you must bring real-world observation skills to the table. Notice how sunlight reflects off glass, how fabric wrinkles, and how shadows soften. The more you observe the messy, imperfect details of our physical world, the better you will become at describing them to a machine. By moving away from overcomplicated tech jargon and embracing the timeless rules of classical photography, you can unlock the full power of any image generator. Stop settling for cheap digital renders, bring your photography mindset to life and try the Pixelbin AI Image Generator to create jaw-dropping photorealistic AI images!
FAQs
The best way is to describe the image like a real photo shoot. Include the subject, setting, lighting, camera angle or lens look, natural texture, and common mistakes to avoid. After generation, inspect the image at full size and upscale only after the core image looks believable.
Include photo style, subject, action, setting, lighting, camera or framing direction, texture details, mood, and a short negative prompt. Keep the prompt clear rather than stuffing it with too many style words.
Use real-world lighting, natural shadows, small imperfections, and specific textures. Avoid overly smooth skin, perfect symmetry, generic smiles, impossible reflections, and vague prompts.
Camera language can help, especially terms like close-up, wide shot, 35mm look, 50mm perspective, 85mm portrait look, shallow depth of field, and sharp focus on eyes. Exact settings may not always behave like a real camera, so use them to guide the look, not to guarantee technical accuracy.
Yes, but keep them focused. Use negative prompts for repeated problems such as plastic skin, extra fingers, warped text, fake logos, blurry eyes, duplicated objects, and bad reflections.
First choose a clean generation with good composition and few artifacts. Then use targeted editing if needed, upscale the image, compare it at 100 percent zoom, and avoid heavy sharpening that makes skin or edges look harsh.
.webp)


