


We have all come across transparent texts or logos, such as “Shutterstock” or others. That’s a watermark. It protects someone’s photo from being used without permission. Photographers, designers, and stock websites often add watermarks to indicate ownership.
But sometimes, you will need to remove a watermark for the right reasons, like if it’s your photo, or you’ve been given permission to edit it. That’s where Photoshop comes in. In this guide, I’ll walk you through six methods to remove watermarks in Photoshop, plus a few AI tools if you want faster results.
6 ways to remove watermarks in Photoshop
Adobe Photoshop is a professional image editing software widely used for a range of applications like photo editing, photo upscaling, and more. When it comes to watermark removal, Photoshop offers great control. Let’s now explore the six techniques.
Spot Healing Brush Tool
If you're looking for a quick and easy way to remove a watermark from a photo, the Spot Healing Brush Tool is a great place to start. It’s one of Photoshop’s smartest tools—kind of like a digital eraser that removes all the unnecessary objects from the image.
Why should it be used?
To remove small text, watermarks, or logos on plain backgrounds, sky, skin, wall, and so on.
How to use the tool?
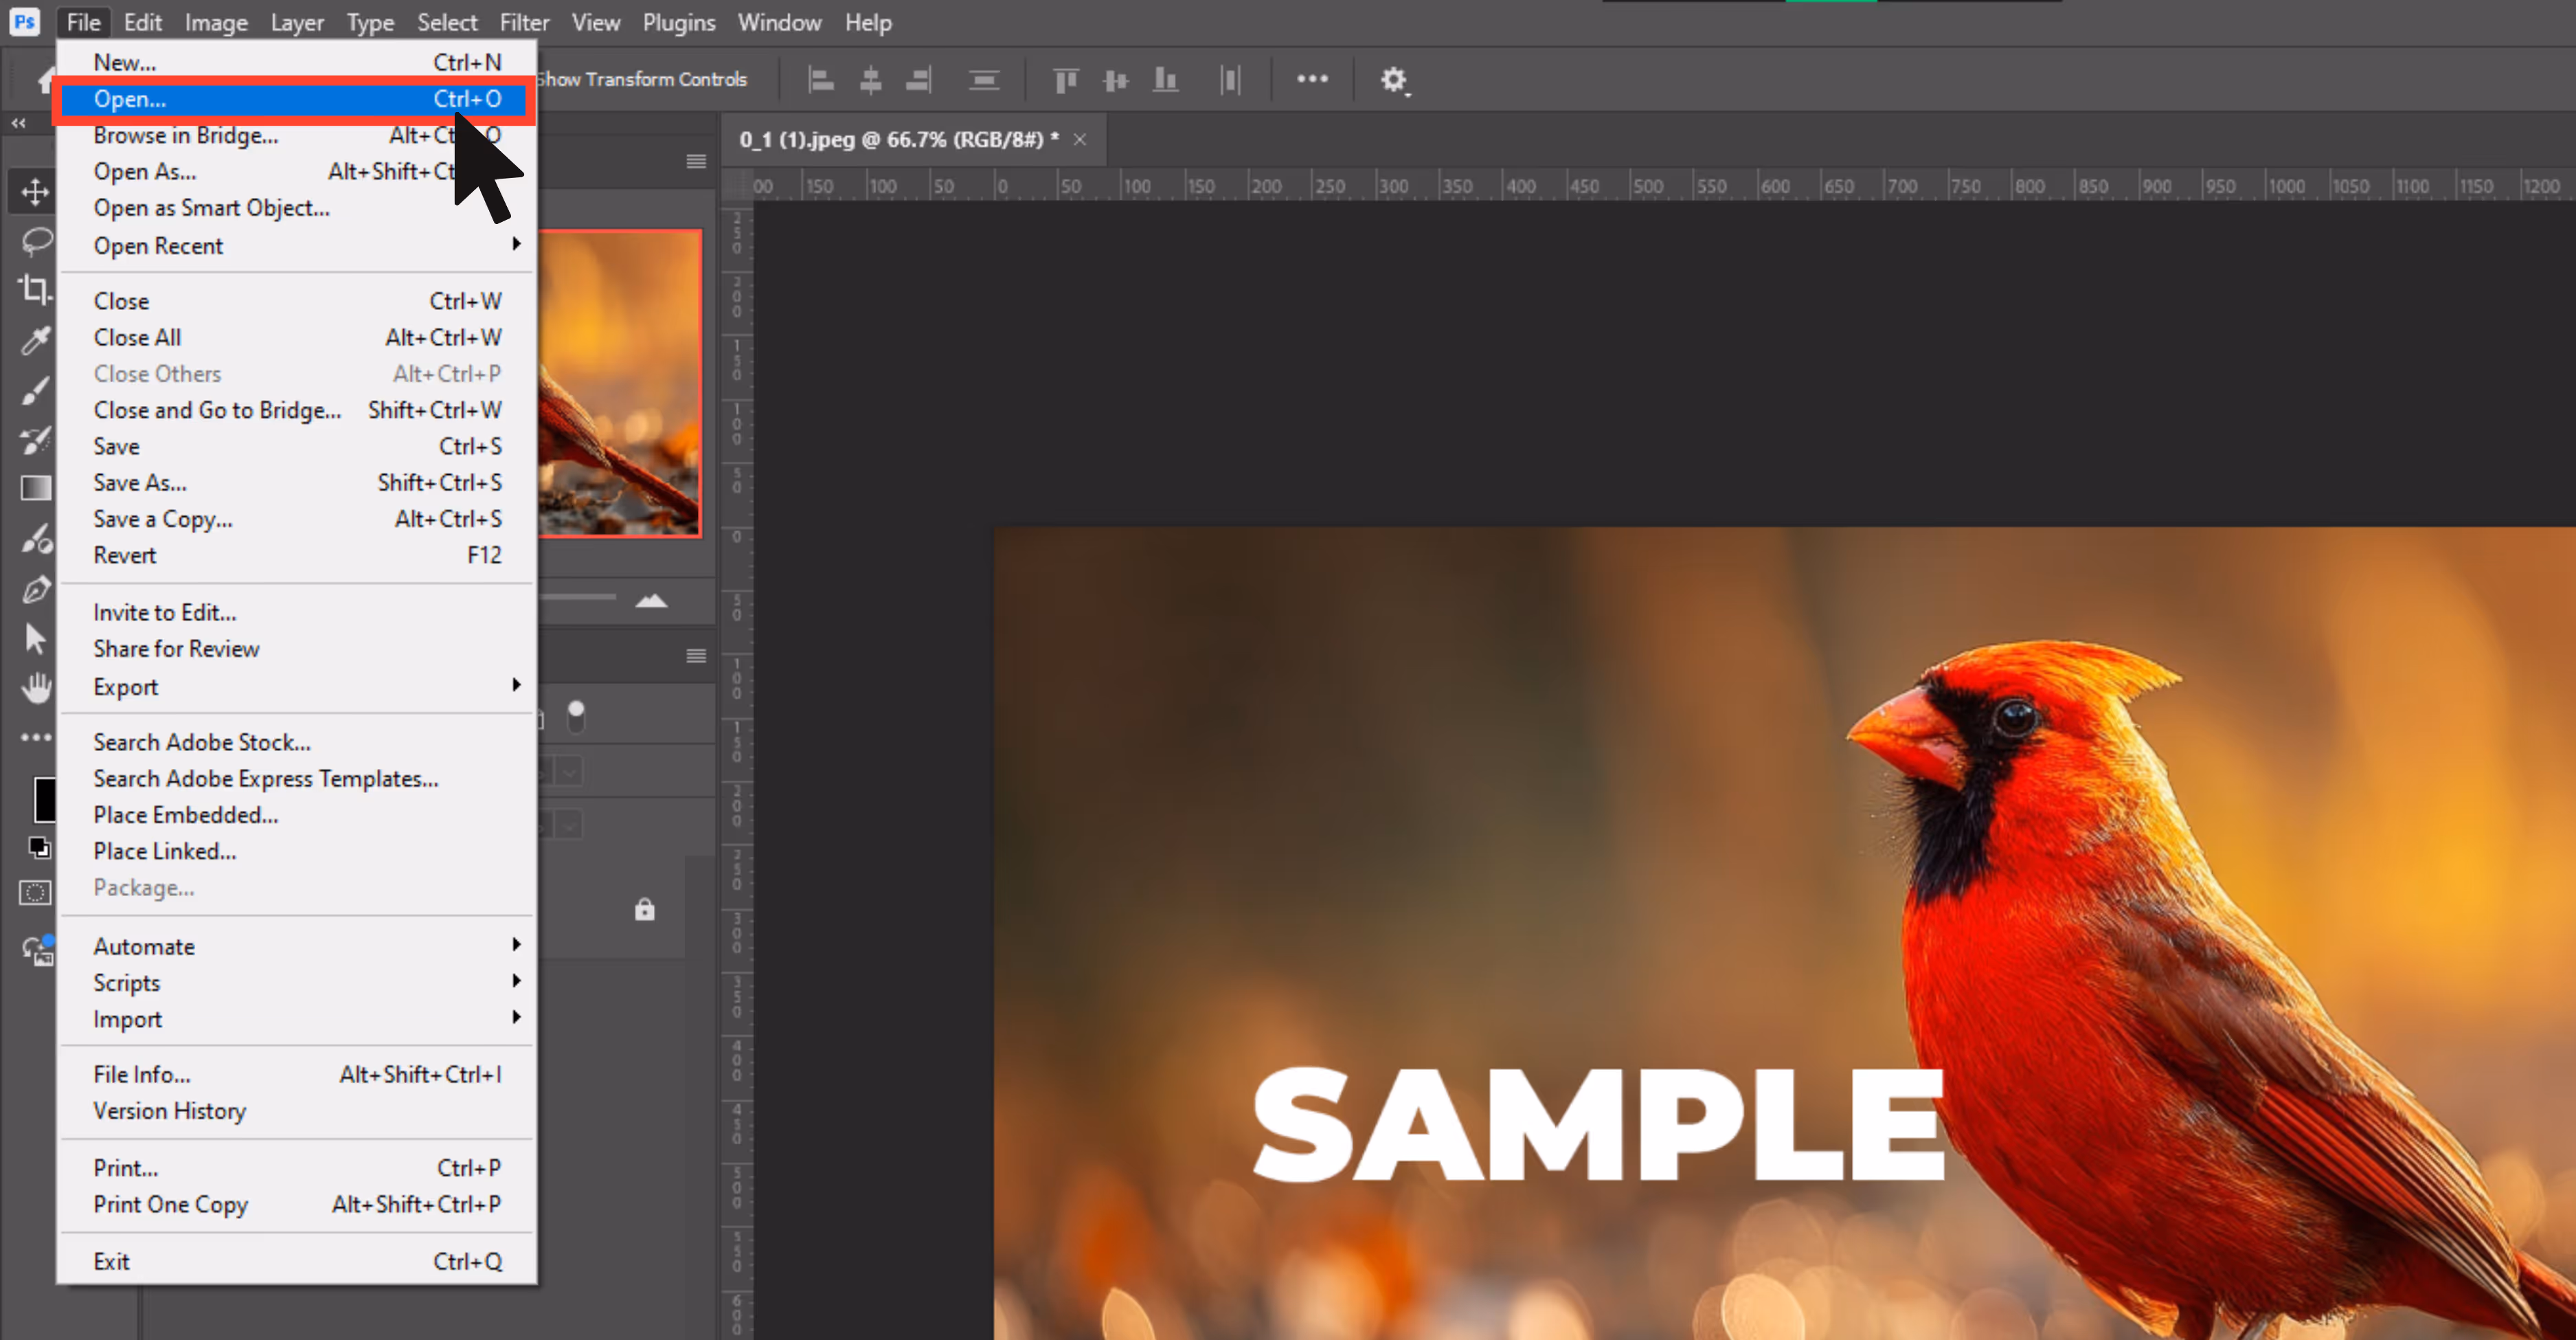
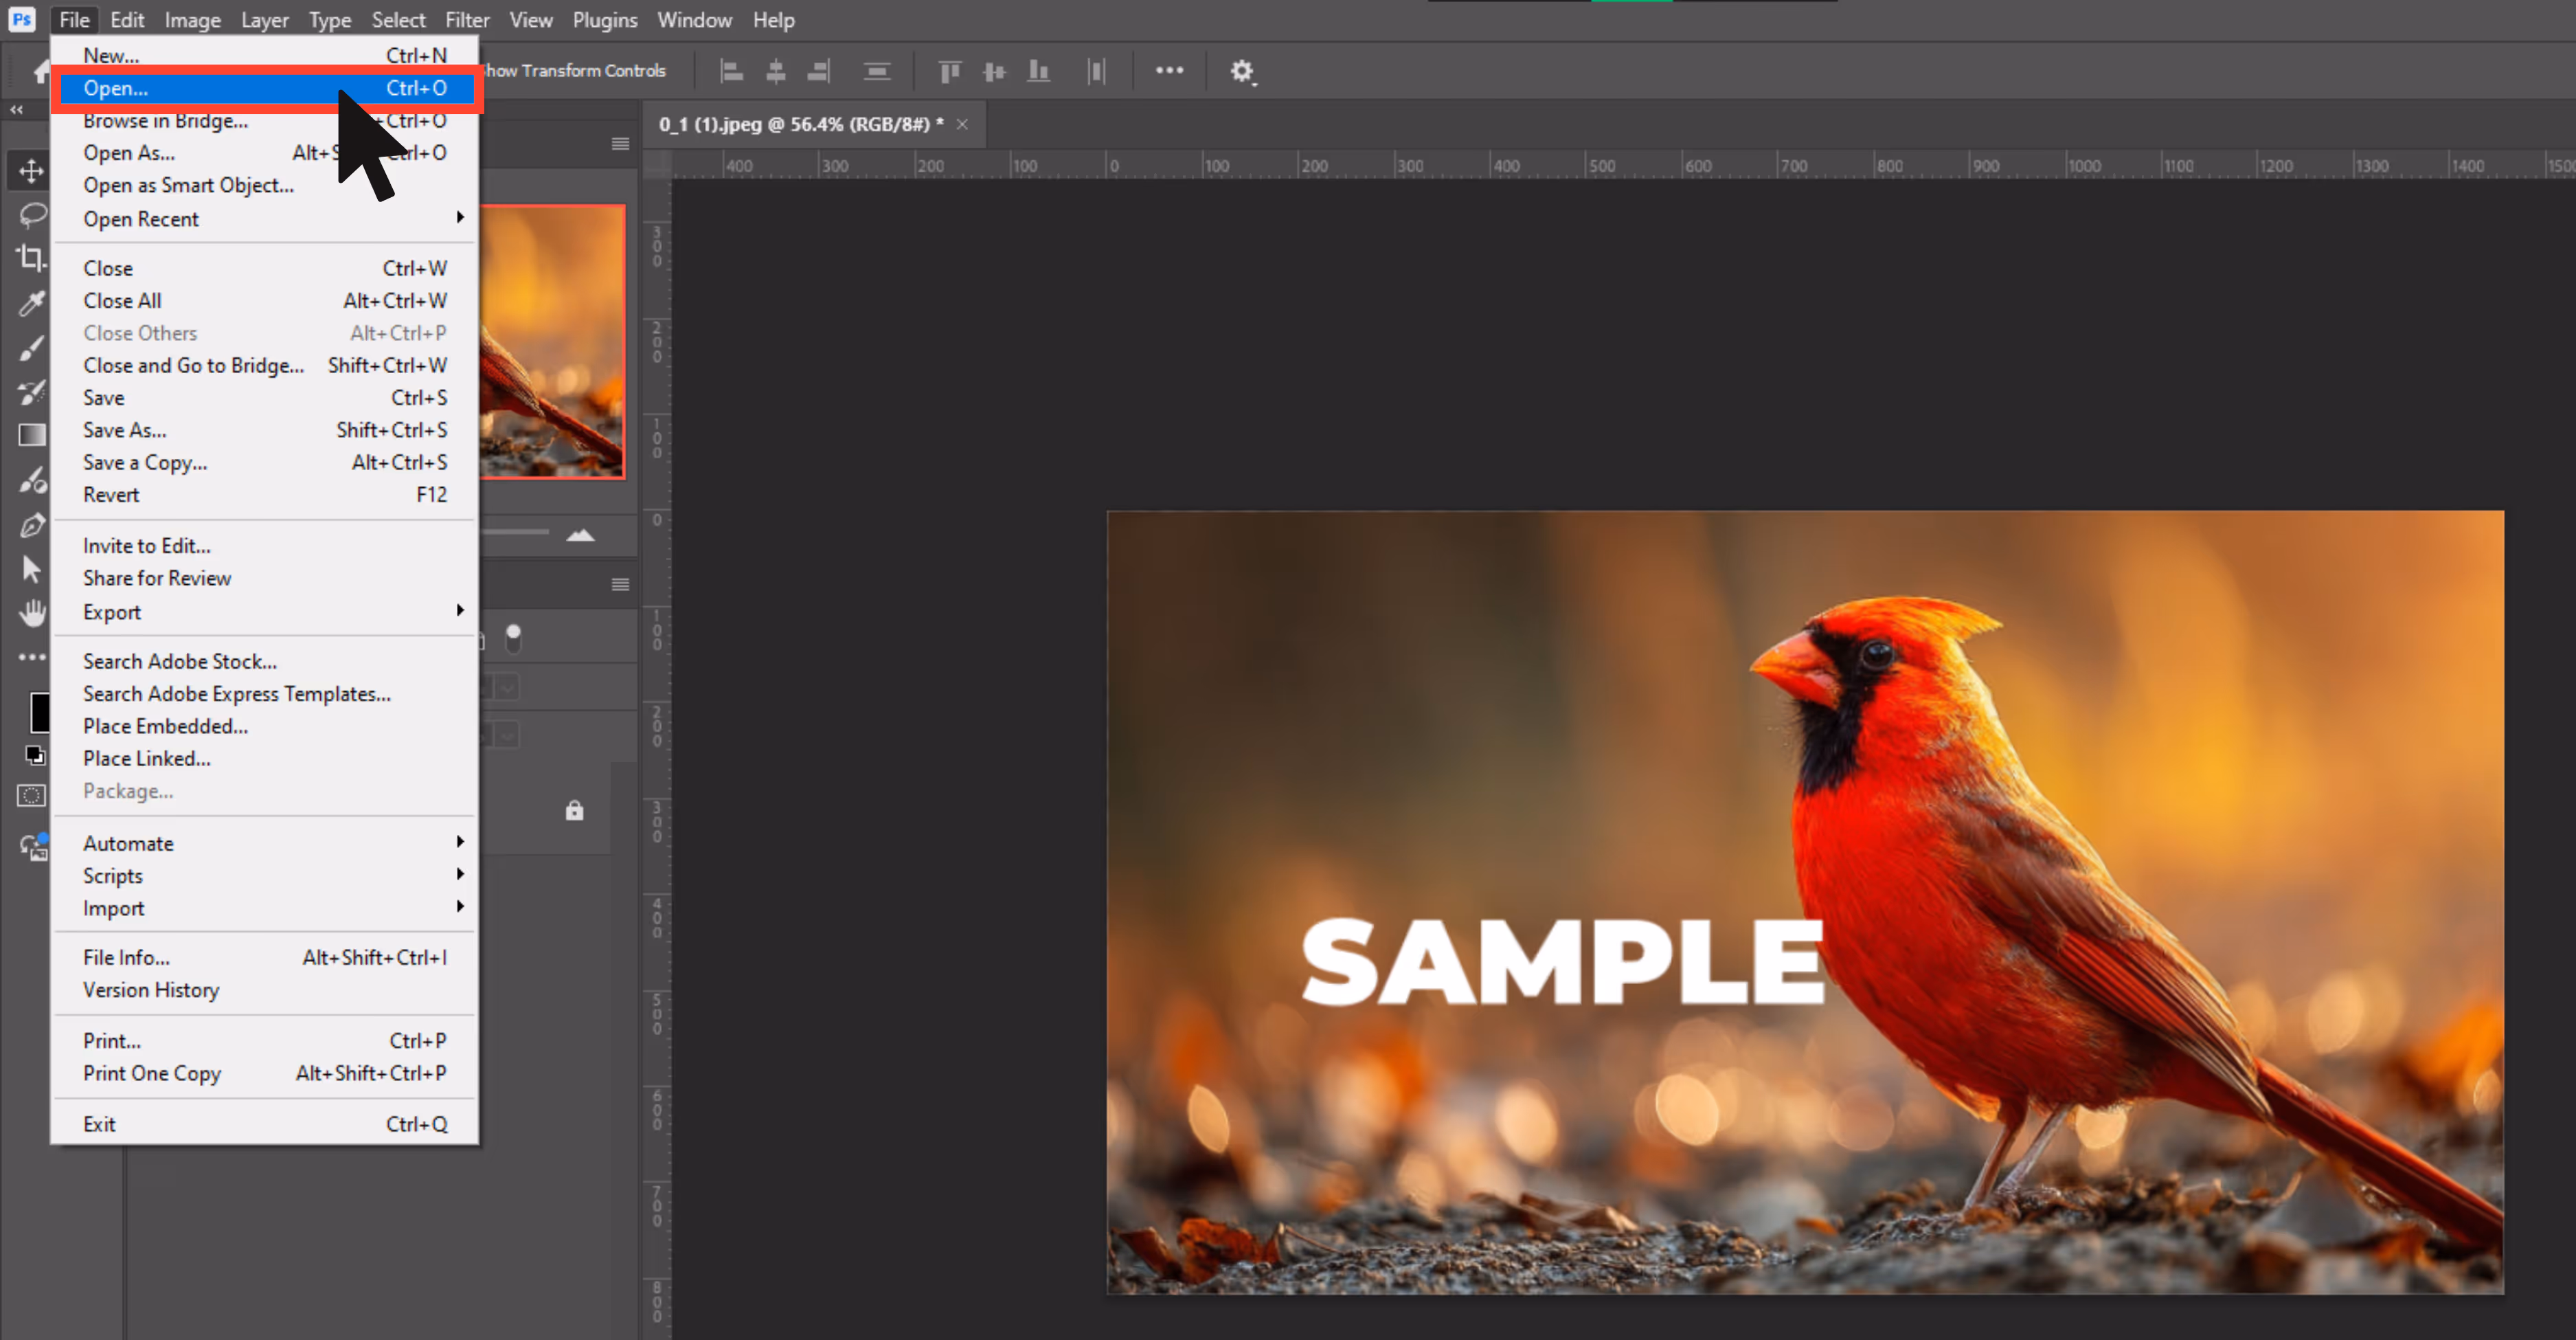
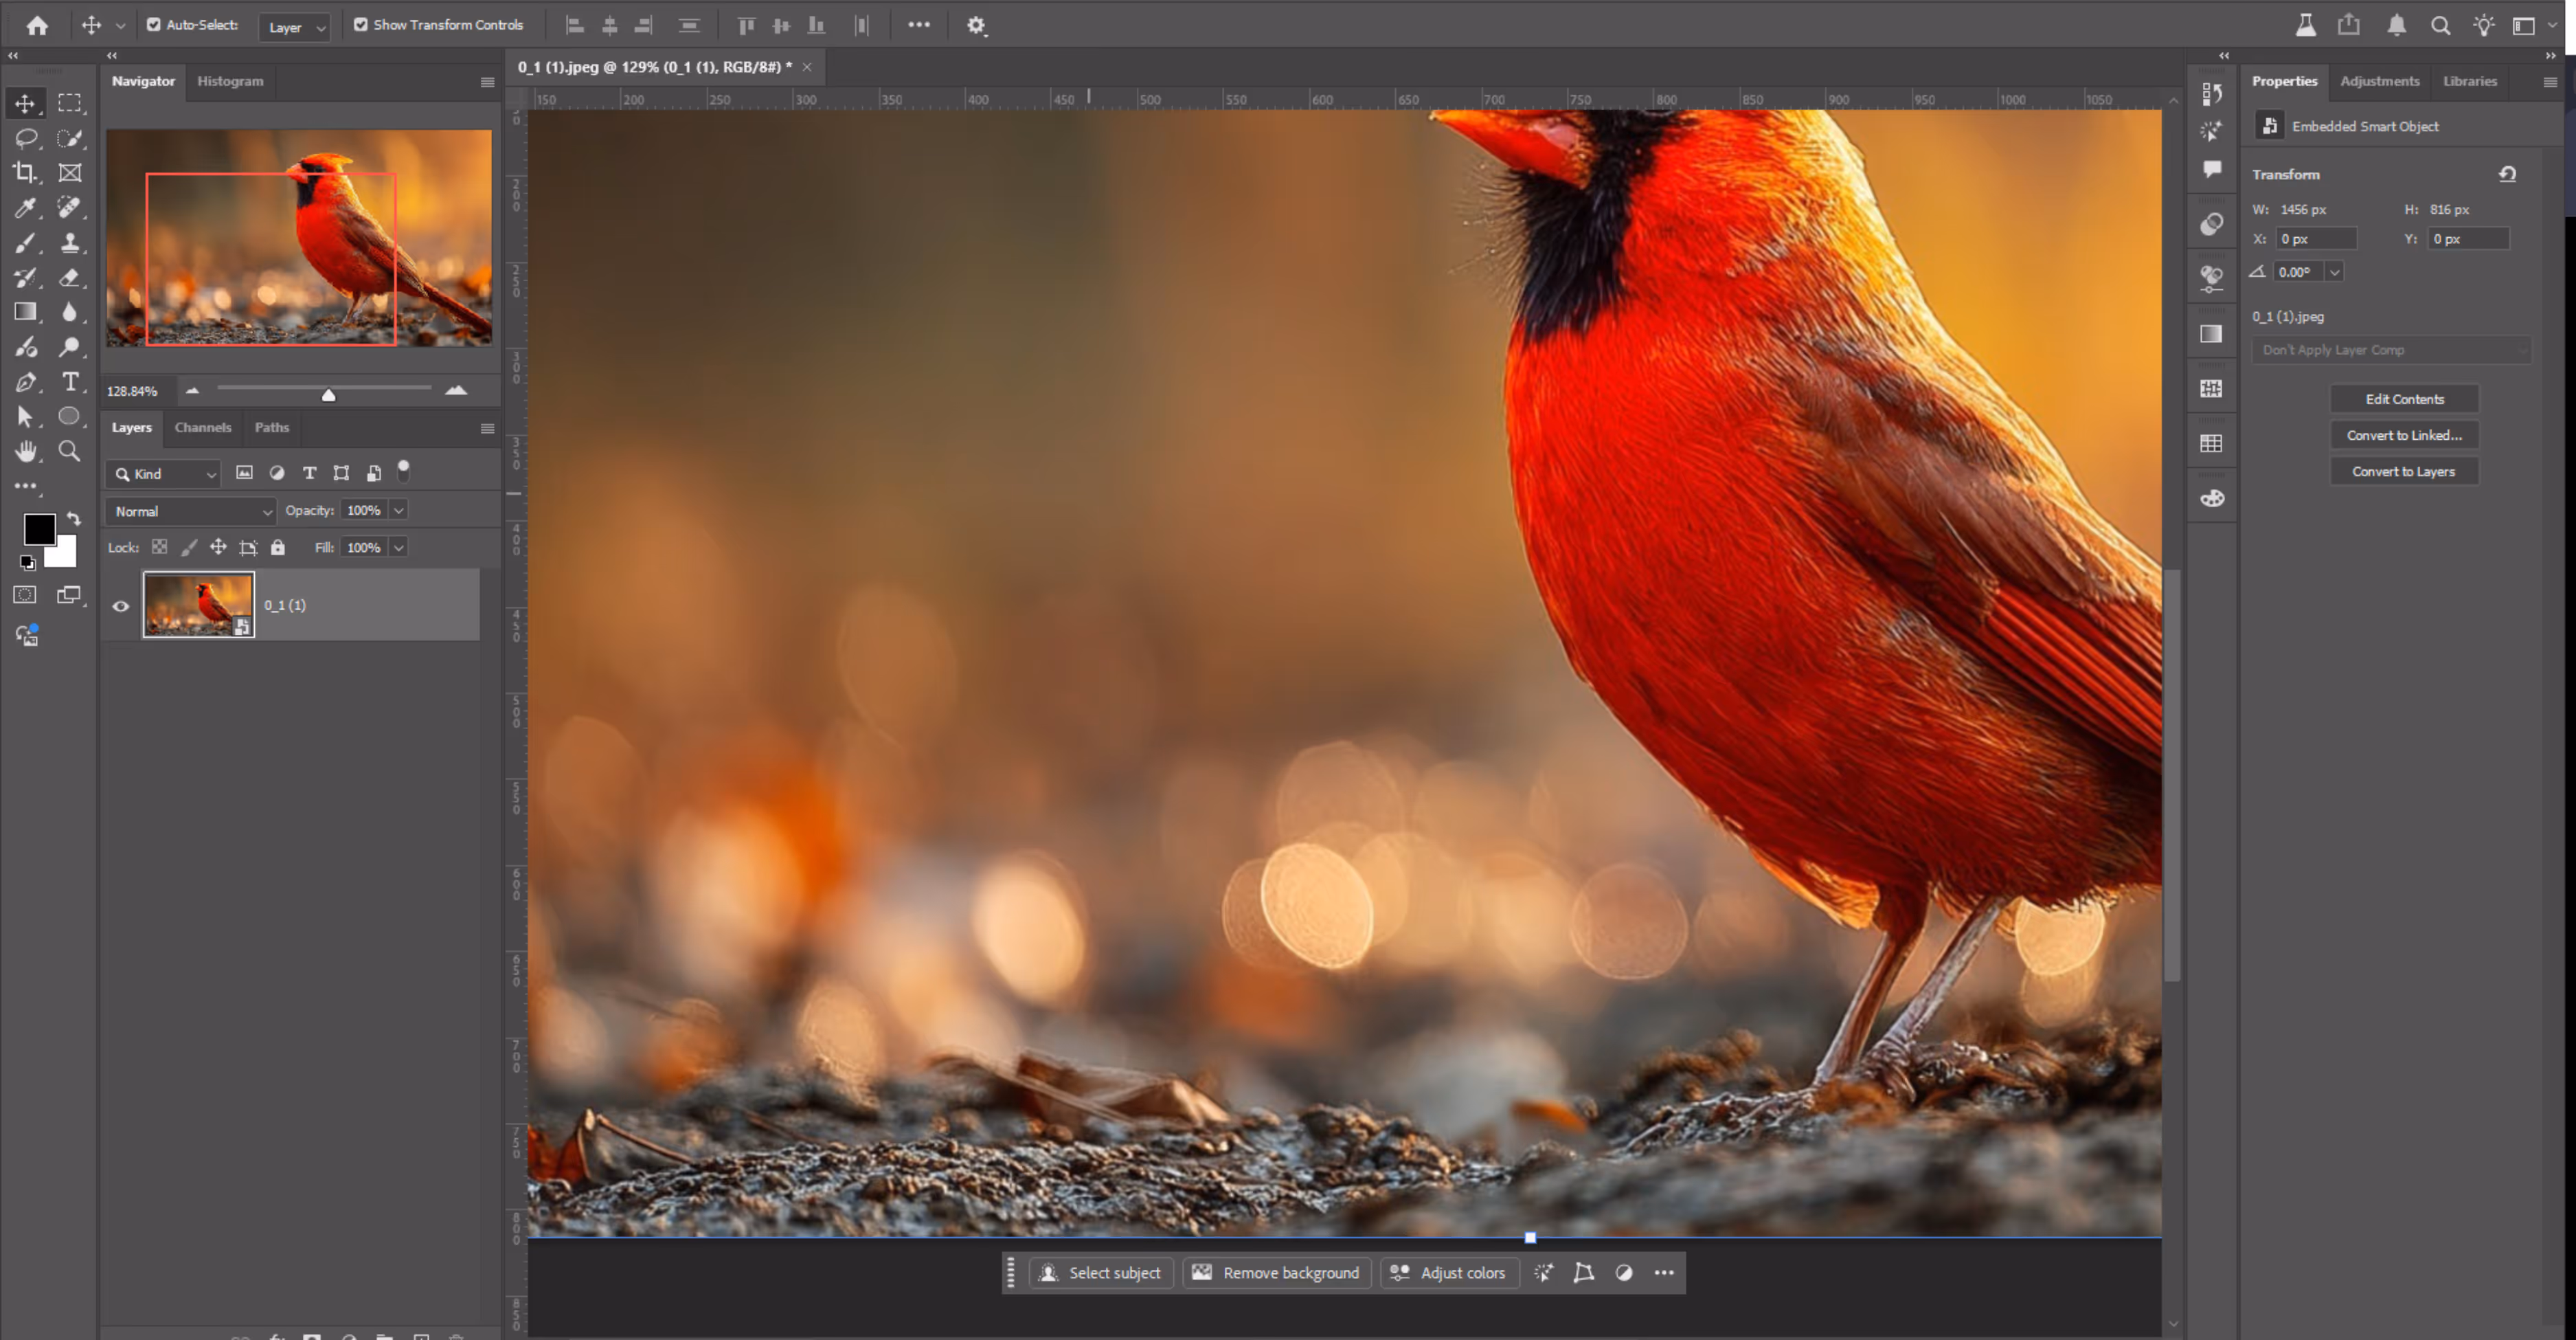
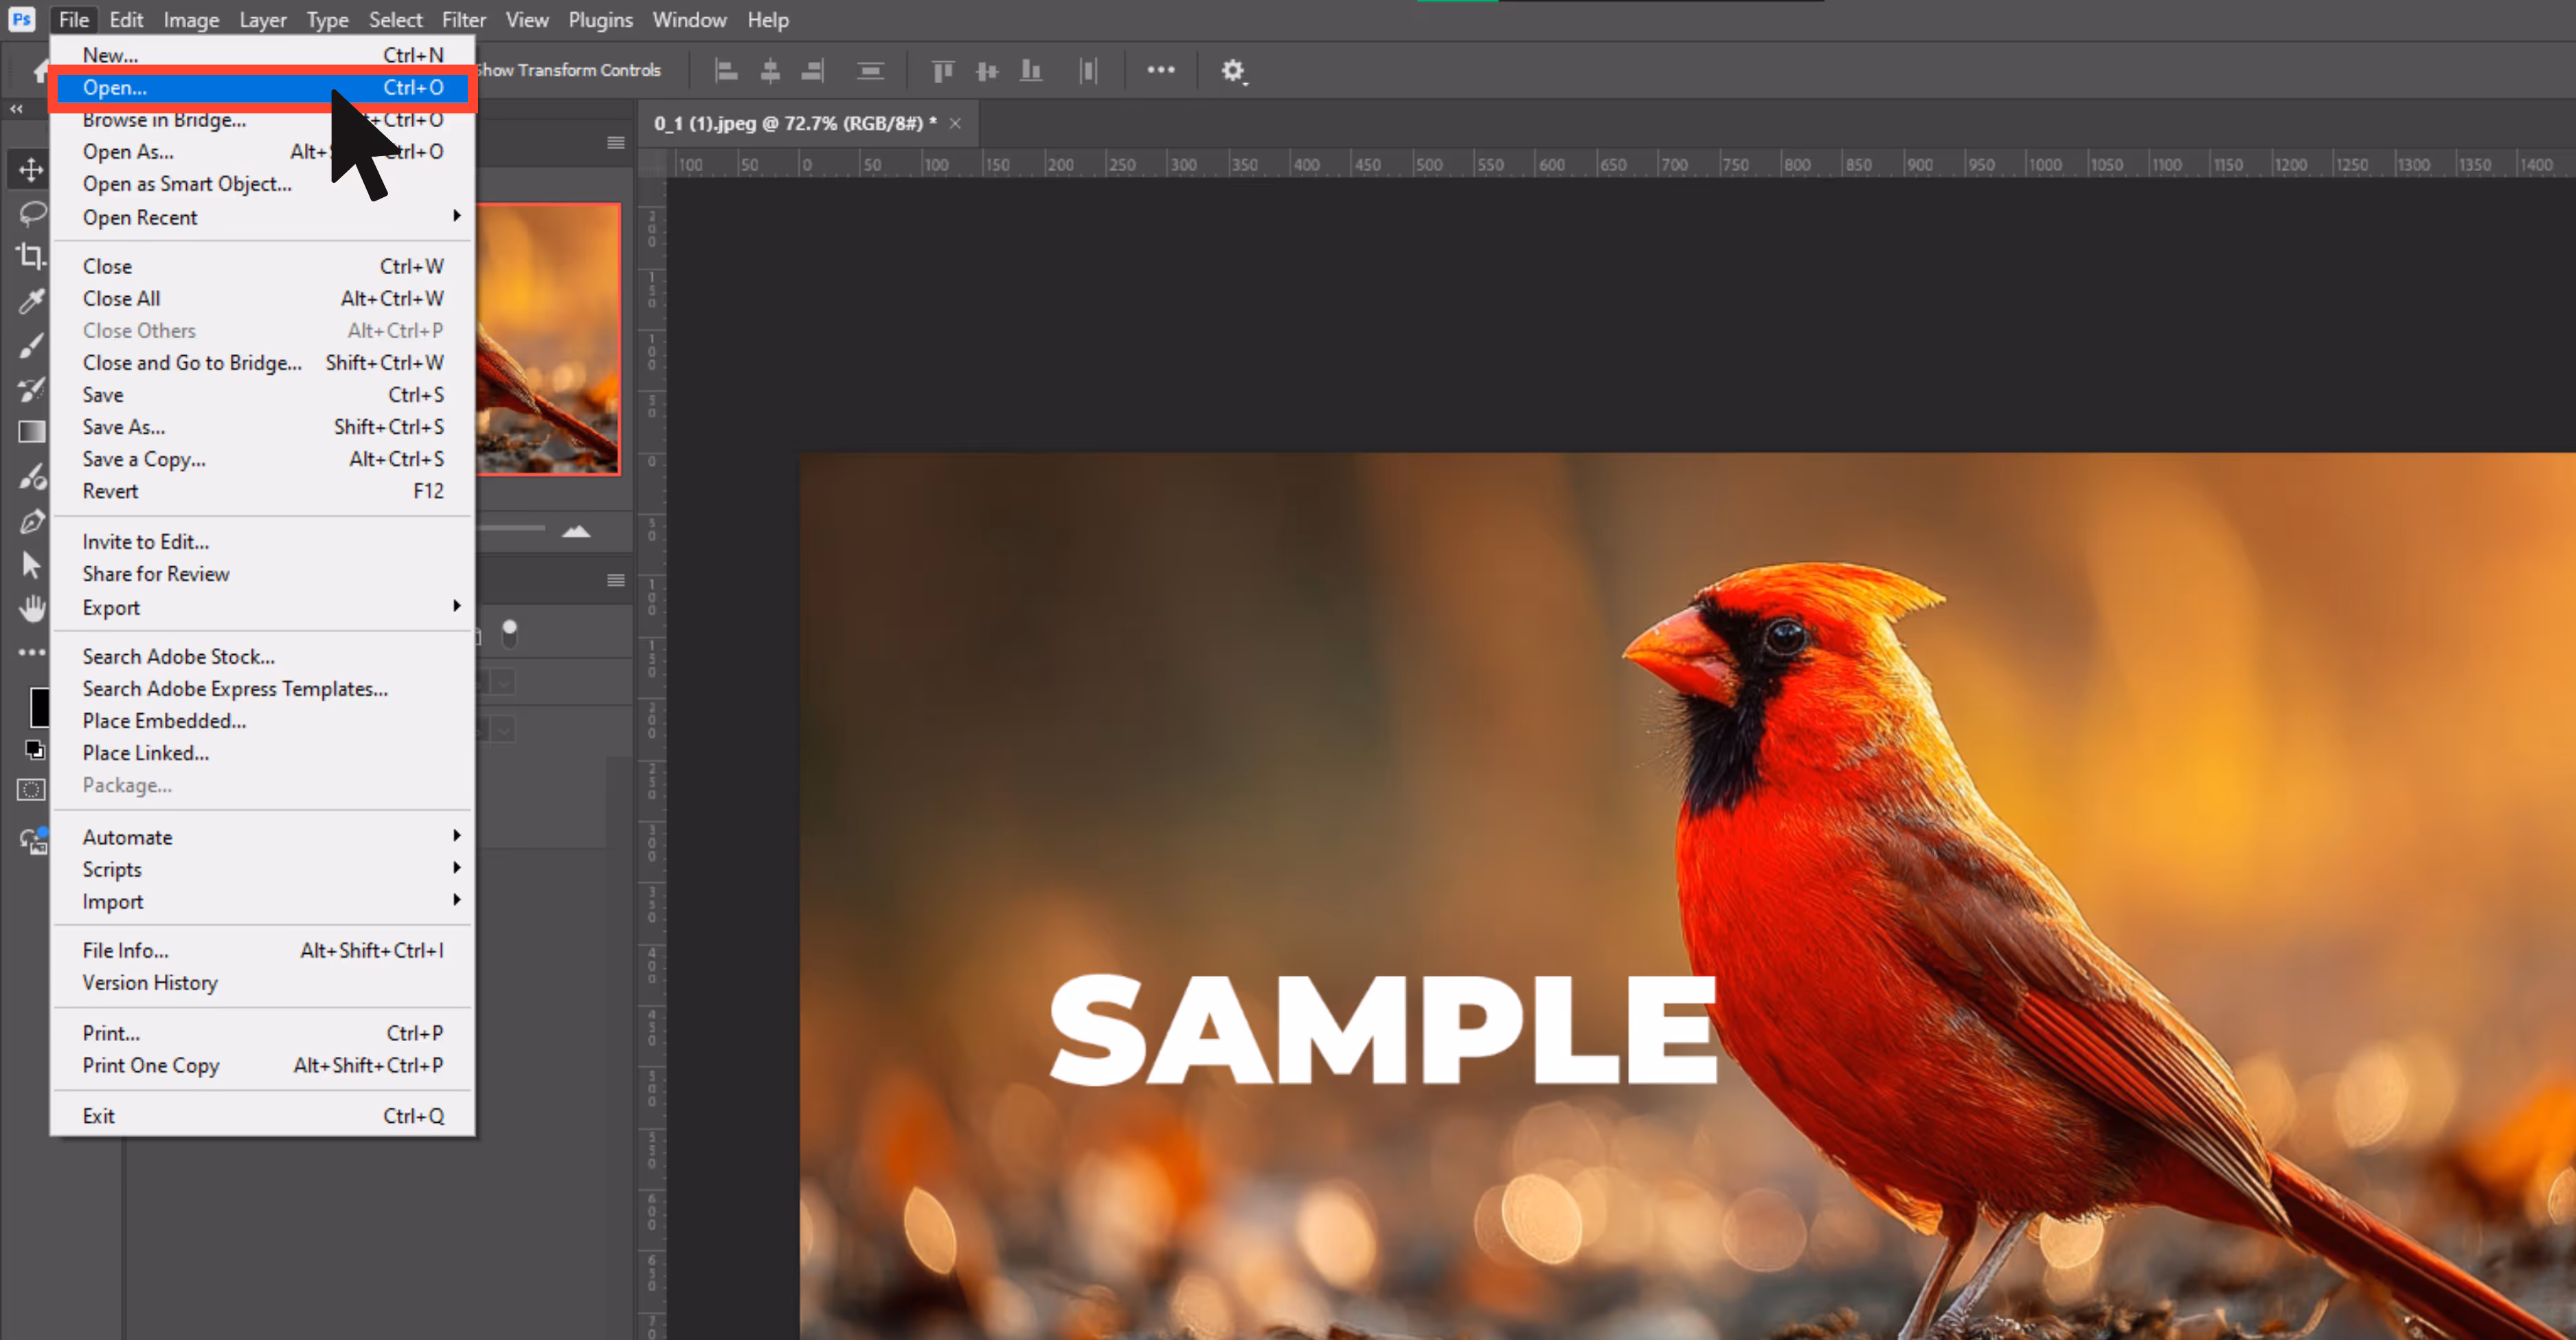
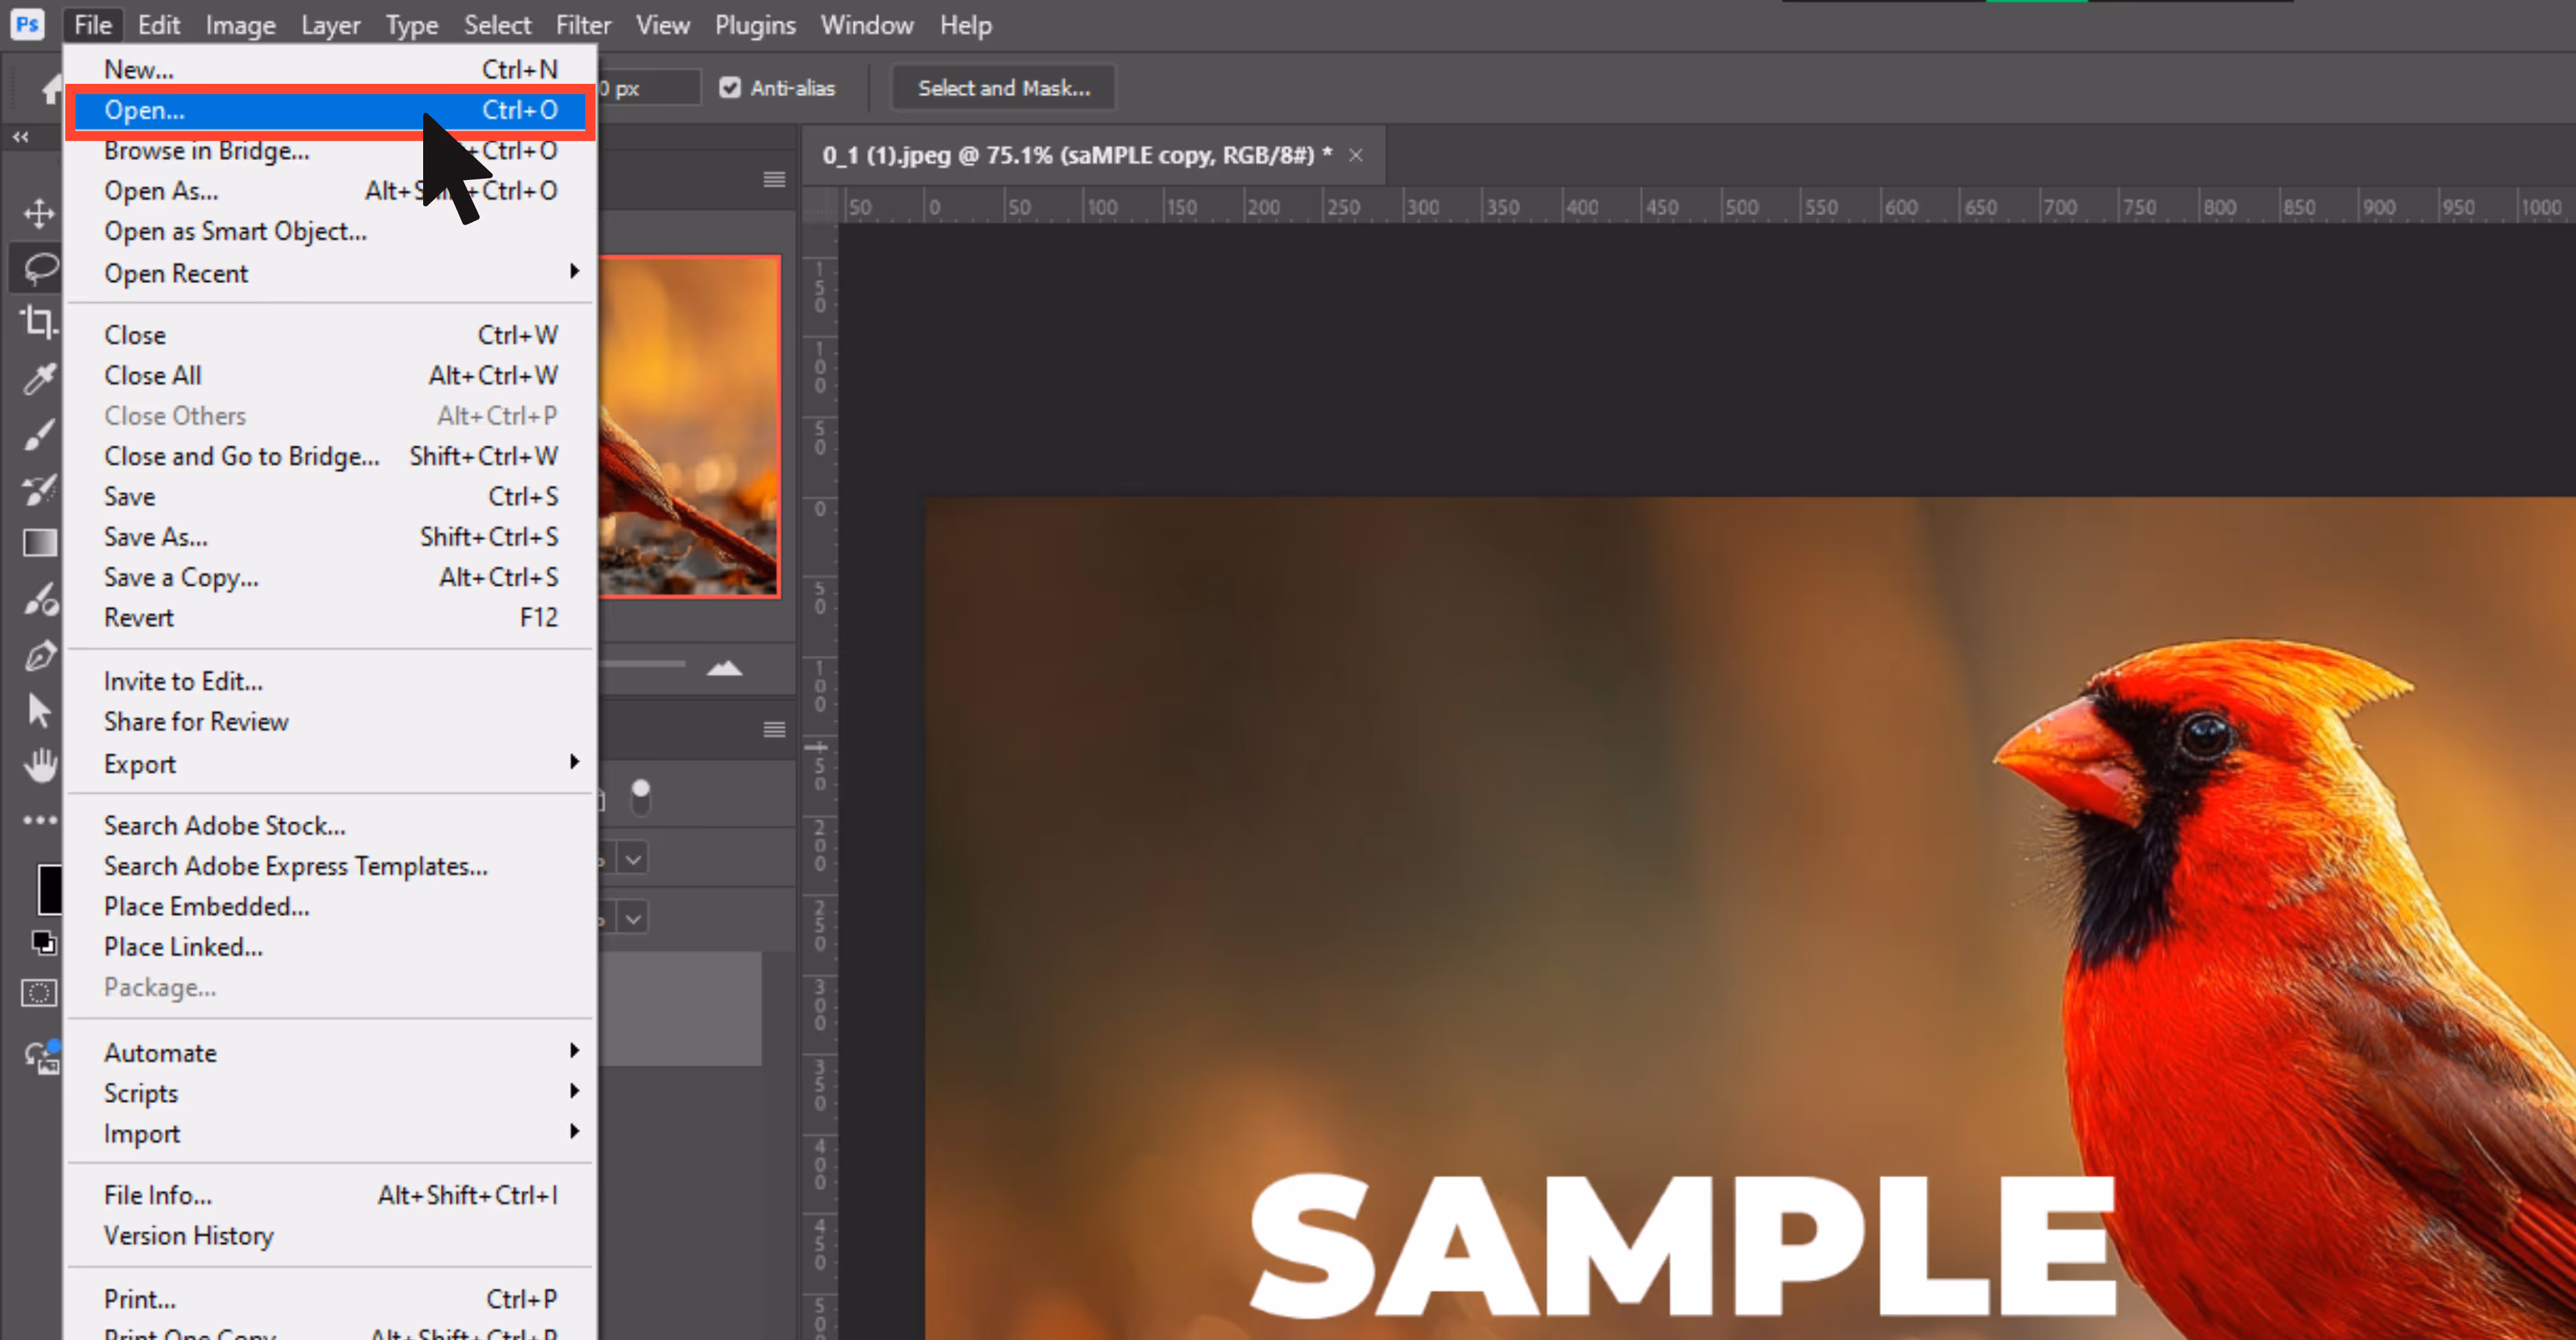
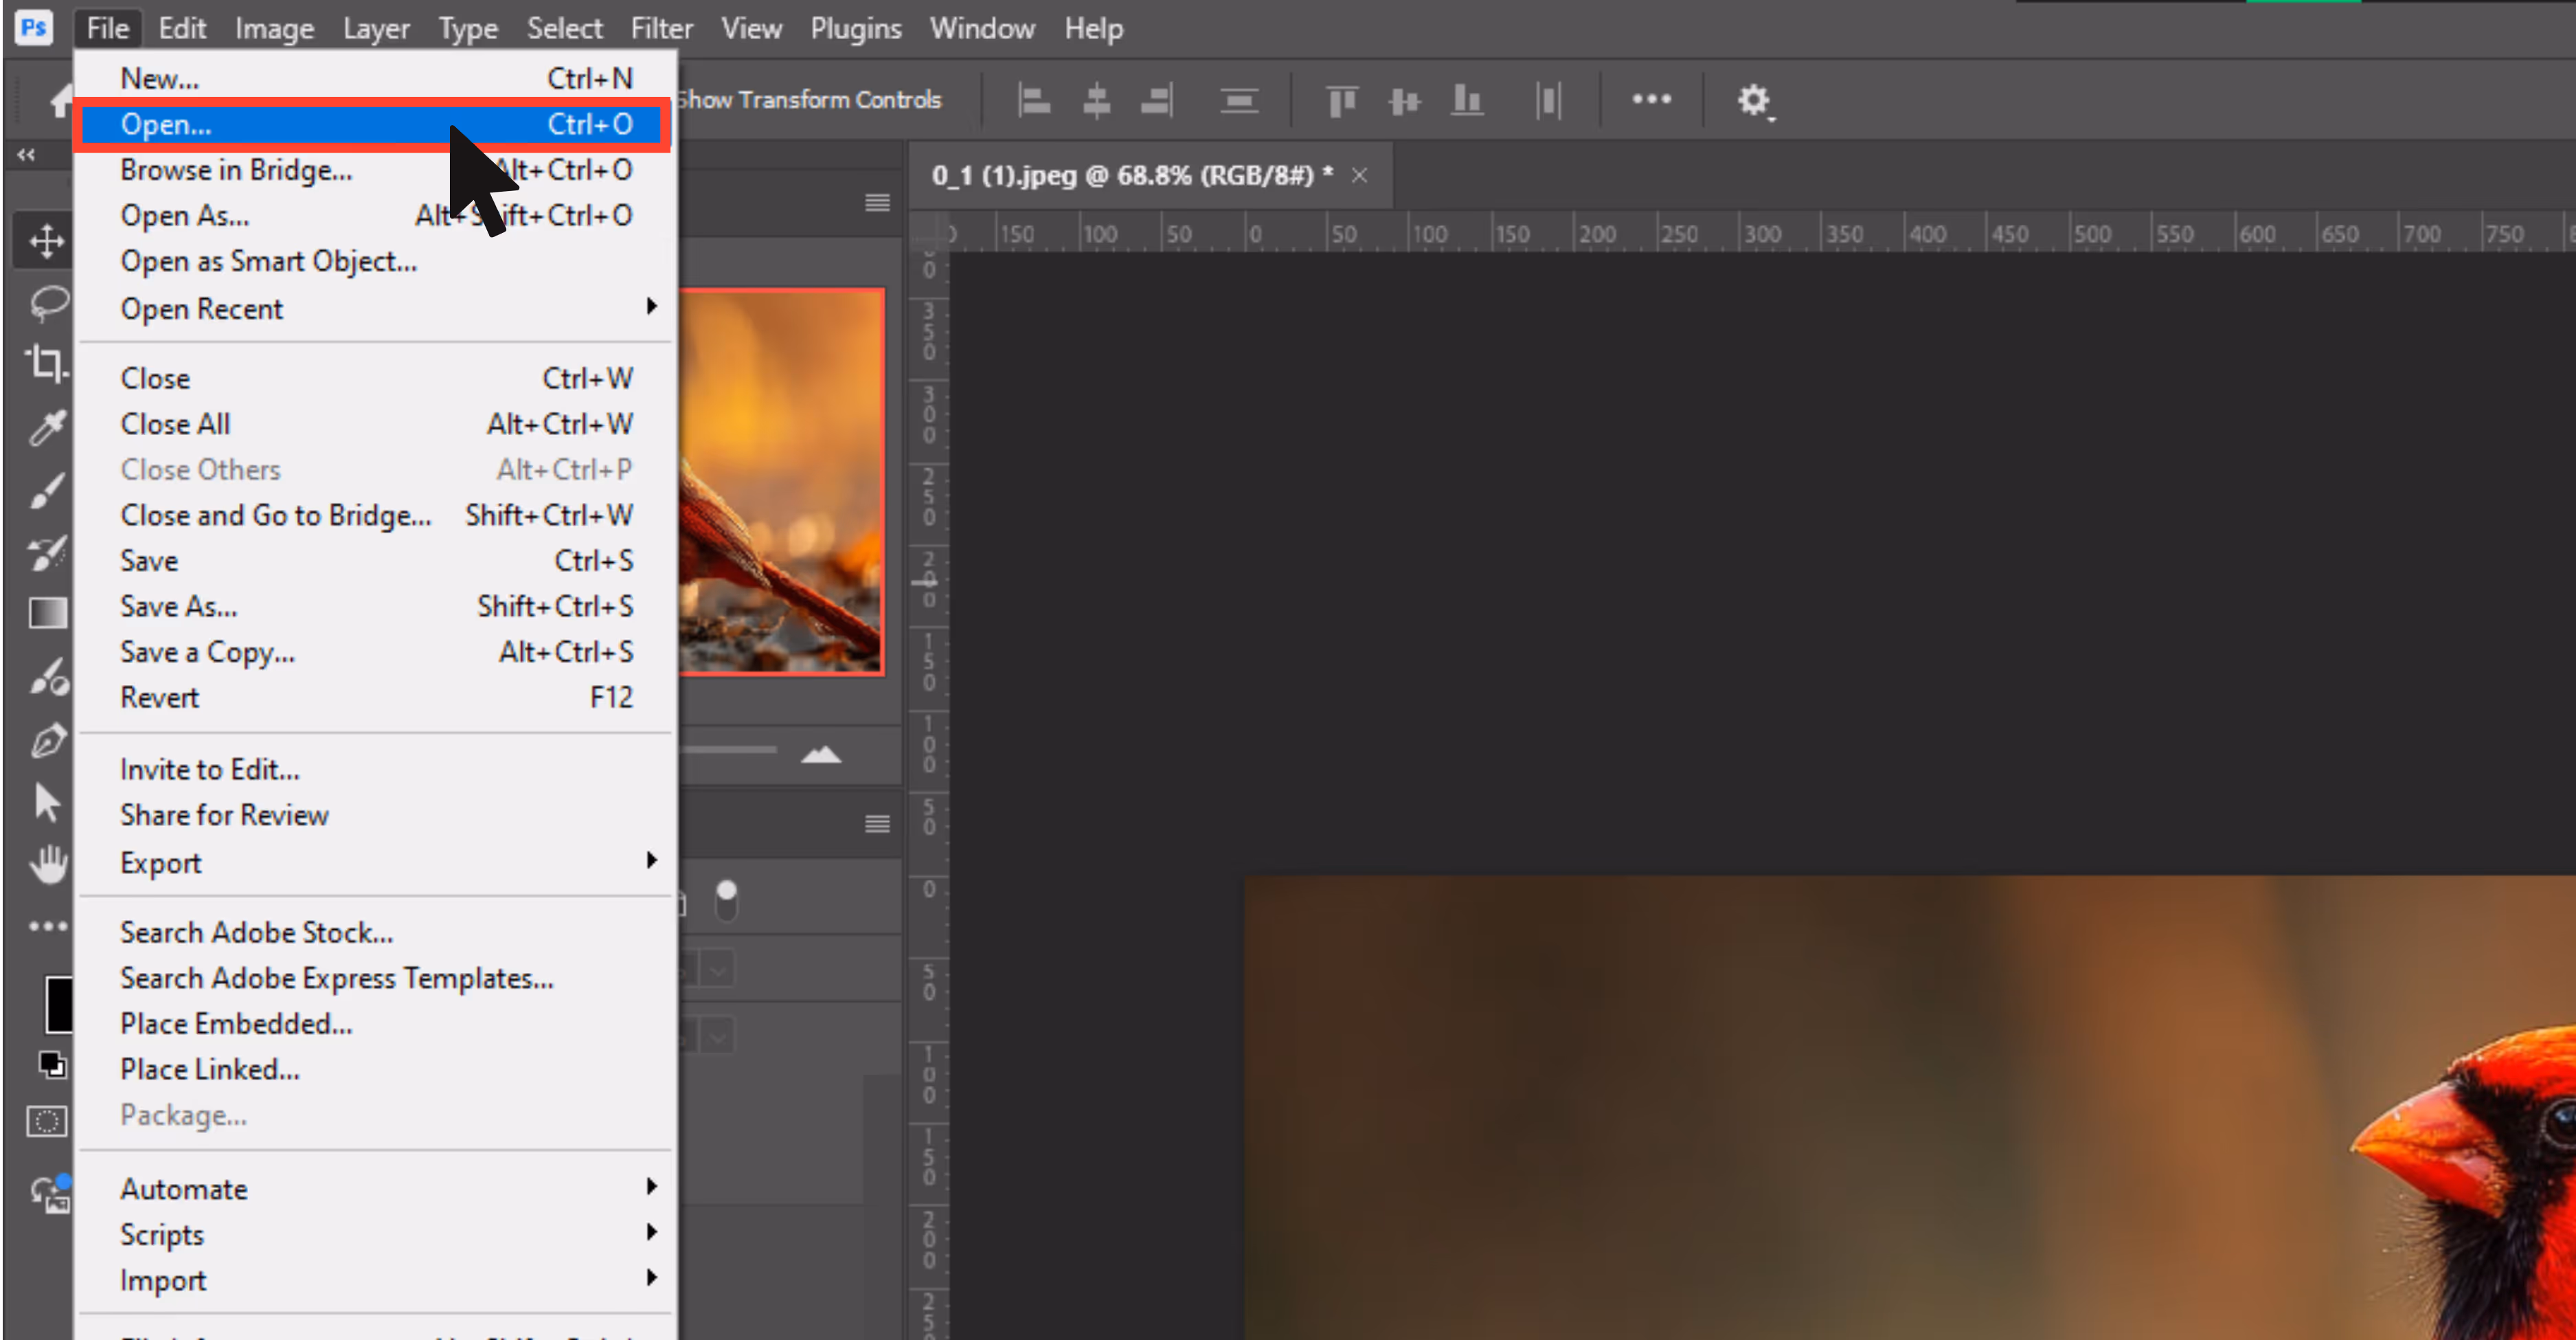
Step 1: Open your image in Photoshop by clicking on File and then Open.
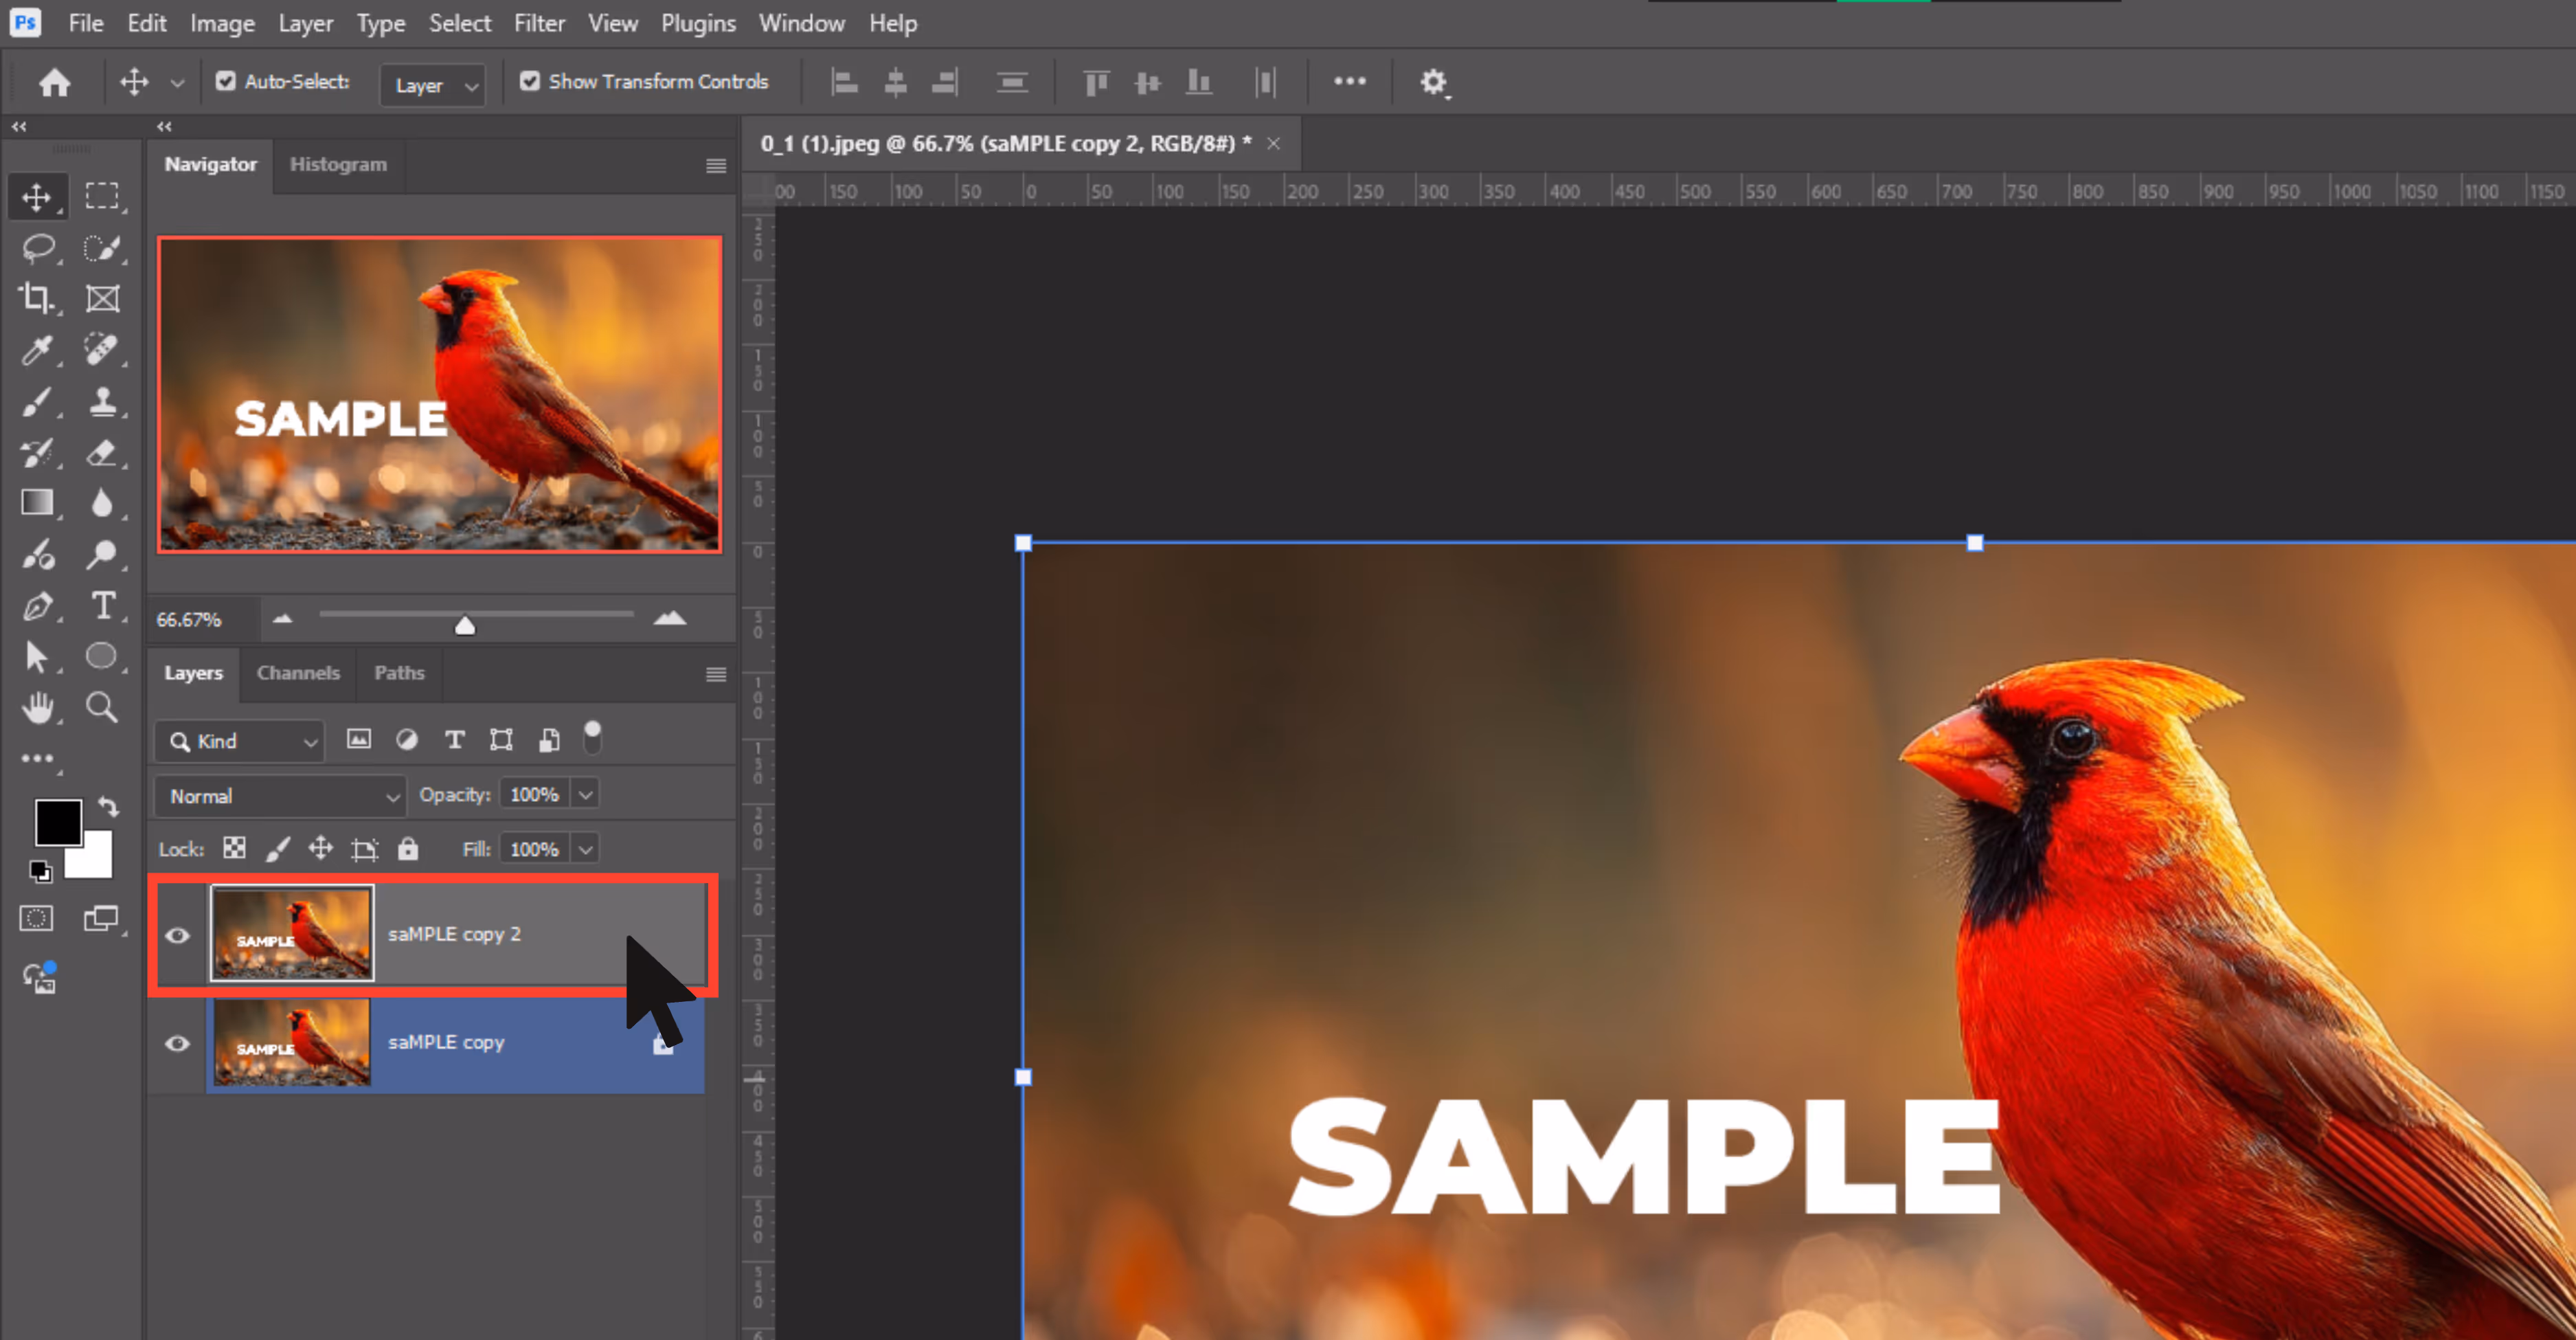
Step 2: Create a duplicate layer by pressing Ctrl+J (Windows). Always work on a duplicate to preserve the original.
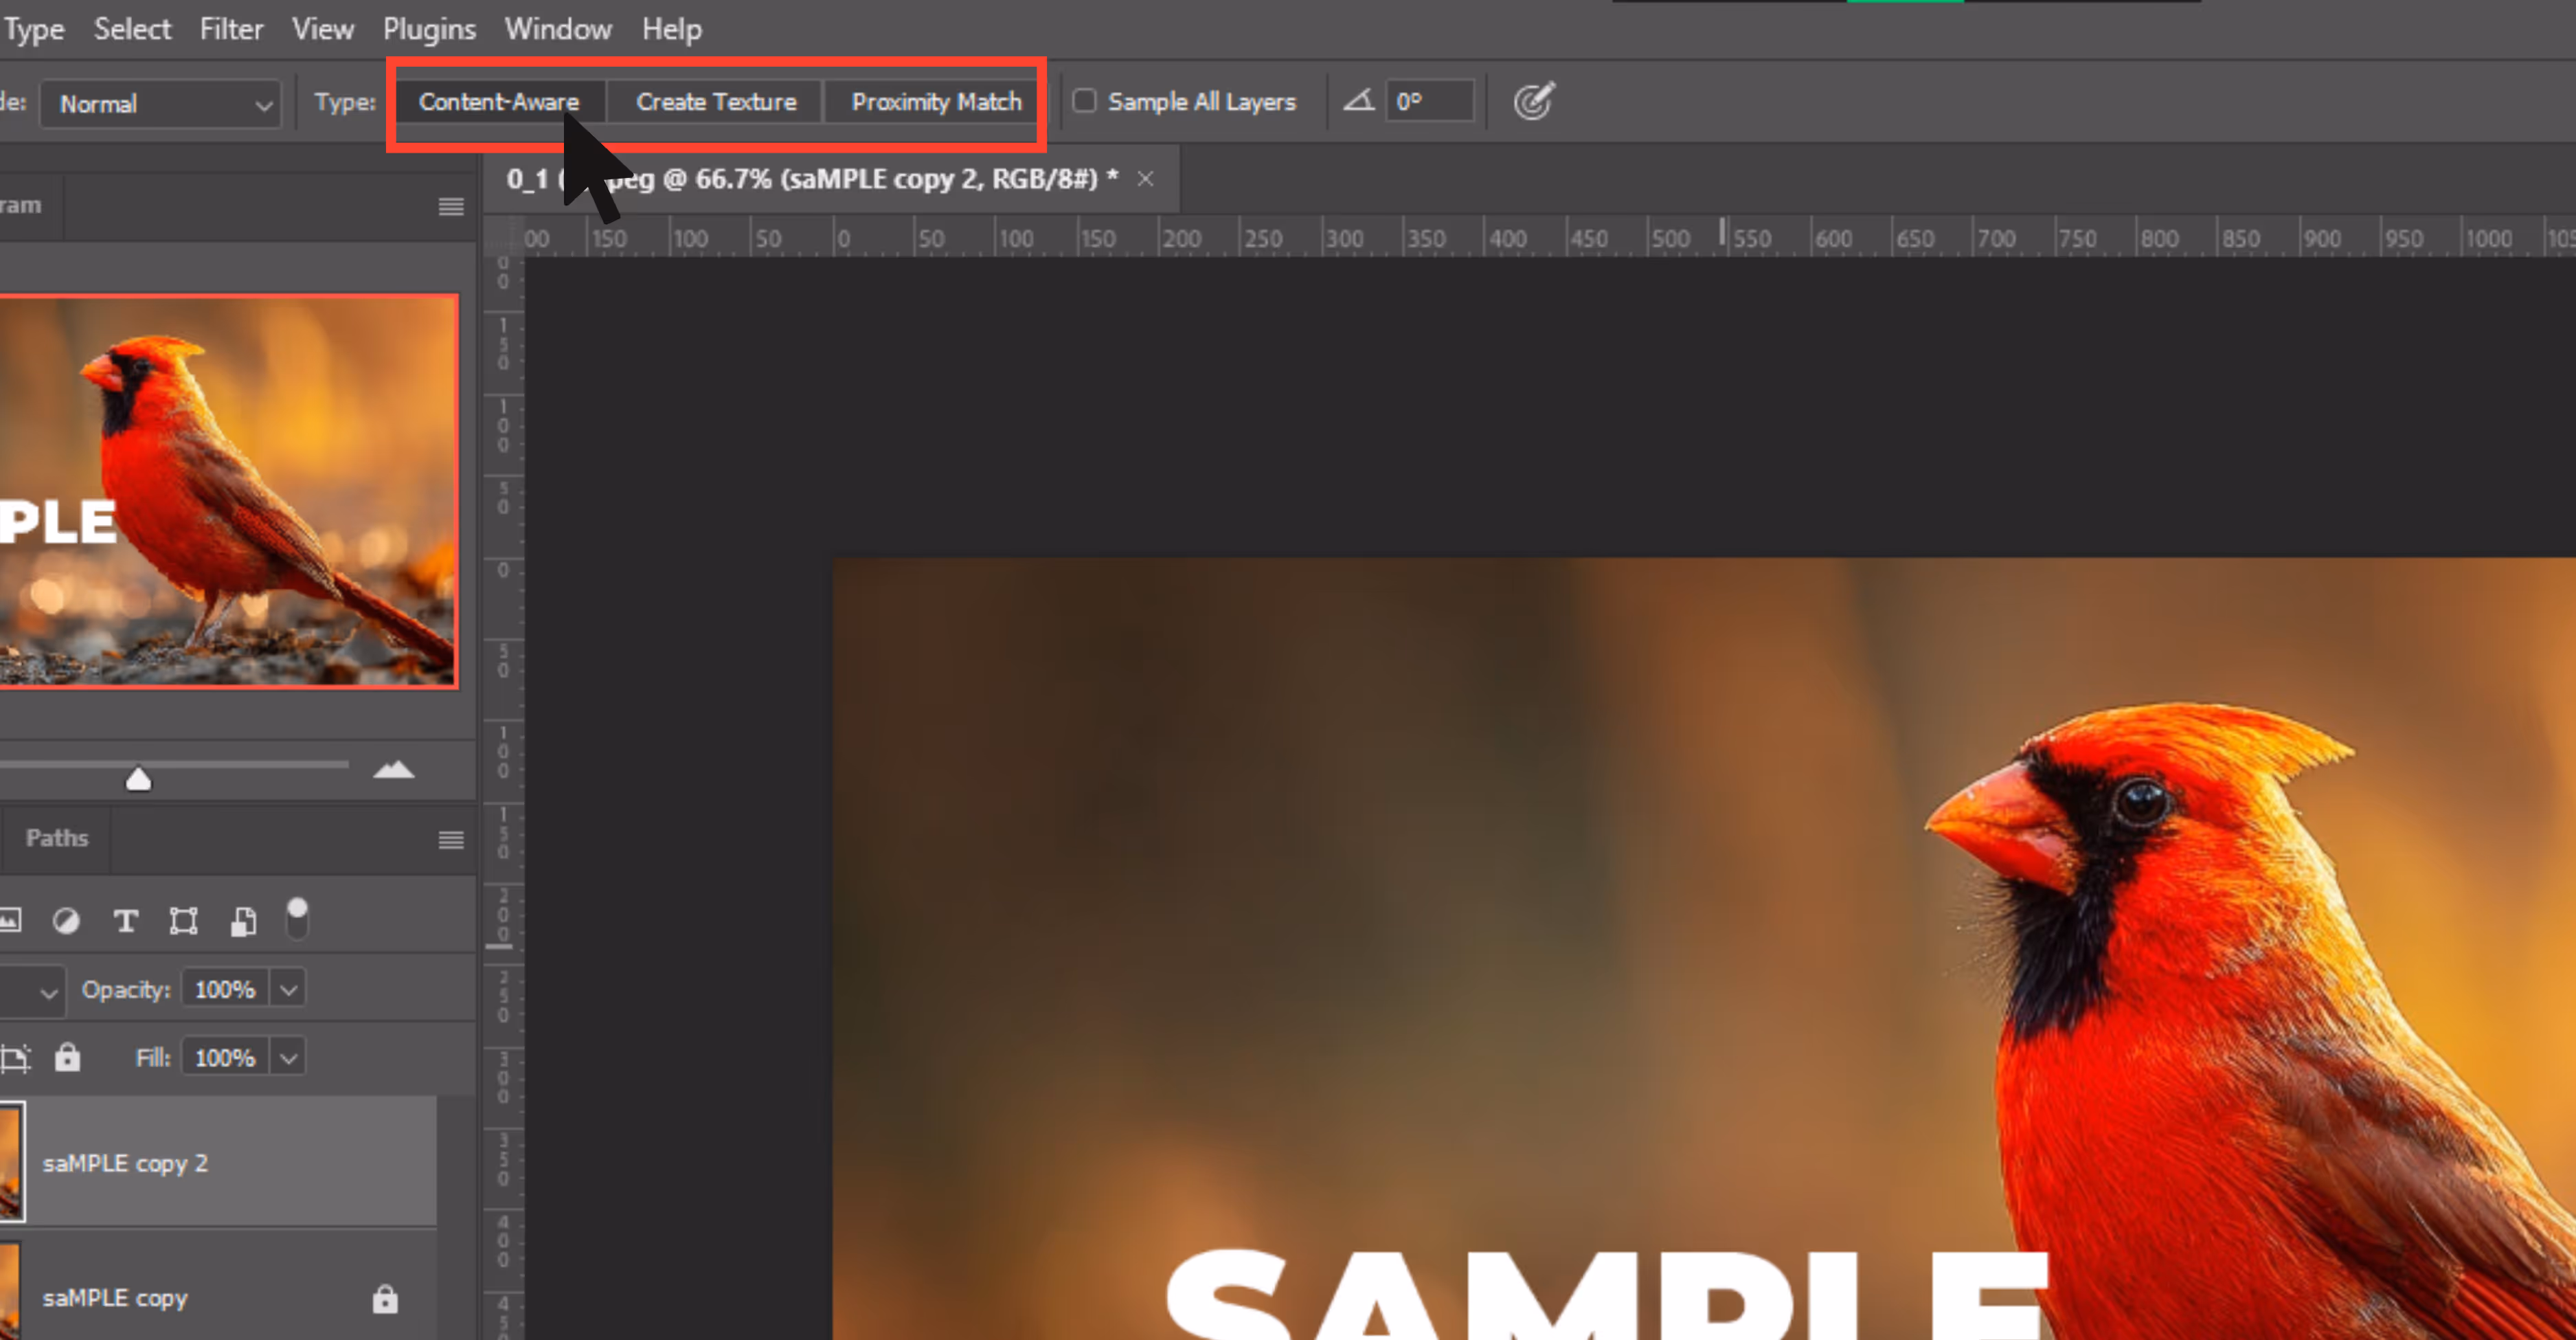
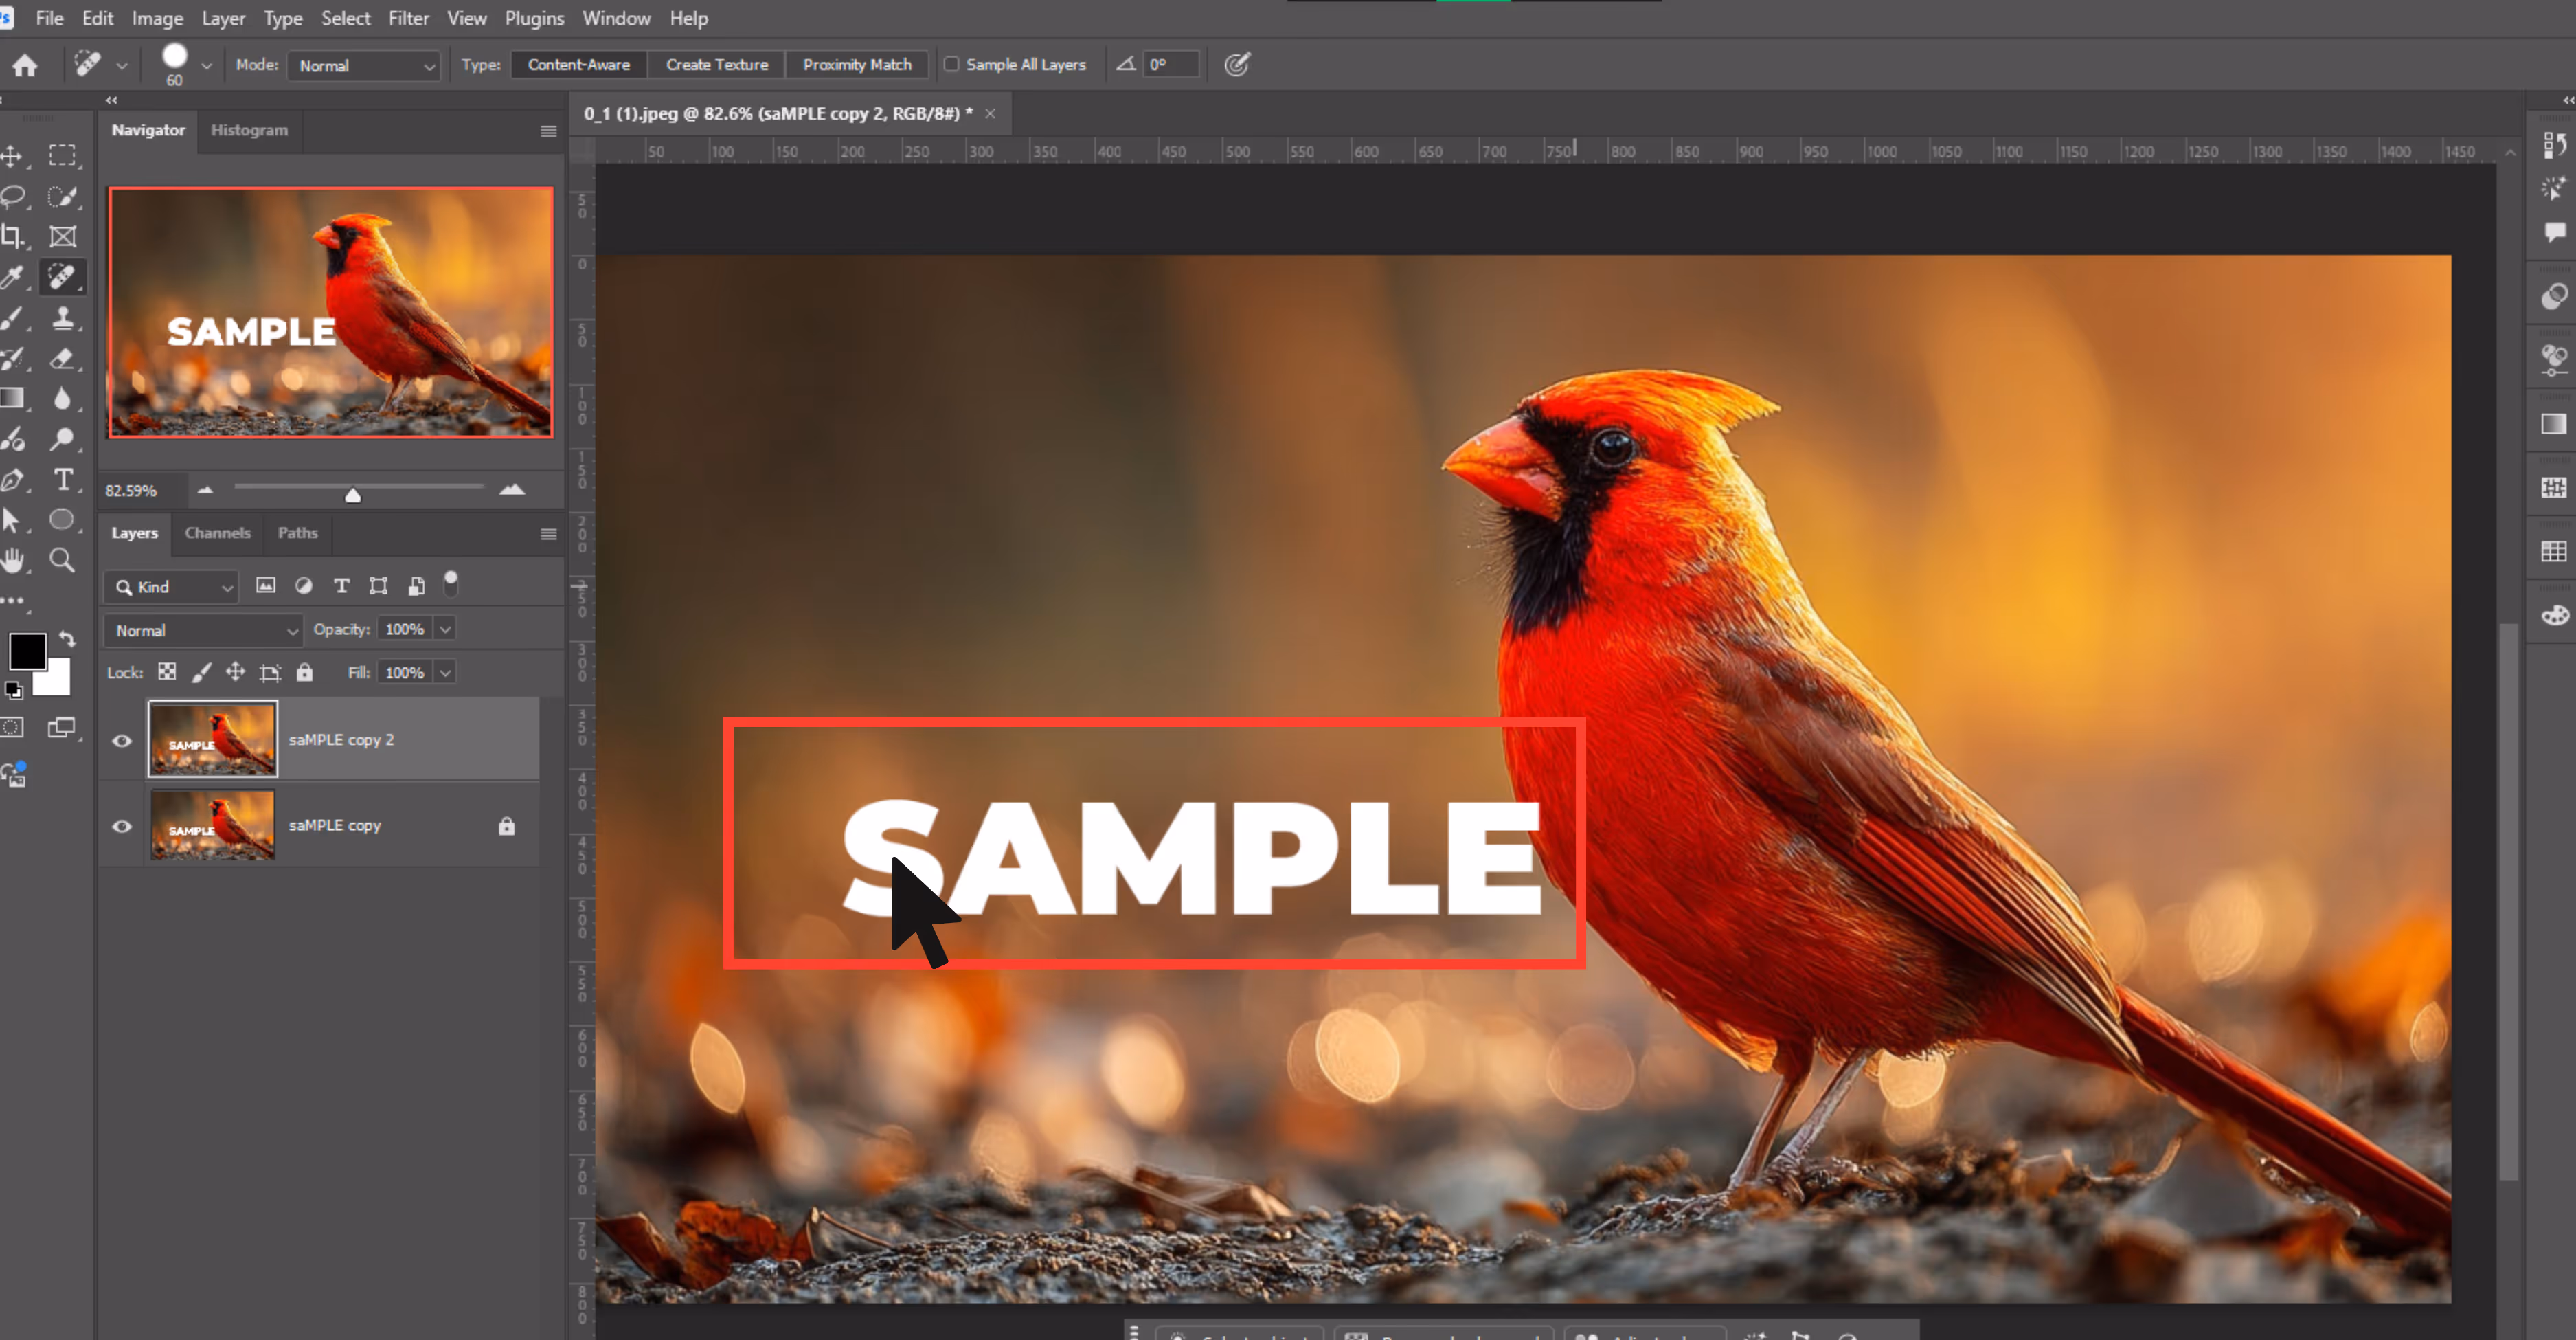
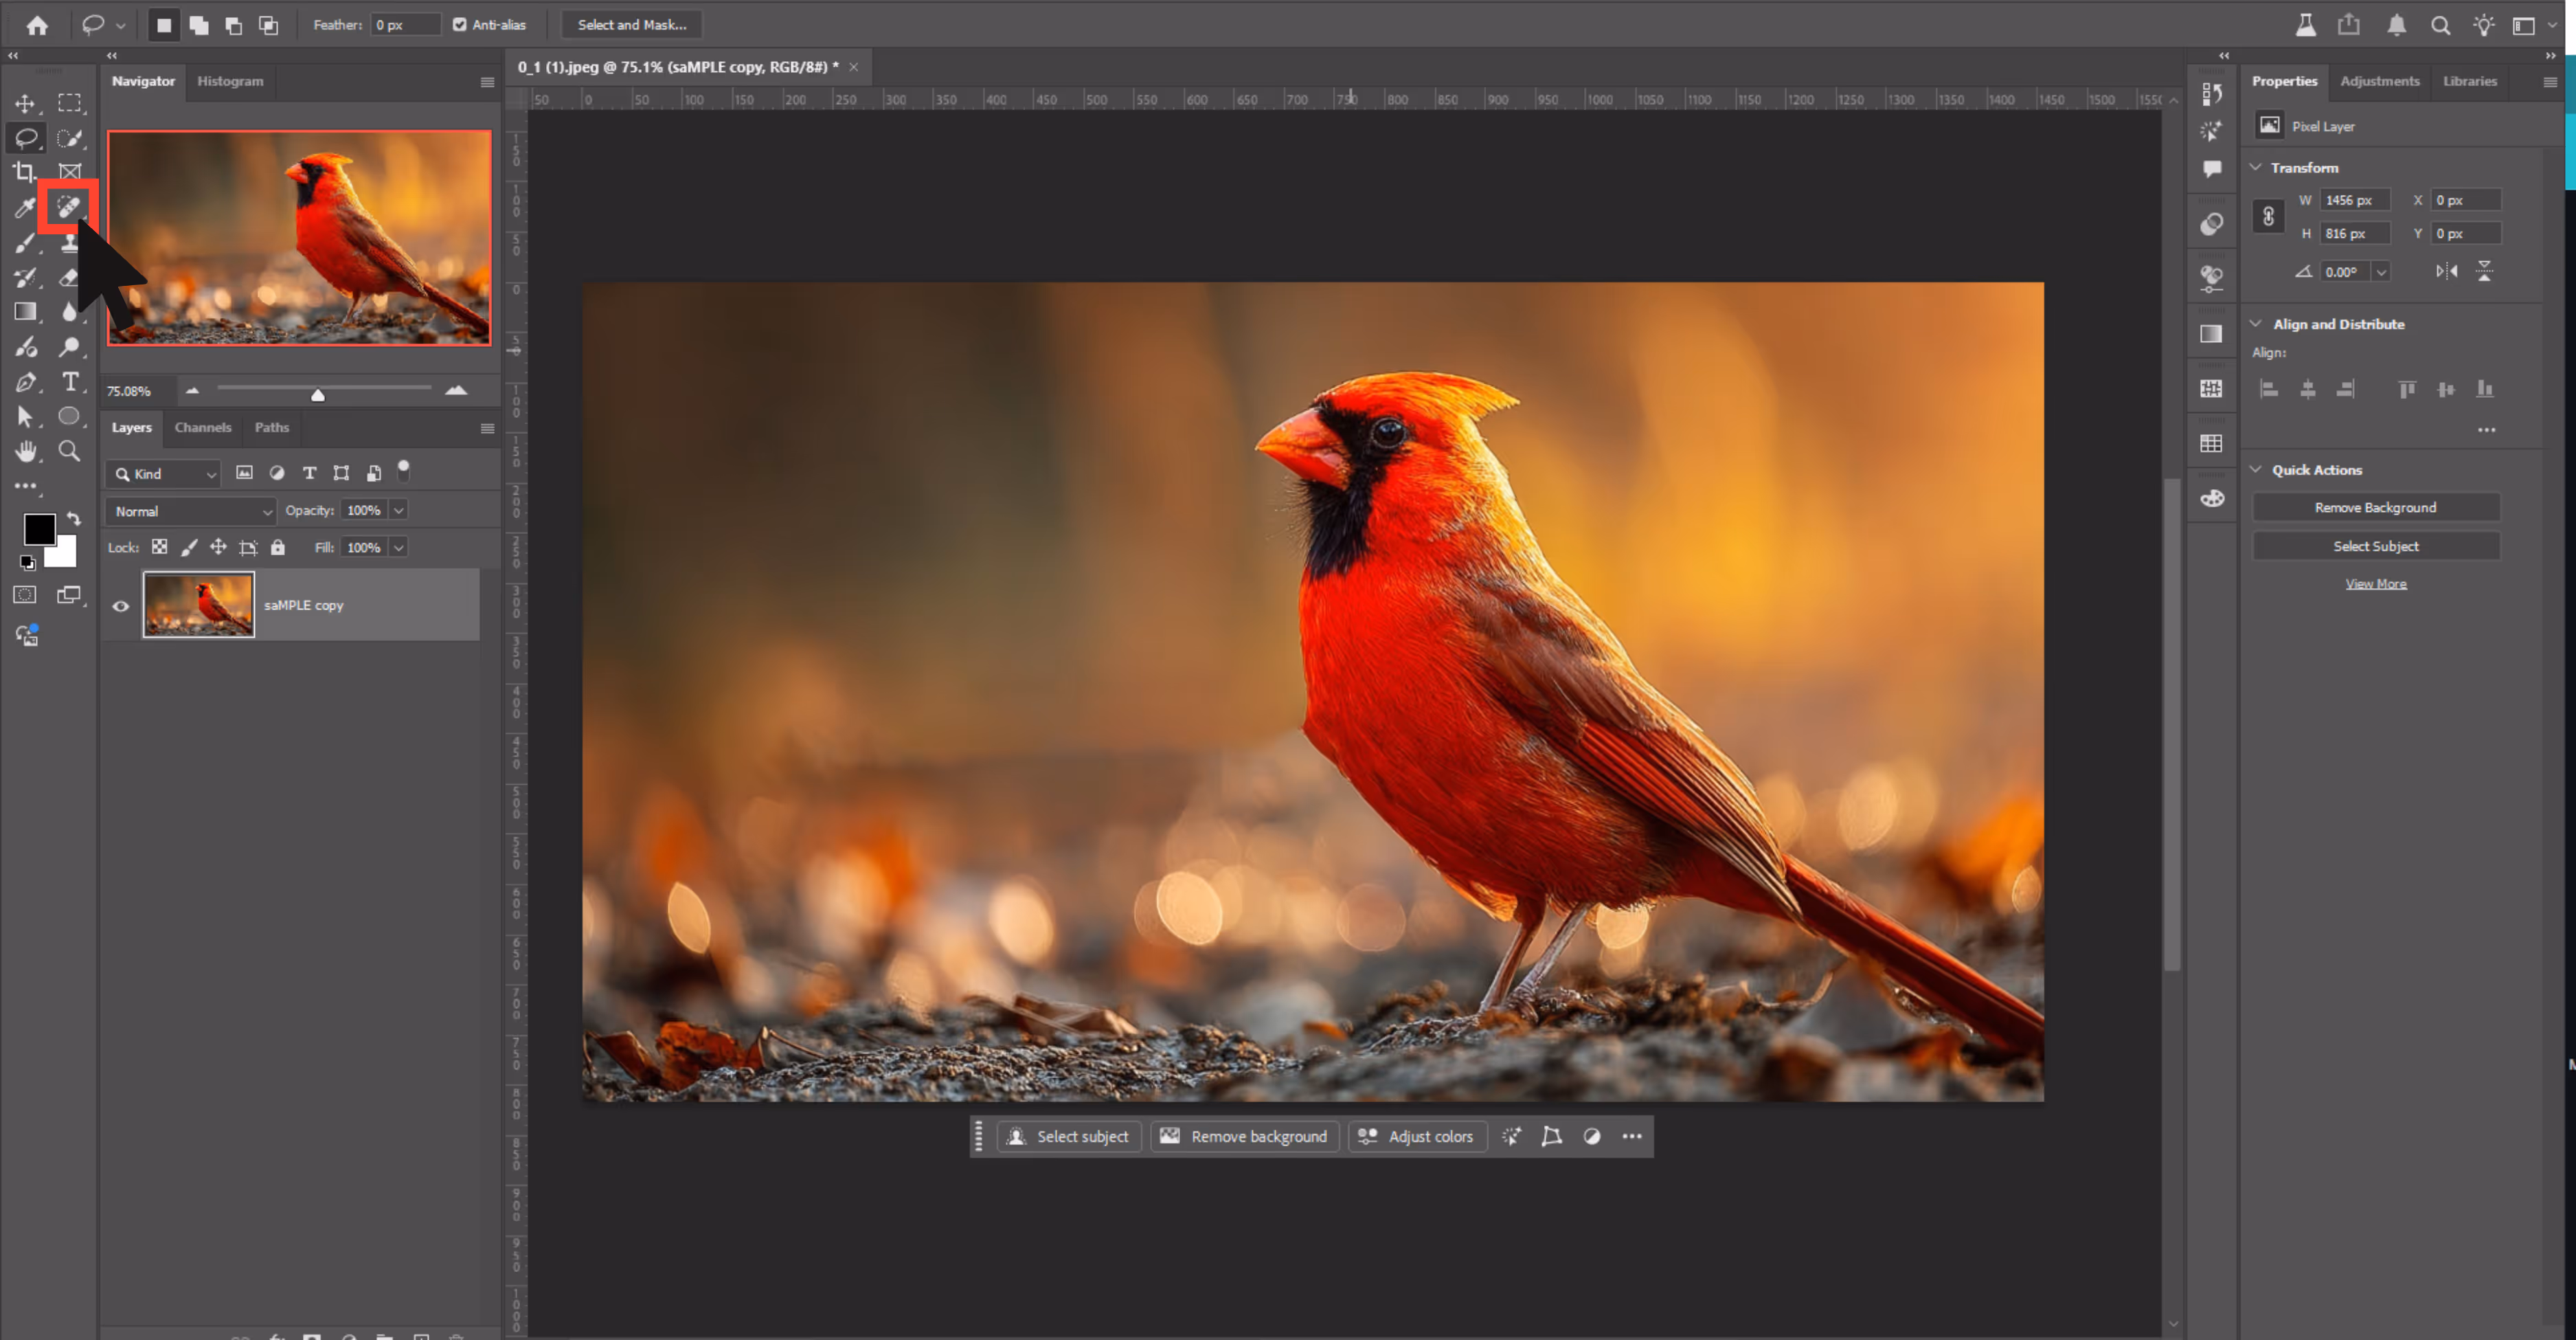
Step 3: Select the Spot Healing Brush Tool from the left toolbar.

Step 4: In the top settings bar, select the “Content-Aware” type for blending.
Step 5: Adjust your brush size to be slightly bigger than the watermark text.
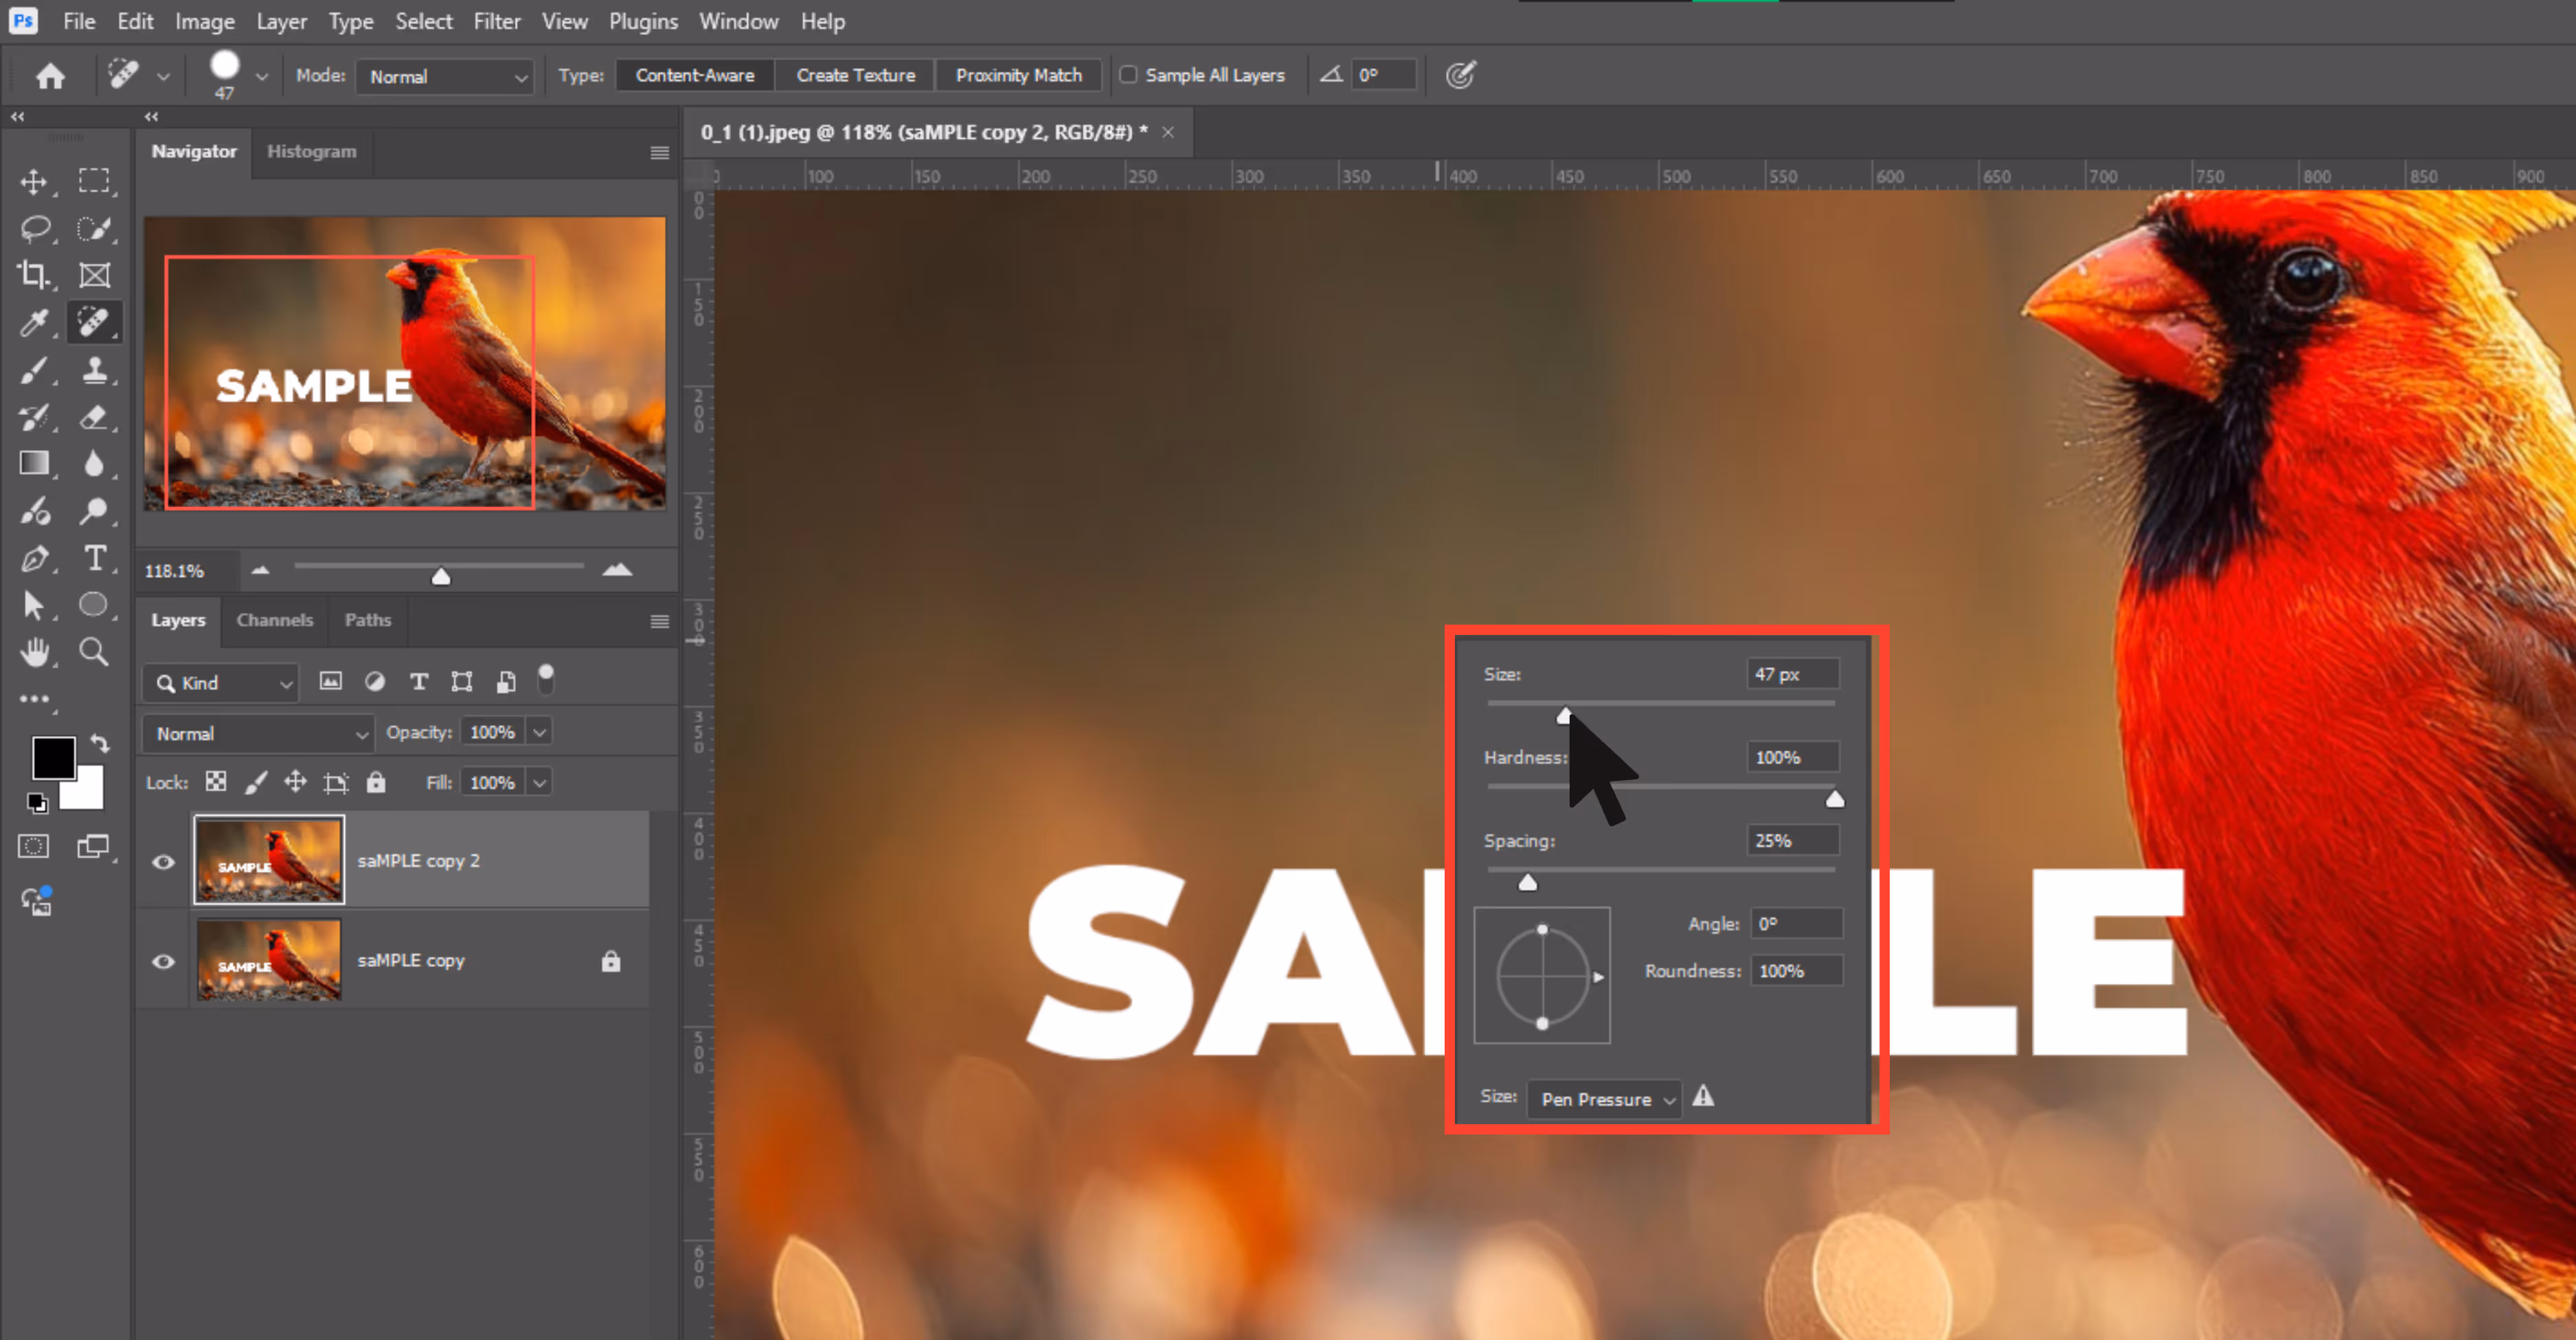
Step 6: Zoom in on the watermark area by pressing Alt.
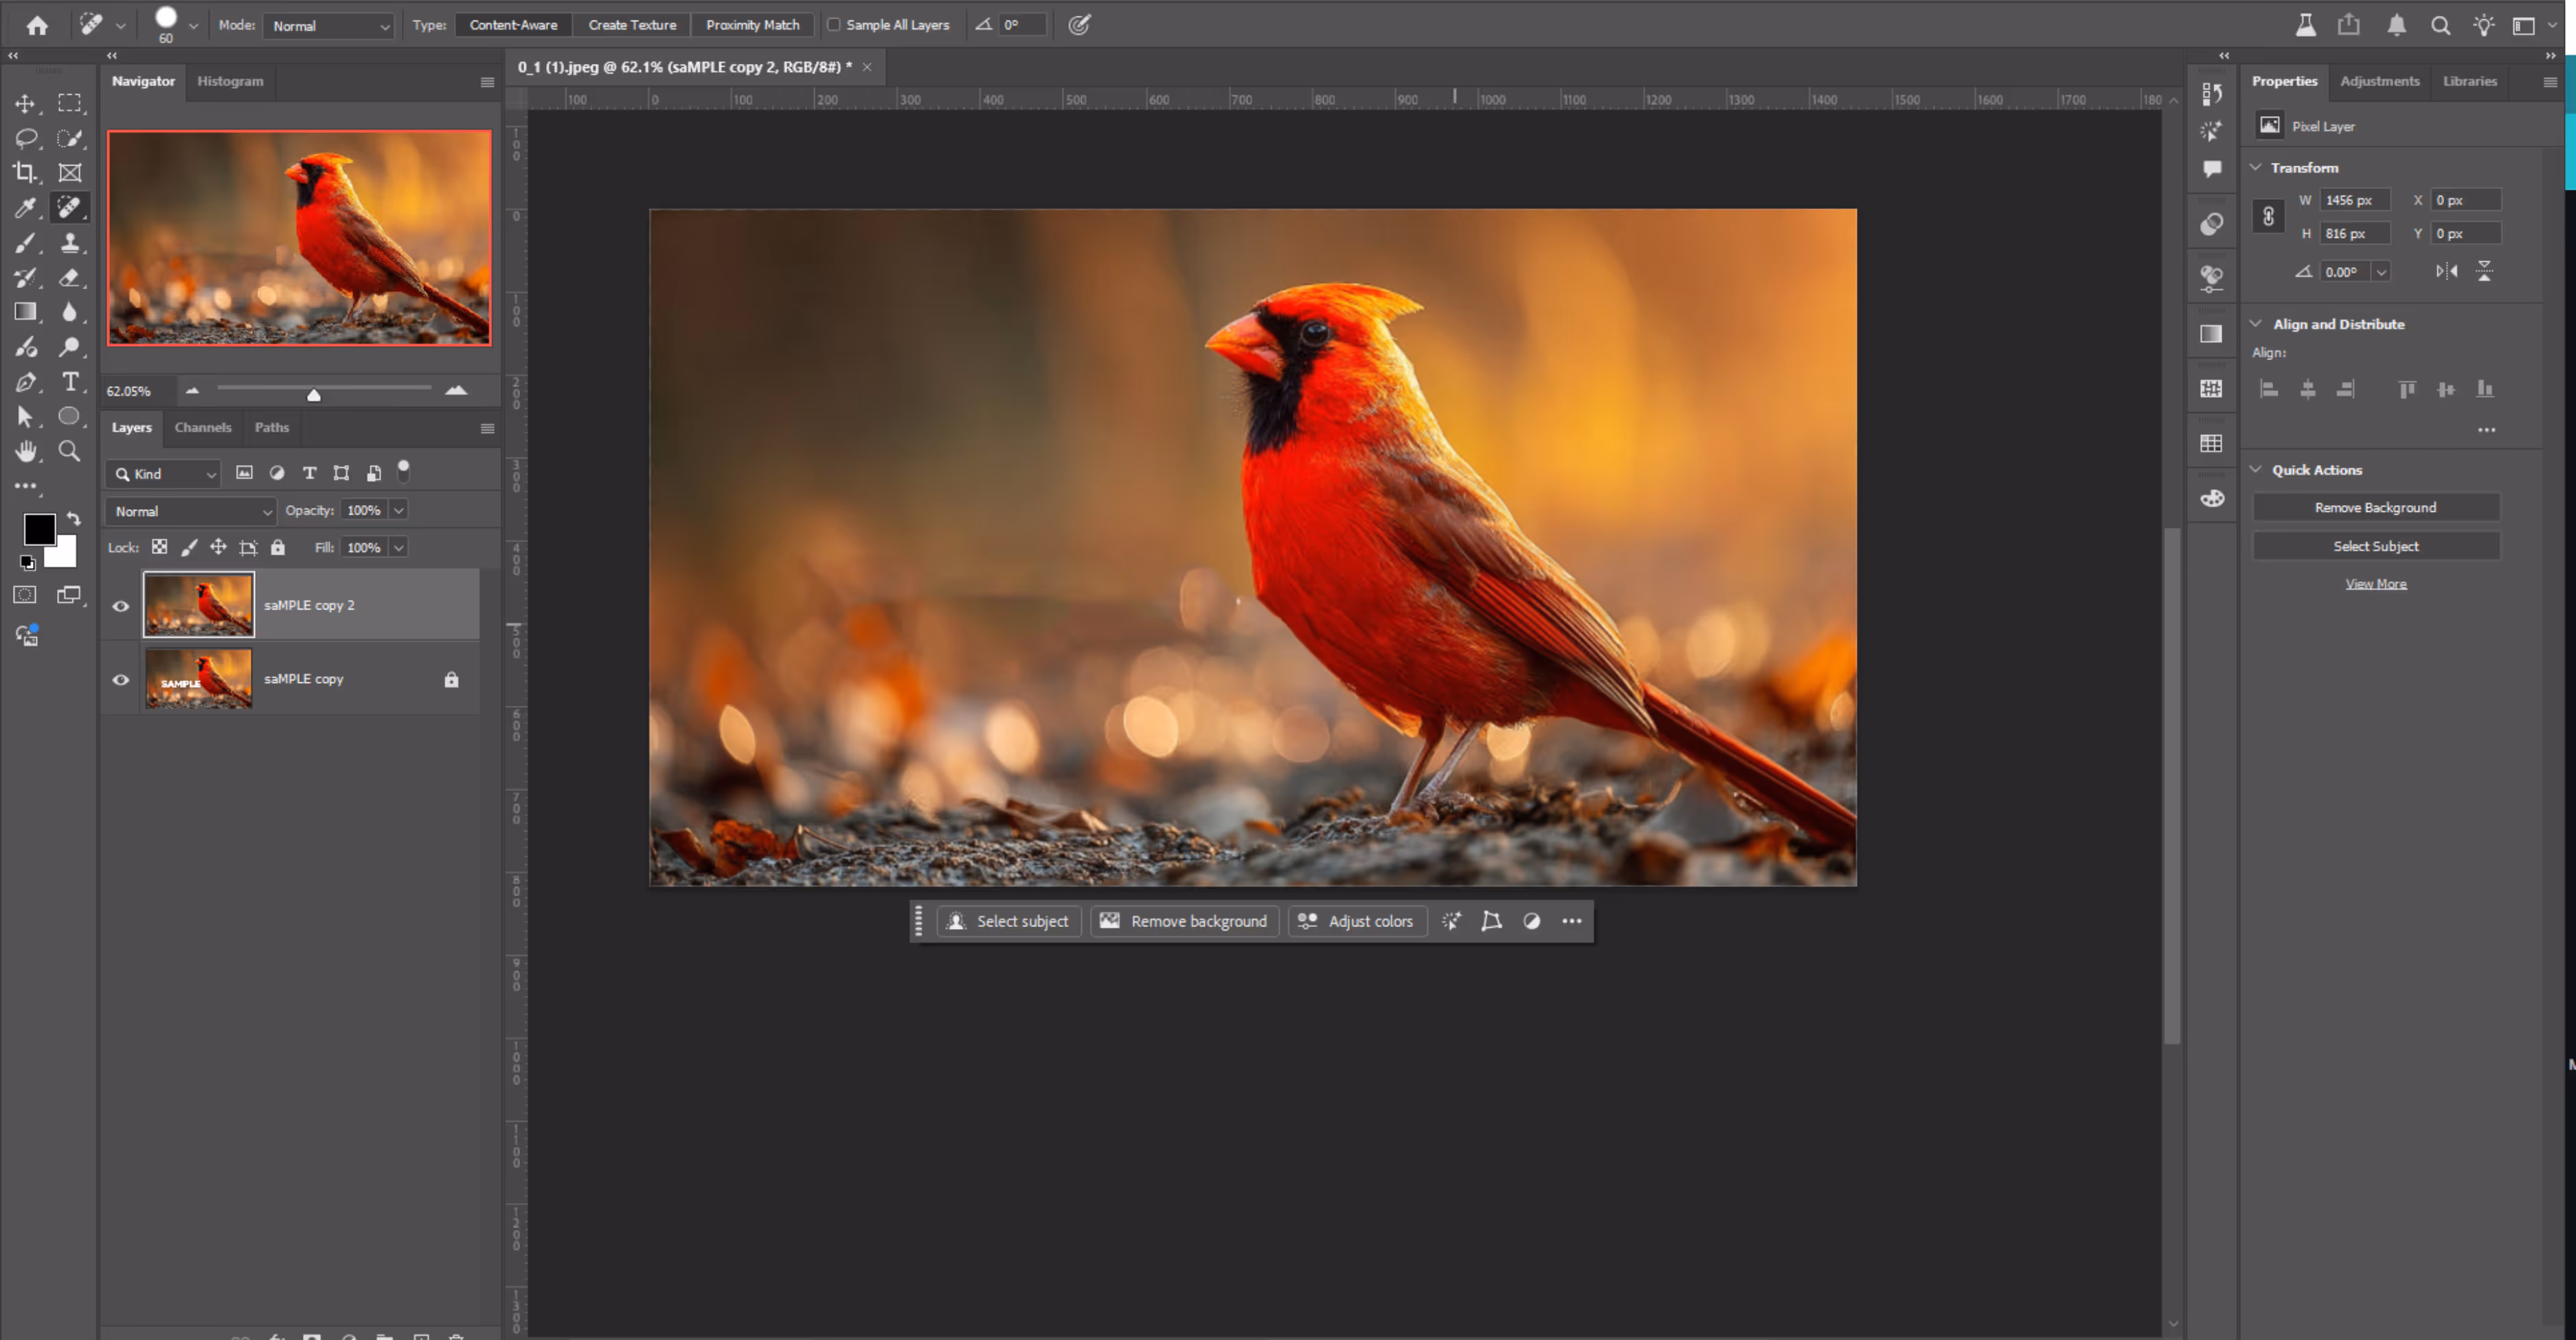
Step 7: Click or drag over the watermark. Photoshop will automatically remove the watermark and fill in the area using nearby pixels.
Clone Stamp Tool
Sometimes, Photoshop’s automatic tools like Spot Healing fail to remove a watermark when the background behind a watermark has patterns, textures, or details (like bricks, leaves, fabrics, or faces).
That’s where the Clone Stamp Tool works. It gives you total control and works great for tricky spots where Photoshop’s guessing might mess things up.
Why should it be used?
For watermarks on textured or patterned areas (grass, bricks, fabric)
How to use the tool?
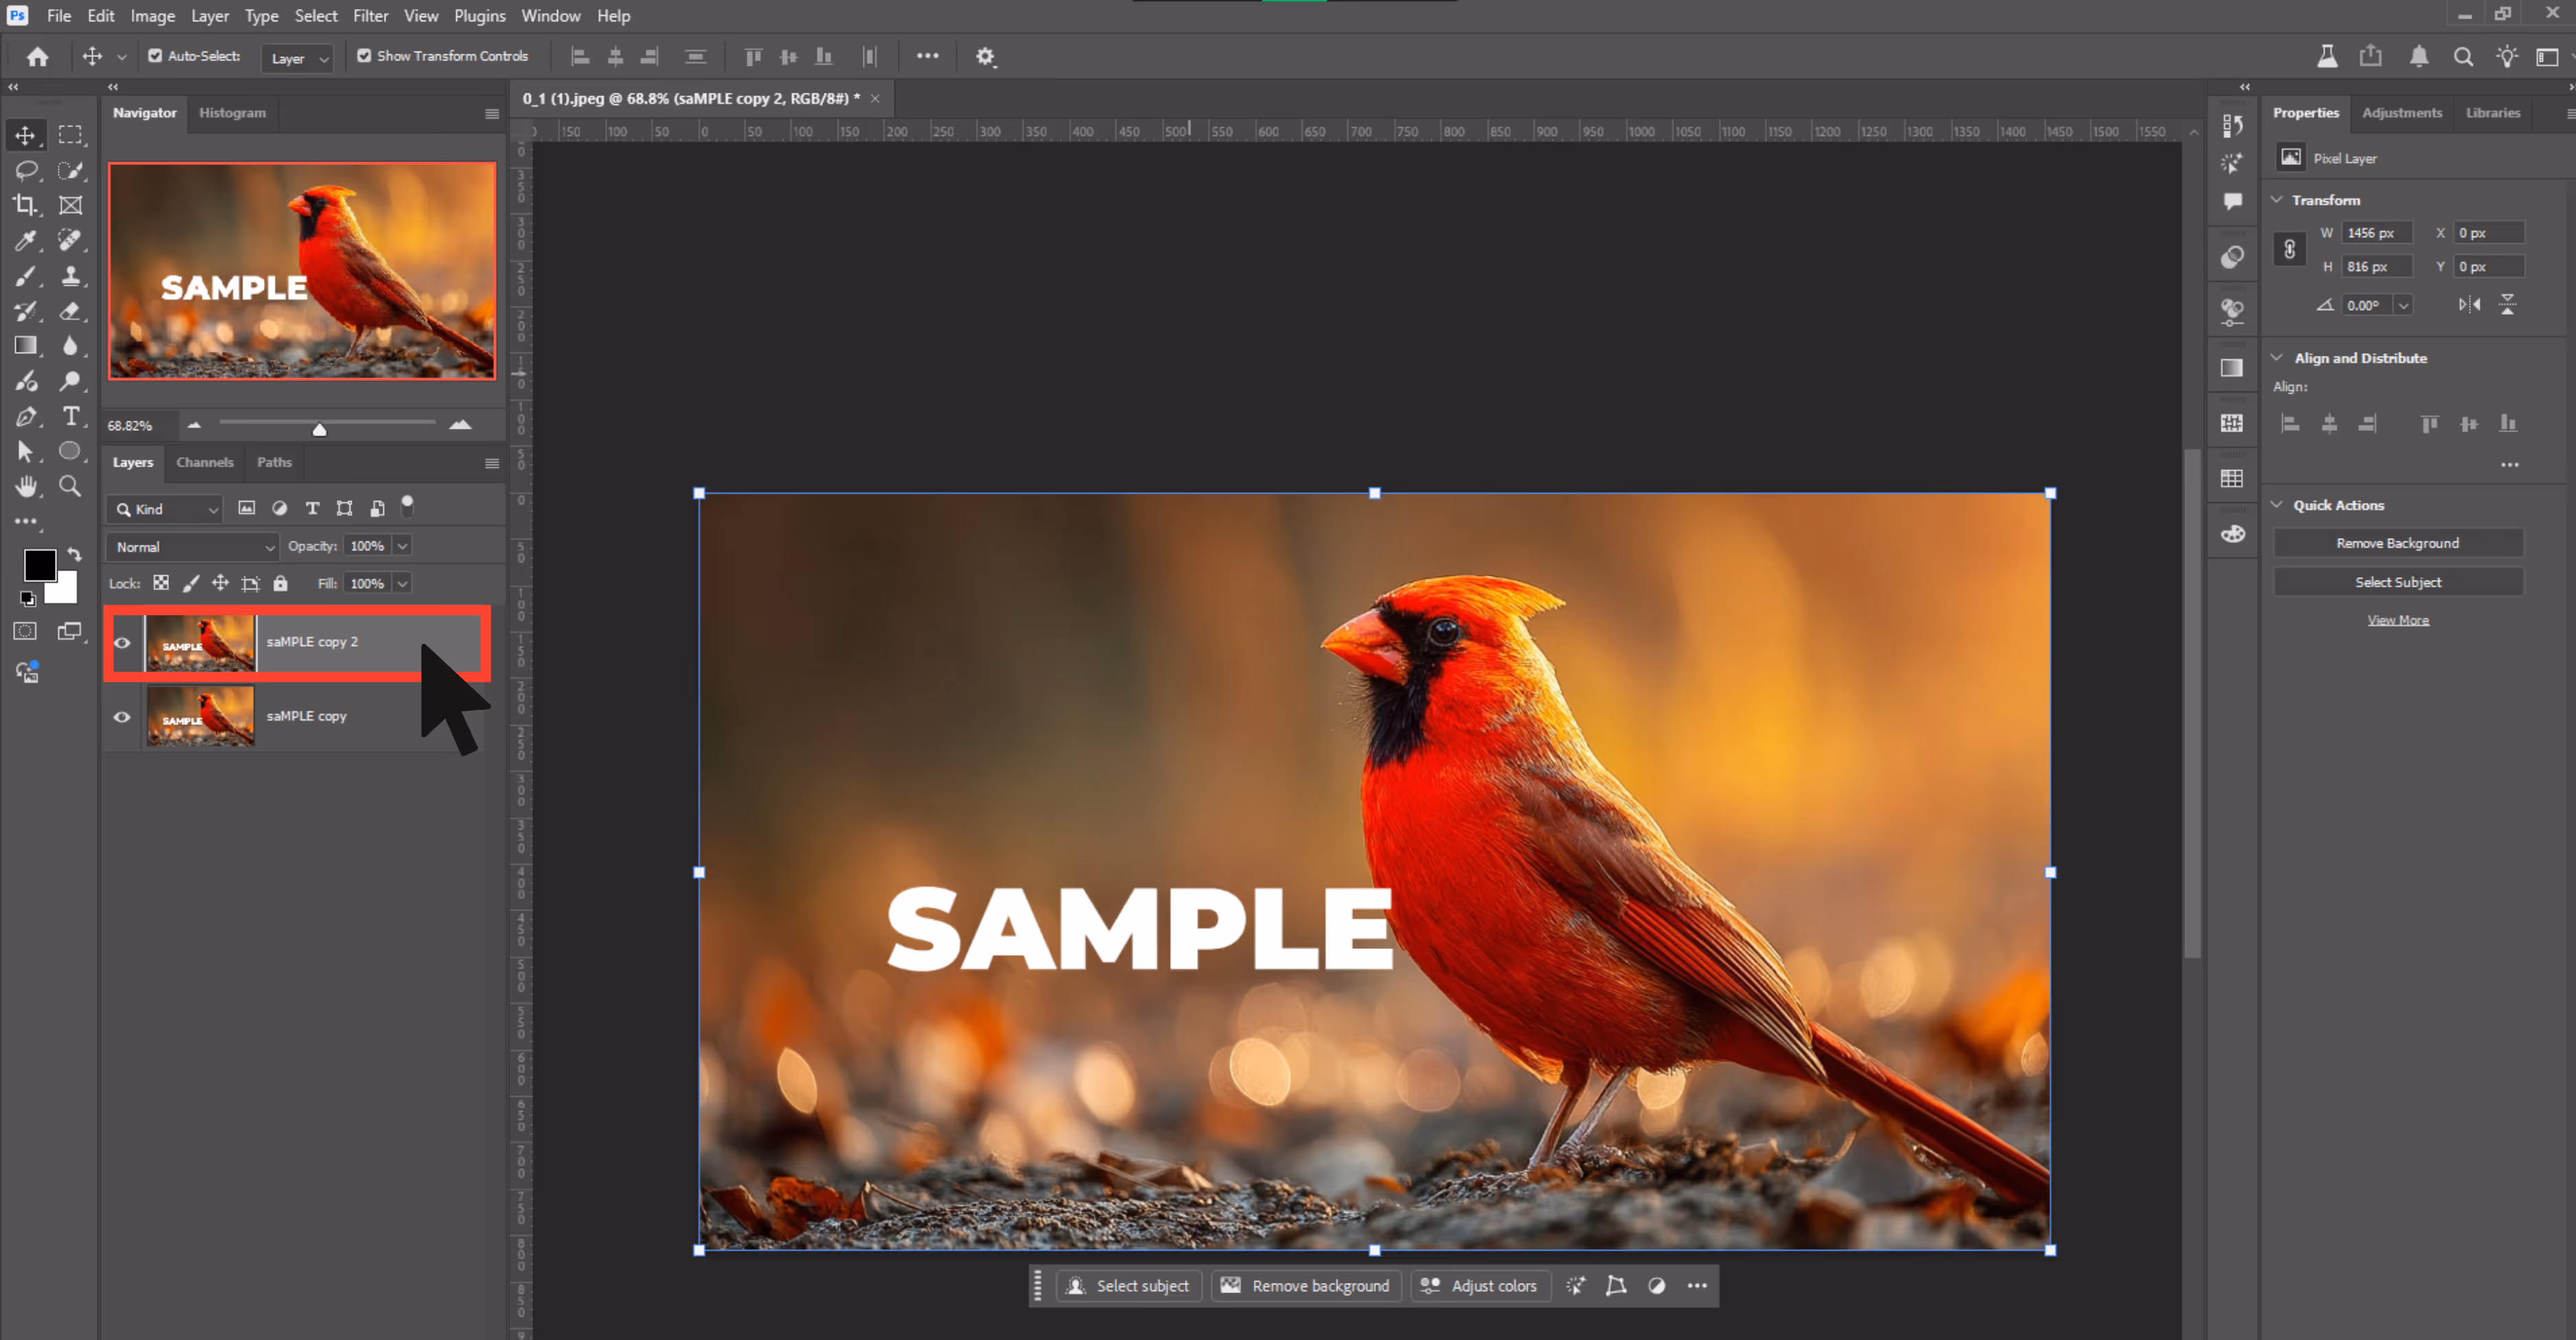
Step 1: Start by opening your image and then duplicate the layer by selecting the generative layer.
Step 2: Select the Clone Stamp Tool from the toolbar on the left side.
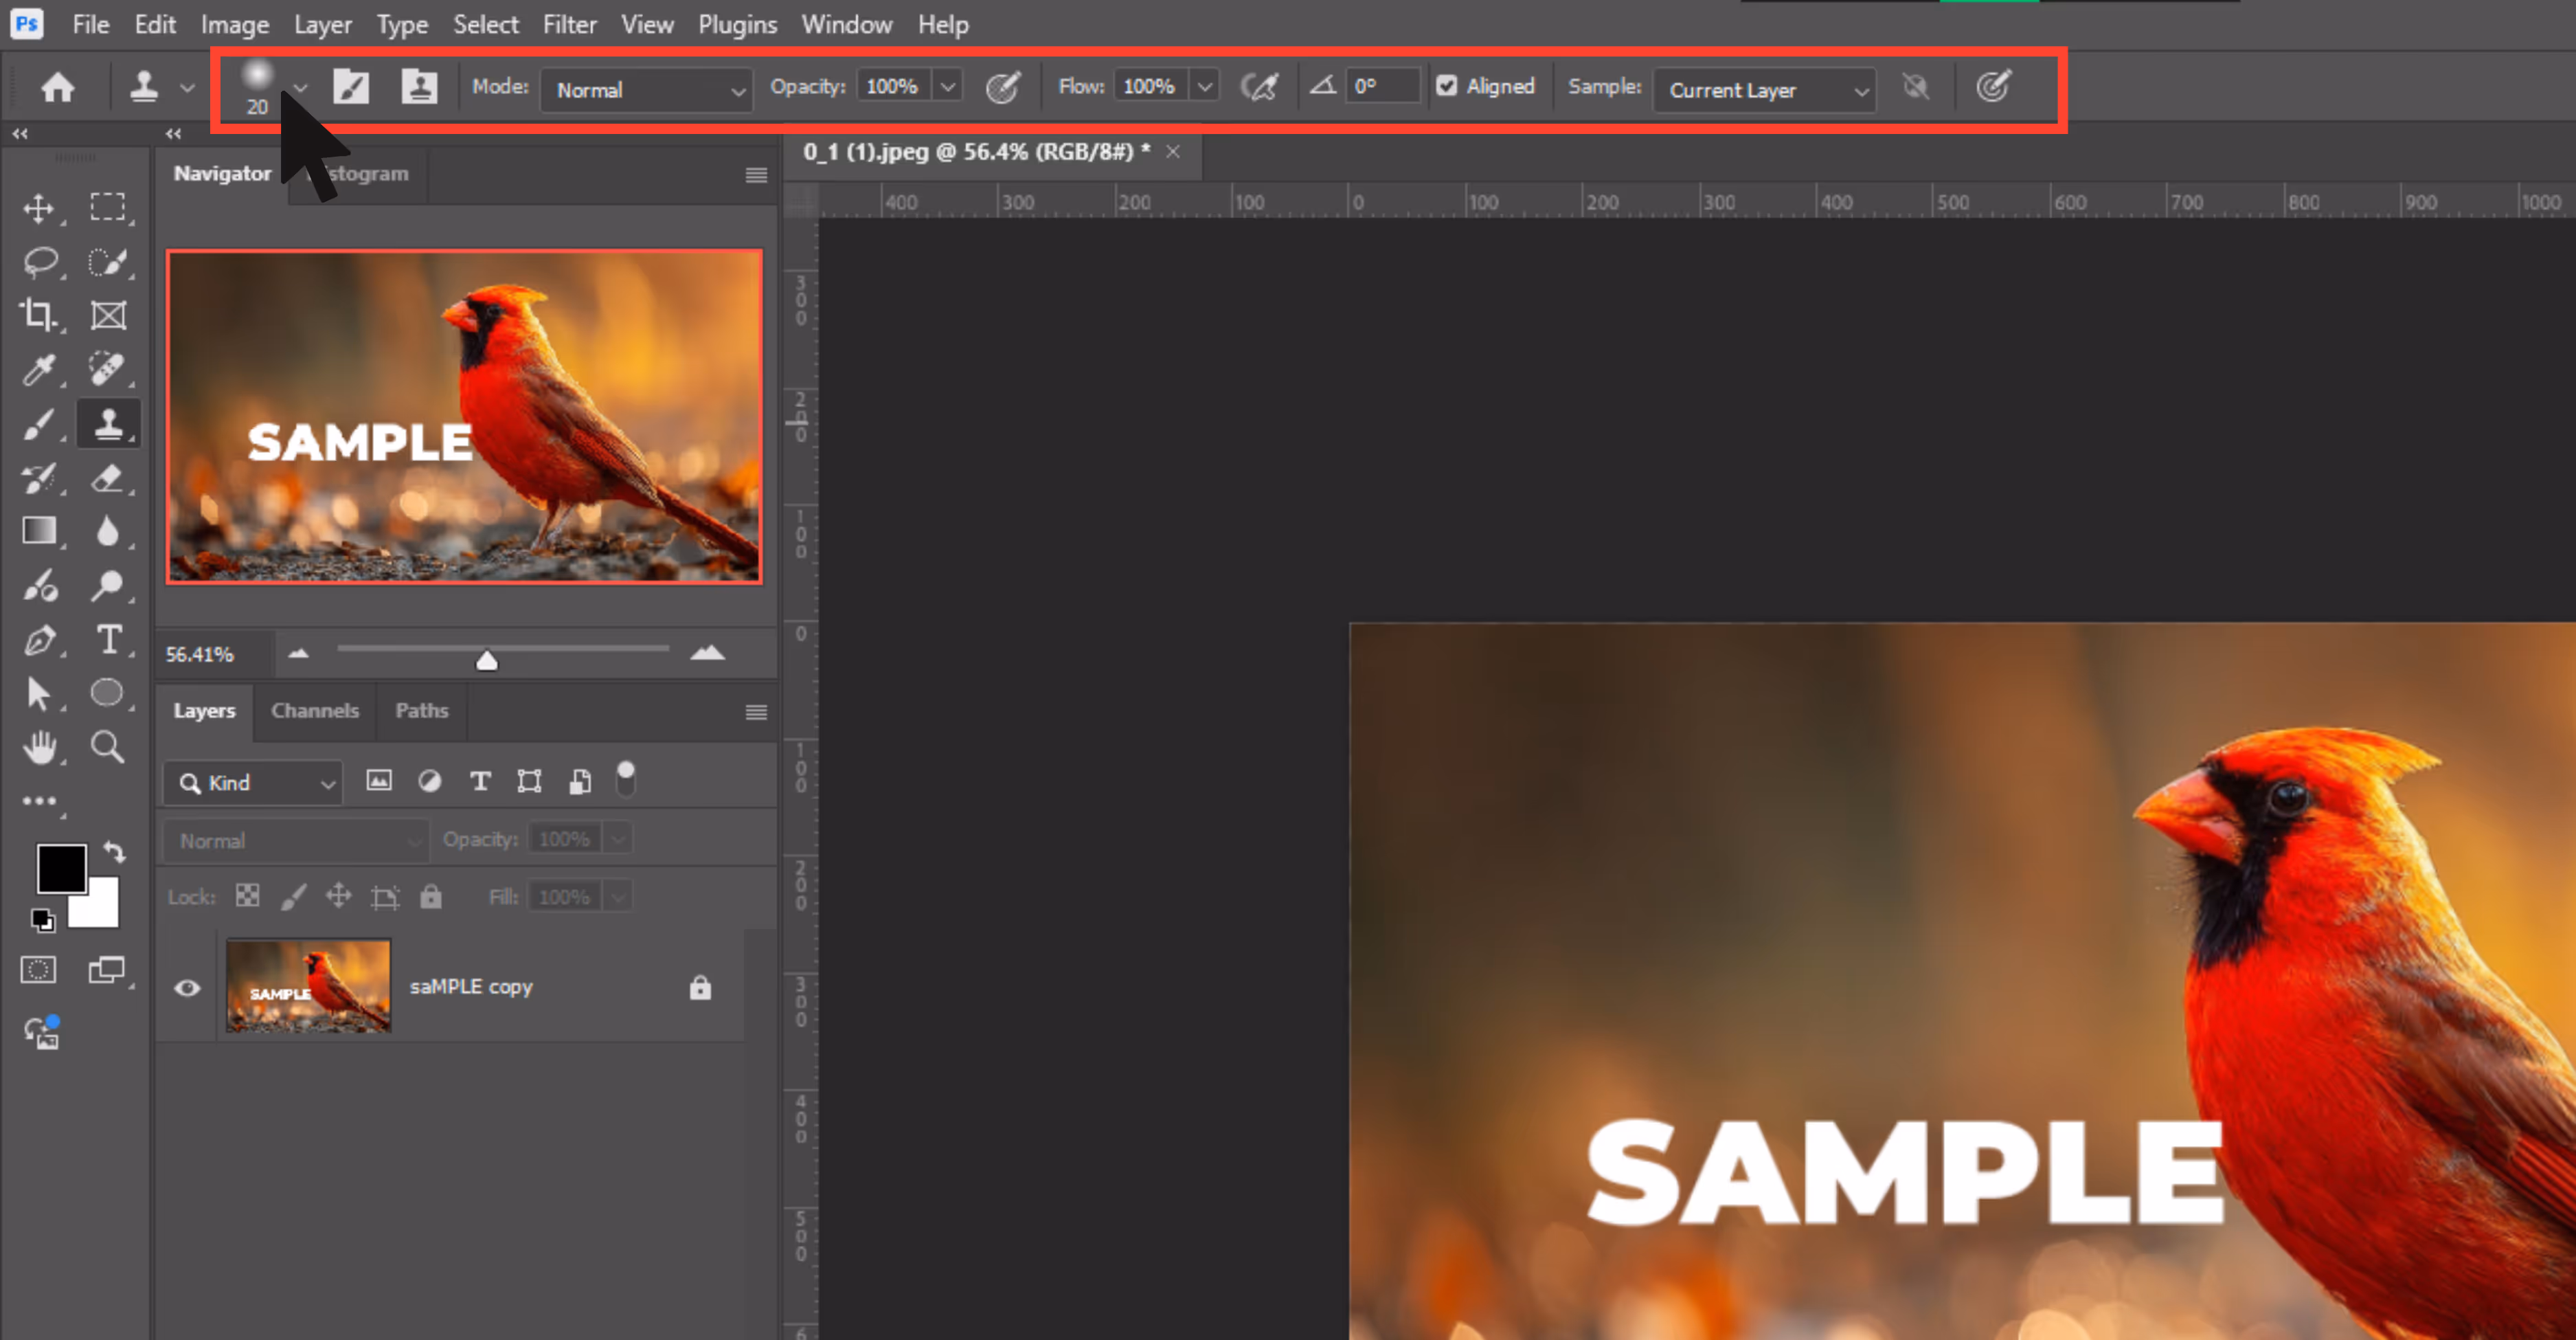
Step 3: Then adjust your brush size and hardness in the options bar.
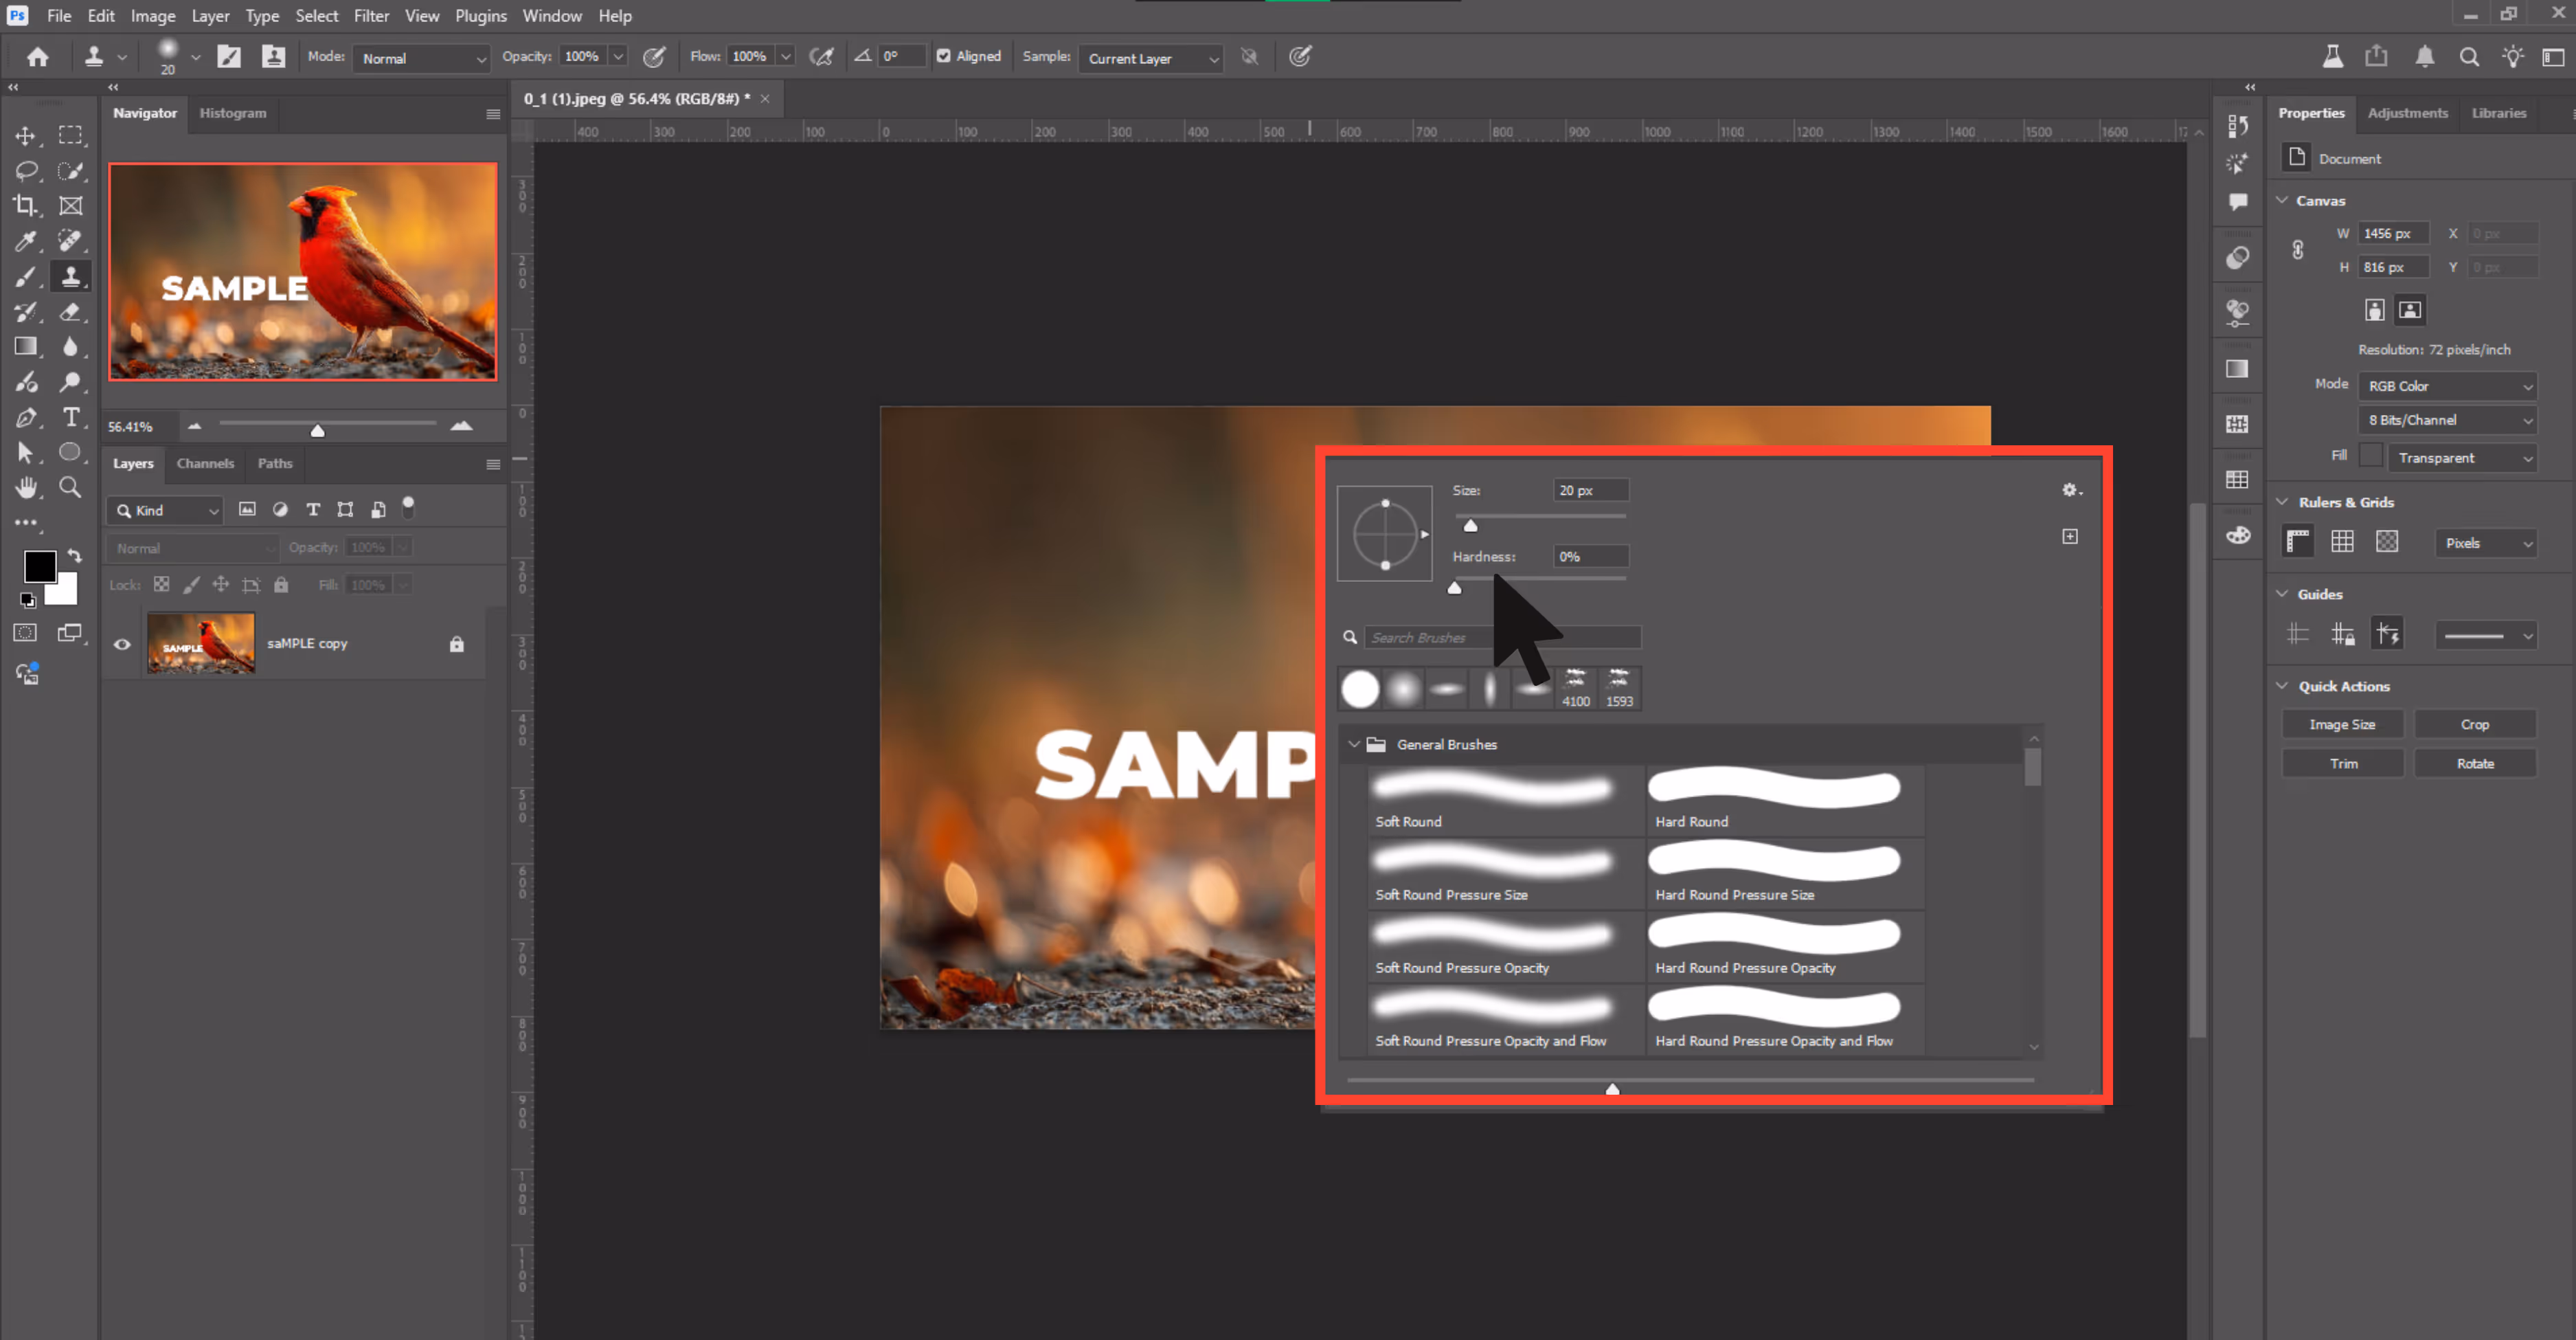
Step 4: Now hold Alt and click on a clean area near the watermark to sample pixels.
Step 5: Release the key and paint over the watermark using thin strokes.
Step 6: Constantly re-sample different parts (hold Alt and click again) to prevent obvious repetition.
Step 7: Use light strokes for fine removal of the watermark.

Step 8: Zoom in to clean the edges for a clean result.
Remove watermark using Lasso + Fill method
If you want a slightly smarter way to remove a watermark—especially if it’s shaped like a logo or text—Photoshop’s Lasso Tool + Content-Aware Fill combo is super useful.
It’s kind of like selecting the unwanted area and letting Photoshop guess what should be behind it. This method gives you more control than the Spot Healing Tool but doesn’t require as much precision as the Clone Stamp.
Why should it be used?
For medium-sized logos or watermark clusters on moderately detailed backgrounds.
How to use the tool?
Step 1: Open the image and duplicate the background layer.
Step 2: Select the Lasso Tool and draw a loose selection around the watermark. Avoid tight edges.

Step 3: Go to Edit and then to Fill Shift.
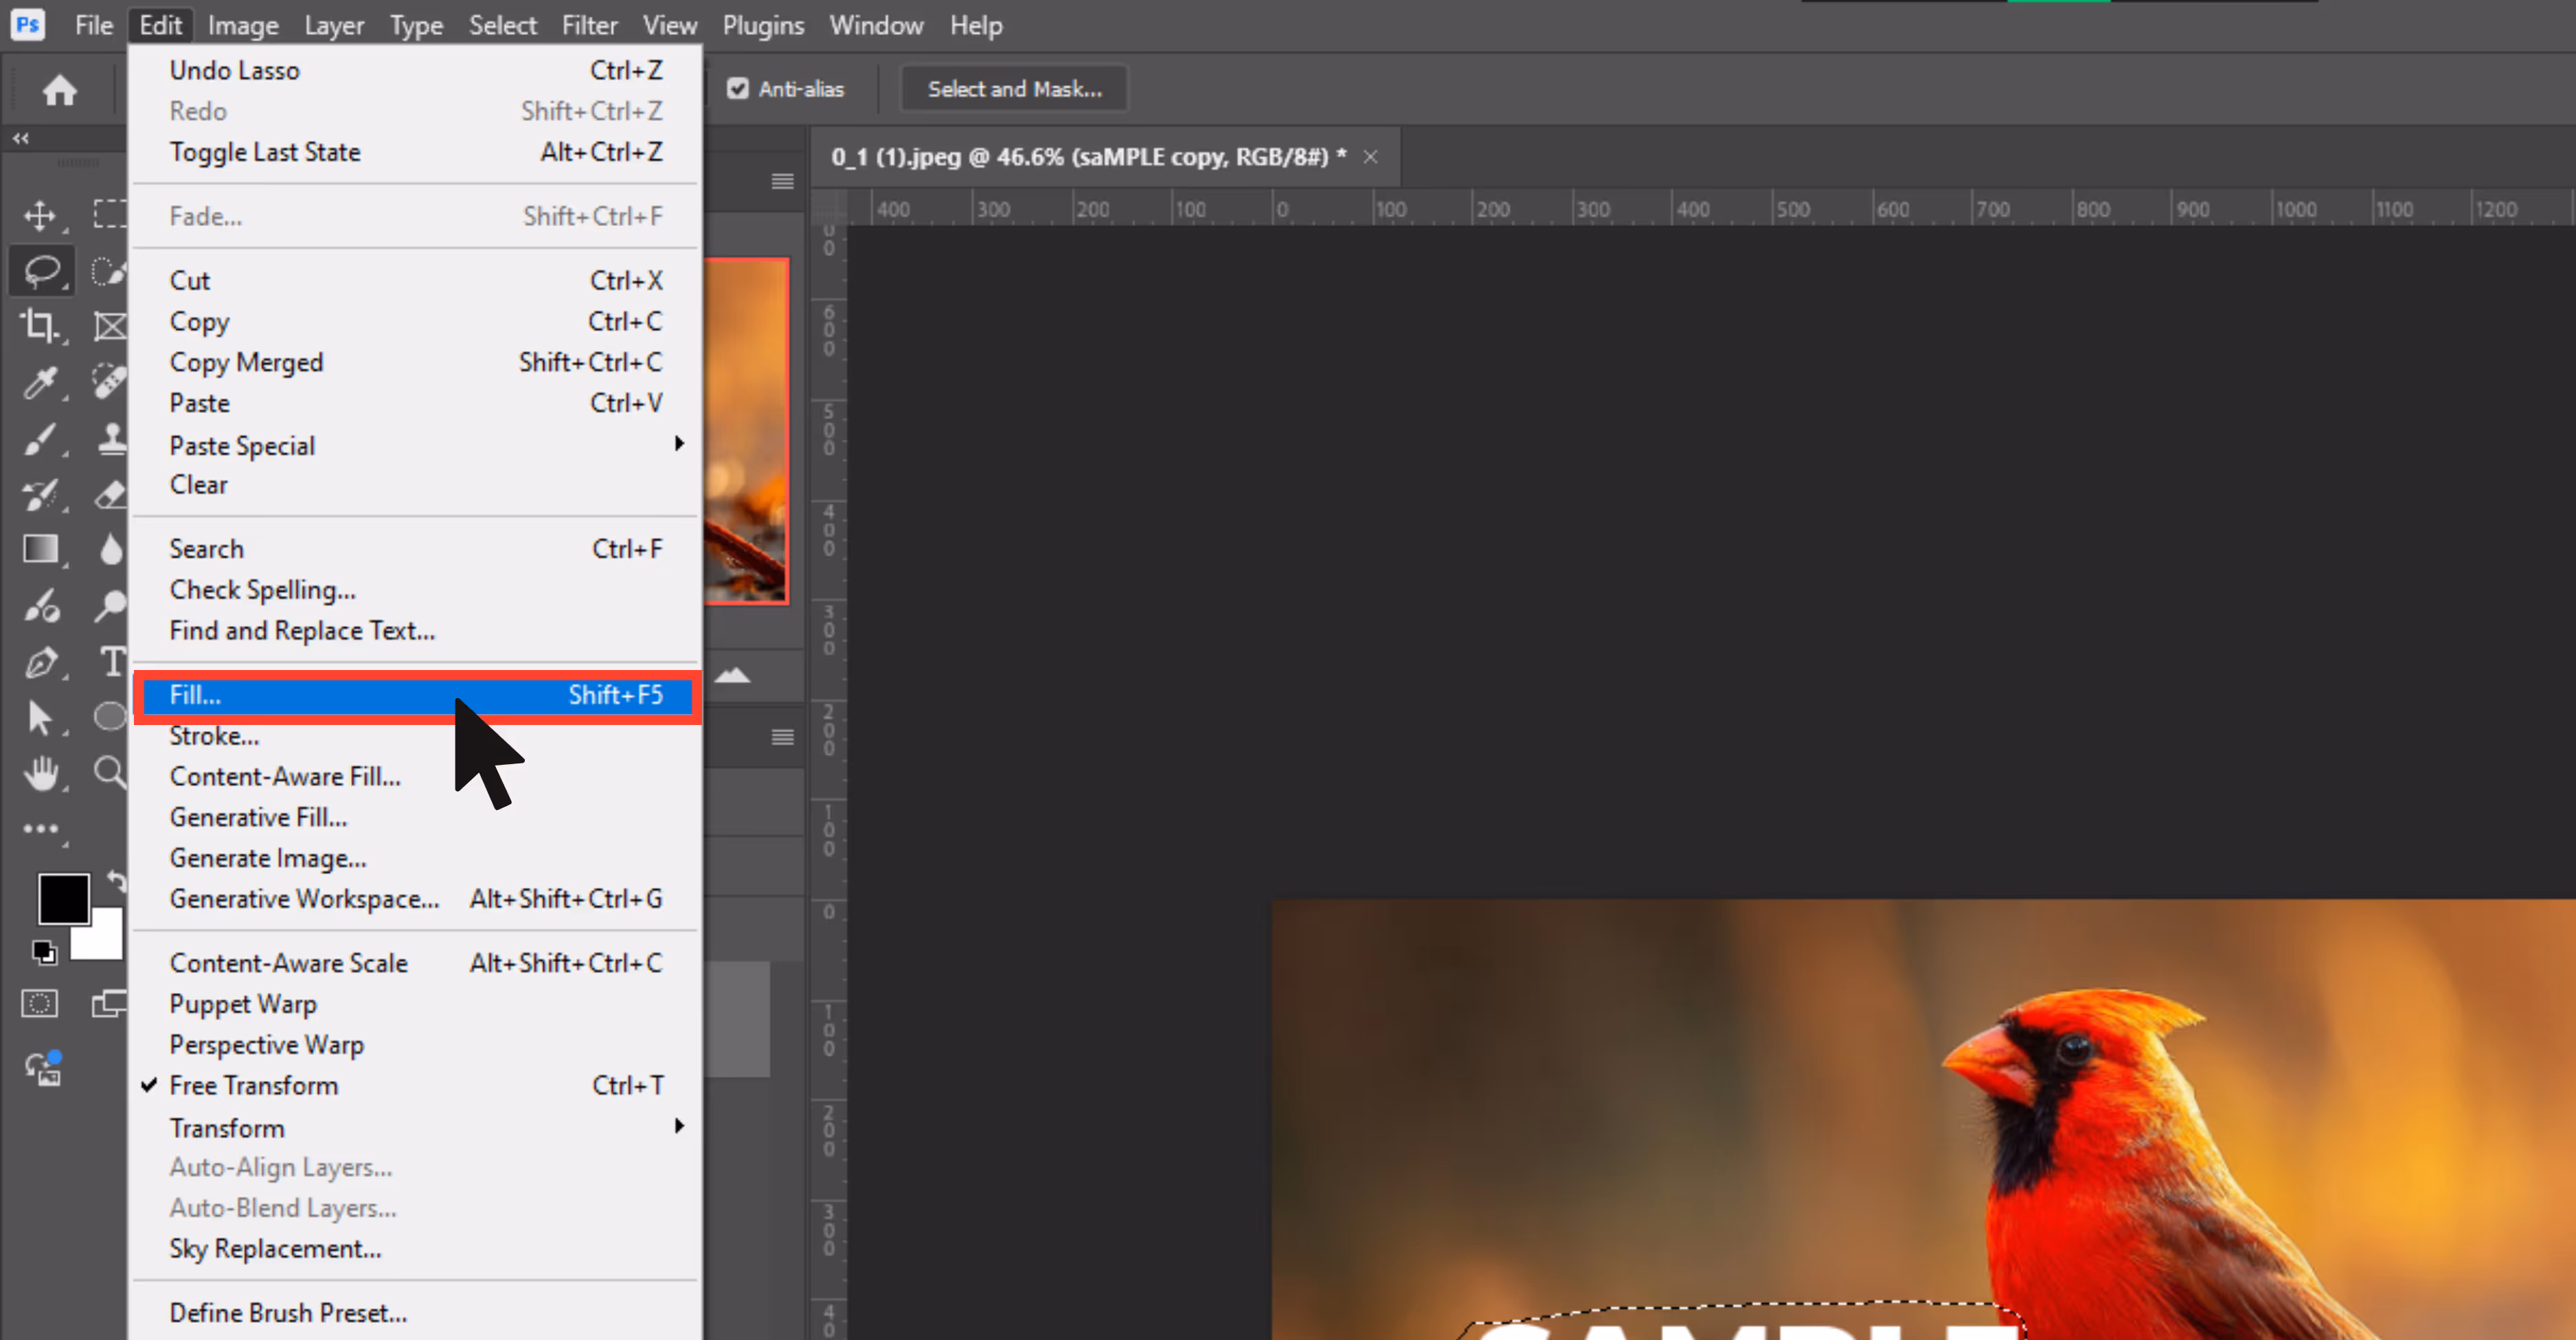
Step 4: In the pop-up box:
- Choose “Content-Aware” under Contents.
- Leave Blending Mode as Normal and Opacity at 100%.
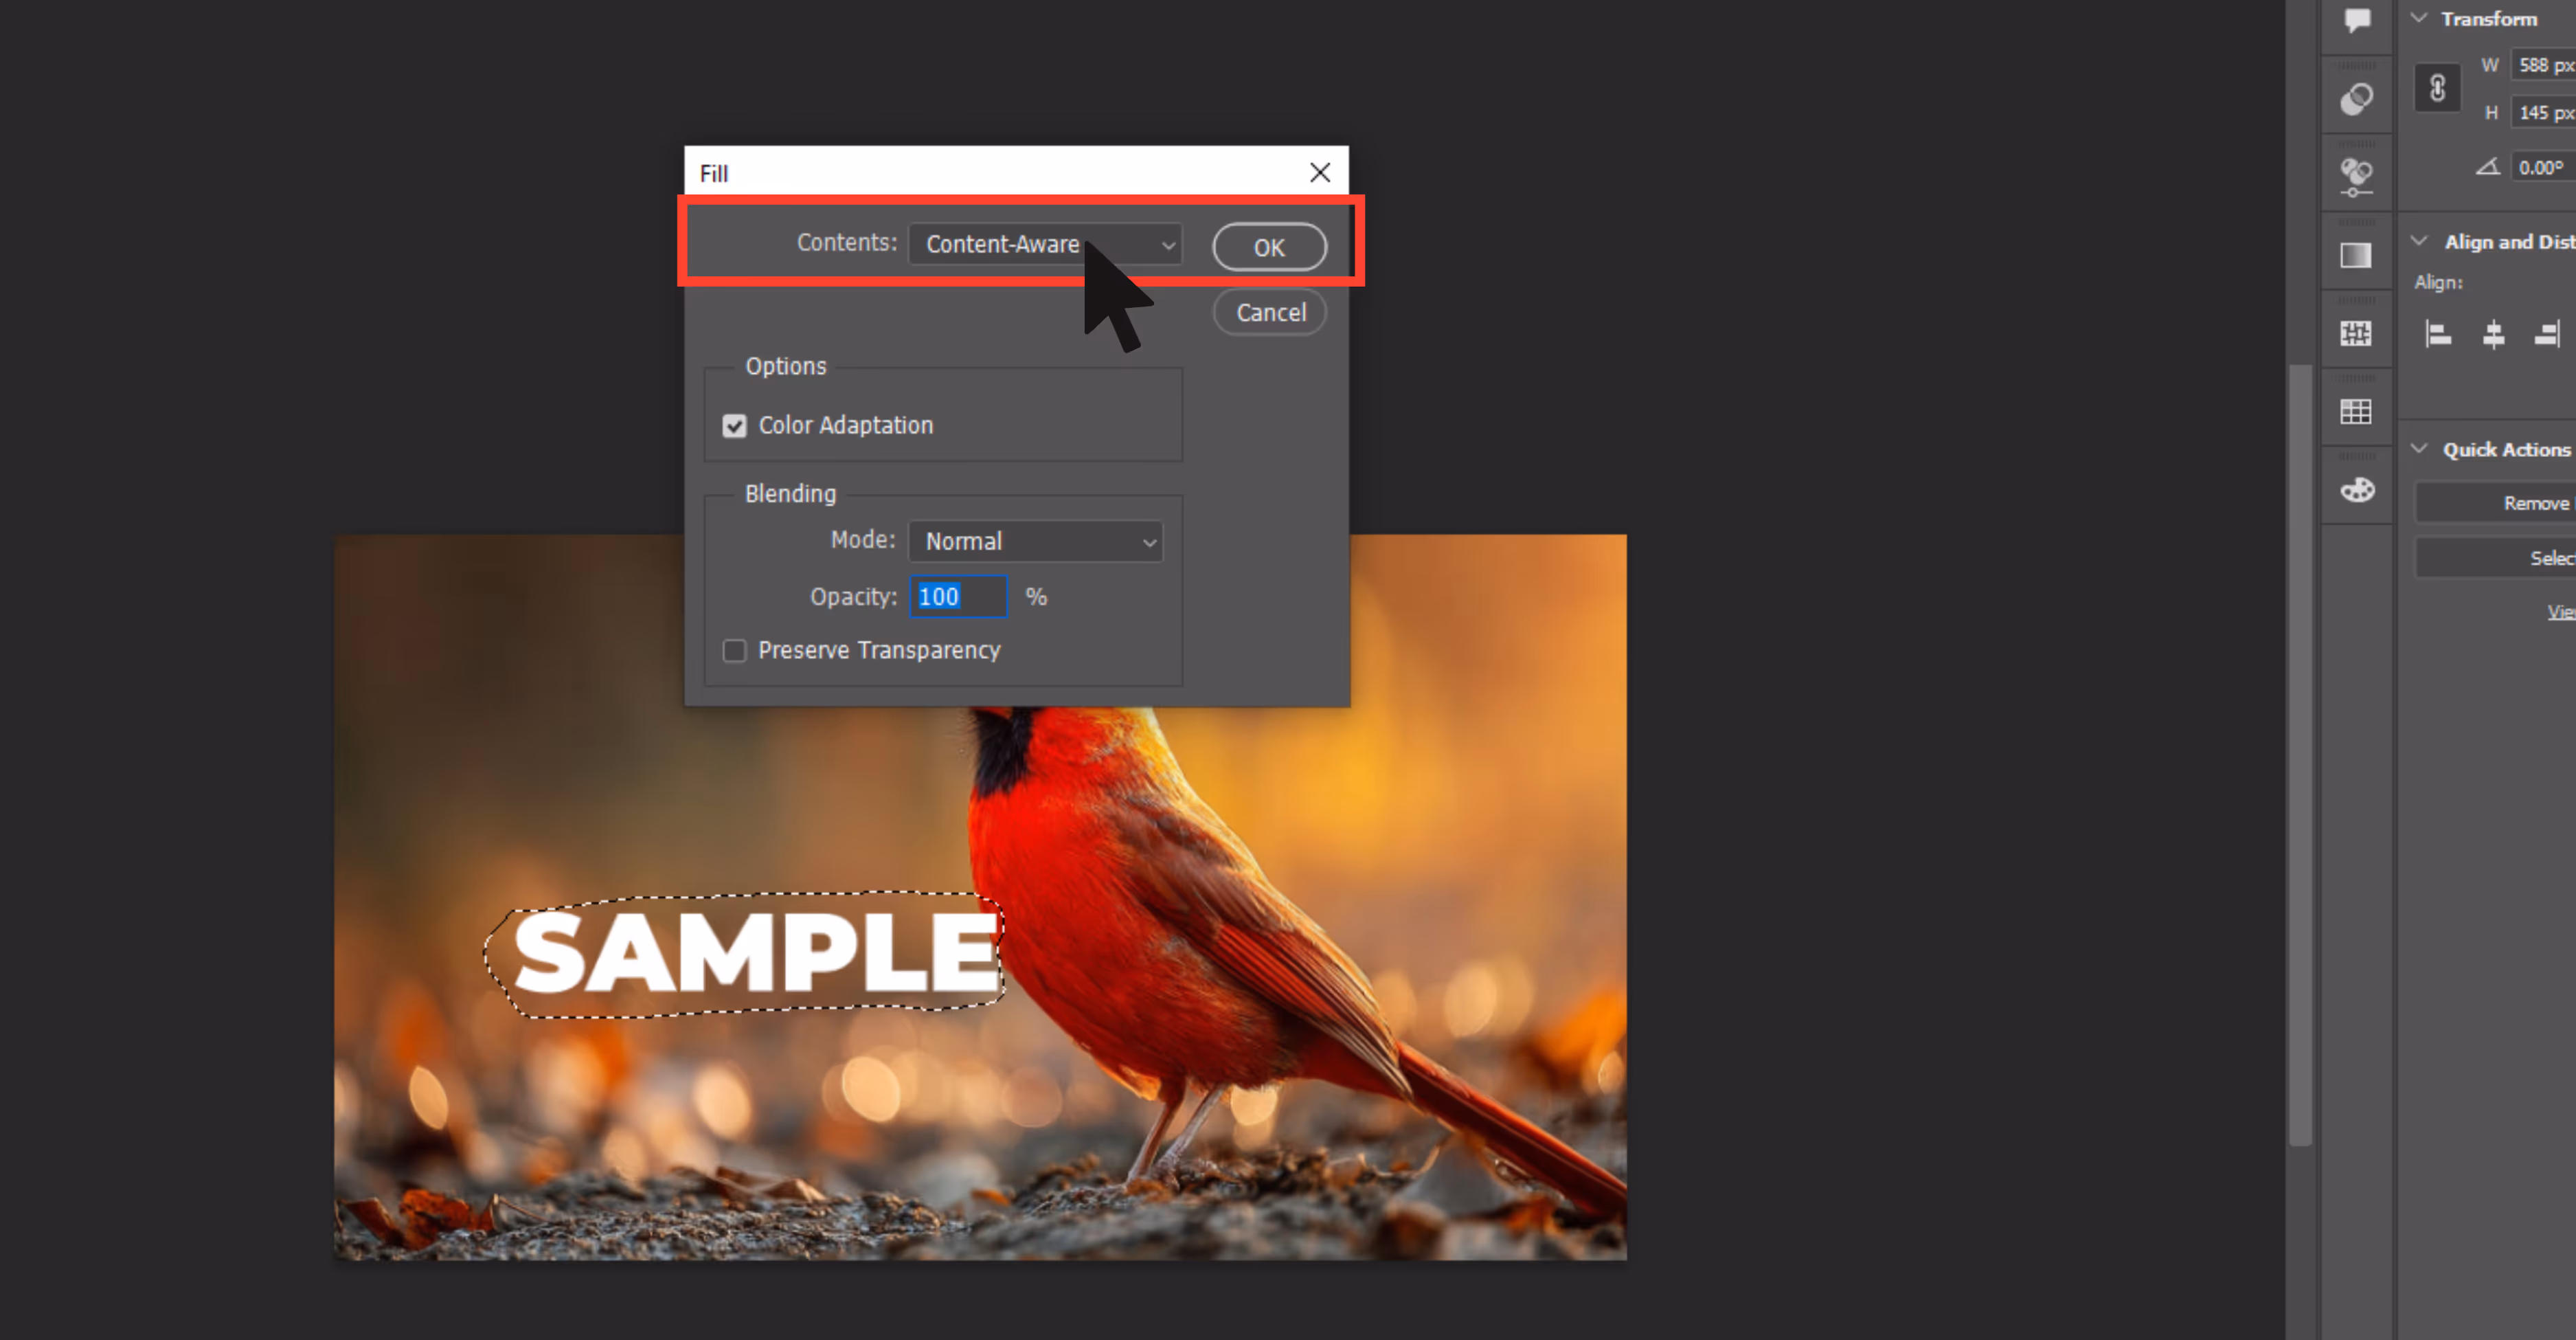
Step 5: Click OK and let Photoshop automatically fill in the selected area.
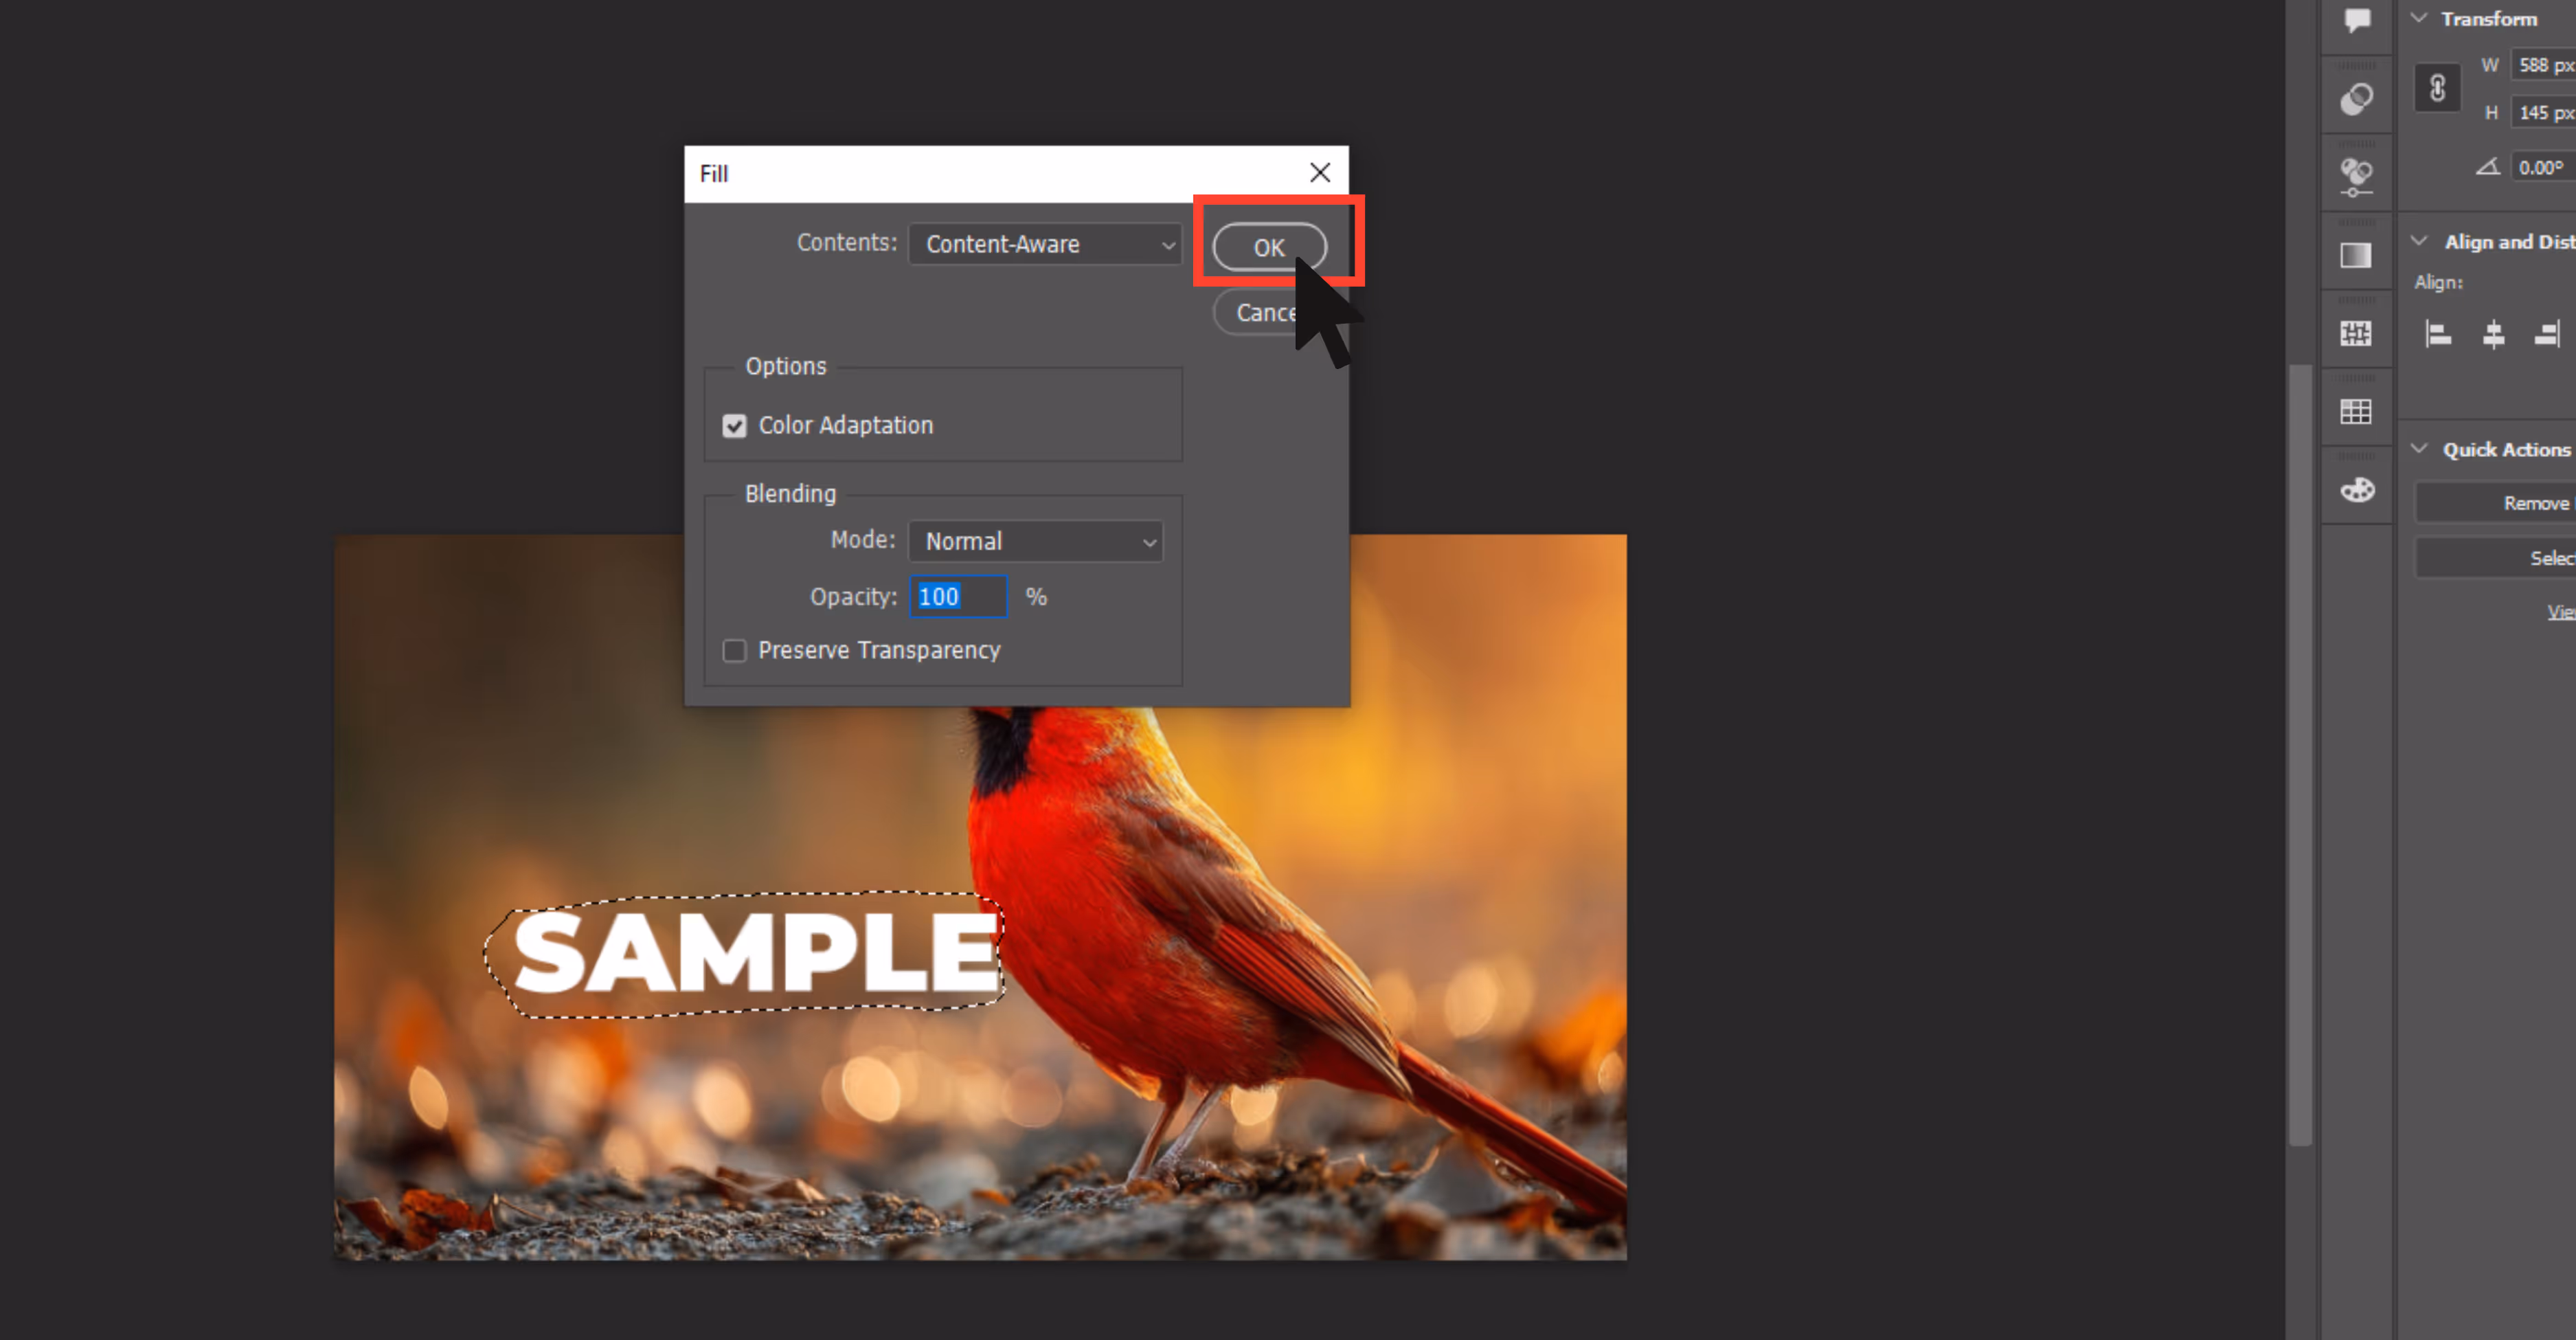
Step 6: Deselect using Ctrl+D.
Step 7: If the filled area looks odd, repeat the process or refine using the Spot Healing Brush.
Content-Aware fill
Imagine if Photoshop could “see” your image and intelligently guess what should be removed from the image; that's what Content-Aware Fill does. This tool gives you more control than the basic Fill option.
Why should it be used?
Removing watermarks surrounded by patterns or gradients.
How to use the tool?
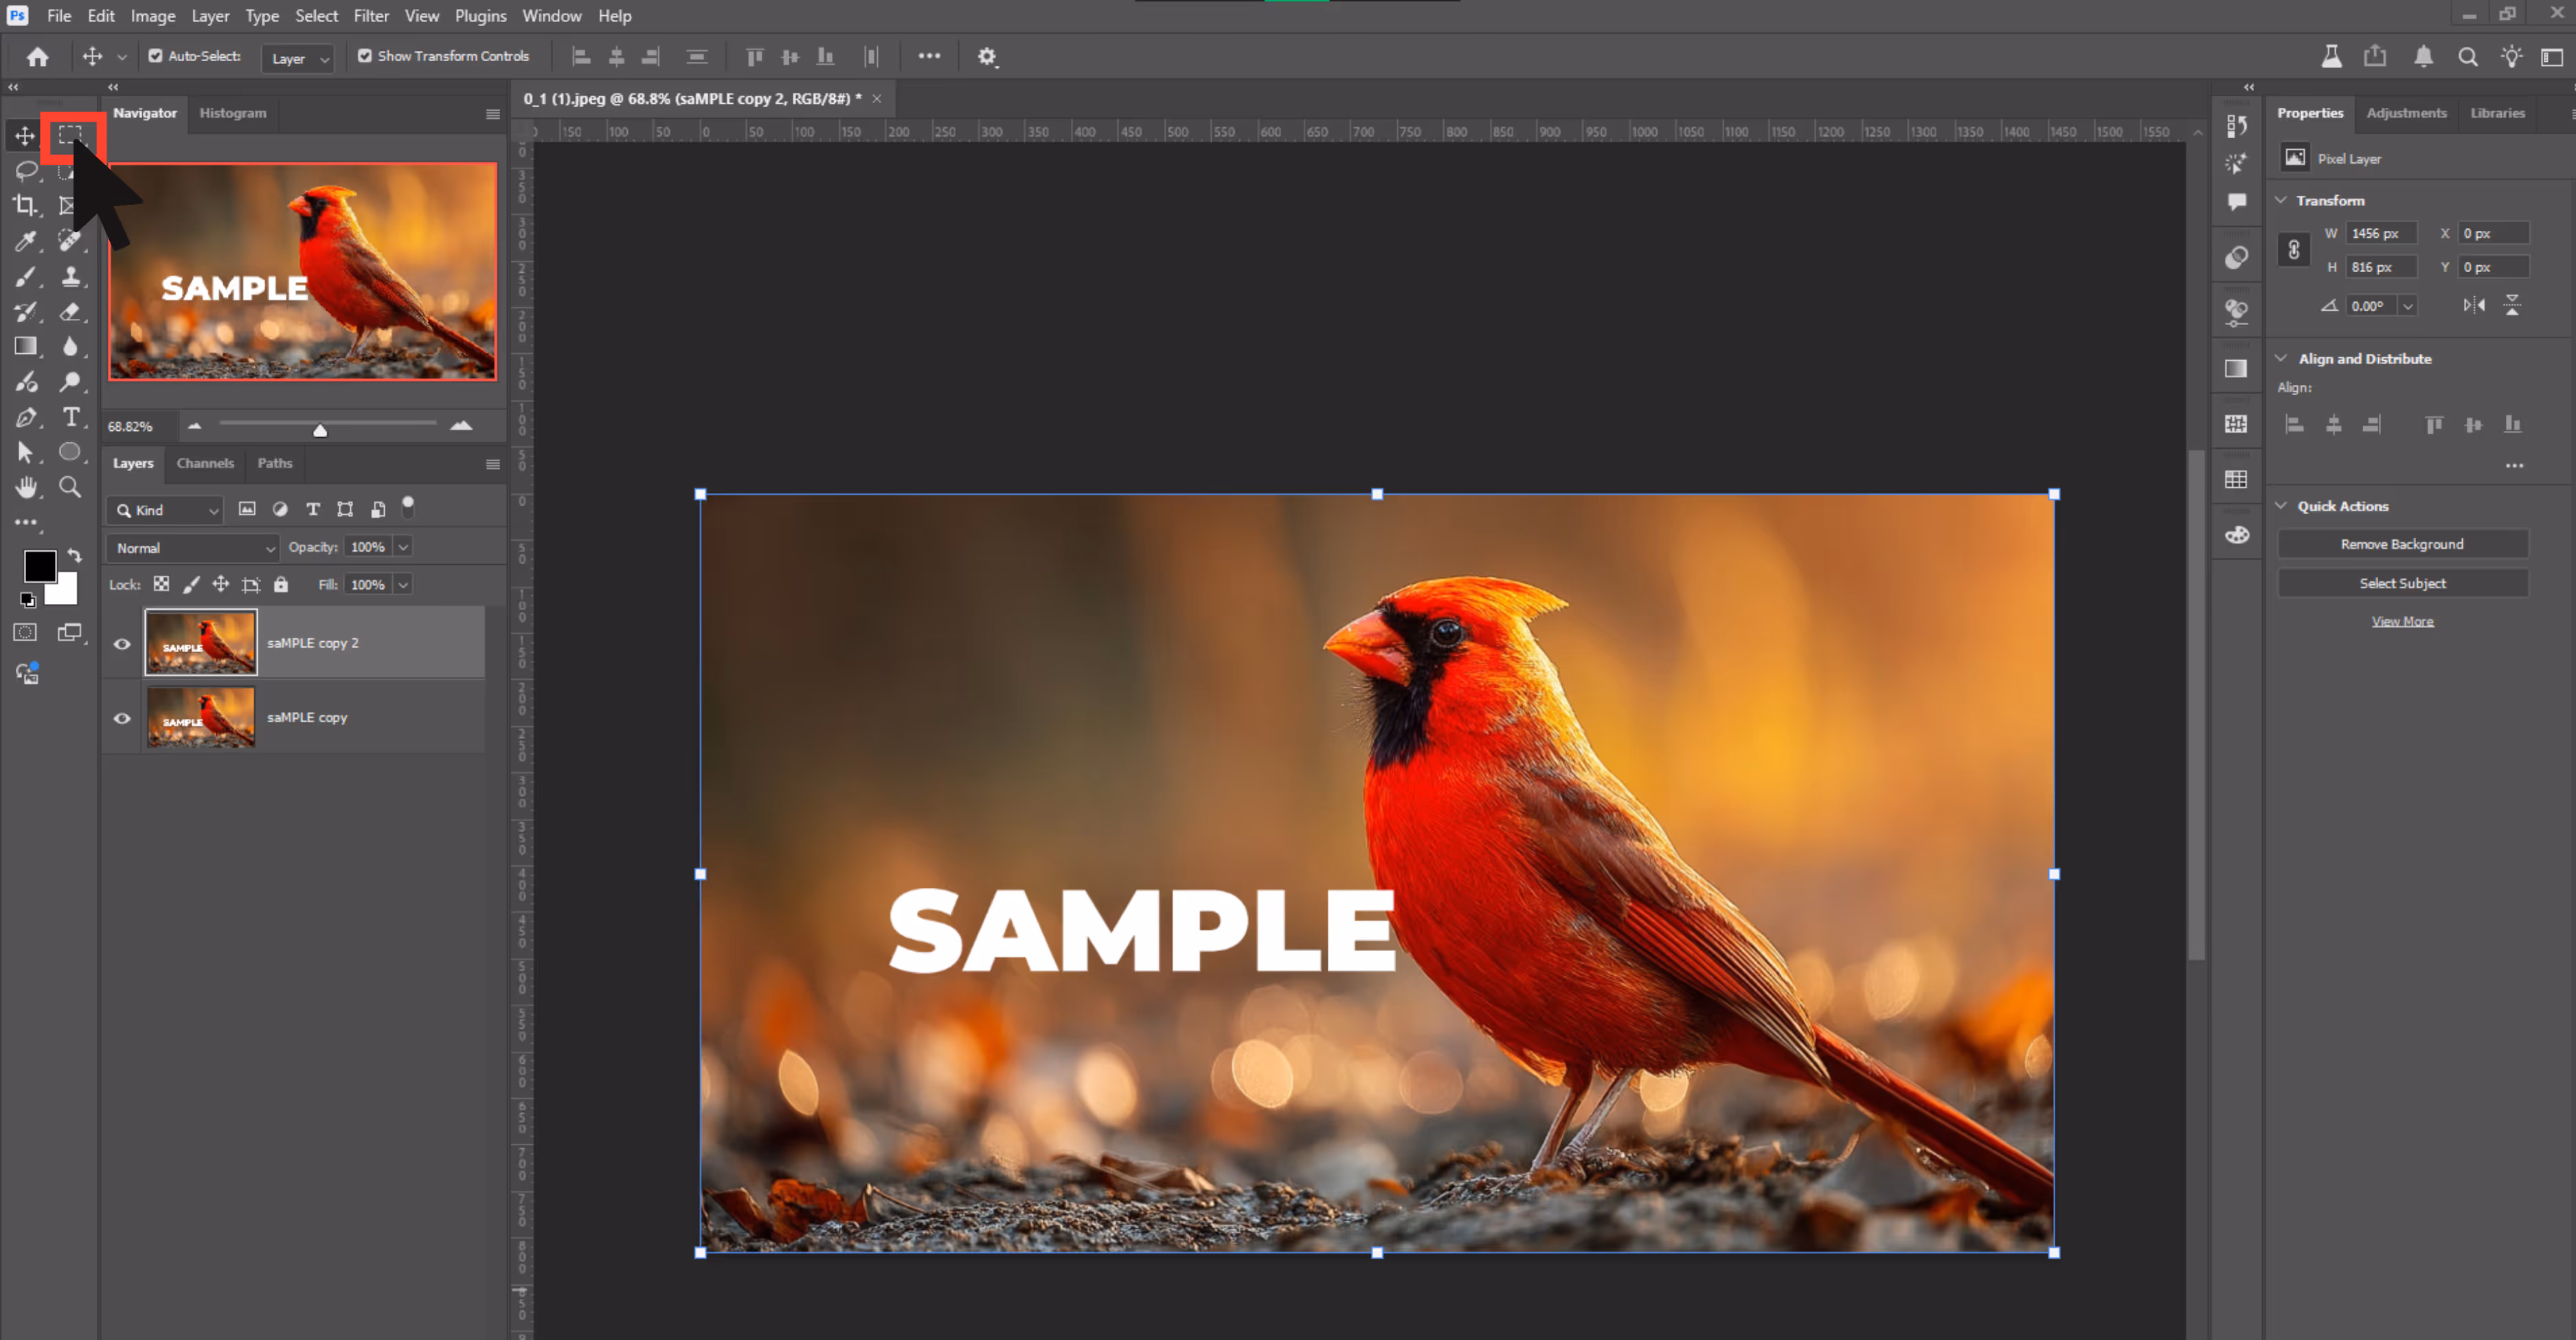
Step 1: Duplicate your image layer.
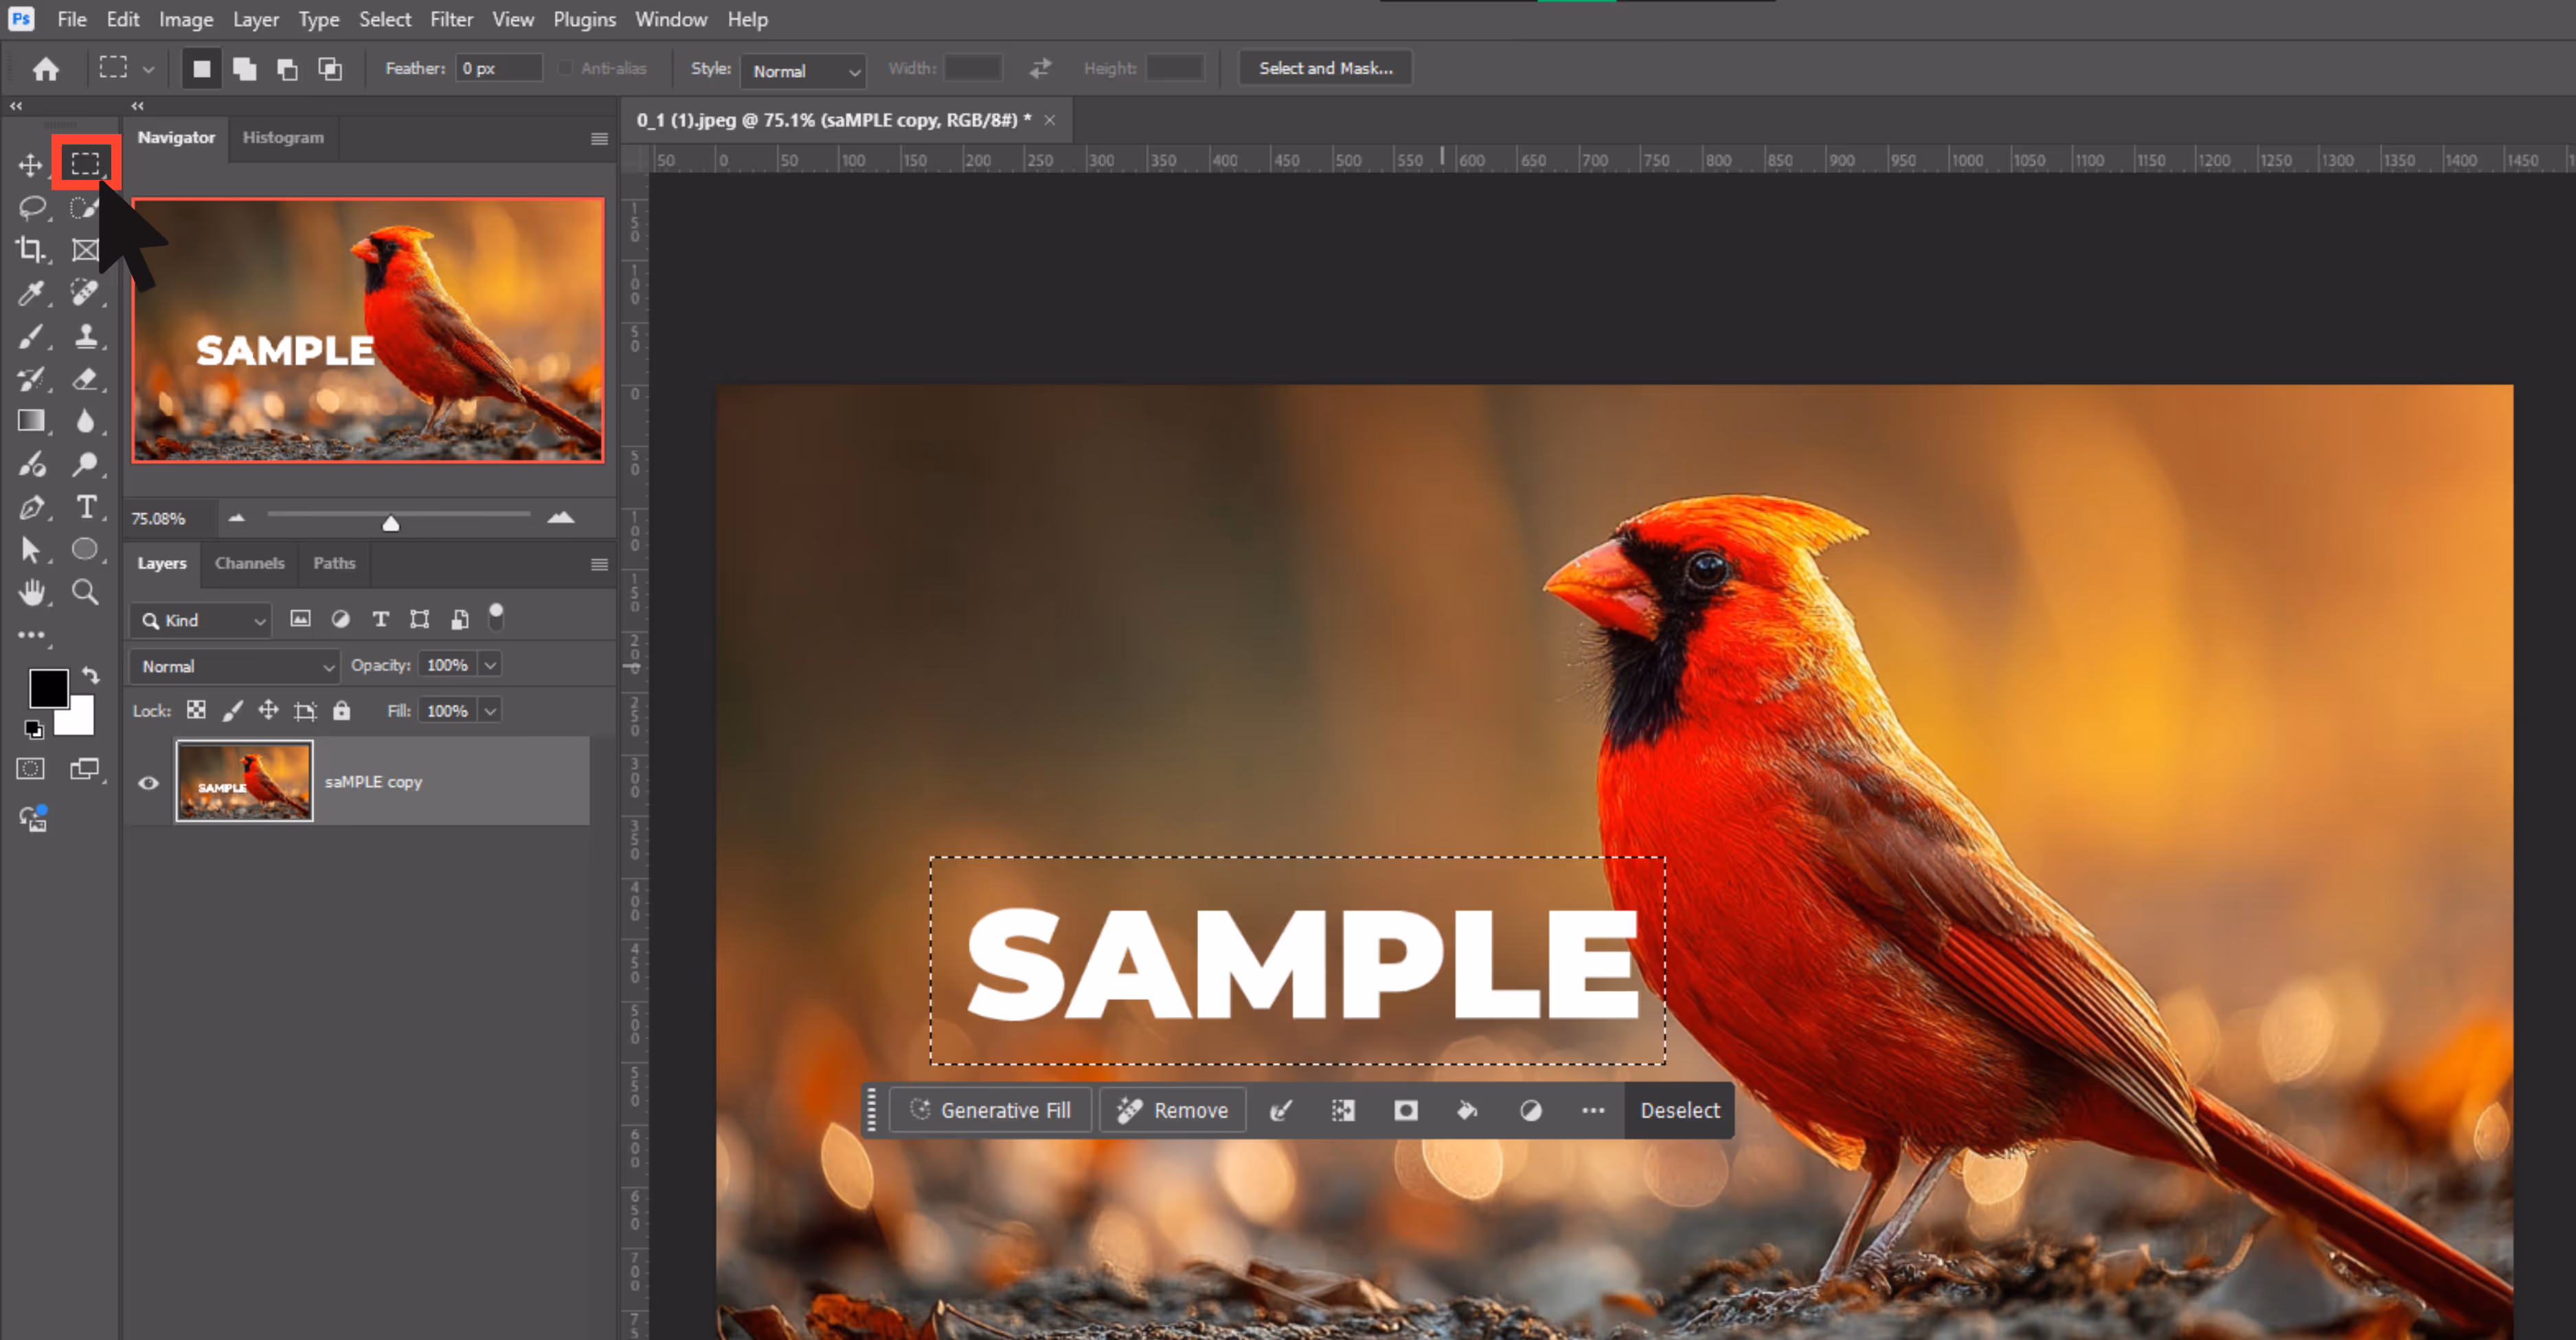
Step 2: Use any selection tool (Lasso, Marquee, or Quick Selection) to select the watermark.
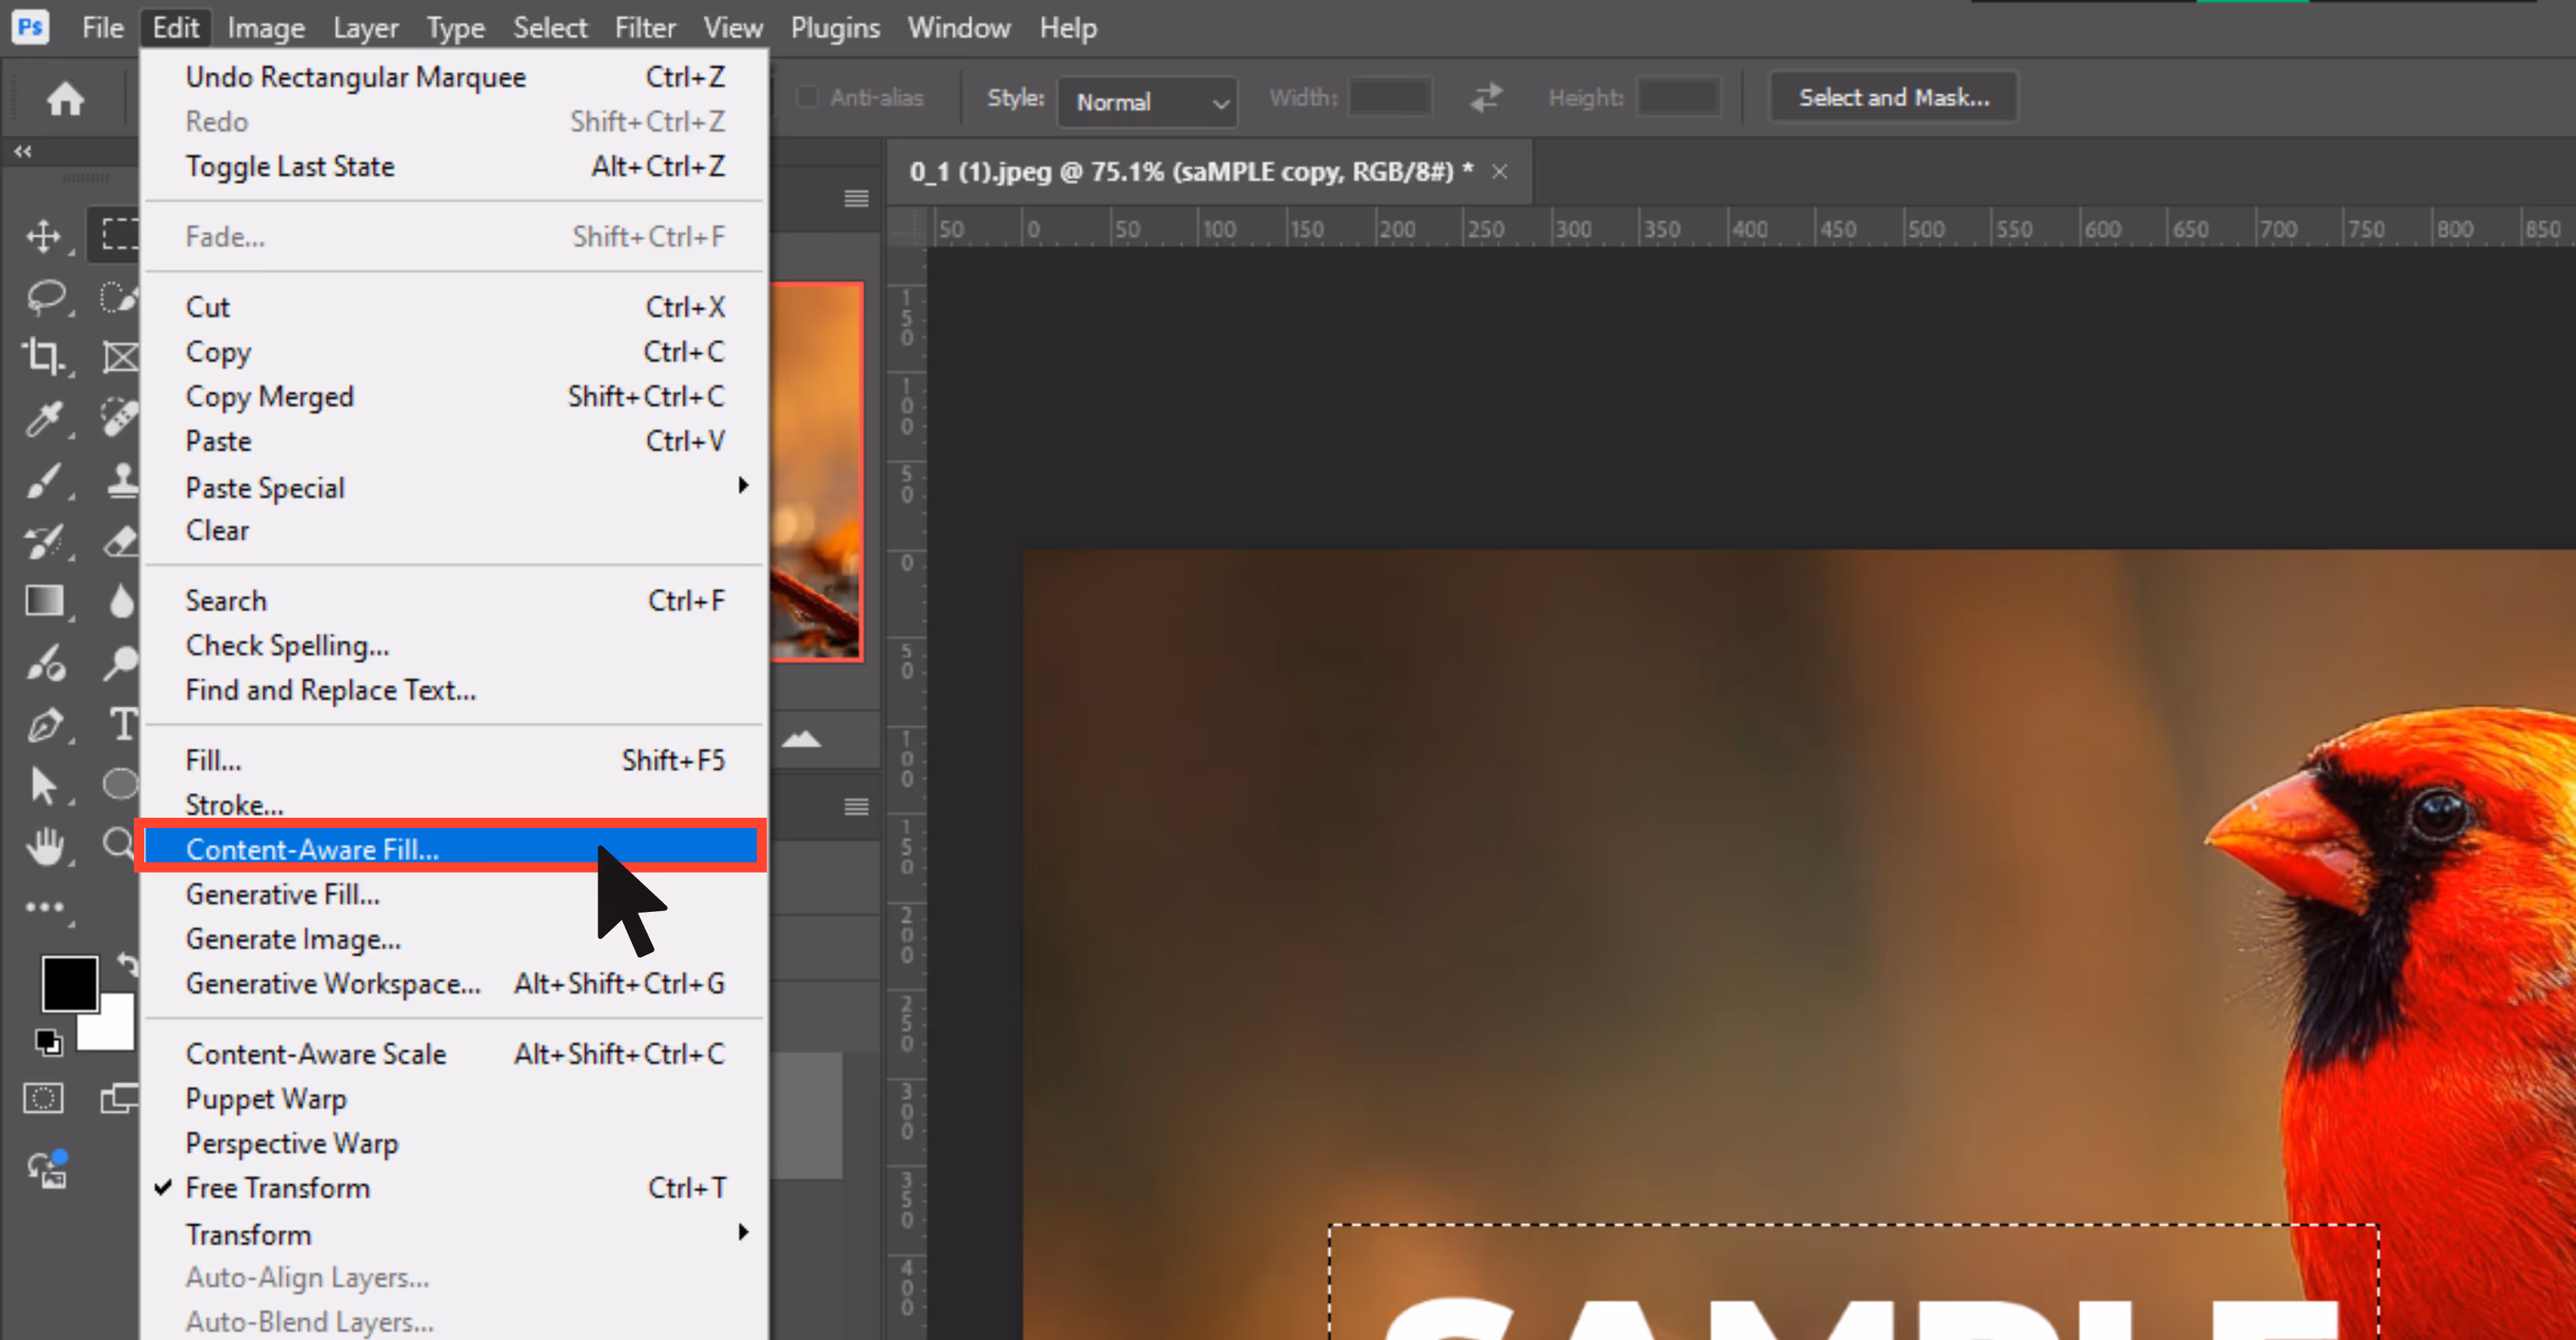
Step 3: Go to Edit and then to Content-Aware Fill.
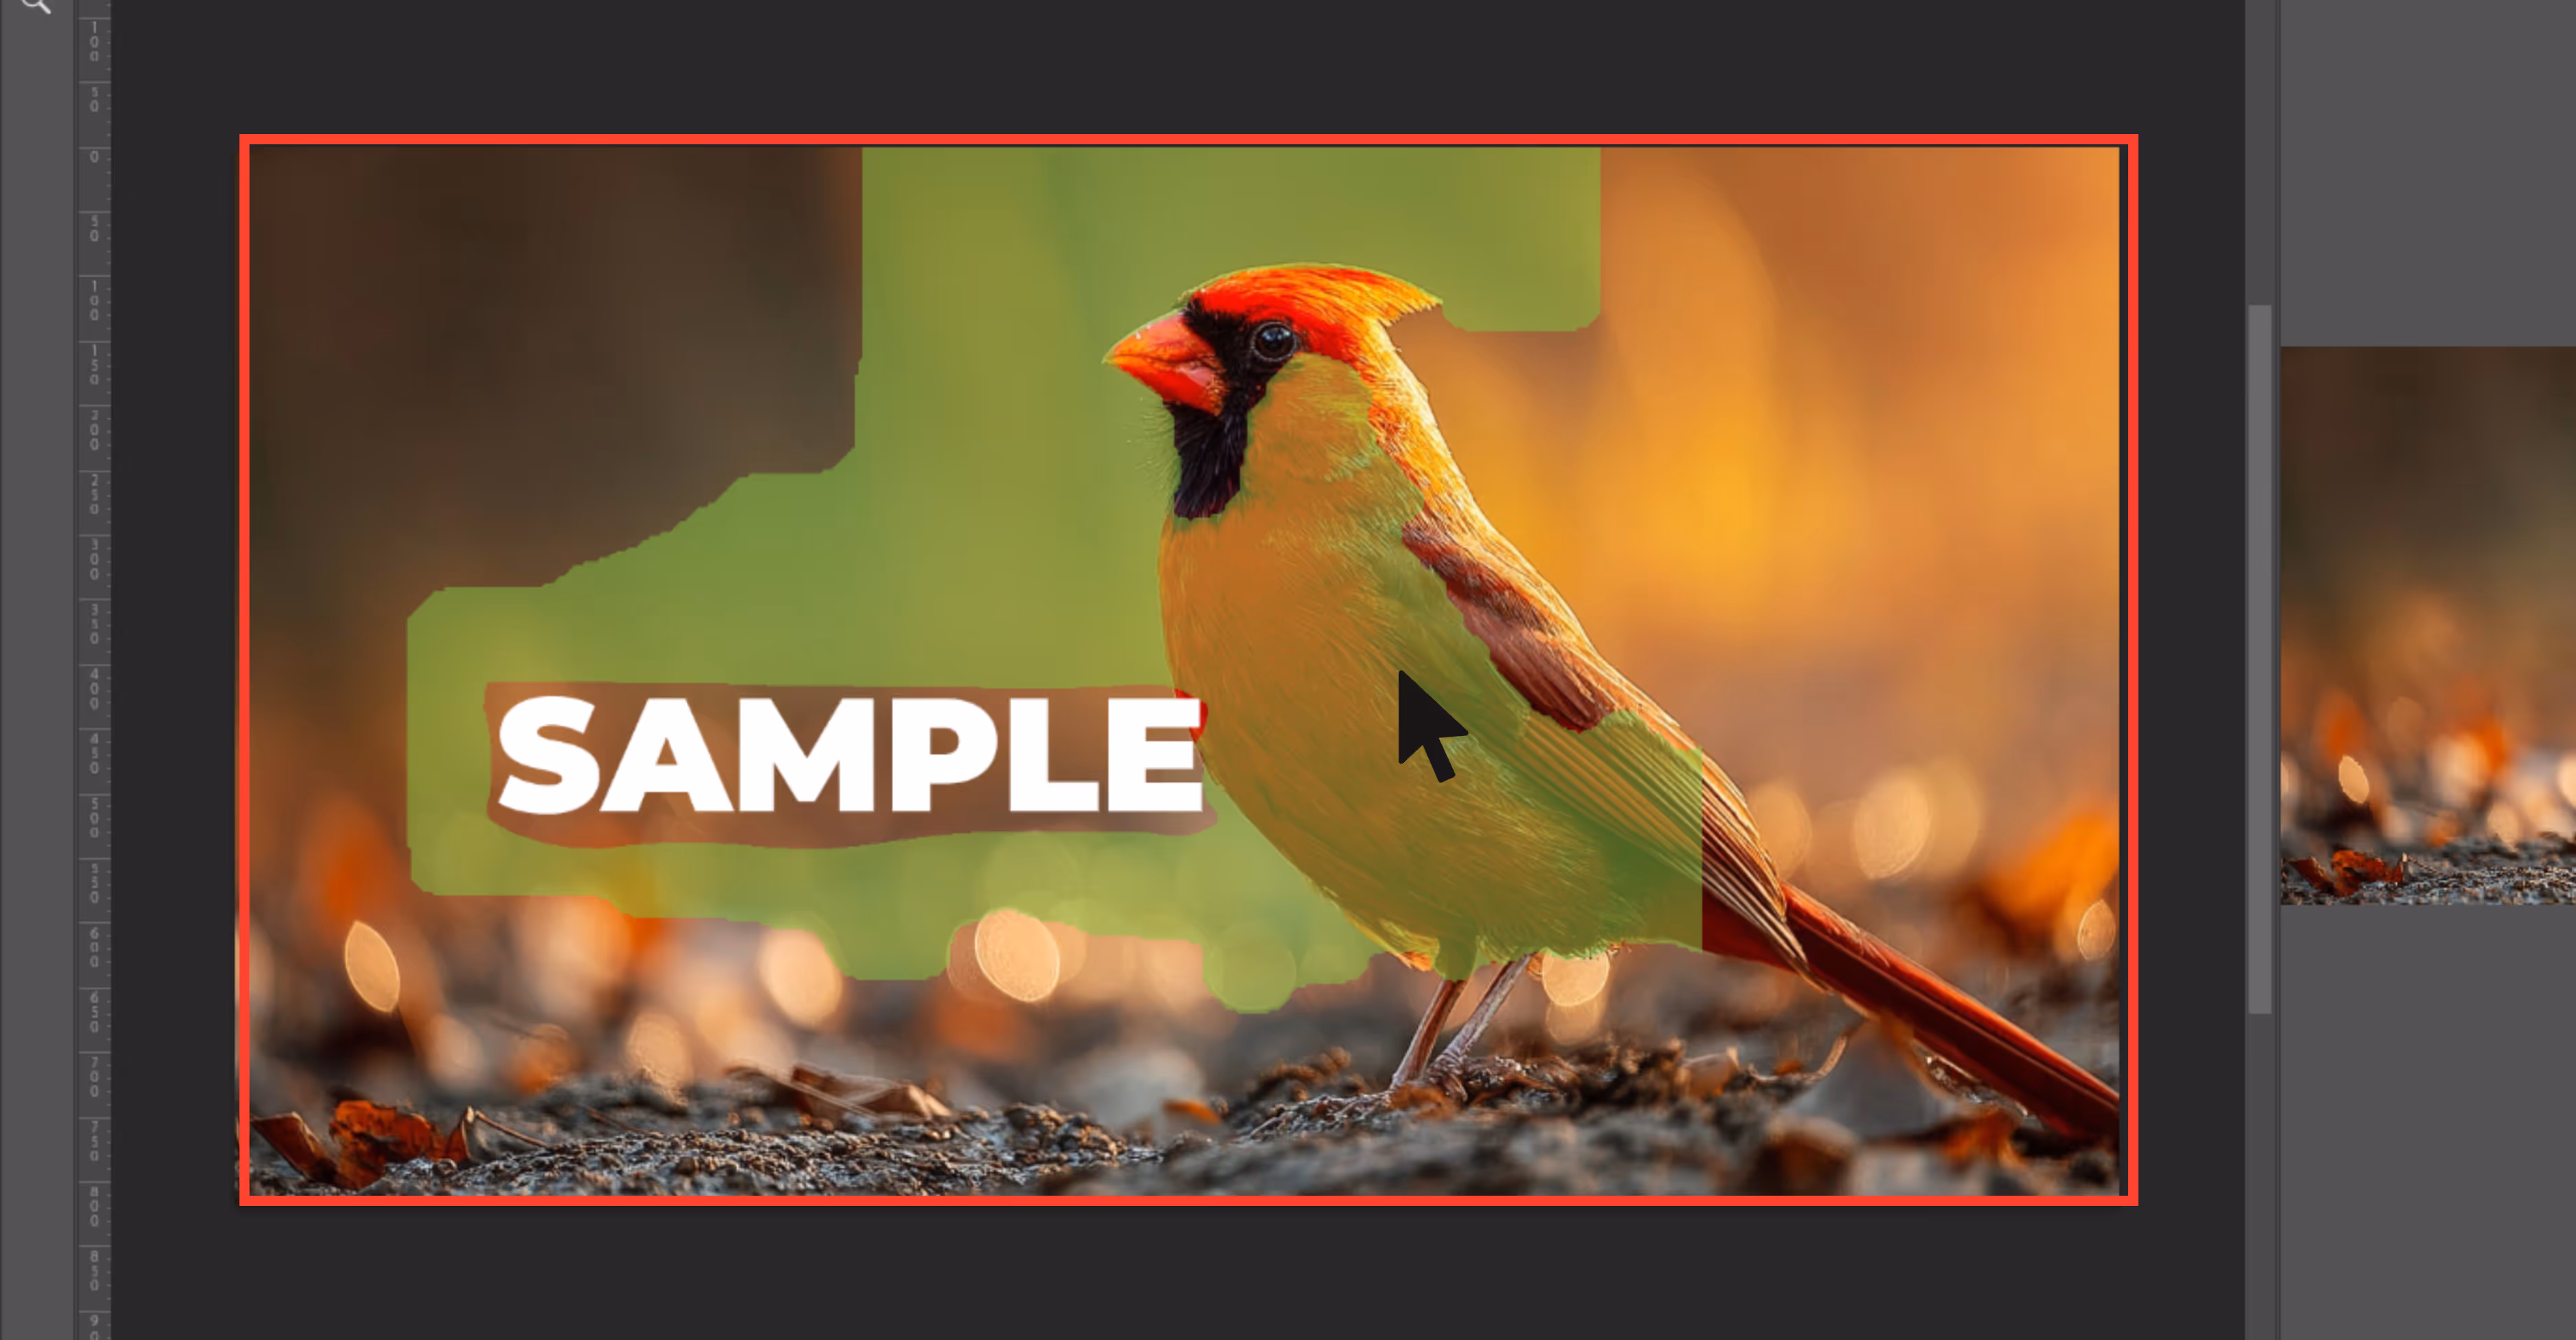
Step 4: A new window will open:
- Keep a note that the Green overlay = sample area.
- Adjust the sampling brush to exclude irrelevant parts.
Step 5: Under Output Settings, choose “New Layer” for non-destructive editing.
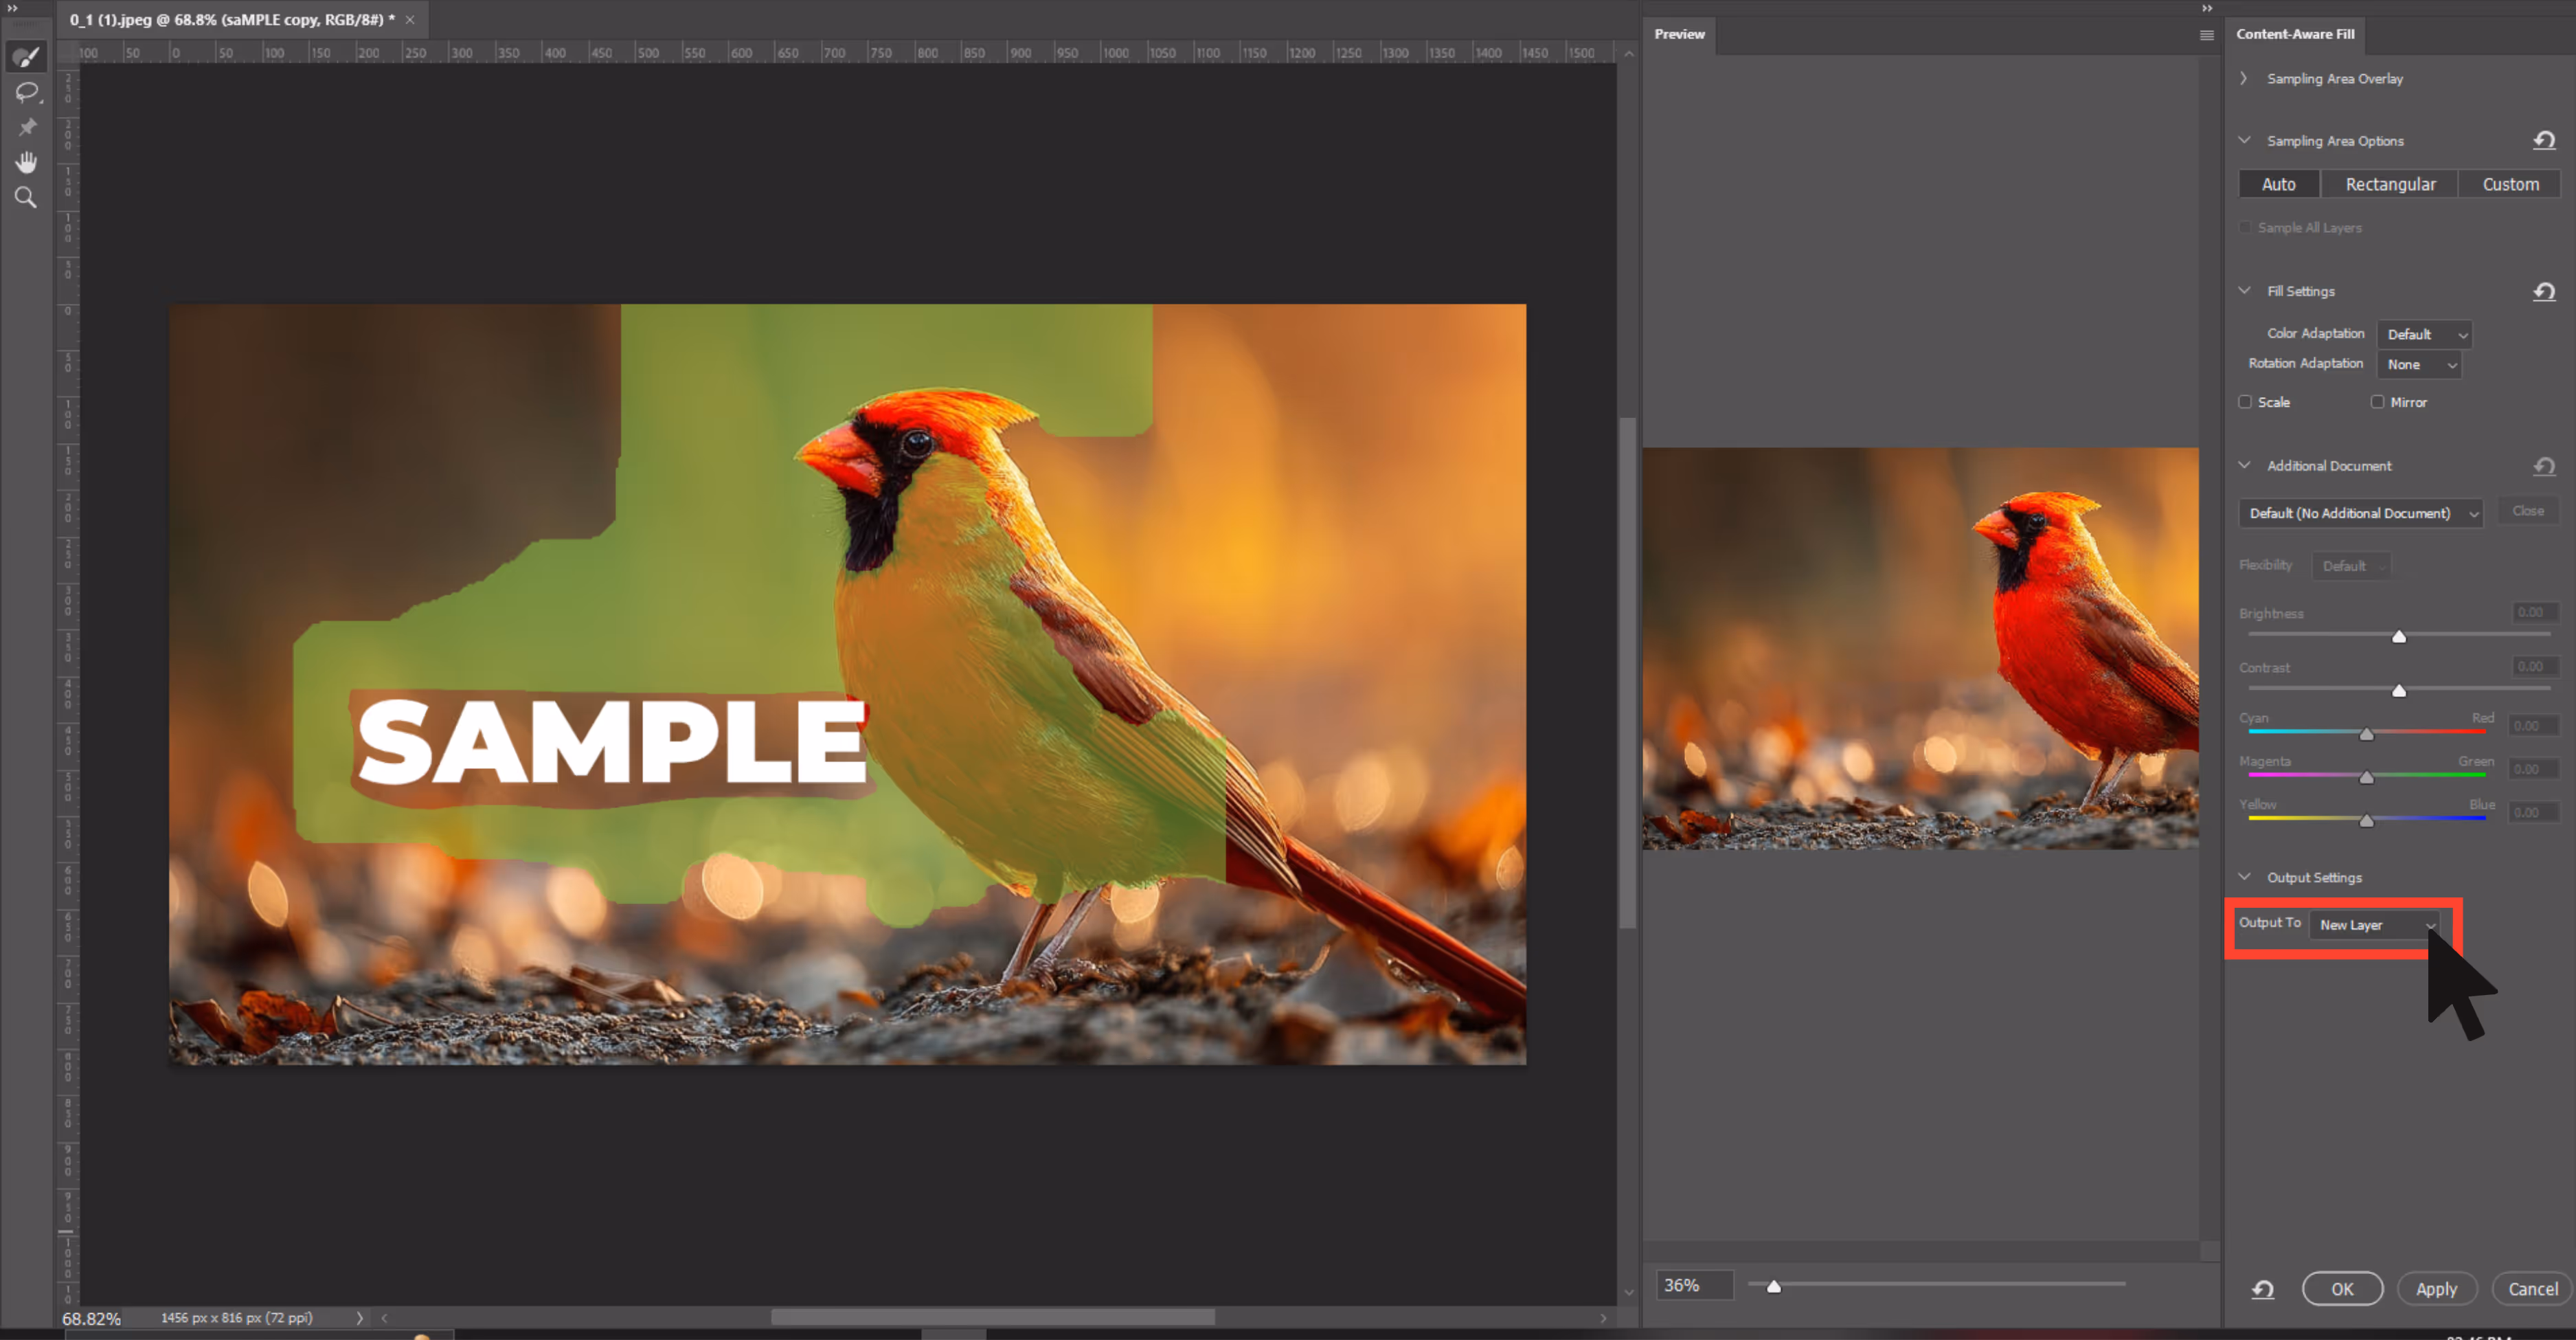
Step 6: Click OK. Photoshop will create a new layer with the filled result.
Step 7: Use Healing Brush or Clone Stamp for minor touch-ups.

Generative fill (Photoshop 2024+ version)
Generative Fill is Photoshop’s newest and smartest tool, launched in the 2024’s. It uses the Adobe Firefly AI plugin to generate new pixels based on your image.
So instead of just copying nearby parts or guessing textures, Photoshop now understands your image, removes the watermark, and fills in the area with brand-new, realistic content. Even if your watermark is sitting on something complicated—like over clothes, on top of grass, or across a wall—Generative Fill does a surprisingly good job.
Why should it be used?
Transparent watermarks, complex image fills, AI-assisted healing.
How to use the tool?
Step 1: Open your image in Photoshop 2024 or later.
Step 2: Create a duplicate layer:
- Press Ctrl+J (Windows). Always work on a copy.
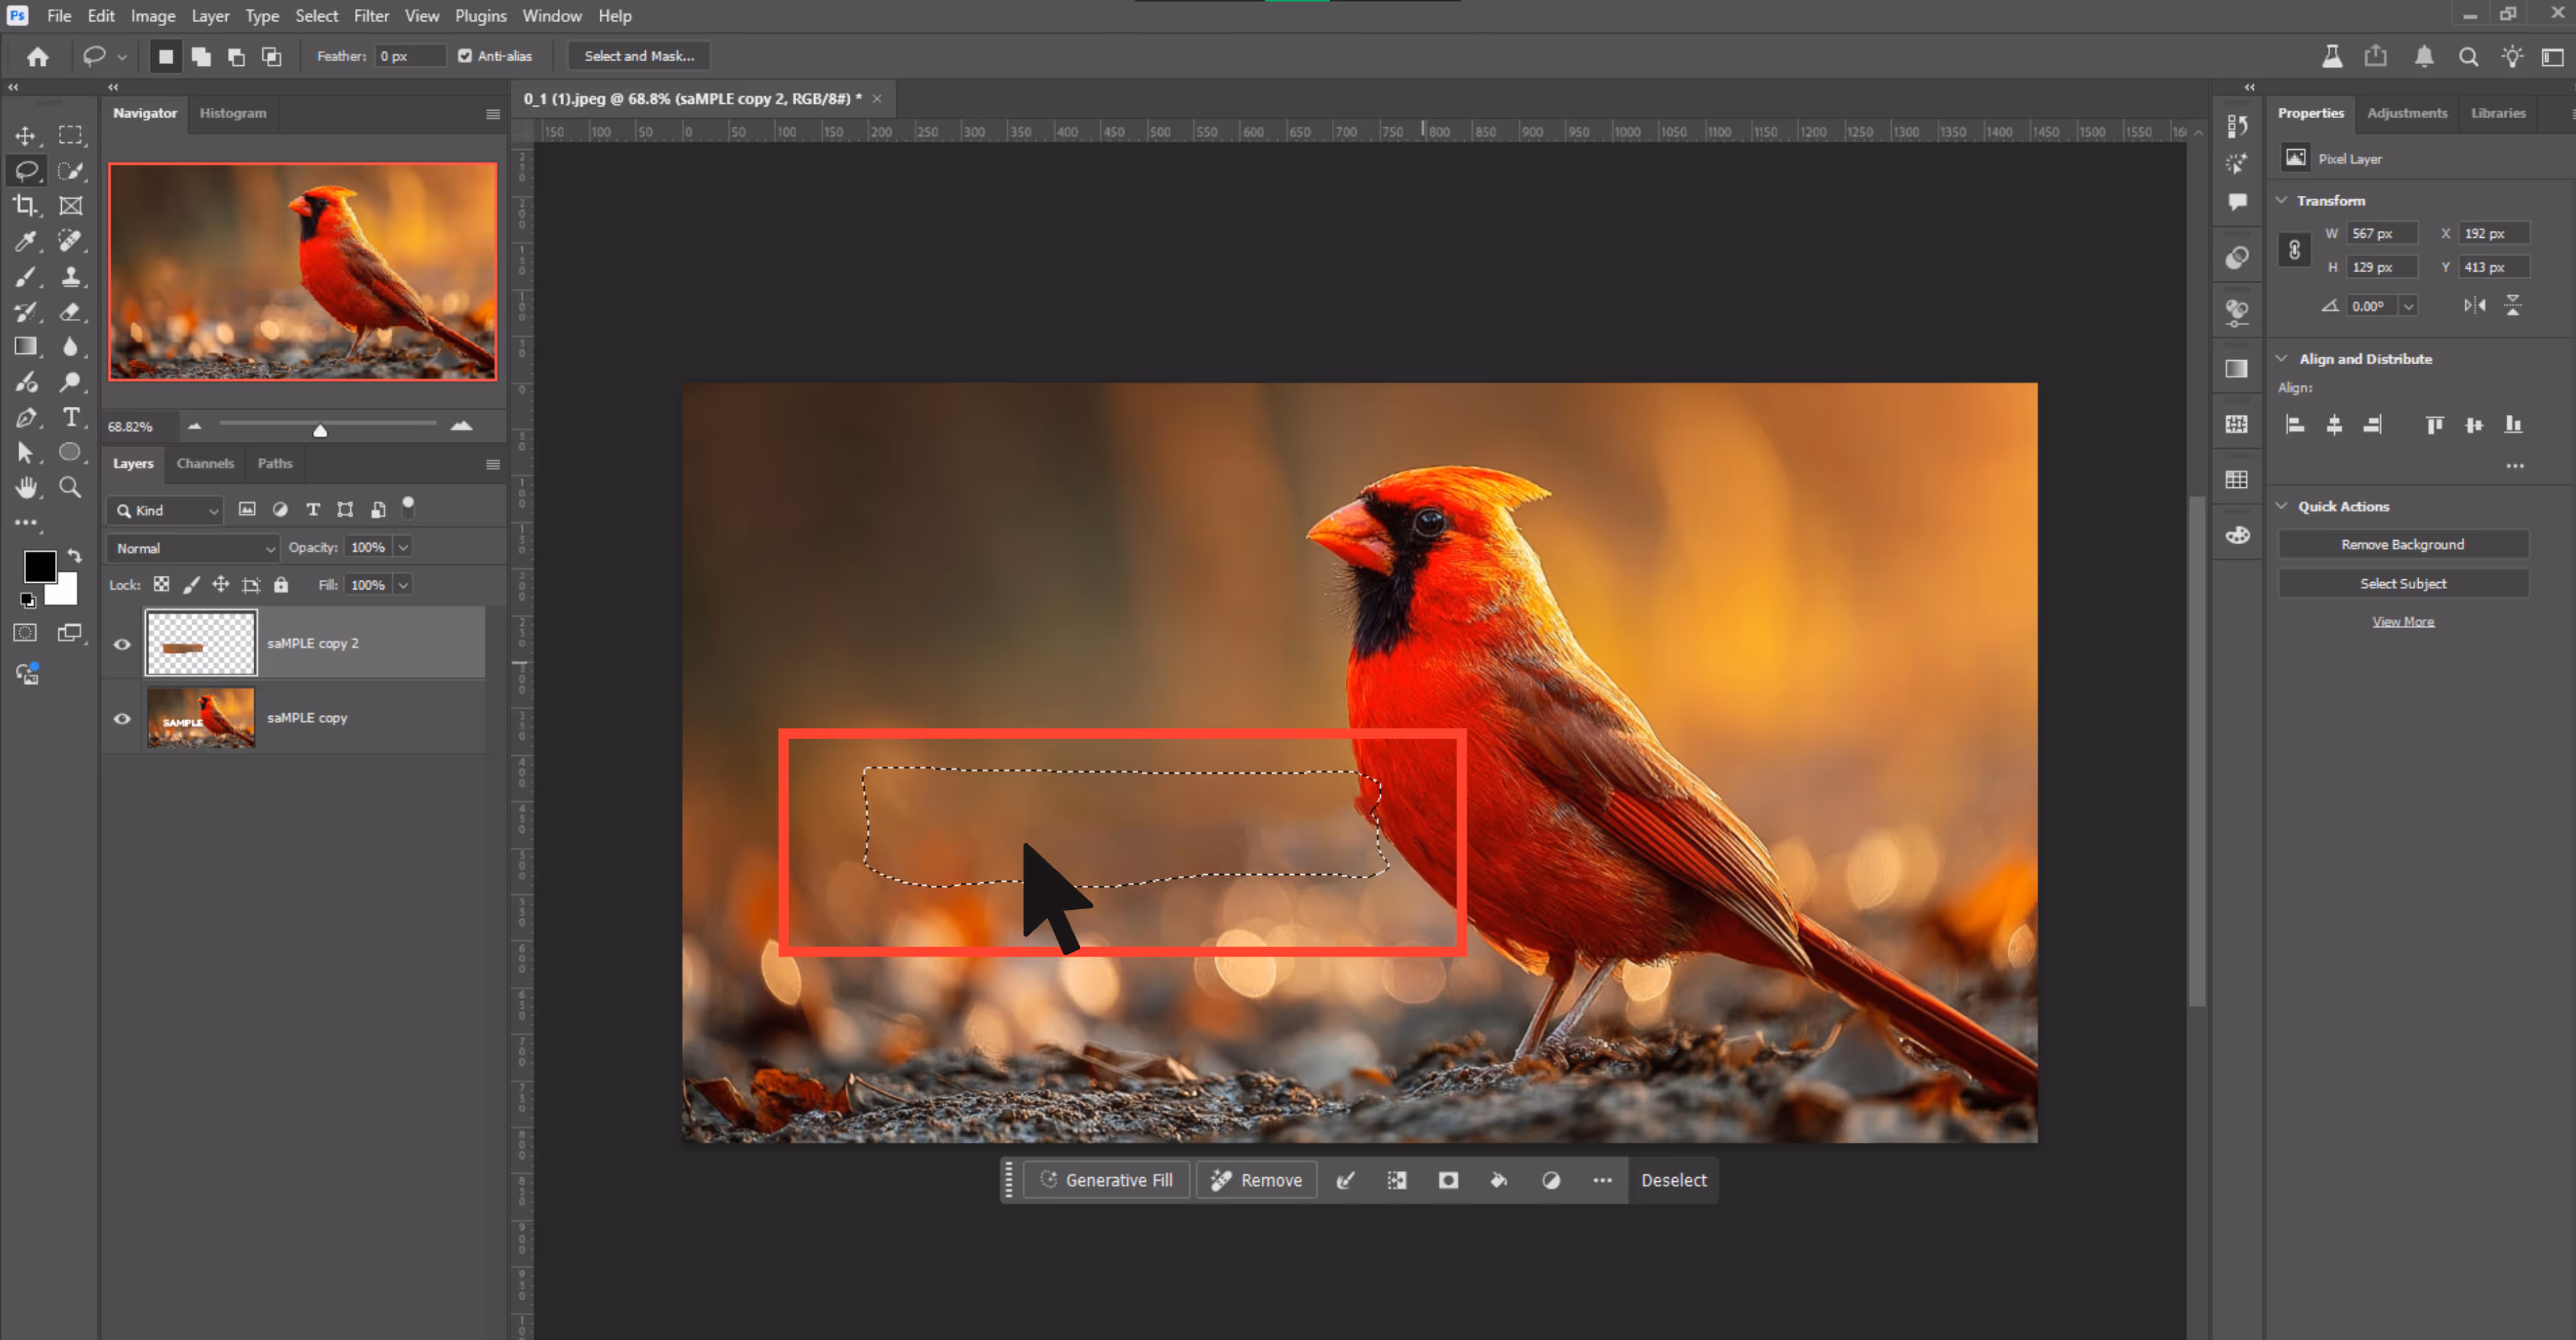
Step 3: Select the Lasso Tool (L) or any other selection tool (e.g., Marquee Tool).
- Draw a loose selection around the watermark. Don’t worry about being super precise.

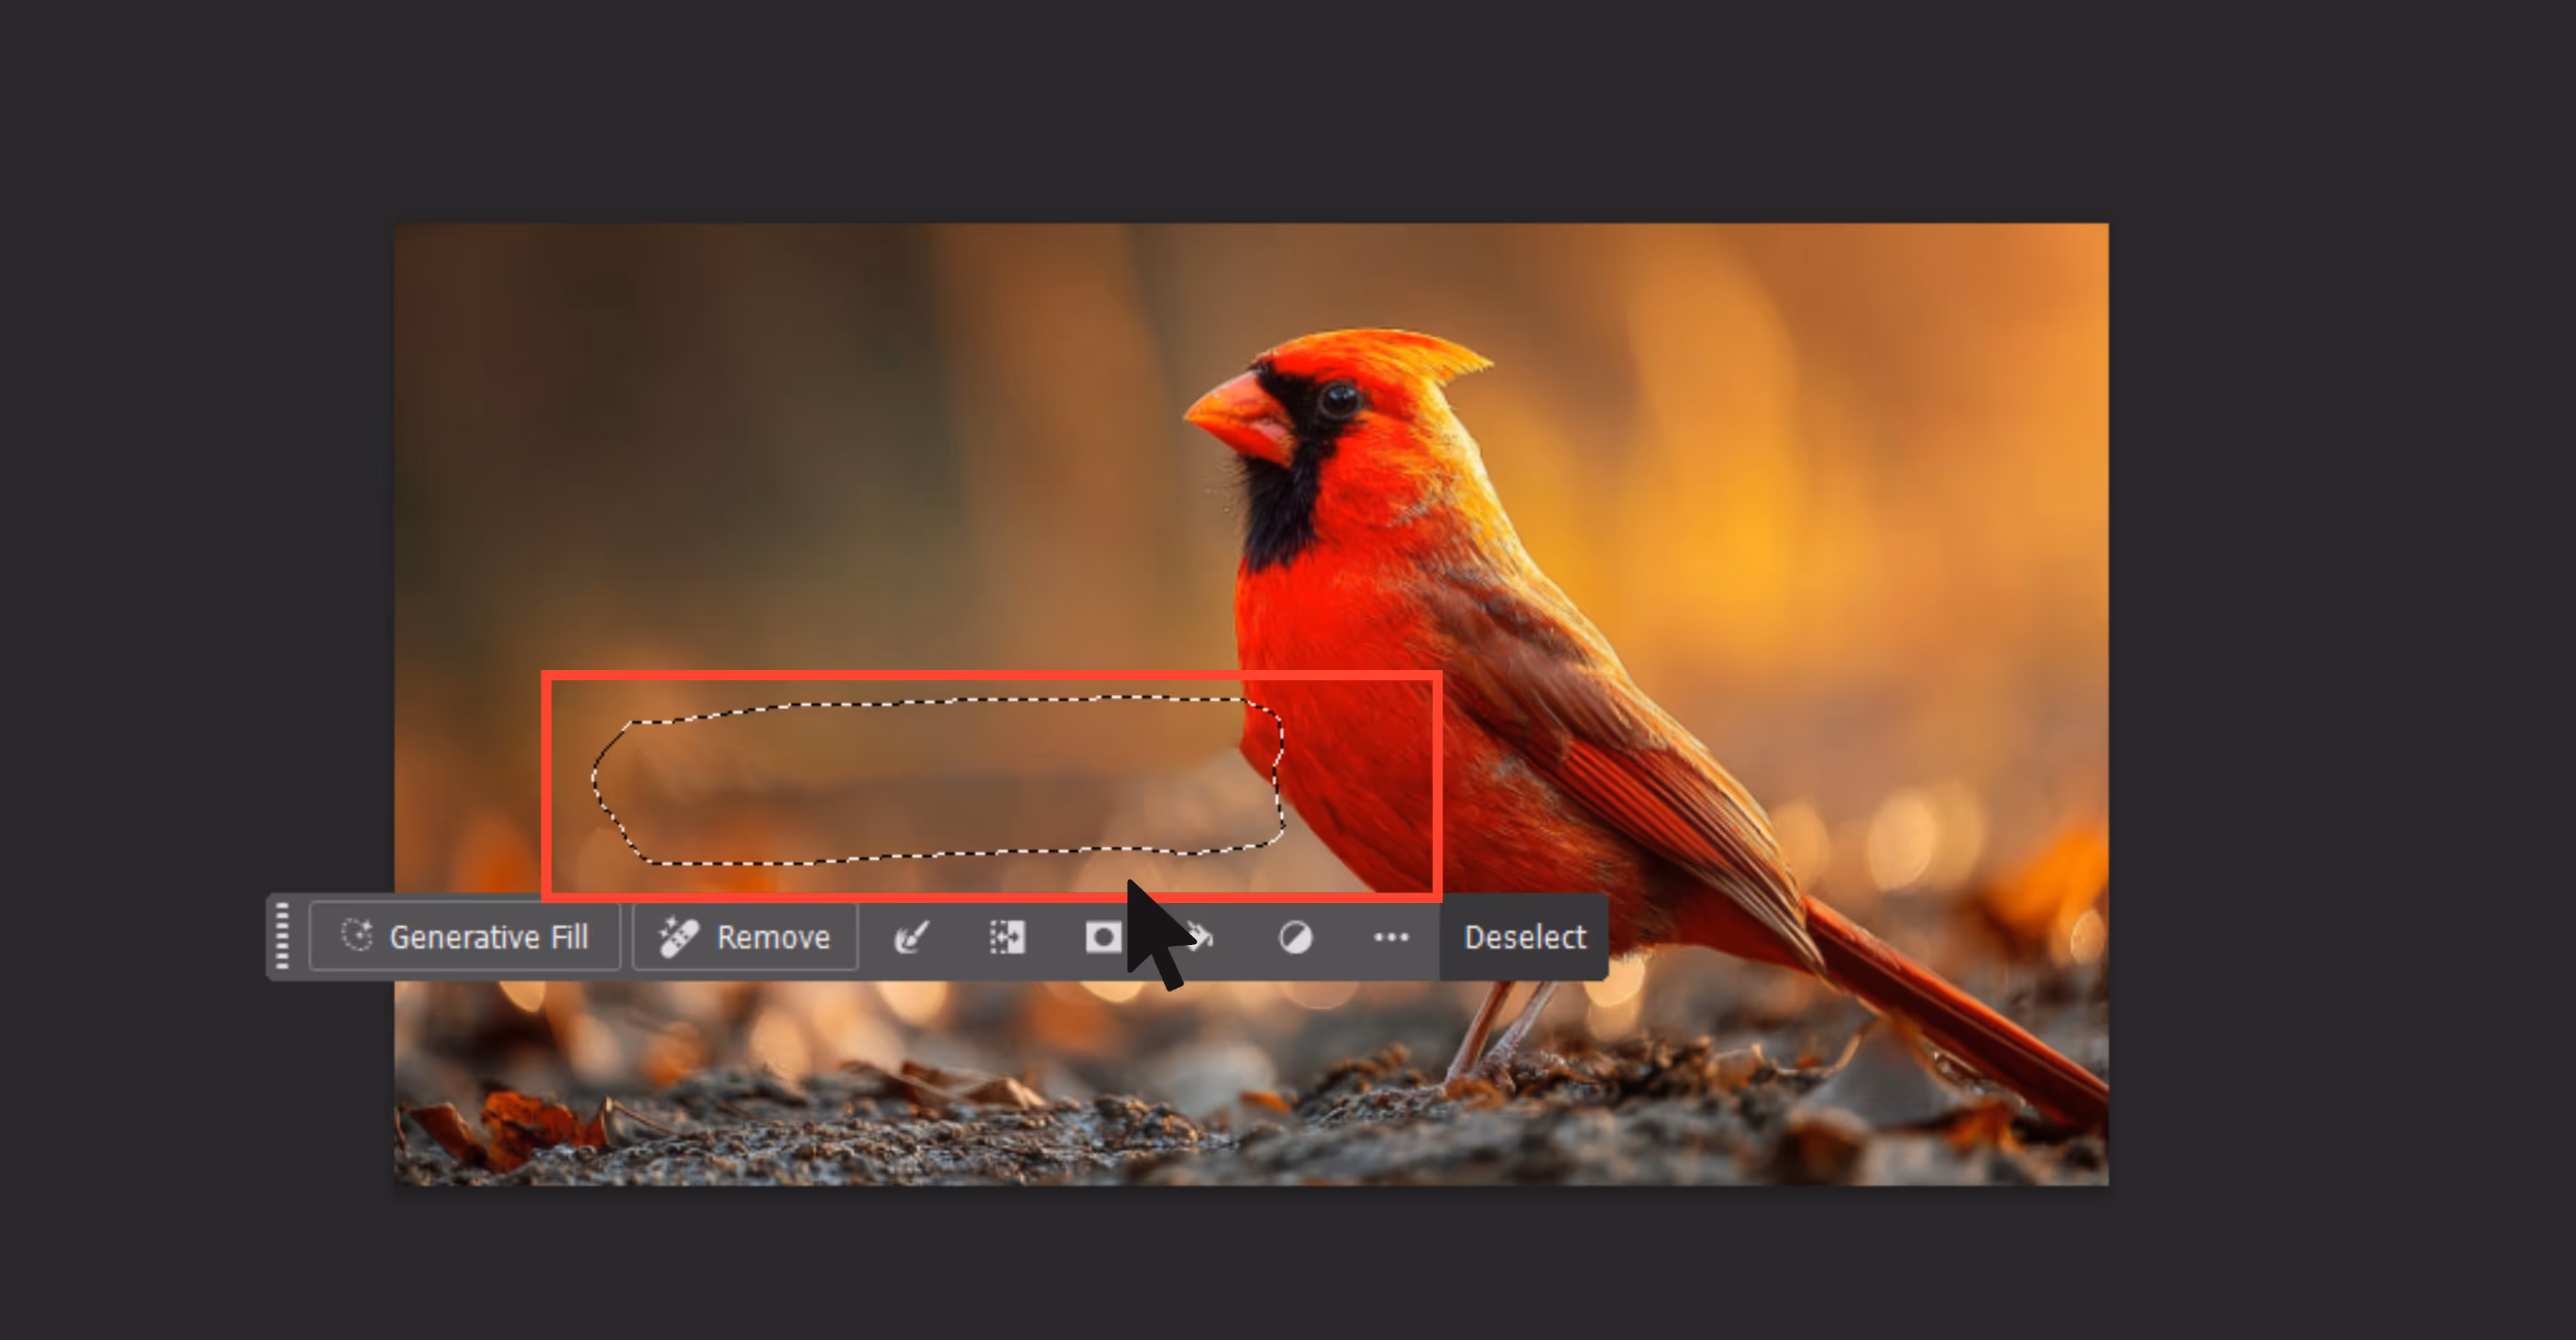
Step 4: As soon as you make the selection, a context bar will appear at the bottom with a “Generative Fill” button. Click it.

Step 5: You’ll see a prompt box. You can either:
- Leave it blank (Photoshop will auto-detect what’s behind the watermark)
Or type a simple prompt like:
- "remove watermark and match background" or "replace with plain wall"
Step 6: Click Generate.

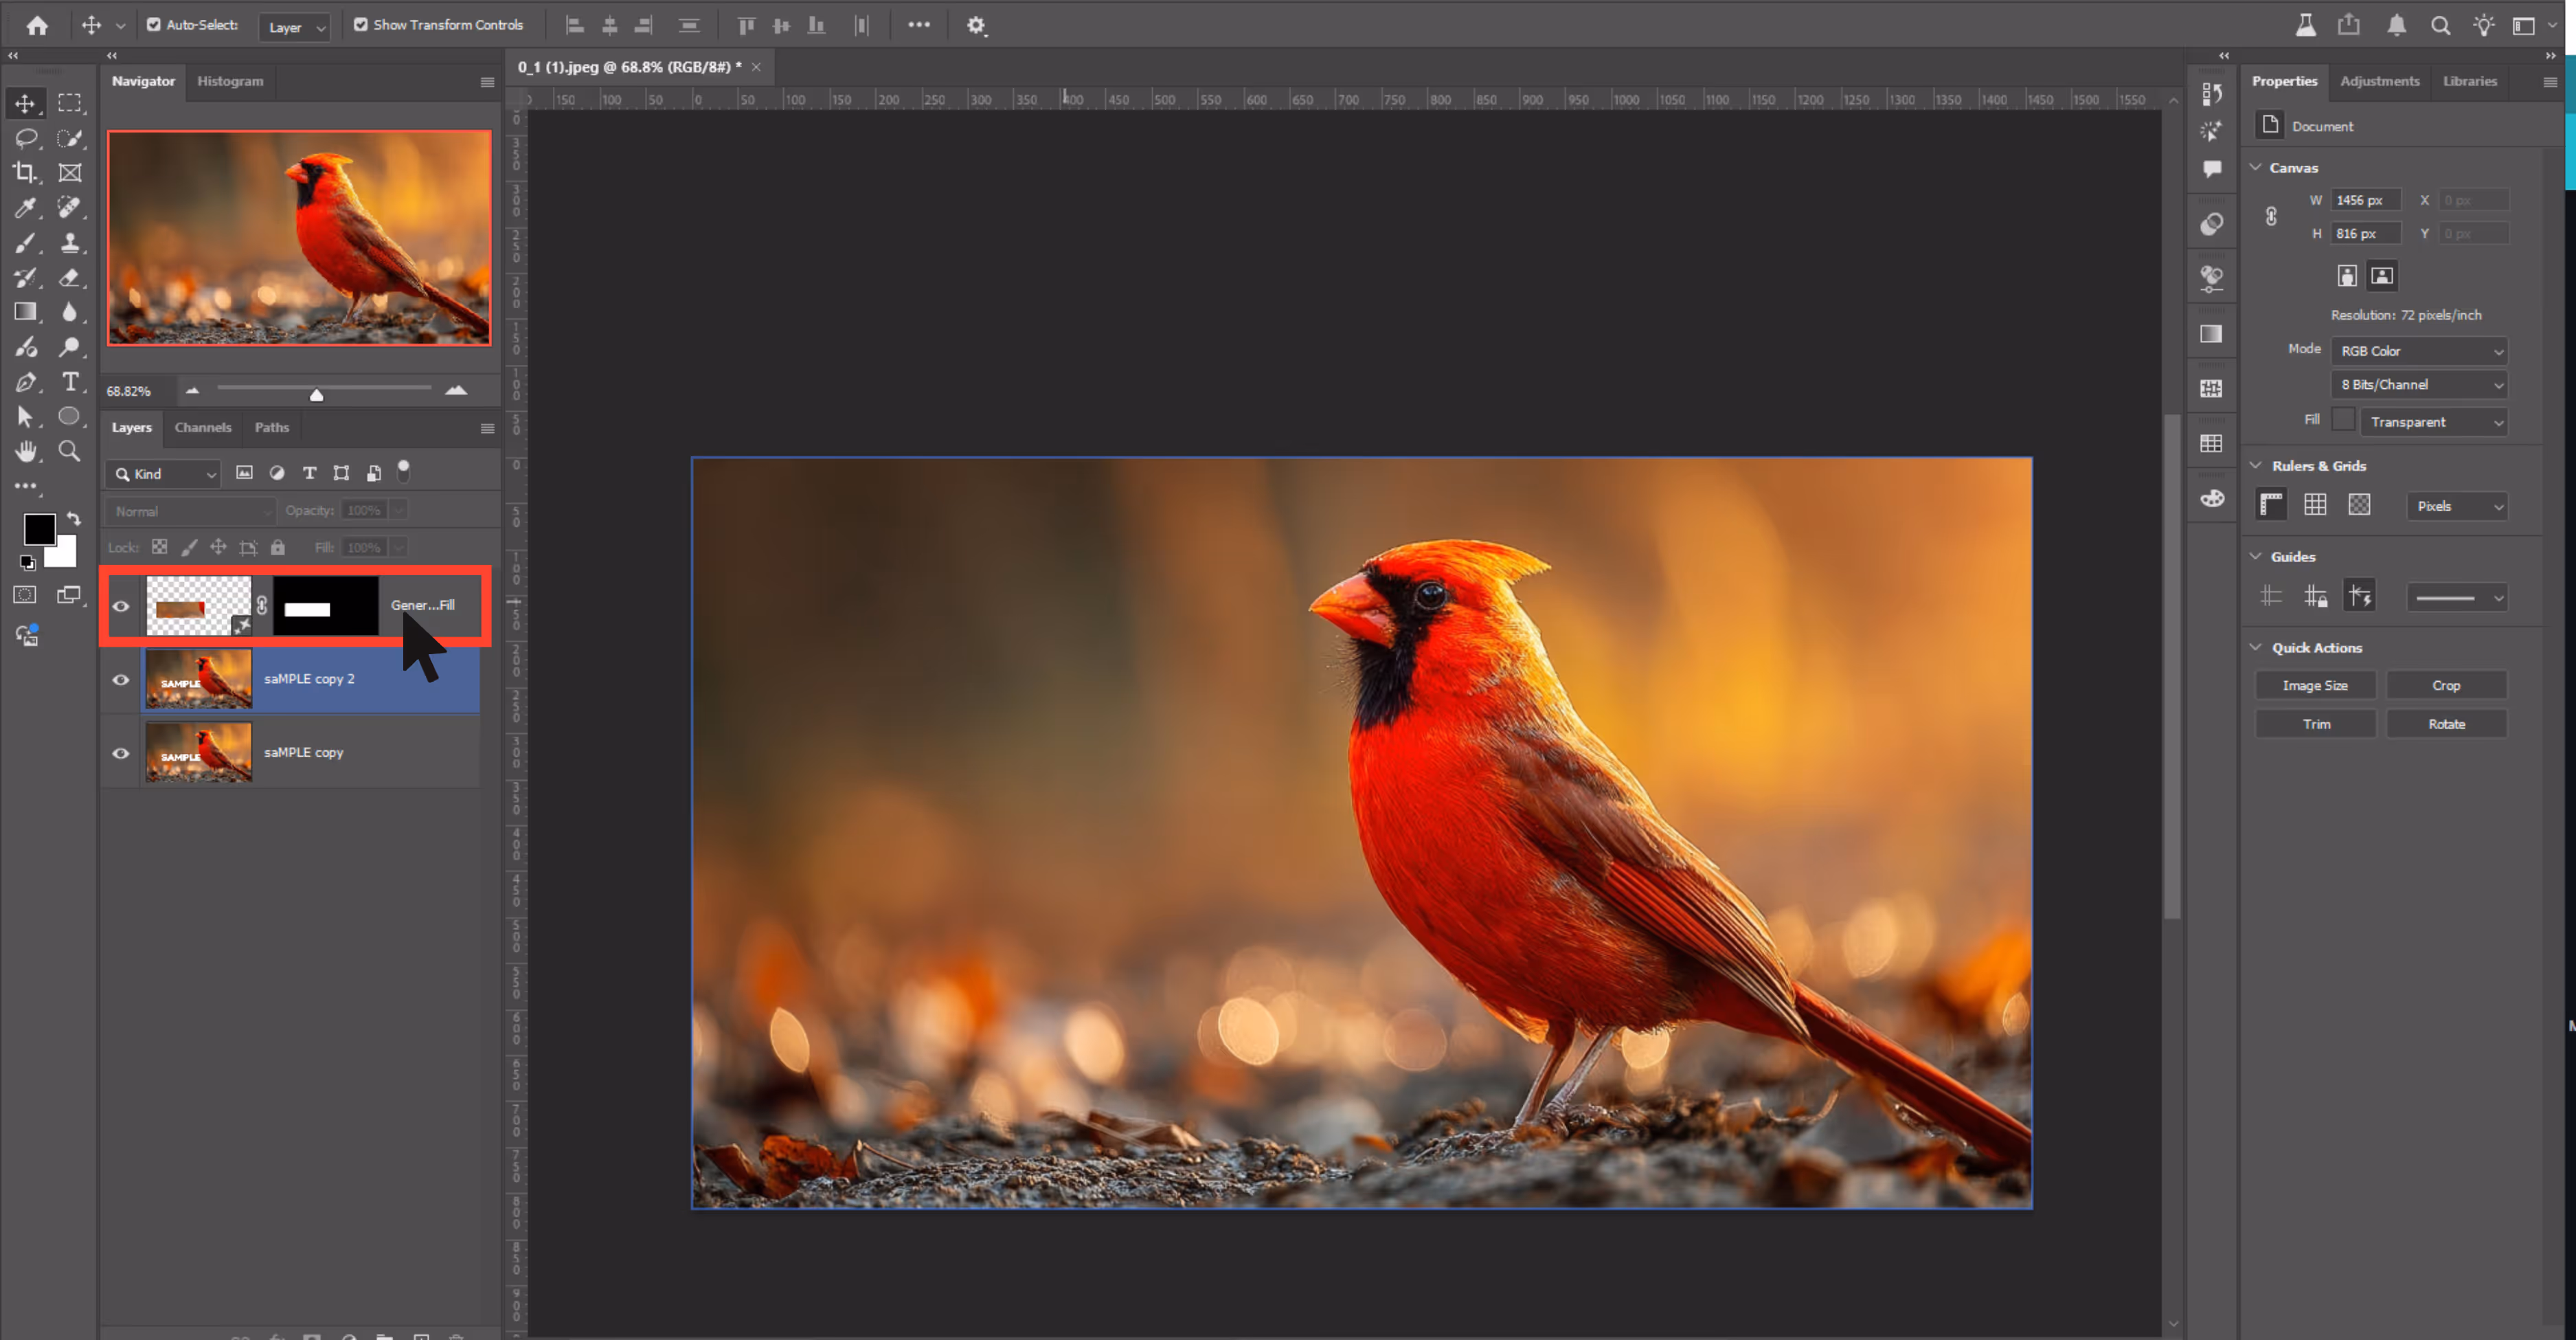
Step 7: Once you're happy, click Apply. The result will appear as a new Generative Layer in your Layers panel.
Patch tool
The Patch Tool is like Photoshop’s "cut and replace" feature. You select the watermark area and then drag that selection to a clean part of the image—Photoshop then blends that new area into the original.
It’s perfect for removing medium-to-large watermarks from areas where the surrounding texture is smooth or consistent.
Why should it be used?
Watermarks with consistent surroundings like clouds, walls, skin.
How to use the tool?
Step 1: Duplicate your image layer.
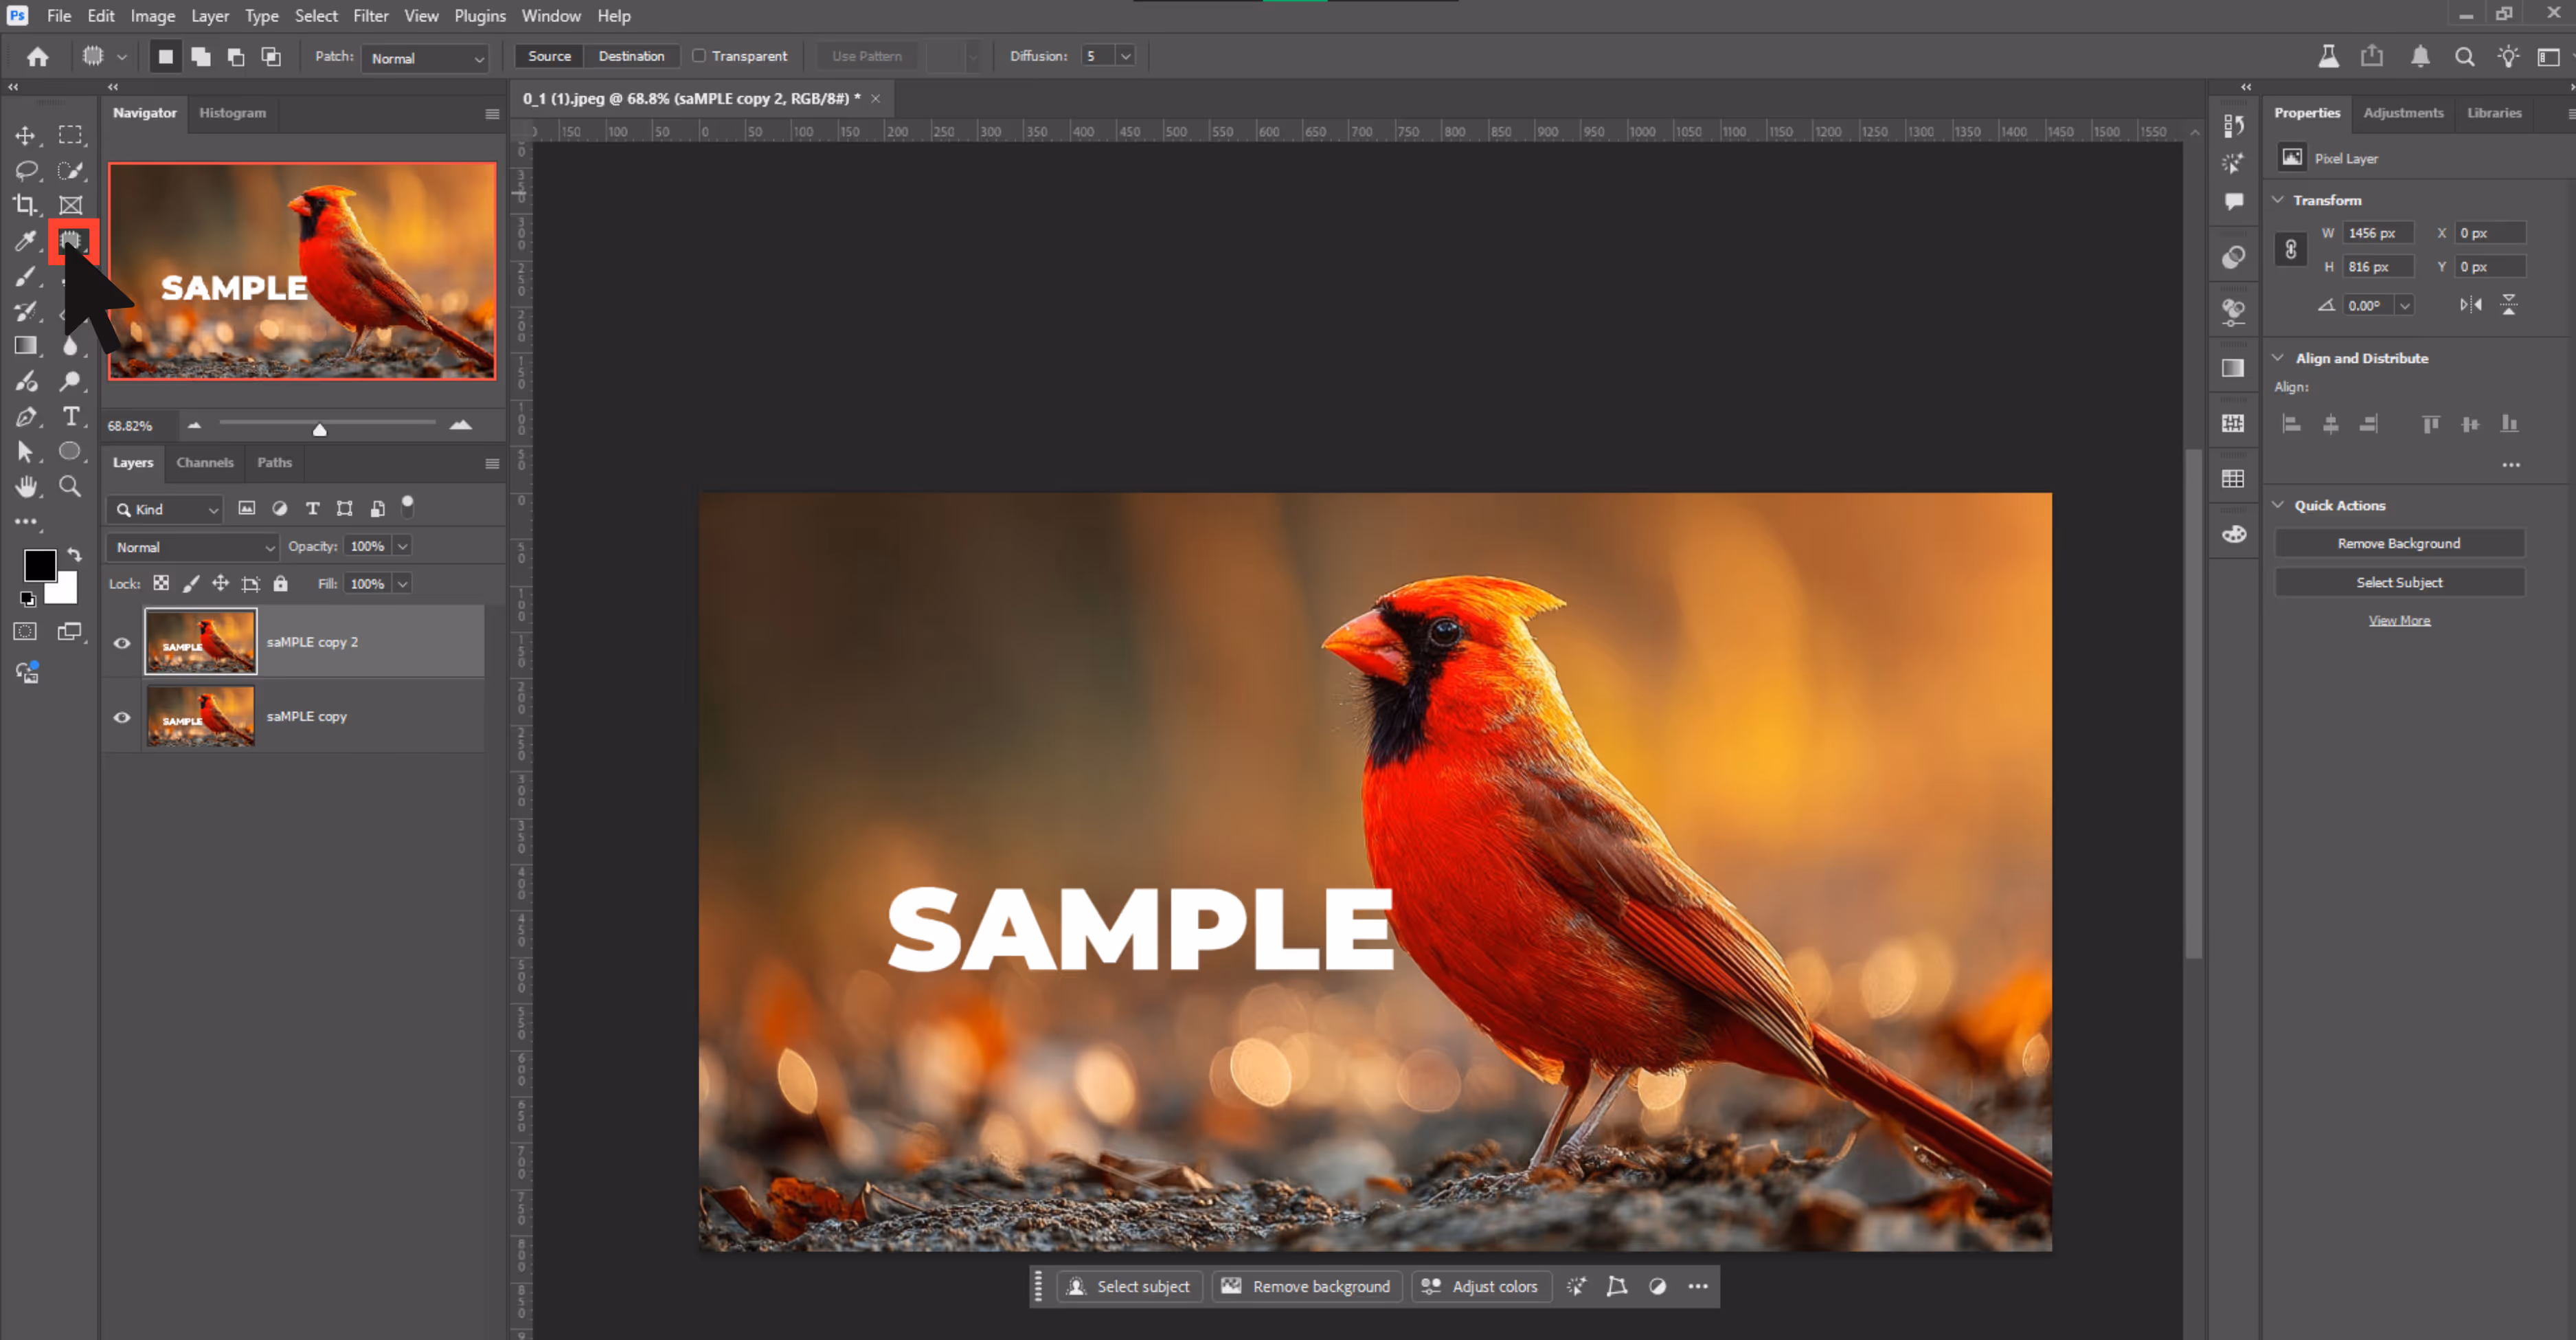
Step 2: Select the Patch Tool from the Healing tools (under the Spot Healing dropdown).
Step 3: Draw a selection around the watermark.
Step 4: Drag the selection to an area that looks similar.
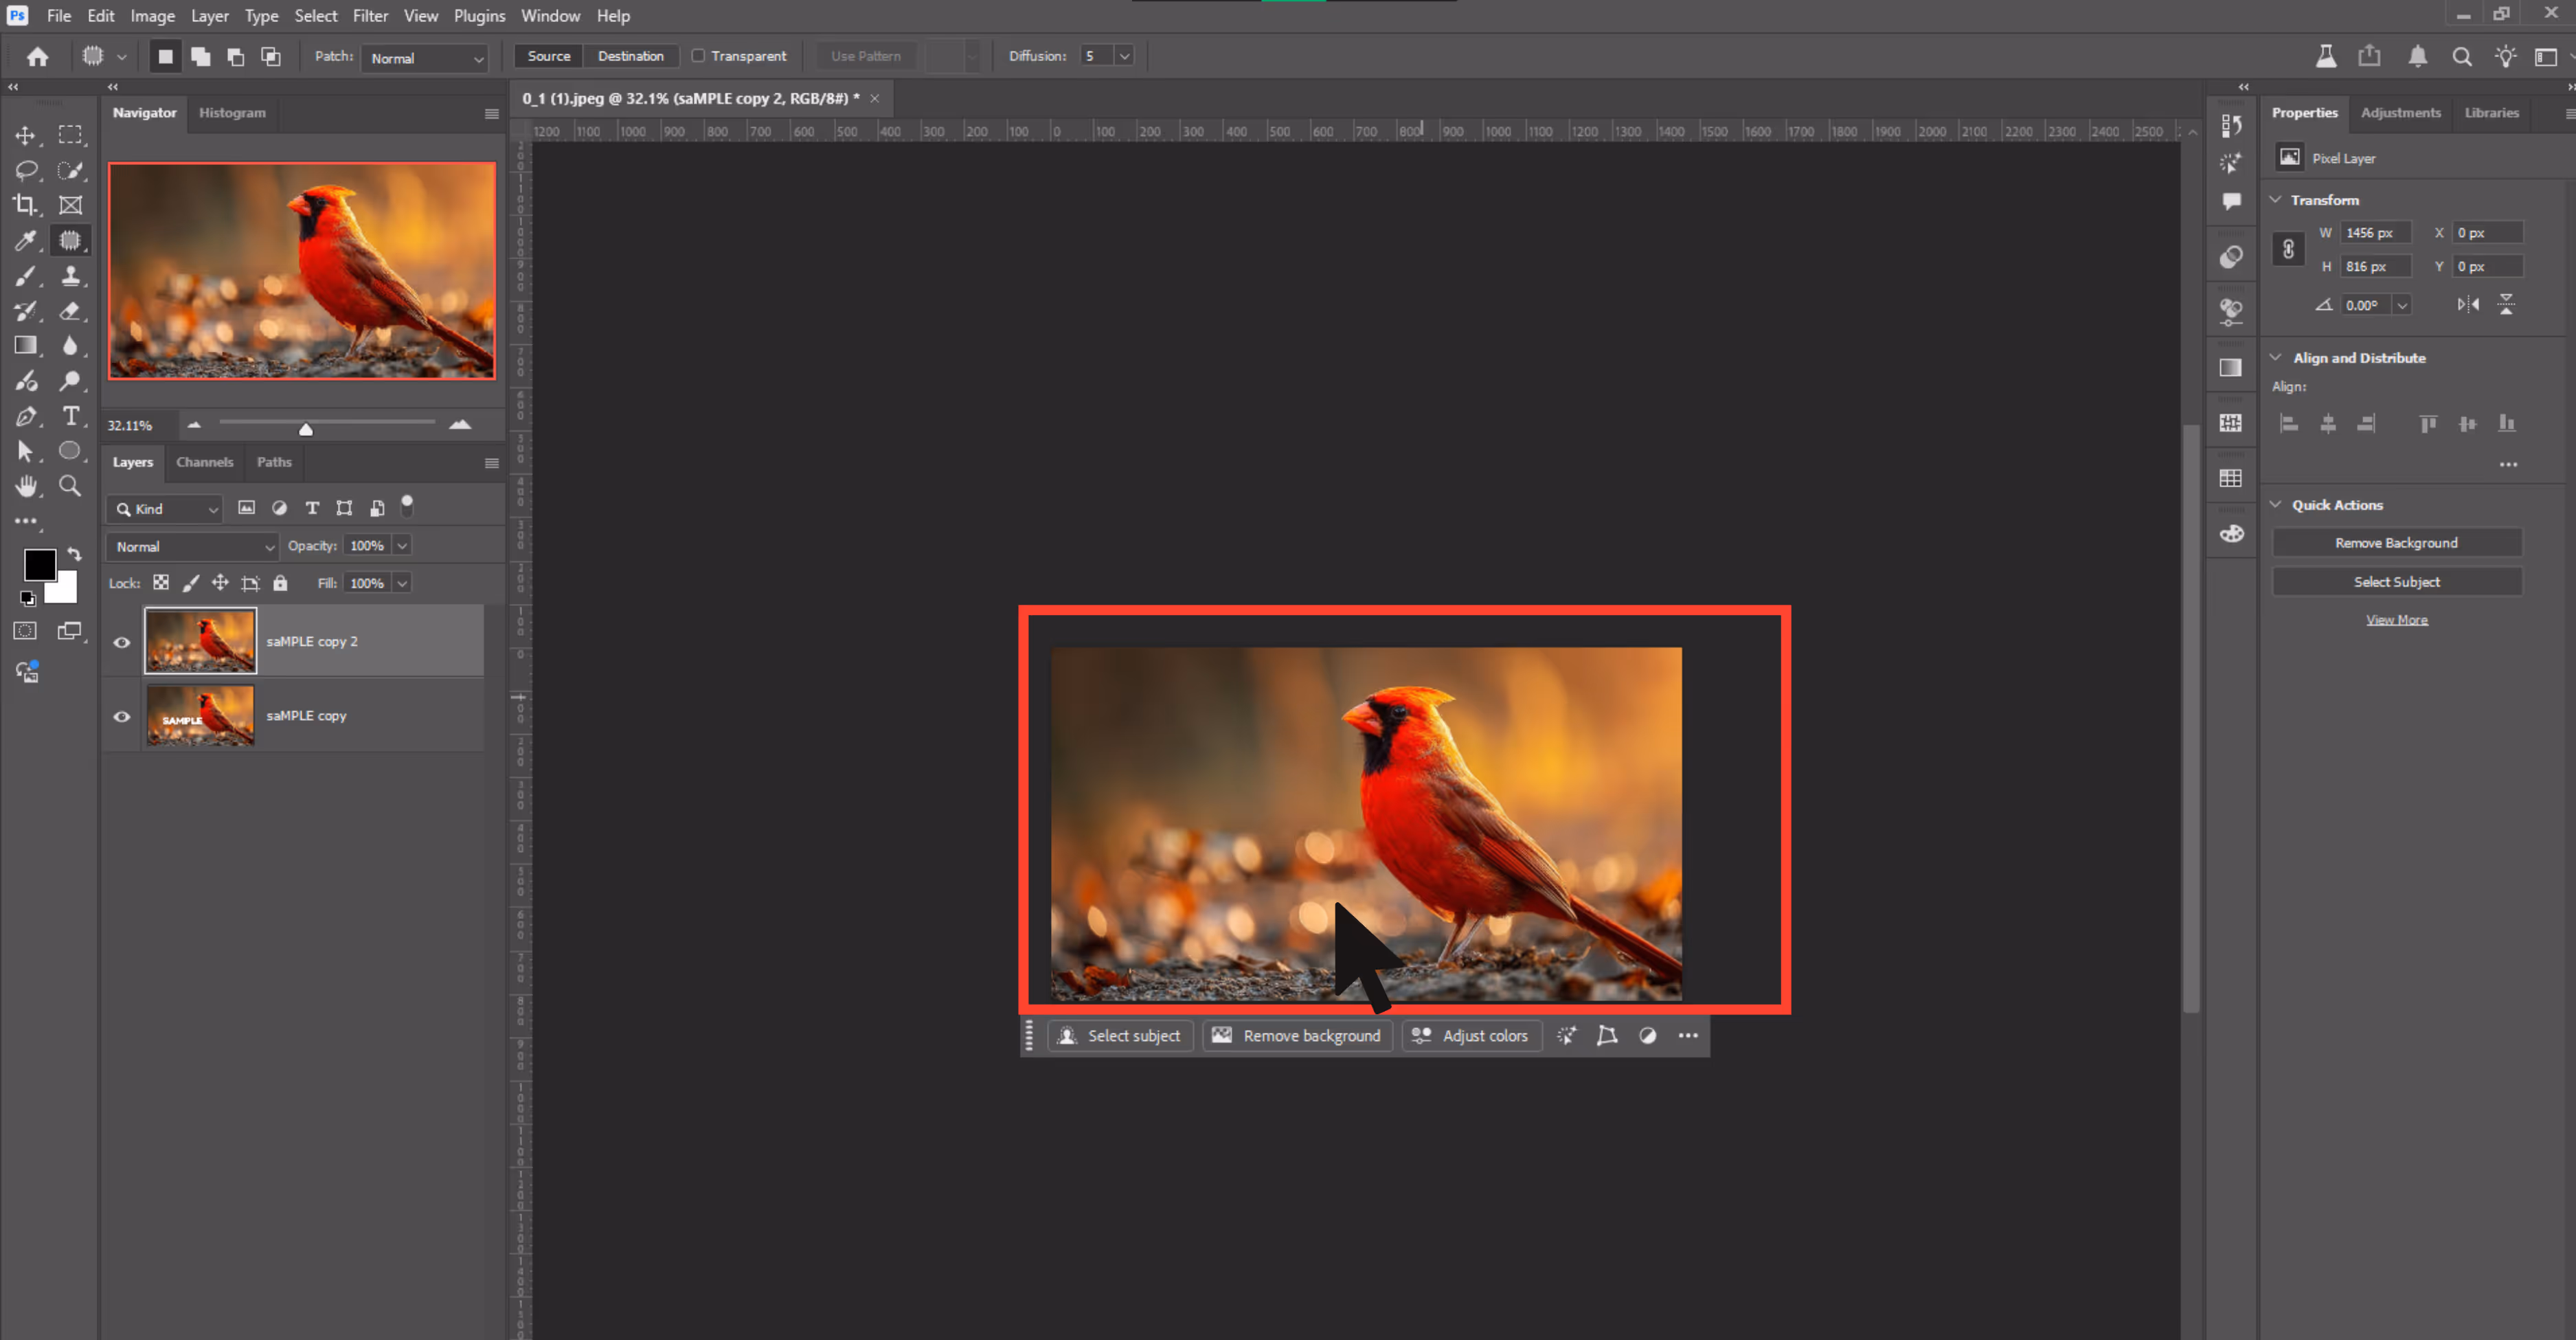
Step 5: Release the mouse—Photoshop blends the selected area with your sampled region.
Step 6: Deselect (Ctrl+D) and zoom in to inspect results.

Common mistakes to avoid while using Photoshop for removing a watermark
- Cloning too much from one area results in repetitive textures will lead to blurry patches. Always sample frequently from multiple sources.
- Photoshop may guess incorrectly on surfaces like grass, chain-link fences, or detailed cloth. Prefer manual healing or Clone Stamp here.
- Working at full image size hides finer flaws. Always zoom in (100-200%) when retouching.
- Never edit the background layer directly. Duplicate it and work non-destructively so you can undo or adjust easily.
How to remove watermarks using AI tools (3 Best Options)
There are tons of online tools that promise watermark removal. Some use manual selection, others use AI tools for smart upscaling and removing watermarks. I tested three of the most popular tools, and here's what I found.
1. AI Watermark Remover by Pixelbin

After trying out a bunch of AI tools for watermark removal, I have to say—Pixelbin’s Studio Editor surprised me. It’s more than just another online watermark remover. The watermark remover is easy to use, even if you’re a beginner.
You don’t need any pro-level skills—just upload your image, and it does the heavy lifting for you. Pixelbin’s watermark remover is easy and beginner-friendly.
What I loved about the tool?
- No complex brushwork, simply upload the image, click, and done.
- If you’re managing 100+ product photos, this is a game-changer as it includes batch processing.
- You can see changes as you apply them without refreshing or re-uploading.
- No forced watermark on exported files.
2. WatermarkRemover.io
If you’re looking for a beginner-friendly tool to remove a watermark from a photo without any editing skills, then this tool is one of the best. I tested it out on a few different images, and here’s everything I found.
What I loved about the tool?
- Just upload, and the tool does the rest.
- No signup or login required, the basic features are free to use.
- Clean and easy-to-understand user interface.
- The AI algorithm works accurately for images with complex backgrounds.
- No added watermarks on export image.
3. AI Ease
When I first stumbled upon AIEase, I was drawn in by its tagline: “One-click watermark removal.” I decided to test it with an image having logo and signature watermarks mixed over different backgrounds, and here is what I actually found out after using the tool.
What I loved about the tool?
- Lightning-fast AI watermark cleanup.
- Batch watermark removal can process up to 10 images at once.
- It offers dual-mode auto for speed and Manual for precision editing.
- It works on smartphones via a browser.
- Supports image formats like JPG, JPEG, WEBP, PNG, and BMP
Final thoughts
Photoshop remains the most effective tool for watermark removal because of features like the Clone Stamp and Generative Fill.
Whether you’re cleaning up your own branded photos, restoring old images, or preparing licensed media for final delivery, you now have six clear methods to choose from. If Photoshop isn't accessible, AI tools like Pixelbin are reliable alternatives—but for precision and quality, nothing beats Photoshop.
FAQs
Only if you own the image or have explicit rights or licenses to edit it, removing watermarks from unlicensed stock images, photos, or artwork is illegal and violates copyright laws.
The Spot Healing Brush using Content-Aware mode is usually the easiest and fastest way to remove small, simple watermarks on uniform backgrounds.
For logos, Content-Aware Fill or Patch Tool works best. For simple text, Spot Healing Brush is the easiest. For complex backgrounds, use Clone Stamp for better blending.
You can create a Photoshop Action that records the watermark removal steps, then use the Batch feature (File > Automate > Batch) to apply it to a folder of images.
Not if done correctly. Using non-destructive editing, zooming in, and carefully blending will preserve quality. Over-editing or careless cloning can result in blurry patches or color mismatches.
Yes. Online AI tools like Pixelbin, WatermarkRemover.io, and mobile apps can help remove watermarks quickly. However, they lack the fine control and precision Photoshop offers.