
While flipping through your Disney PhotoPass picture album and thinking about posting them on social media, you suddenly see the “Disney PhotoPass” watermark across your favorite shot. It’s frustrating, right? We’ve all been there.
Disney adds that semi-transparent logo (sometimes with Mickey ears or the park’s name, like Disneyland Hong Kong) to protect their photos and give you a preview before you buy the original image.
It totally makes sense—they’re protecting their work. But what if you’ve already paid for the photos? Or maybe you’ve got permission to use them from your Disney package or family account? In that case, it’s totally fine to want a clean version for your social media or to frame at home.
Let’s delve into the blog as I’ll walk you through exactly how to remove those watermarks from photos. We’ll use Photoshop, plus a few free AI tools that make the process super easy and simple.
Can you legally remove Disney PhotoPass watermarks?
Disney owns all photos taken by their PhotoPass photographers unless they are purchased. Any previews shown in the app or website with watermarks are not licensed for use, editing, or posting on social media or travel blogs.
This includes screenshots and downloads of watermarked images. Even if the photo is of your family or friends, the image itself was taken by a Disney-employed photographer using Disney-owned equipment in a commercial context.
Therefore, Disney retains the intellectual property rights to those images. You are only allowed to use or edit these images once you’ve bought them, either individually or through the Memory Maker package.
When is it legal to remove a Disney watermark?
- You’ve purchased the high-resolution photo or the Memory Maker package from Disney World.
- You’re editing your own family’s Disney image after downloading it officially.
- You have written permission or official rights to edit the image.
- You have collaborated with Disney, such as a marketing partner or event host, and have been granted editing rights.
If you meet one of these criteria, then you can use the following tools and methods safely. If you don’t, we strongly advise against removing watermarks.
How to remove the Disney PhotoPass watermark using Photoshop (2 methods)
Photoshop is widely regarded as the best tool for removing watermarks. It’s used by professionals for image editing or creating graphics. We’ll show you two simple methods that work well for Disney PhotoPass images and are suitable for beginners.
Spot Healing Brush Tool
The tool is great for images with backgrounds, such as skies, walls, or grassy areas.
Why do I use this tool?
- It’s faster than other Photoshop tools.
- The tool understands the watermark automatically.
How to use the spot healing brush tool?
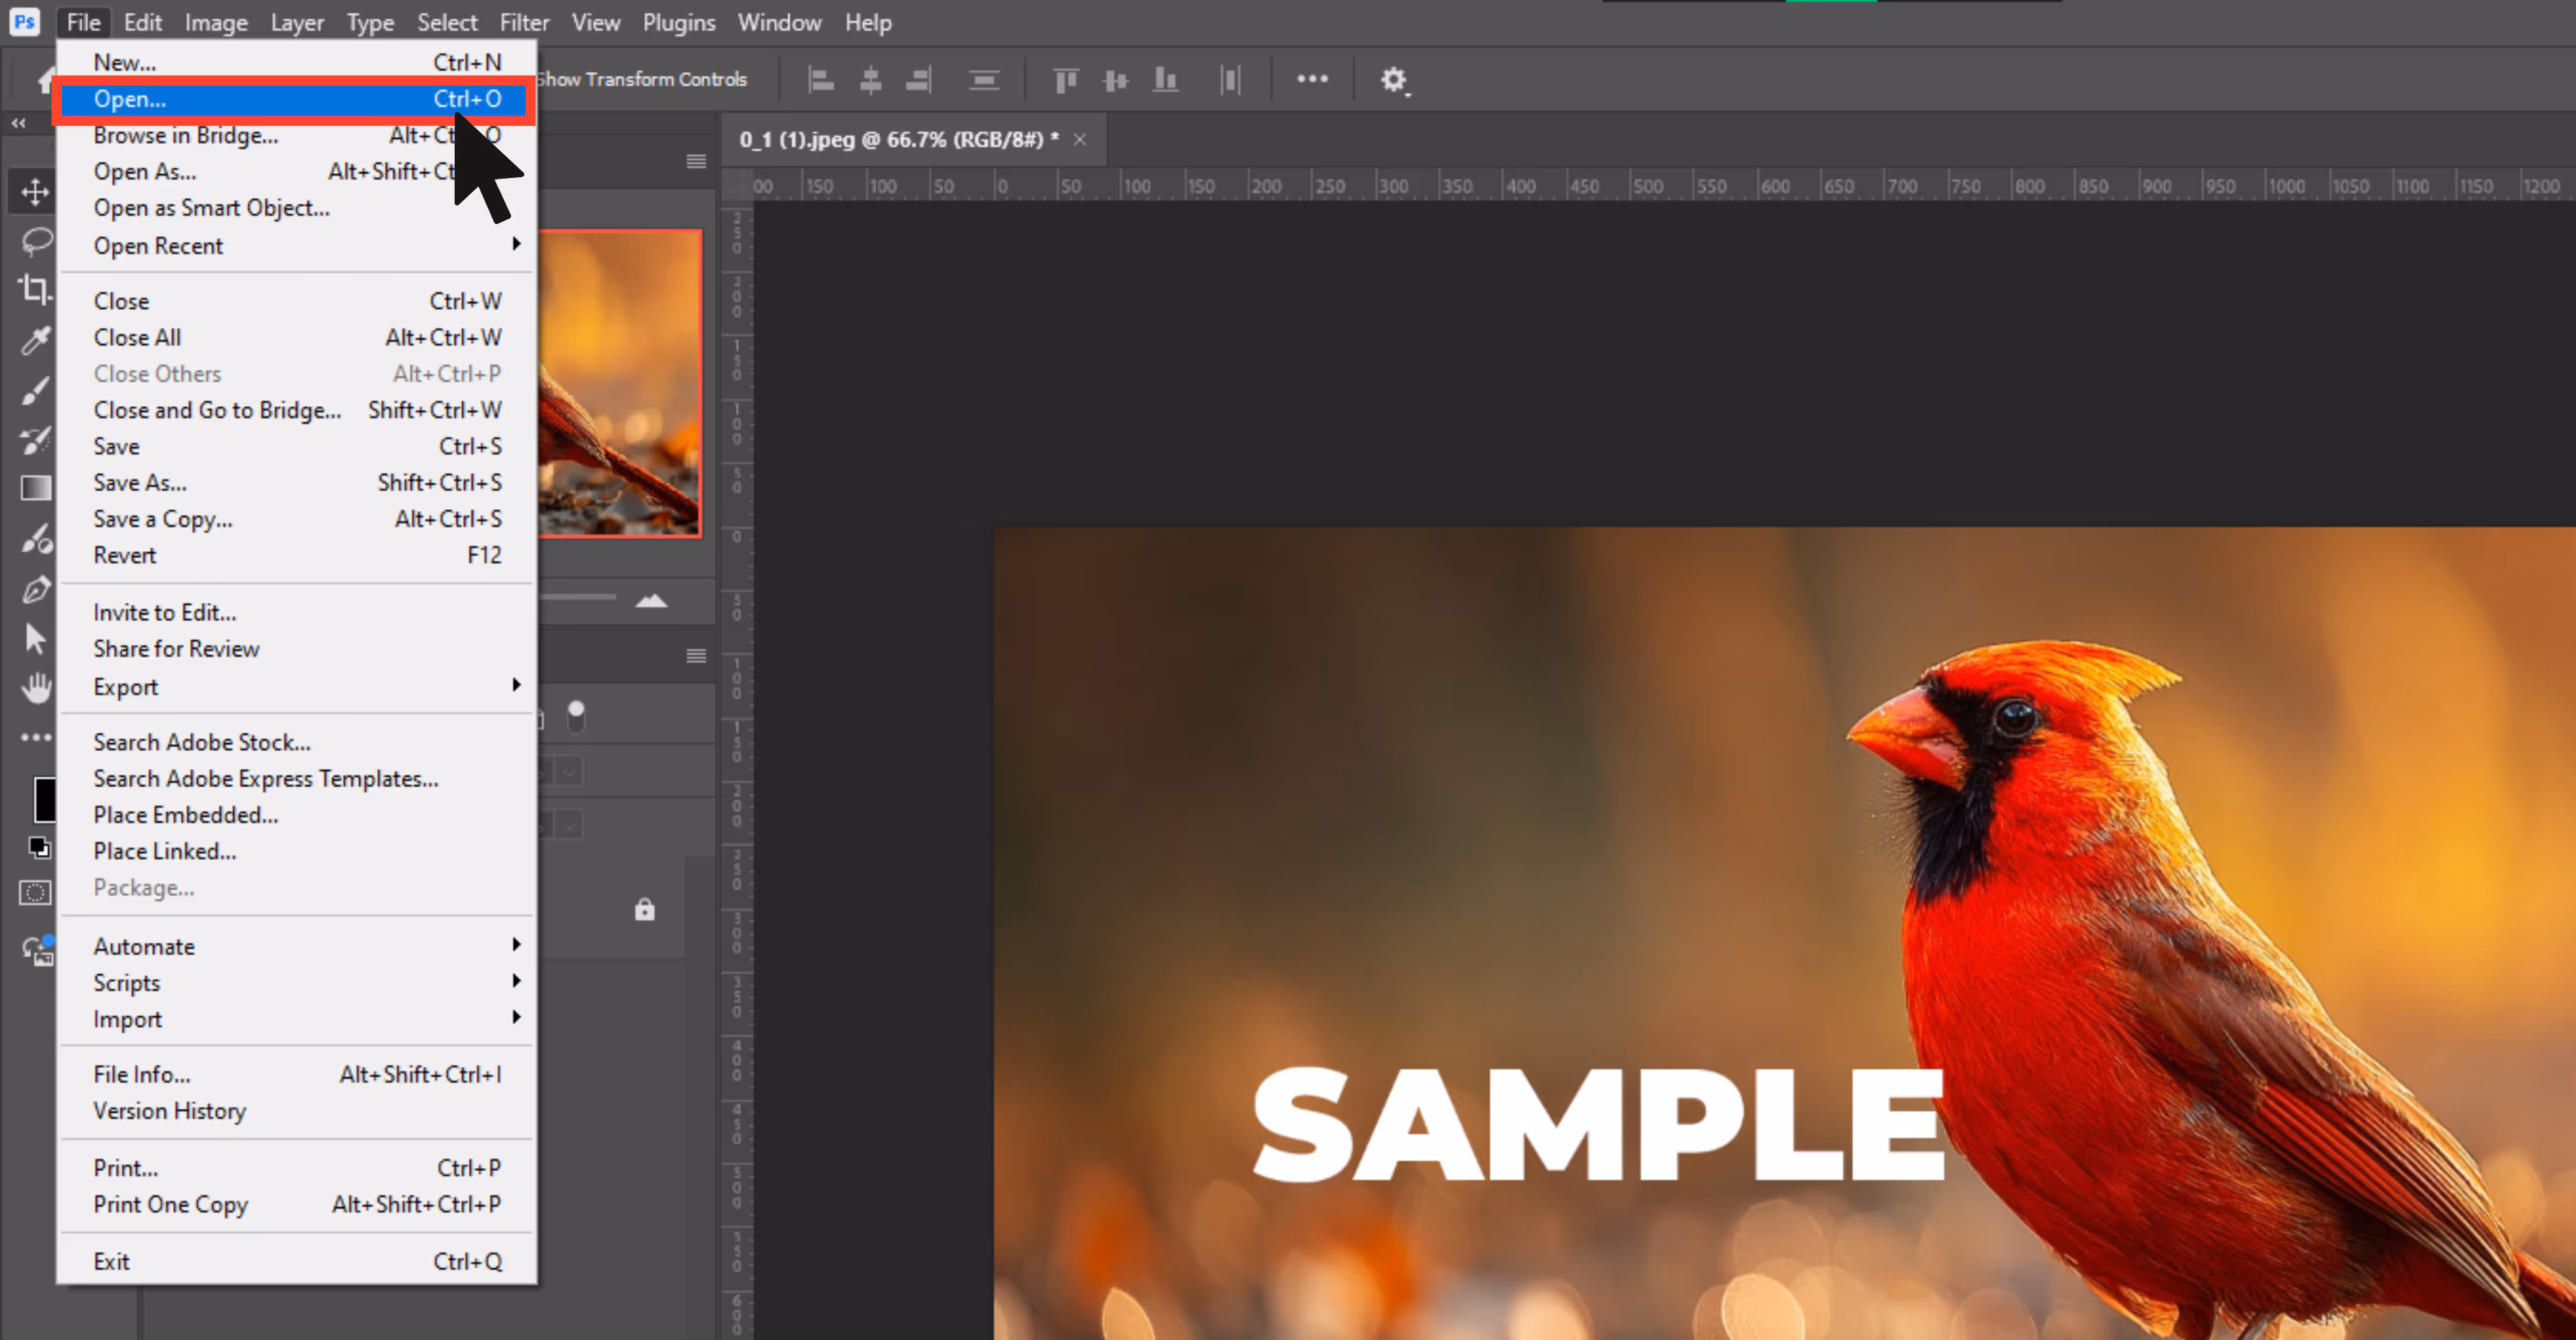
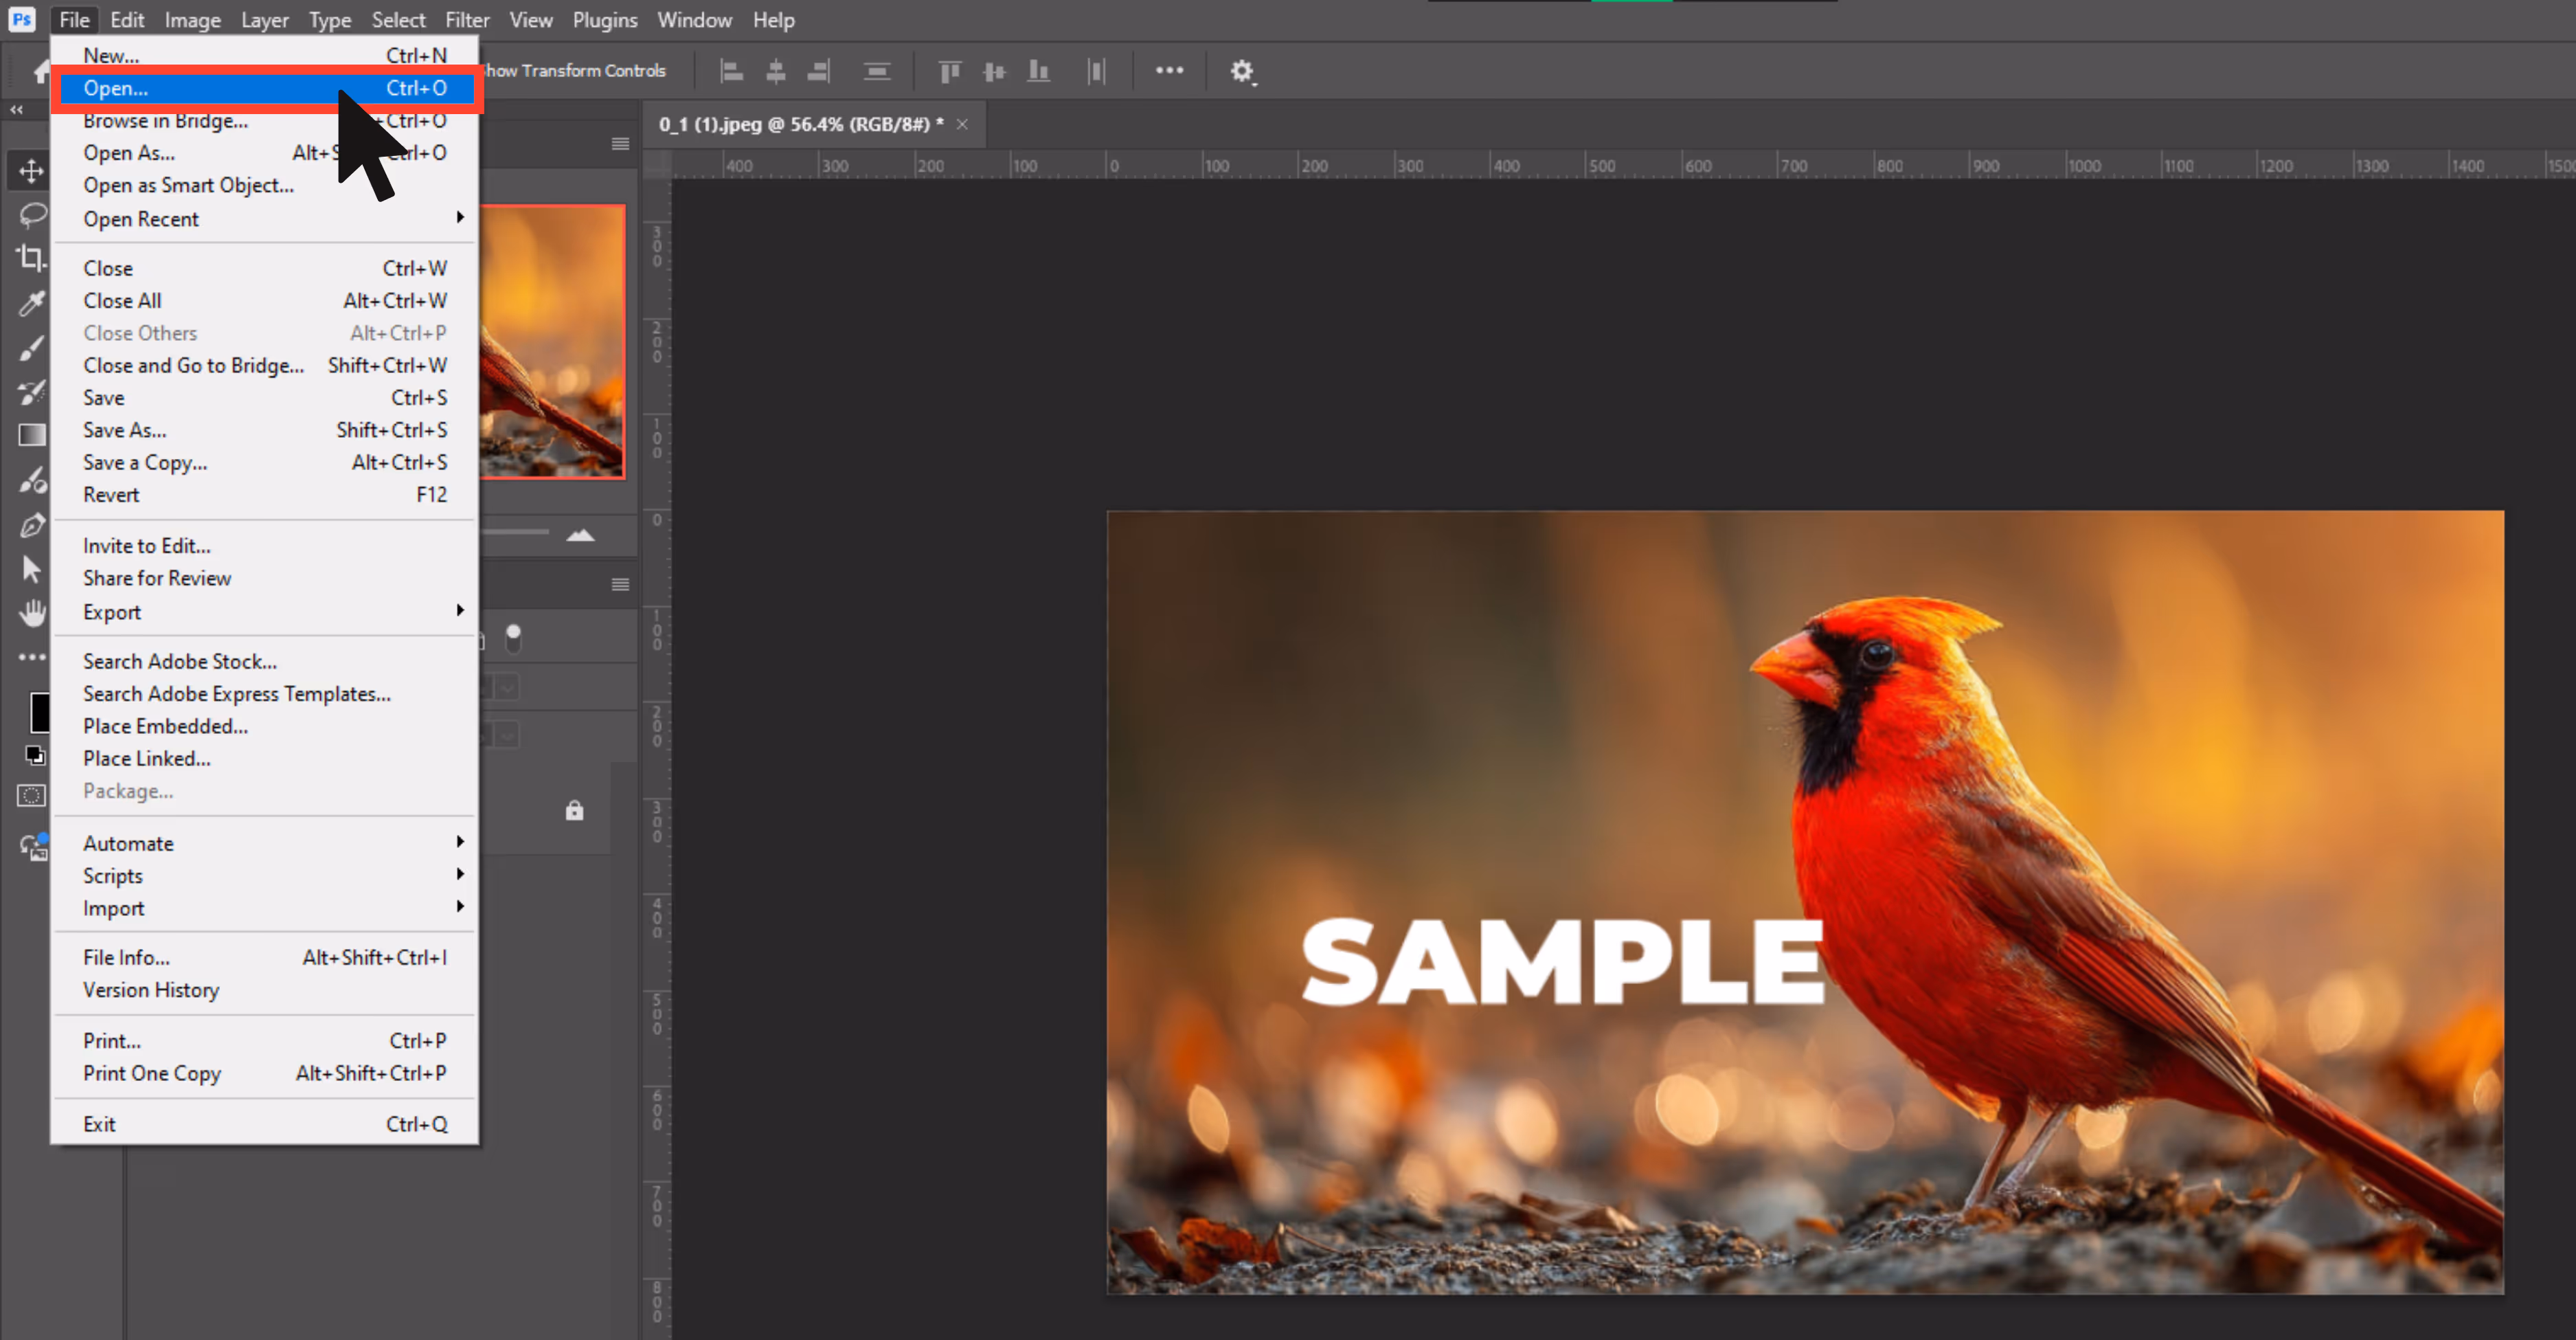
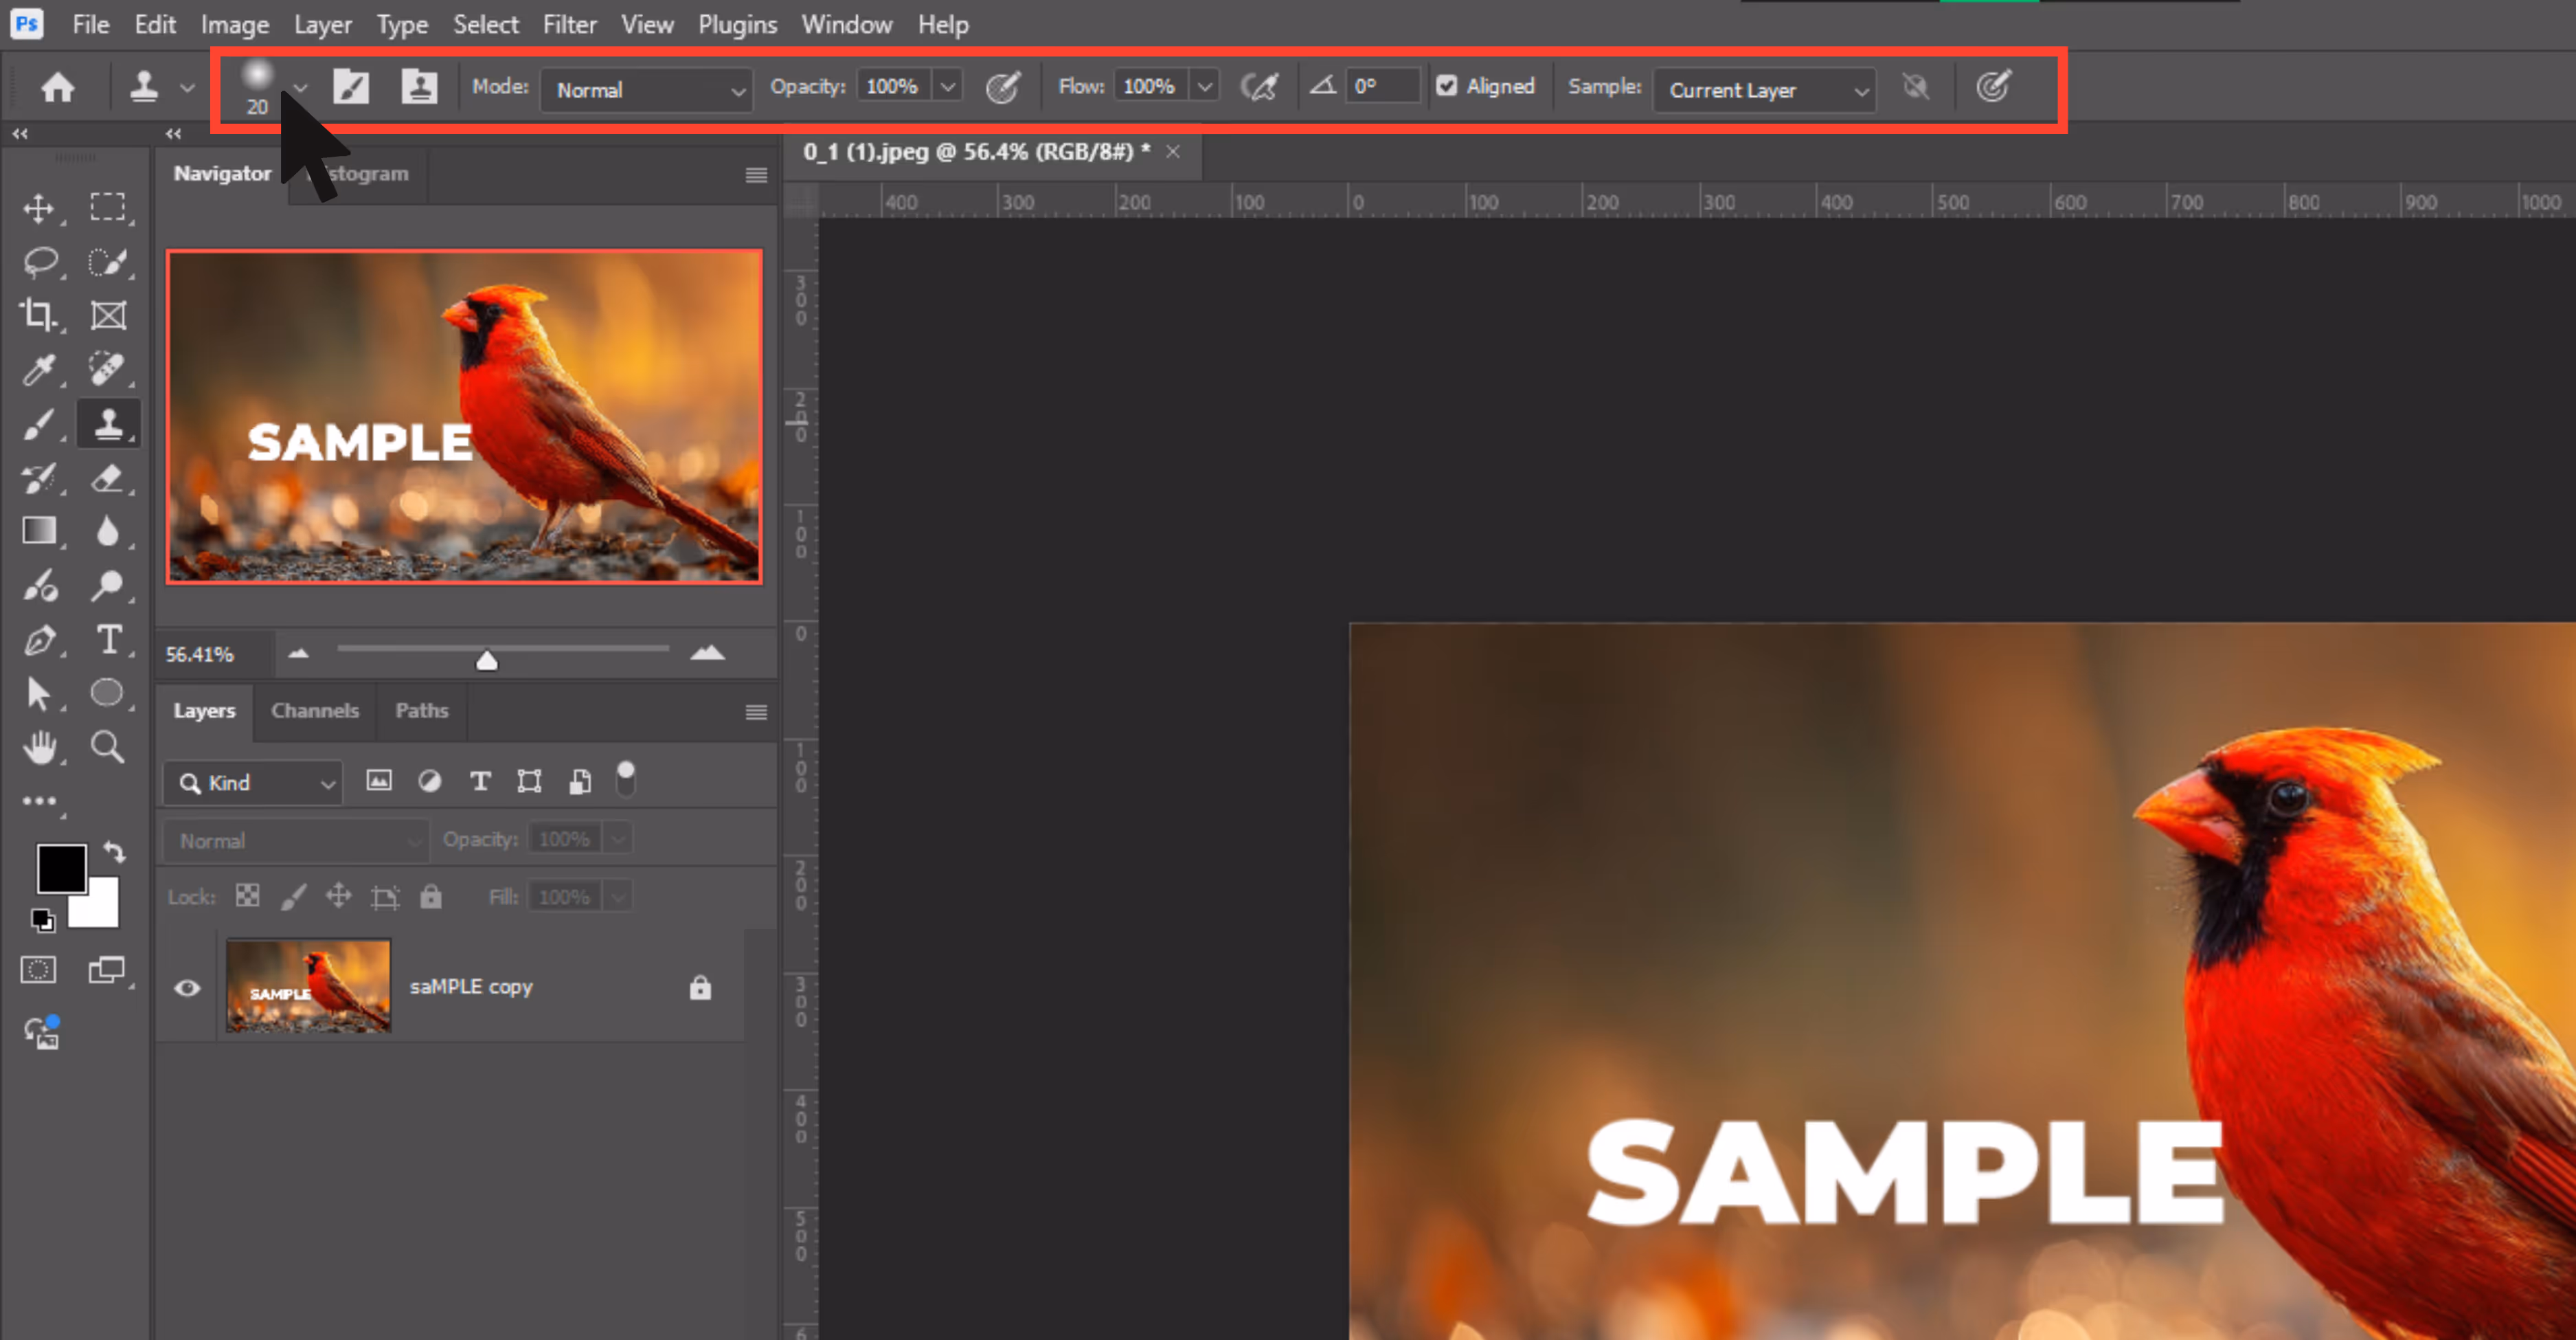
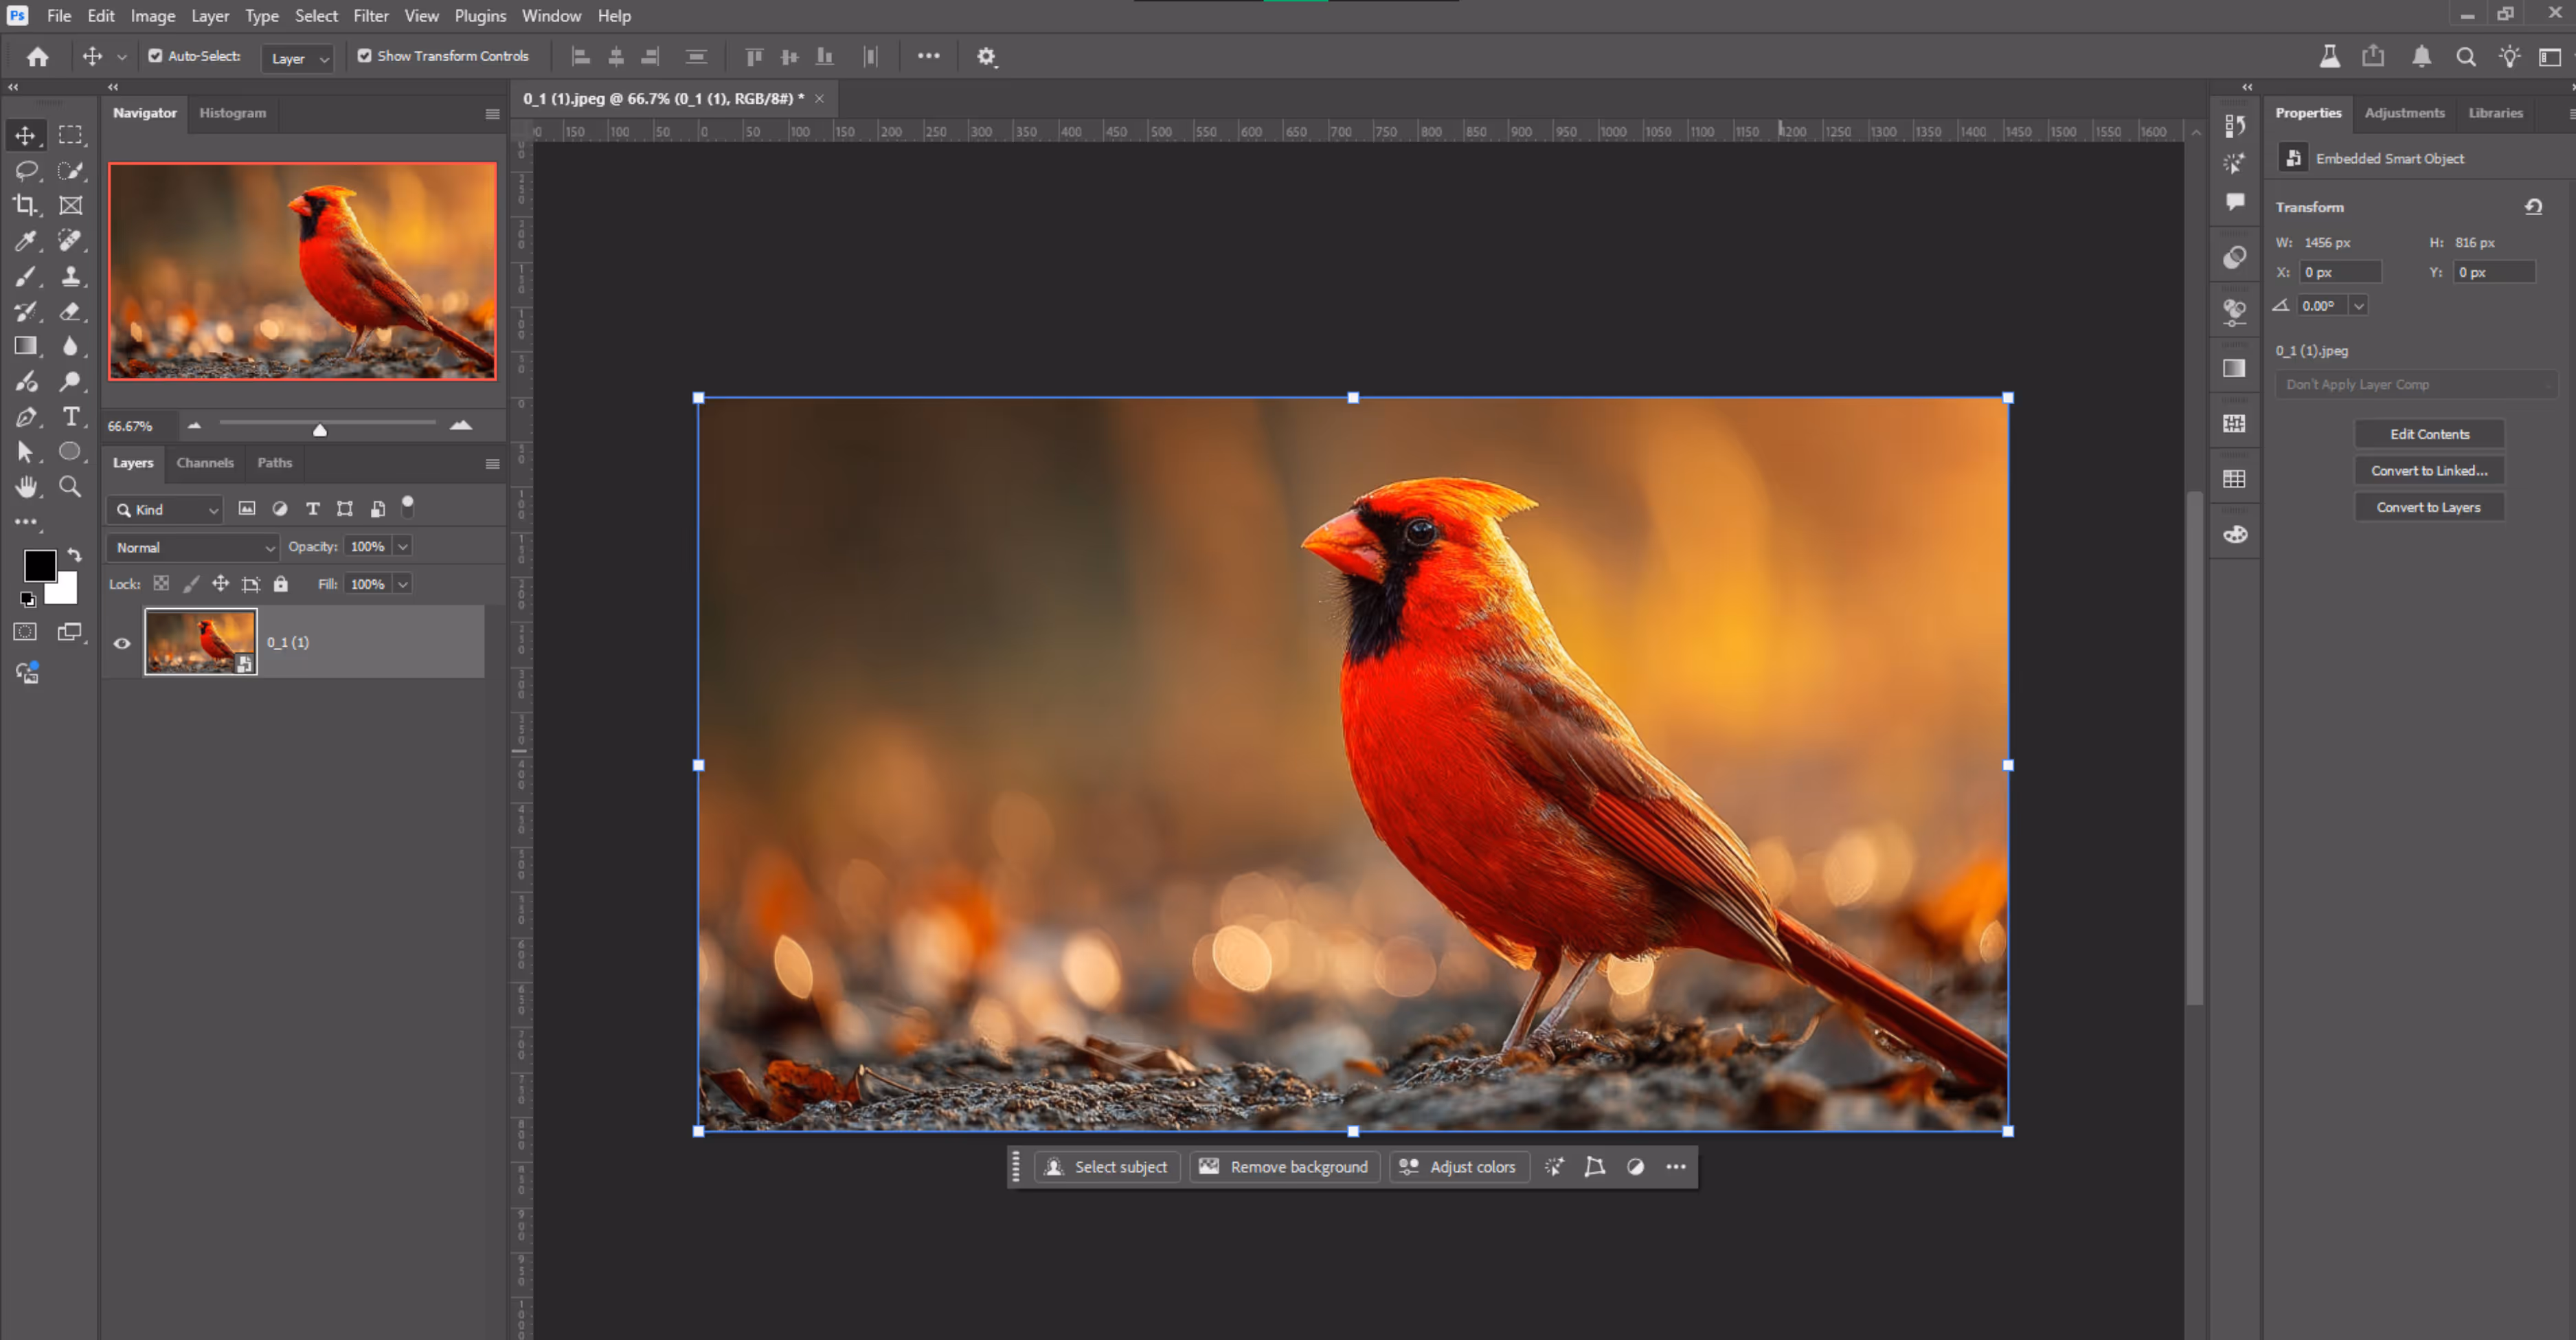
Step 1: Open your image in Photoshop by clicking on File and then Open.
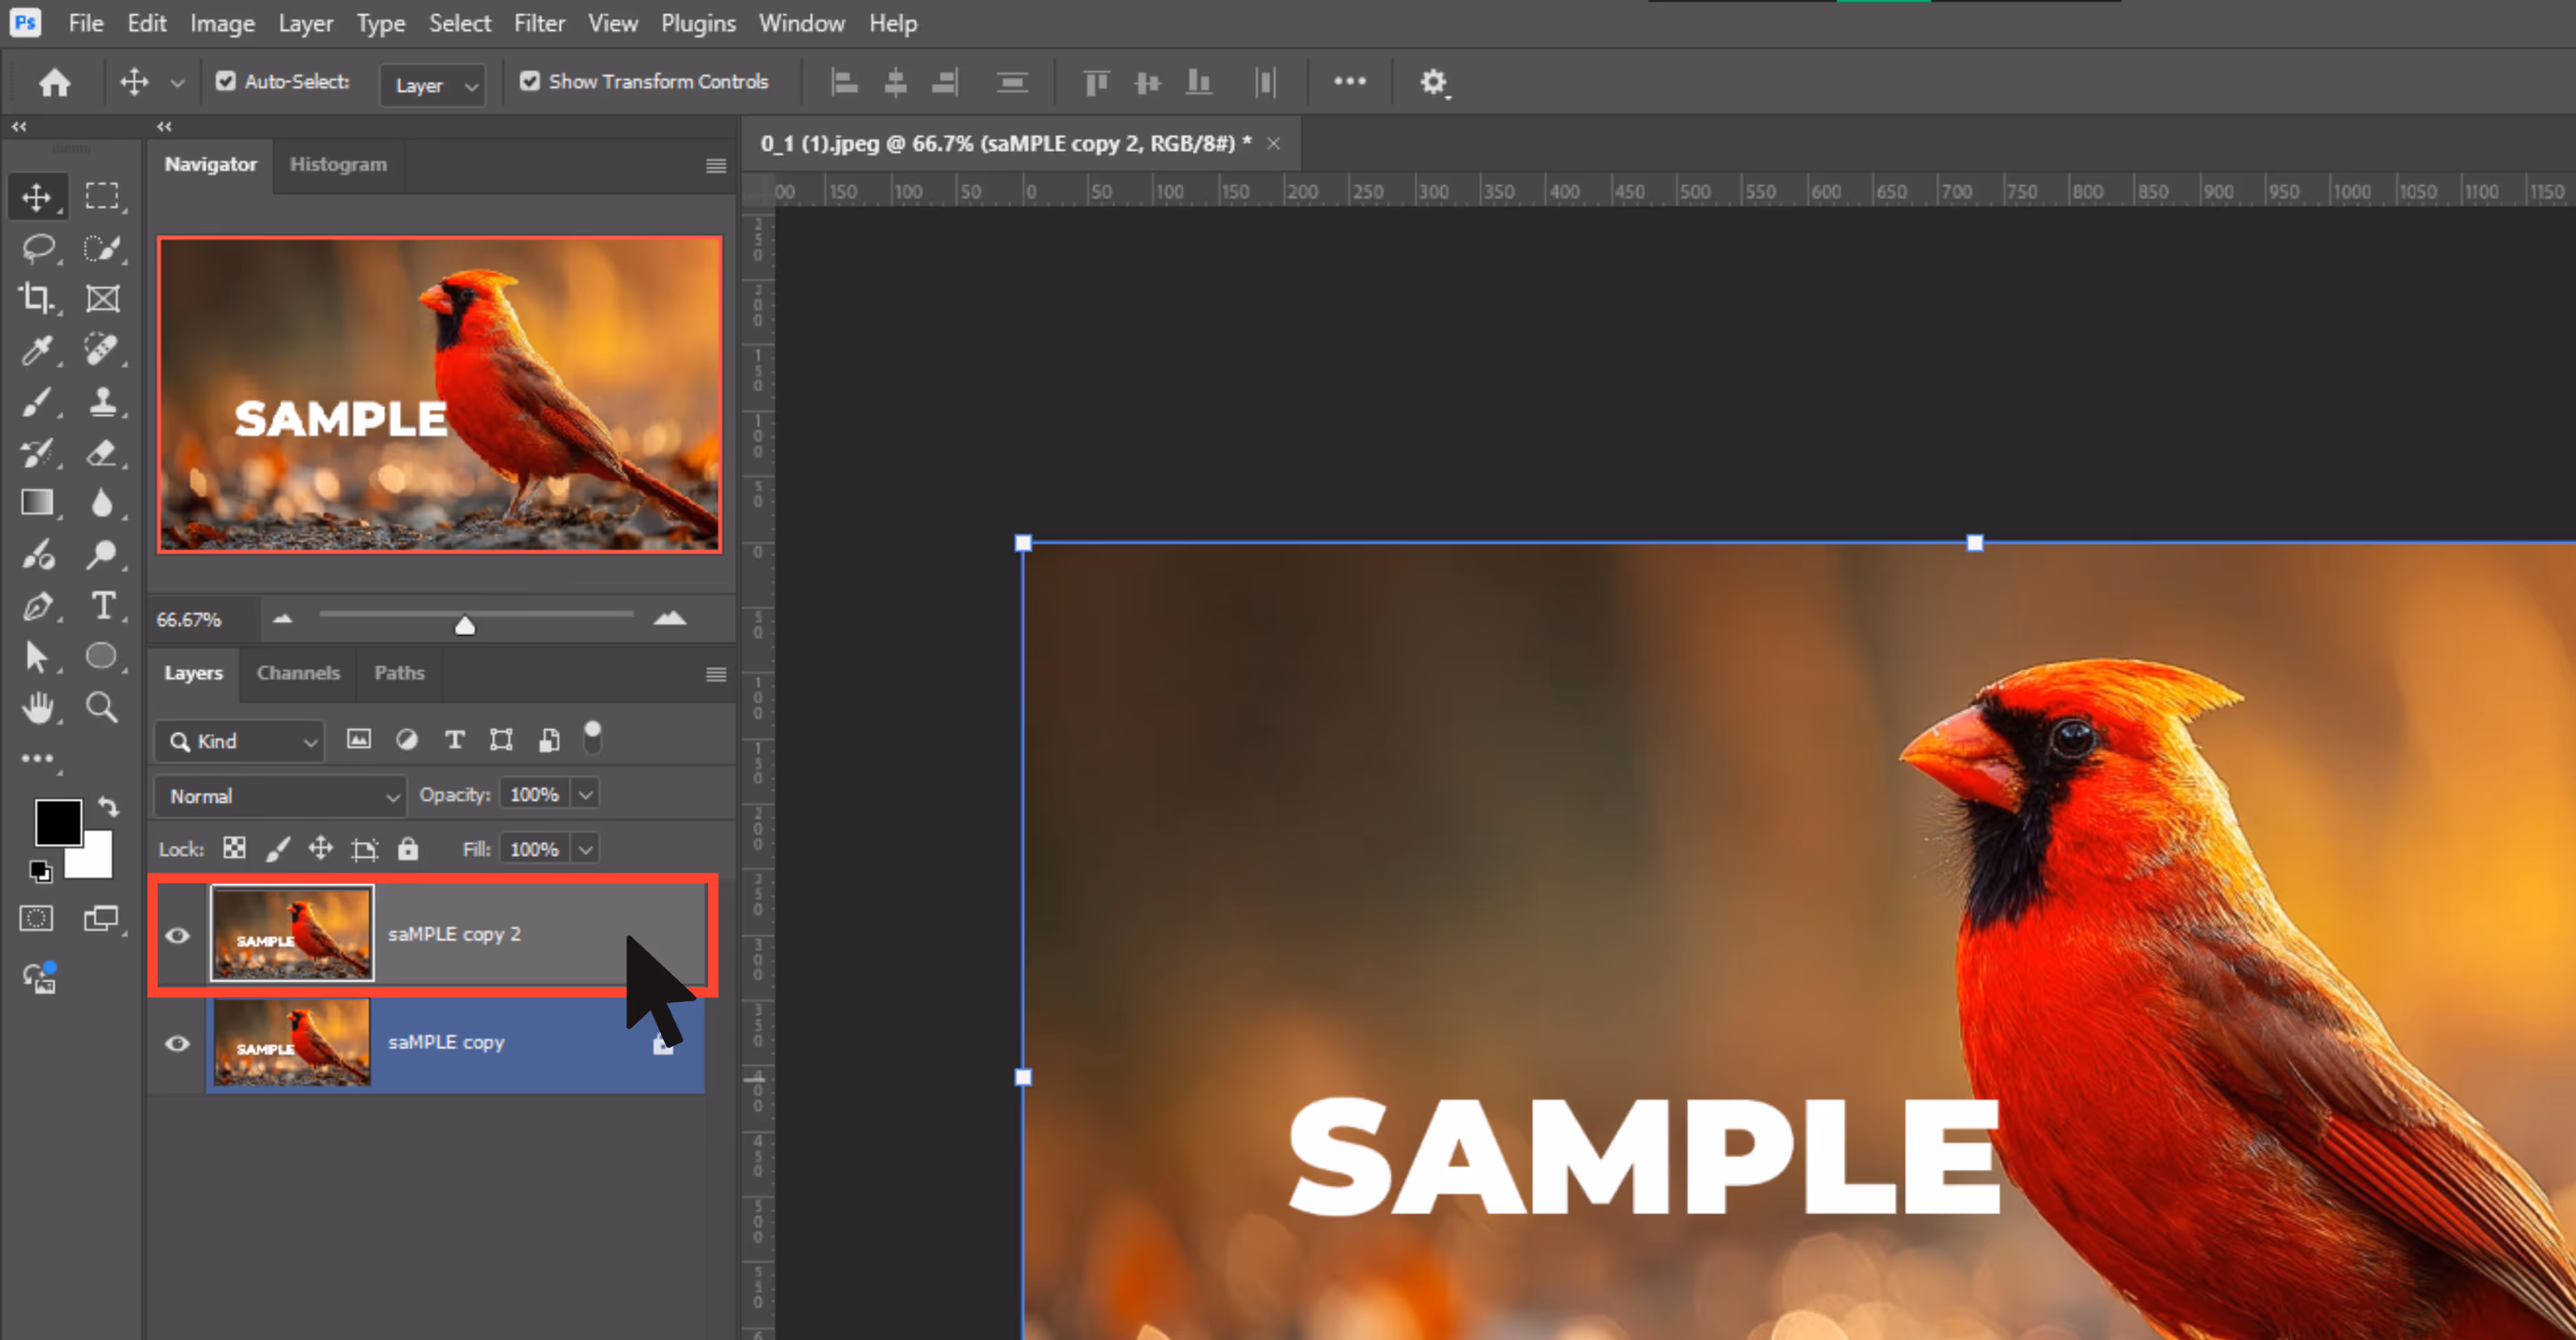
Step 2: Create a duplicate layer. Always work on a duplicate to preserve the original.
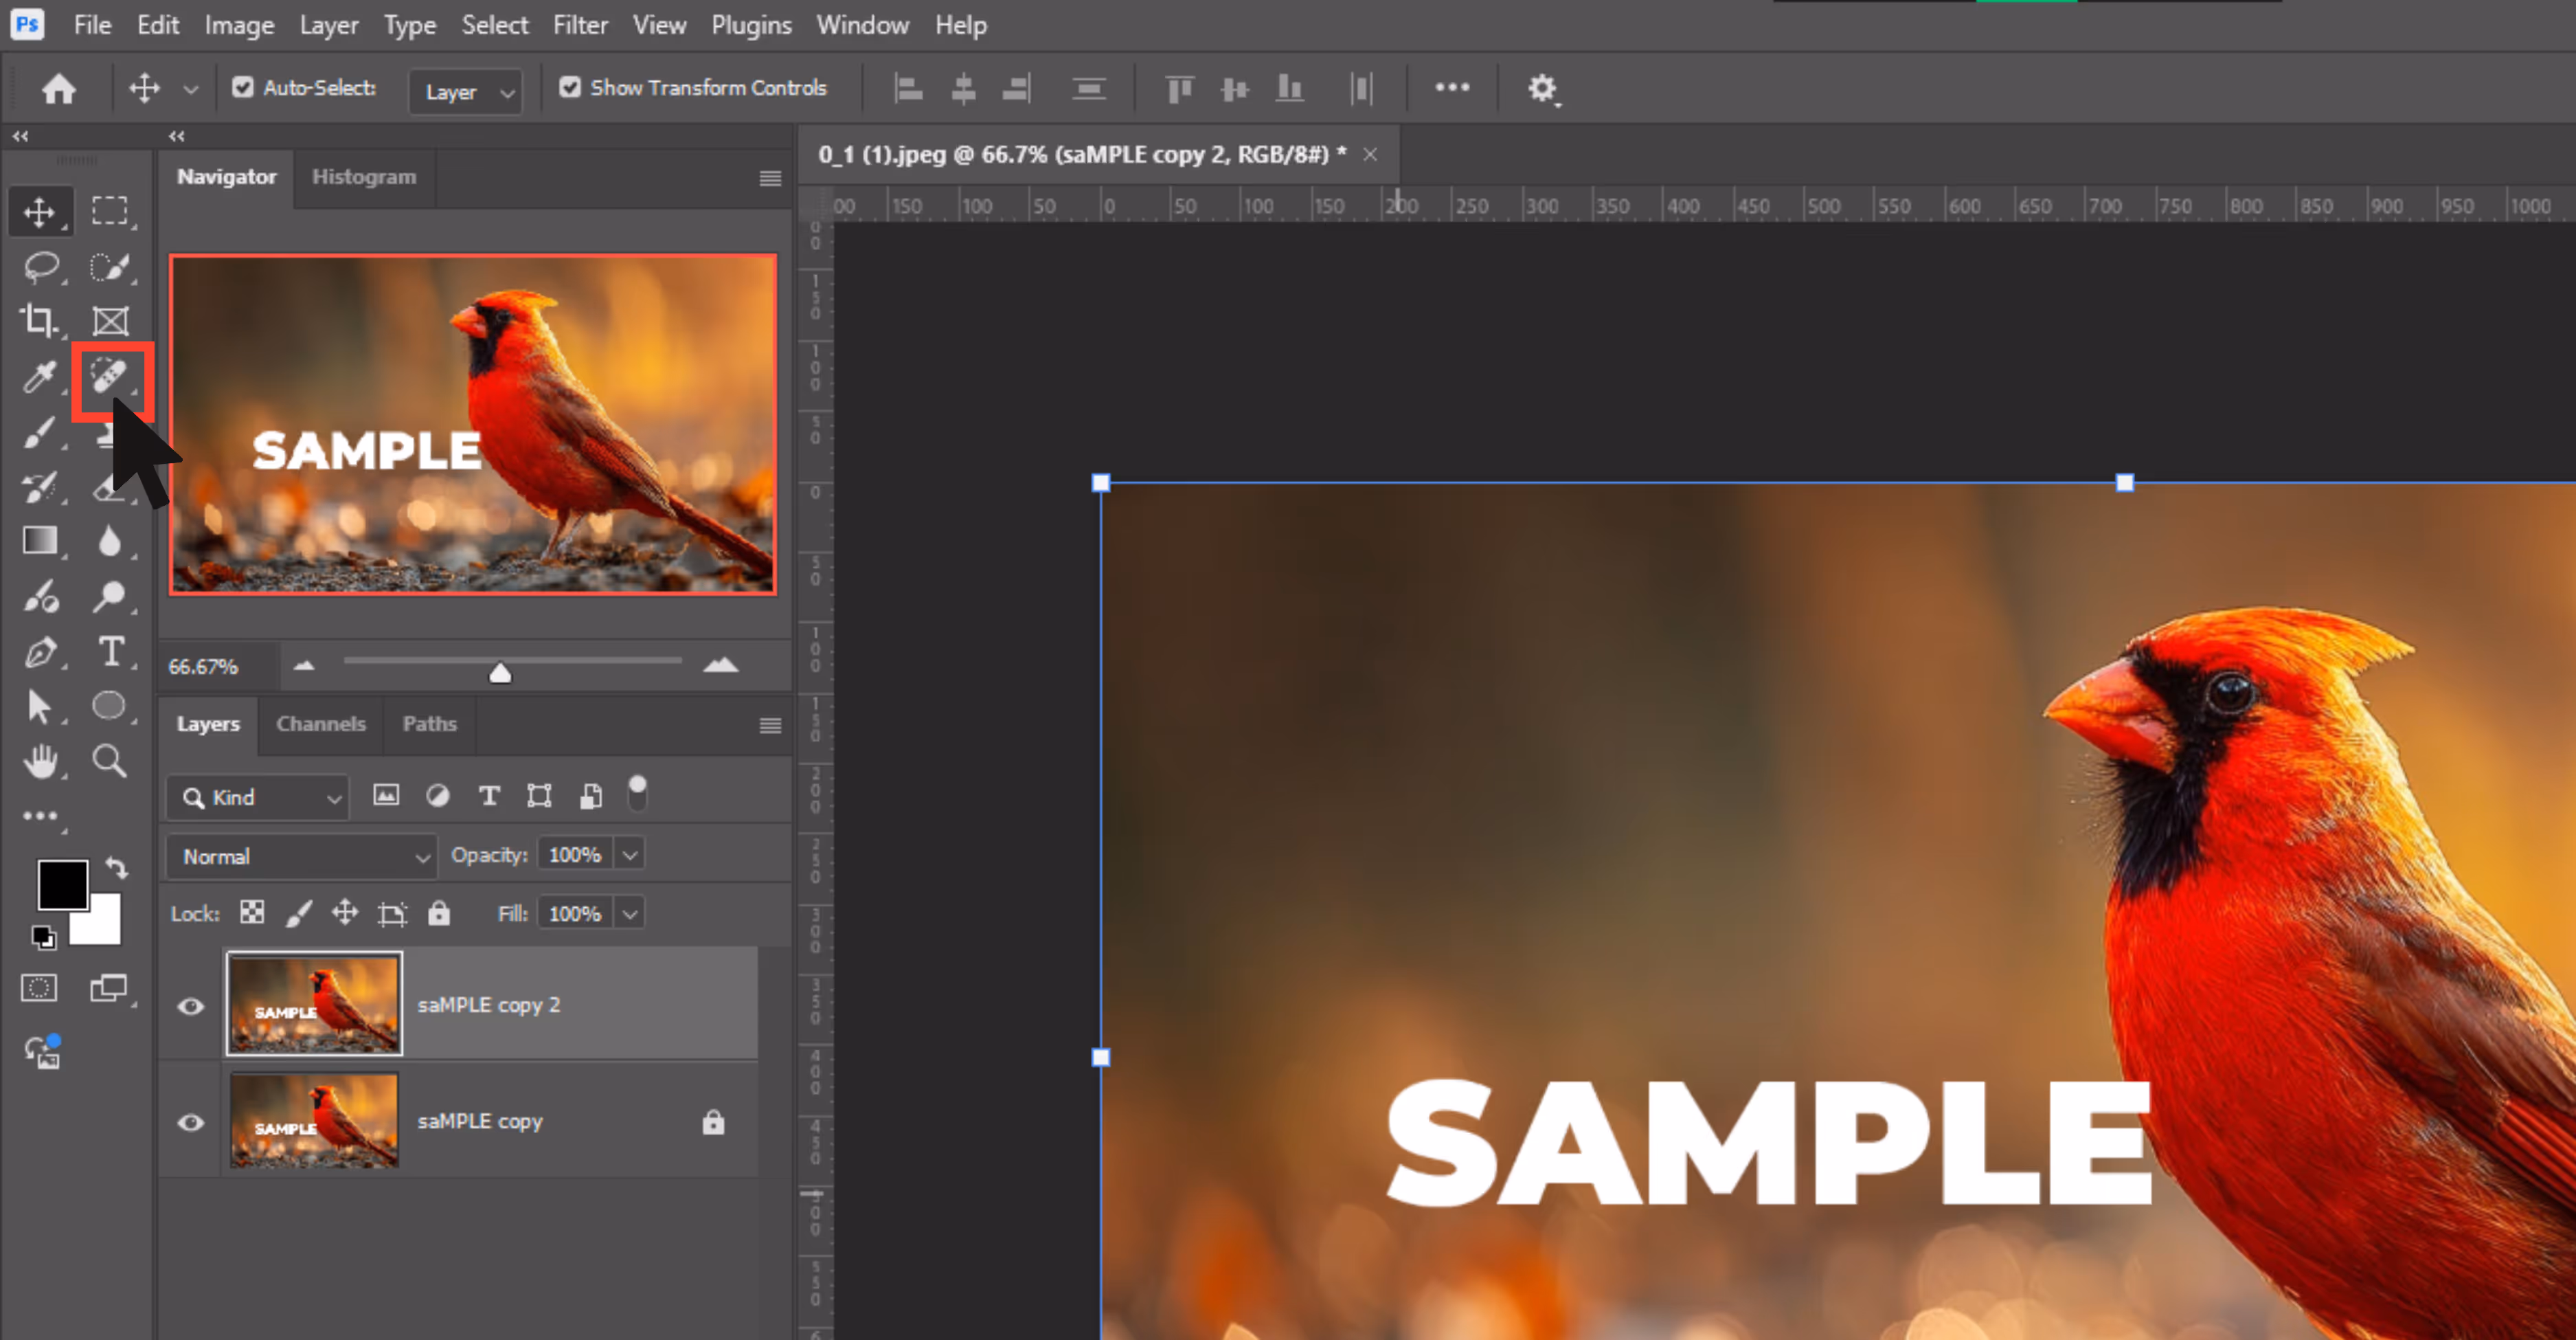
Step 3: Select the Spot Healing Brush Tool from the left toolbar.
Step 4: In the top settings bar, select the “Content-Aware”.
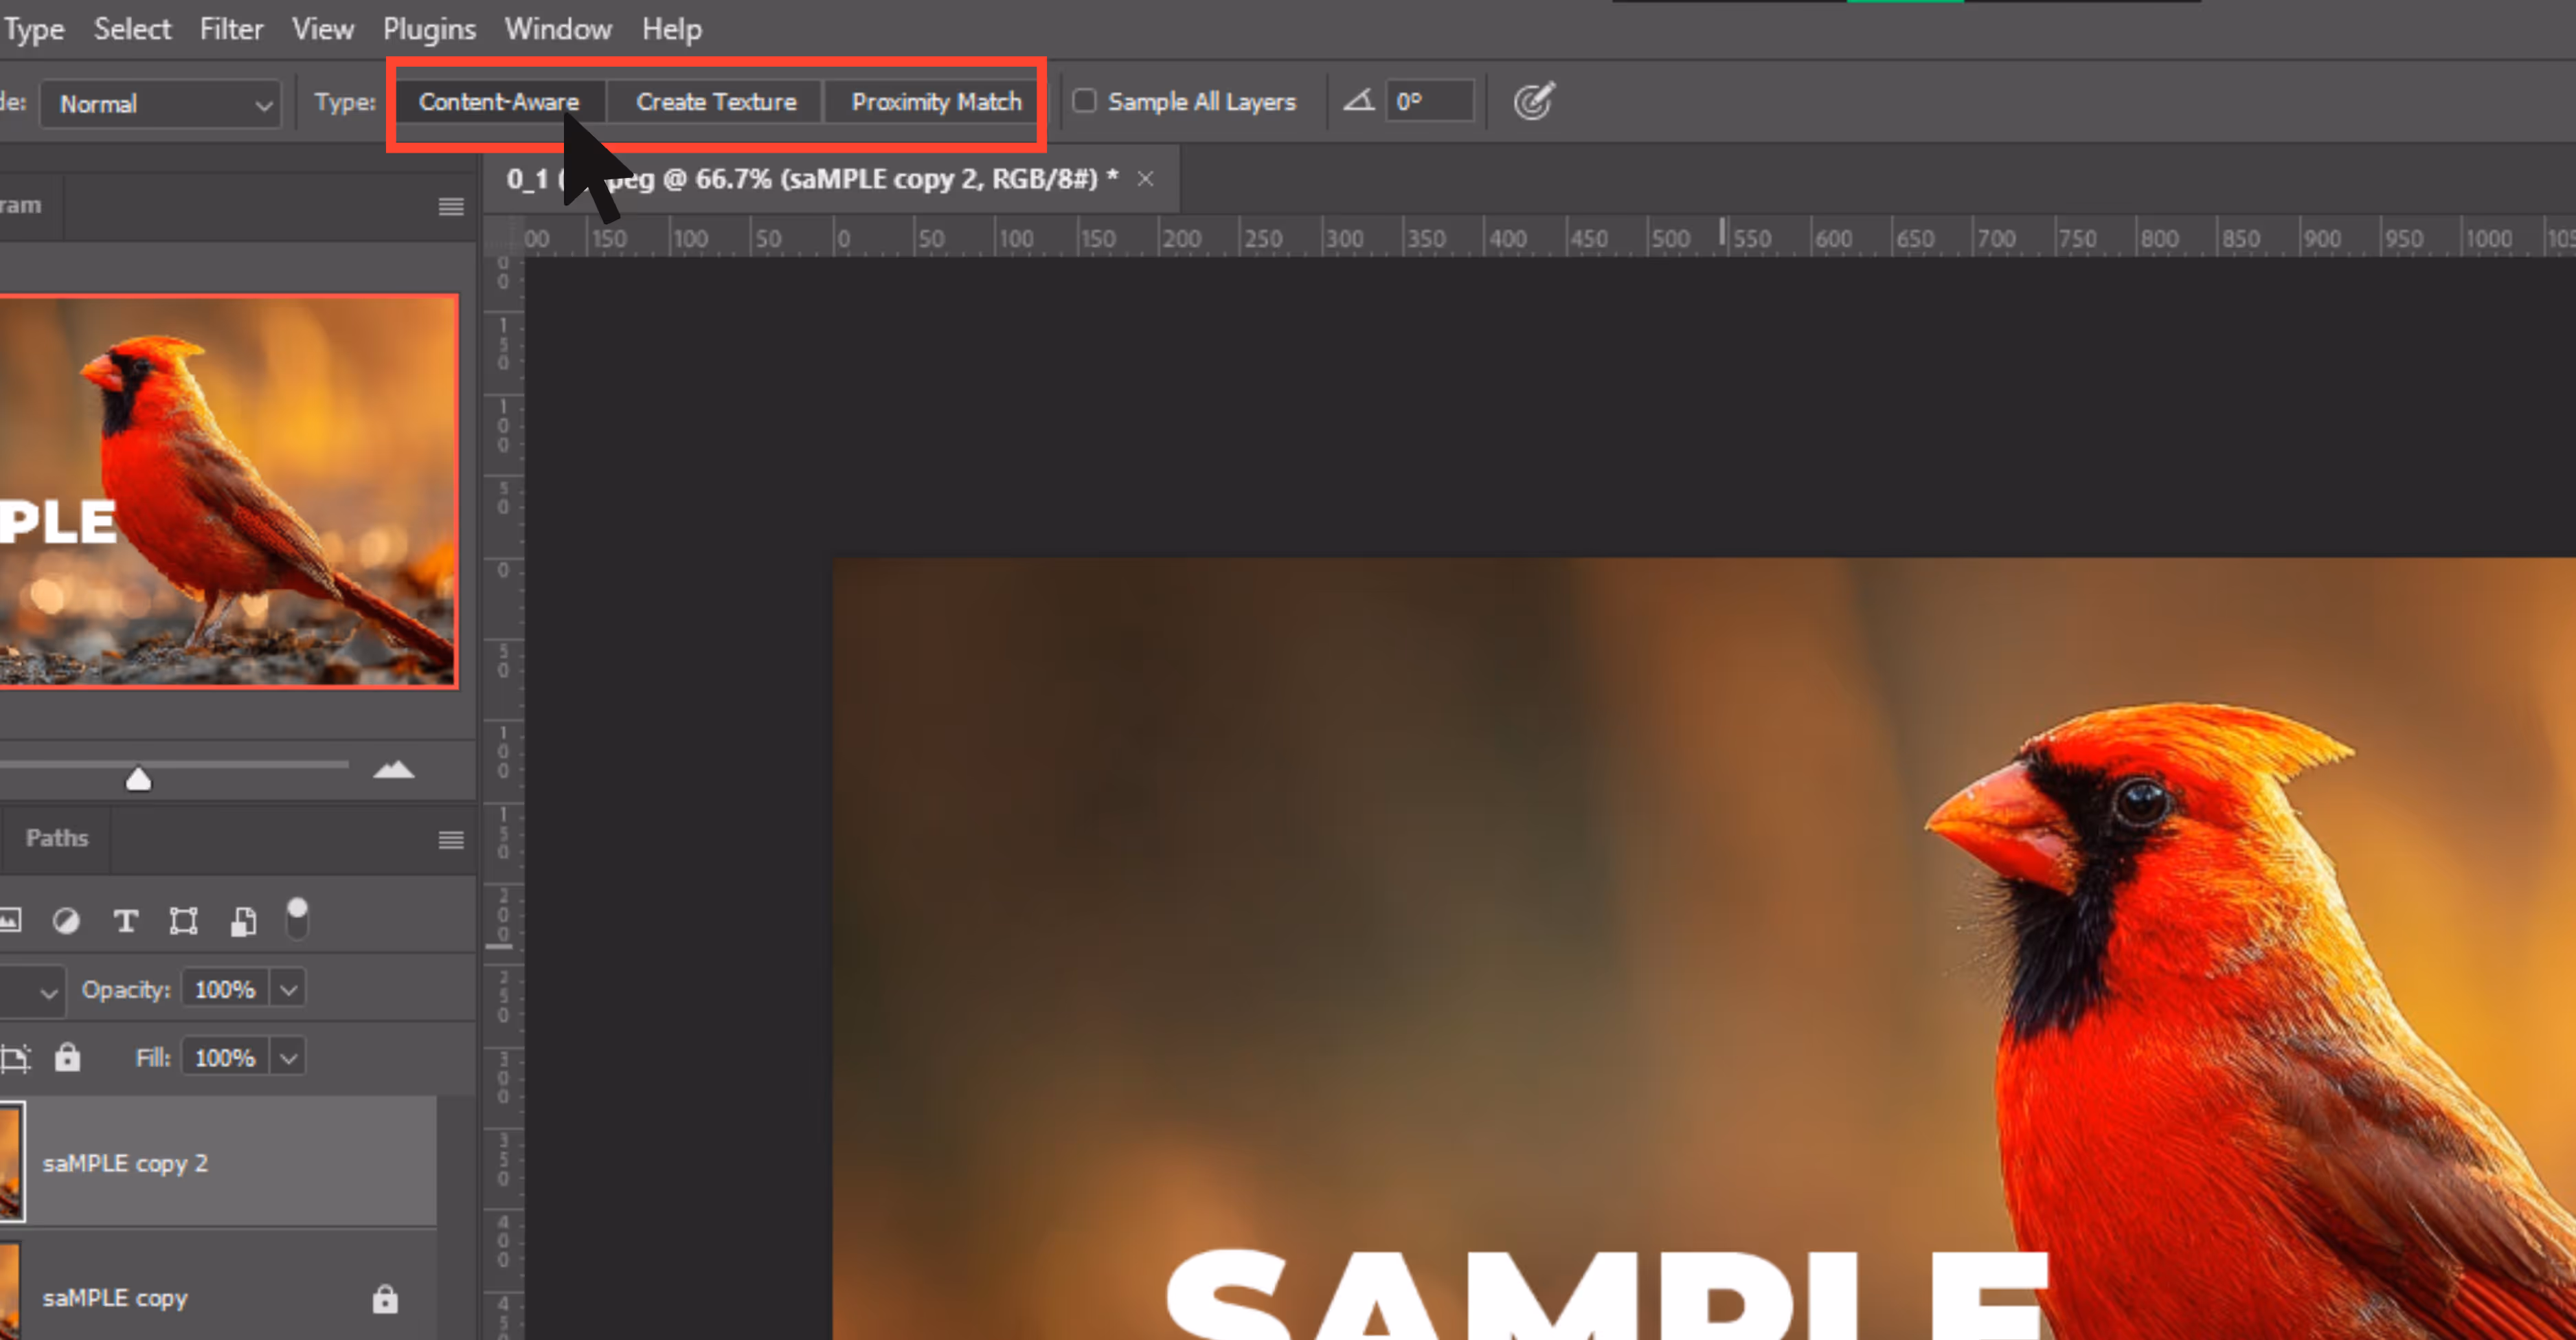
Step 5: Adjust your brush size.

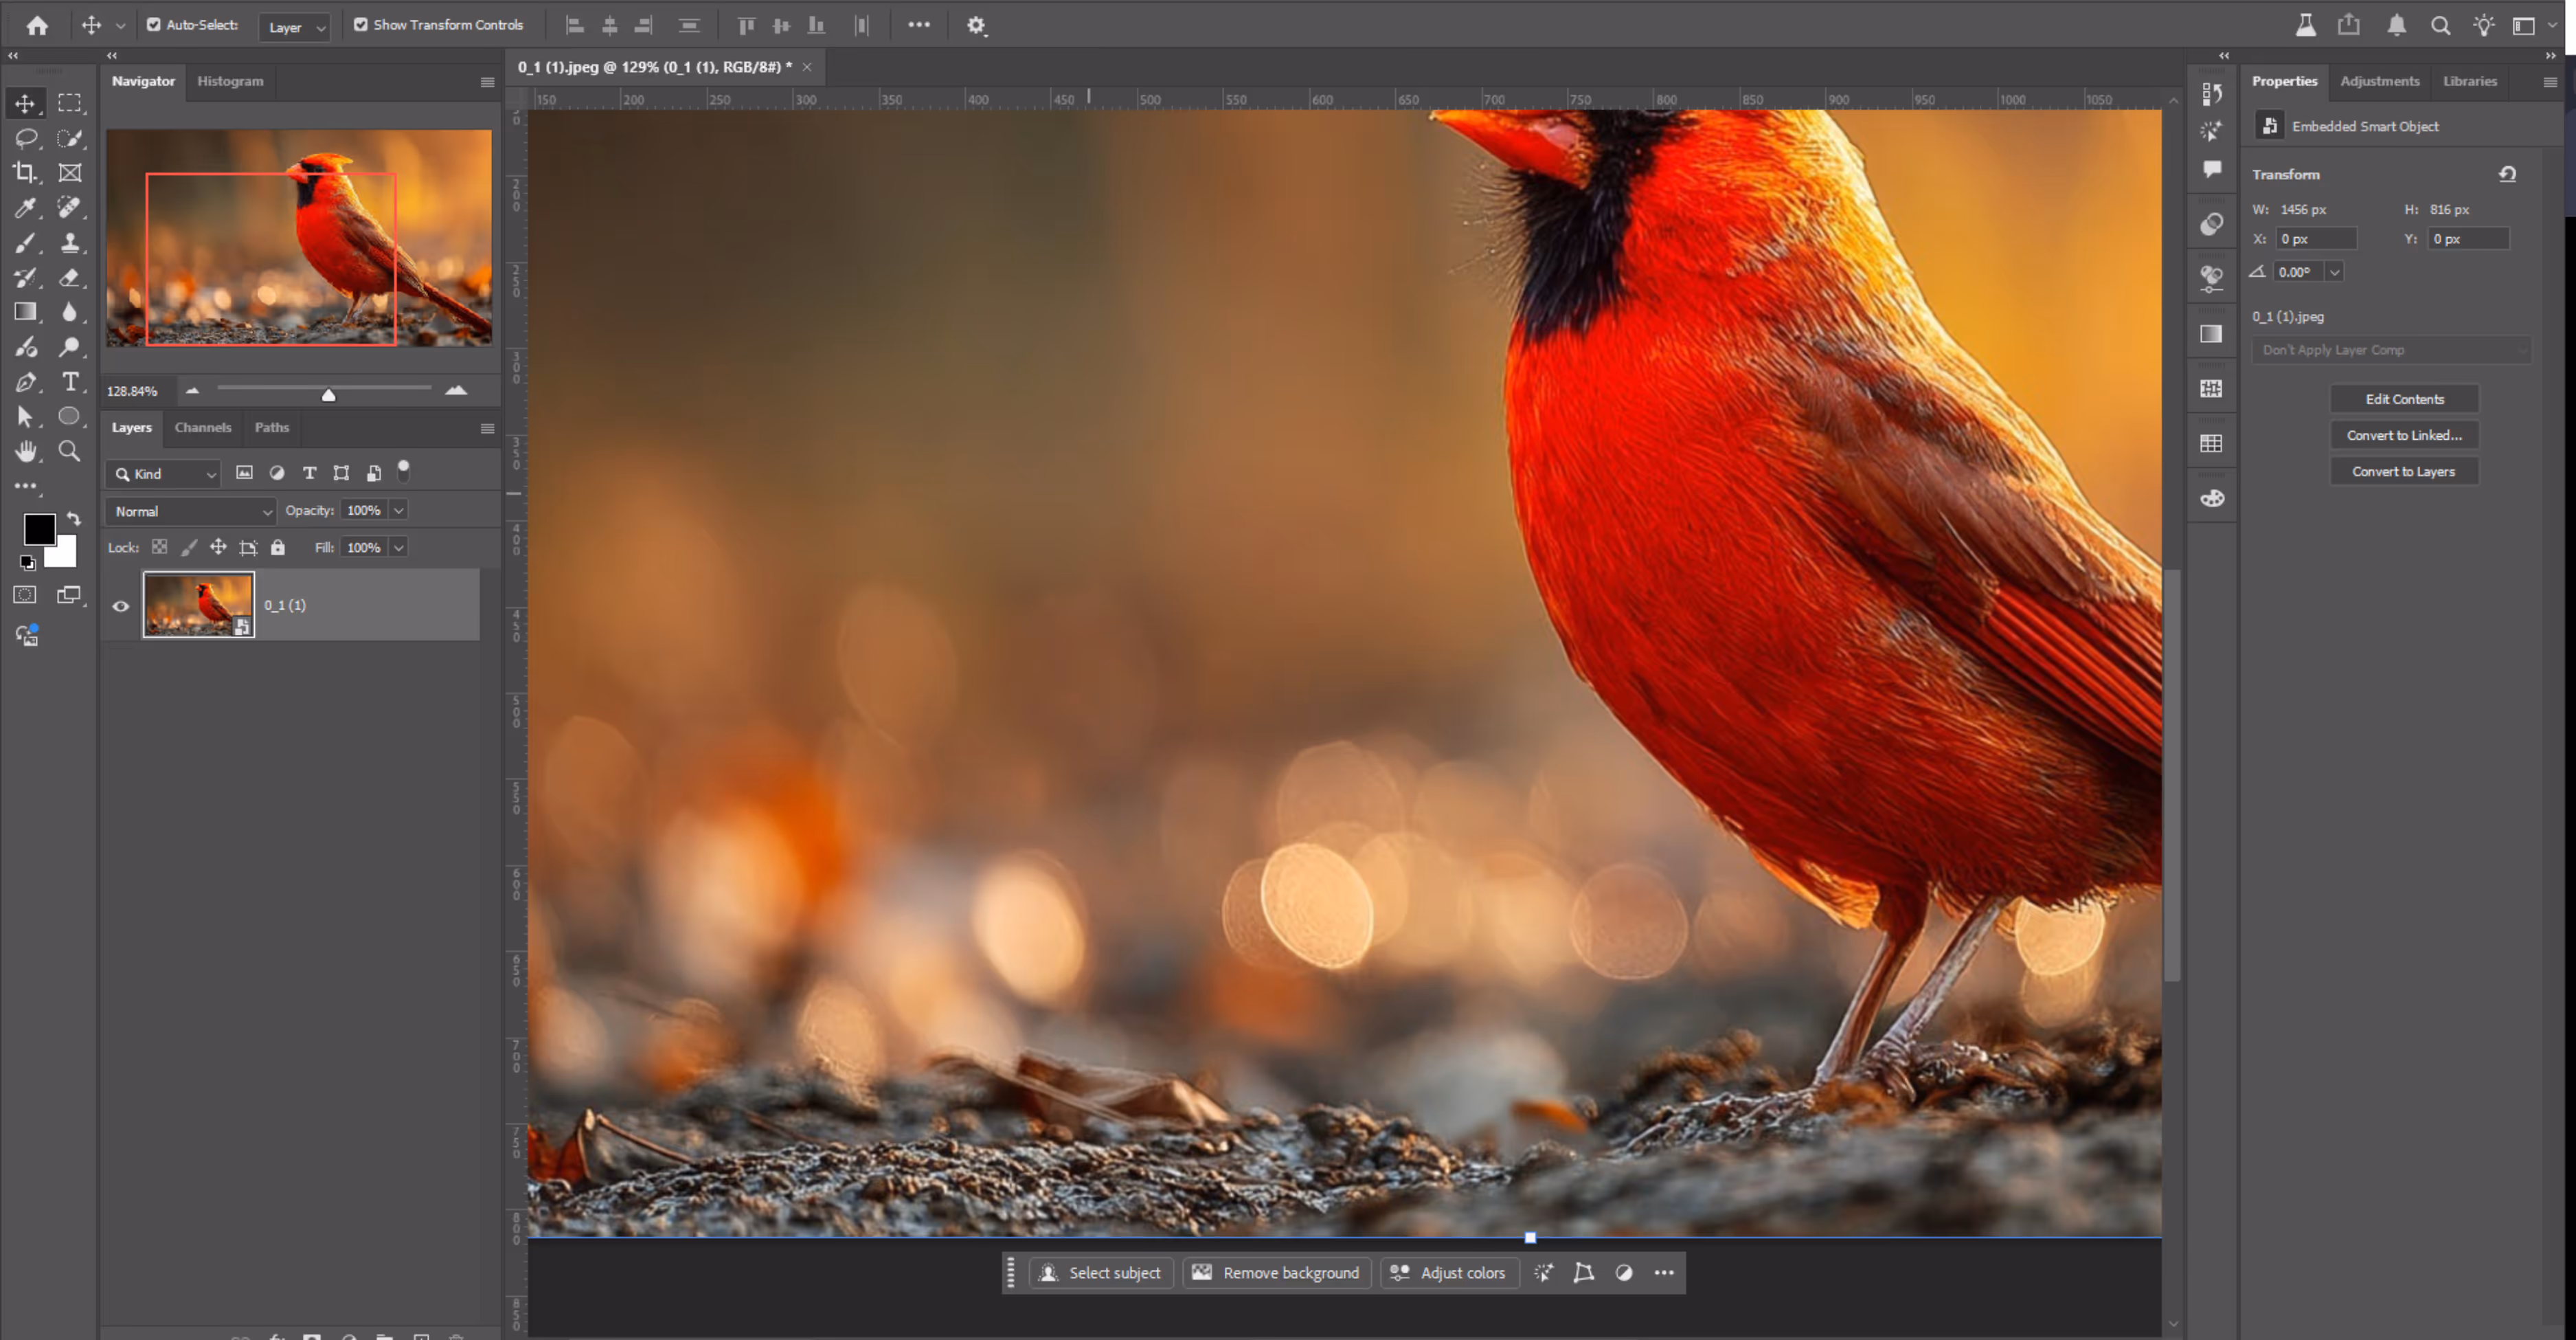
Step 6: Zoom in on the watermark area by using Ctrl++ or the Zoom Tool (Z) to zoom in accurately.
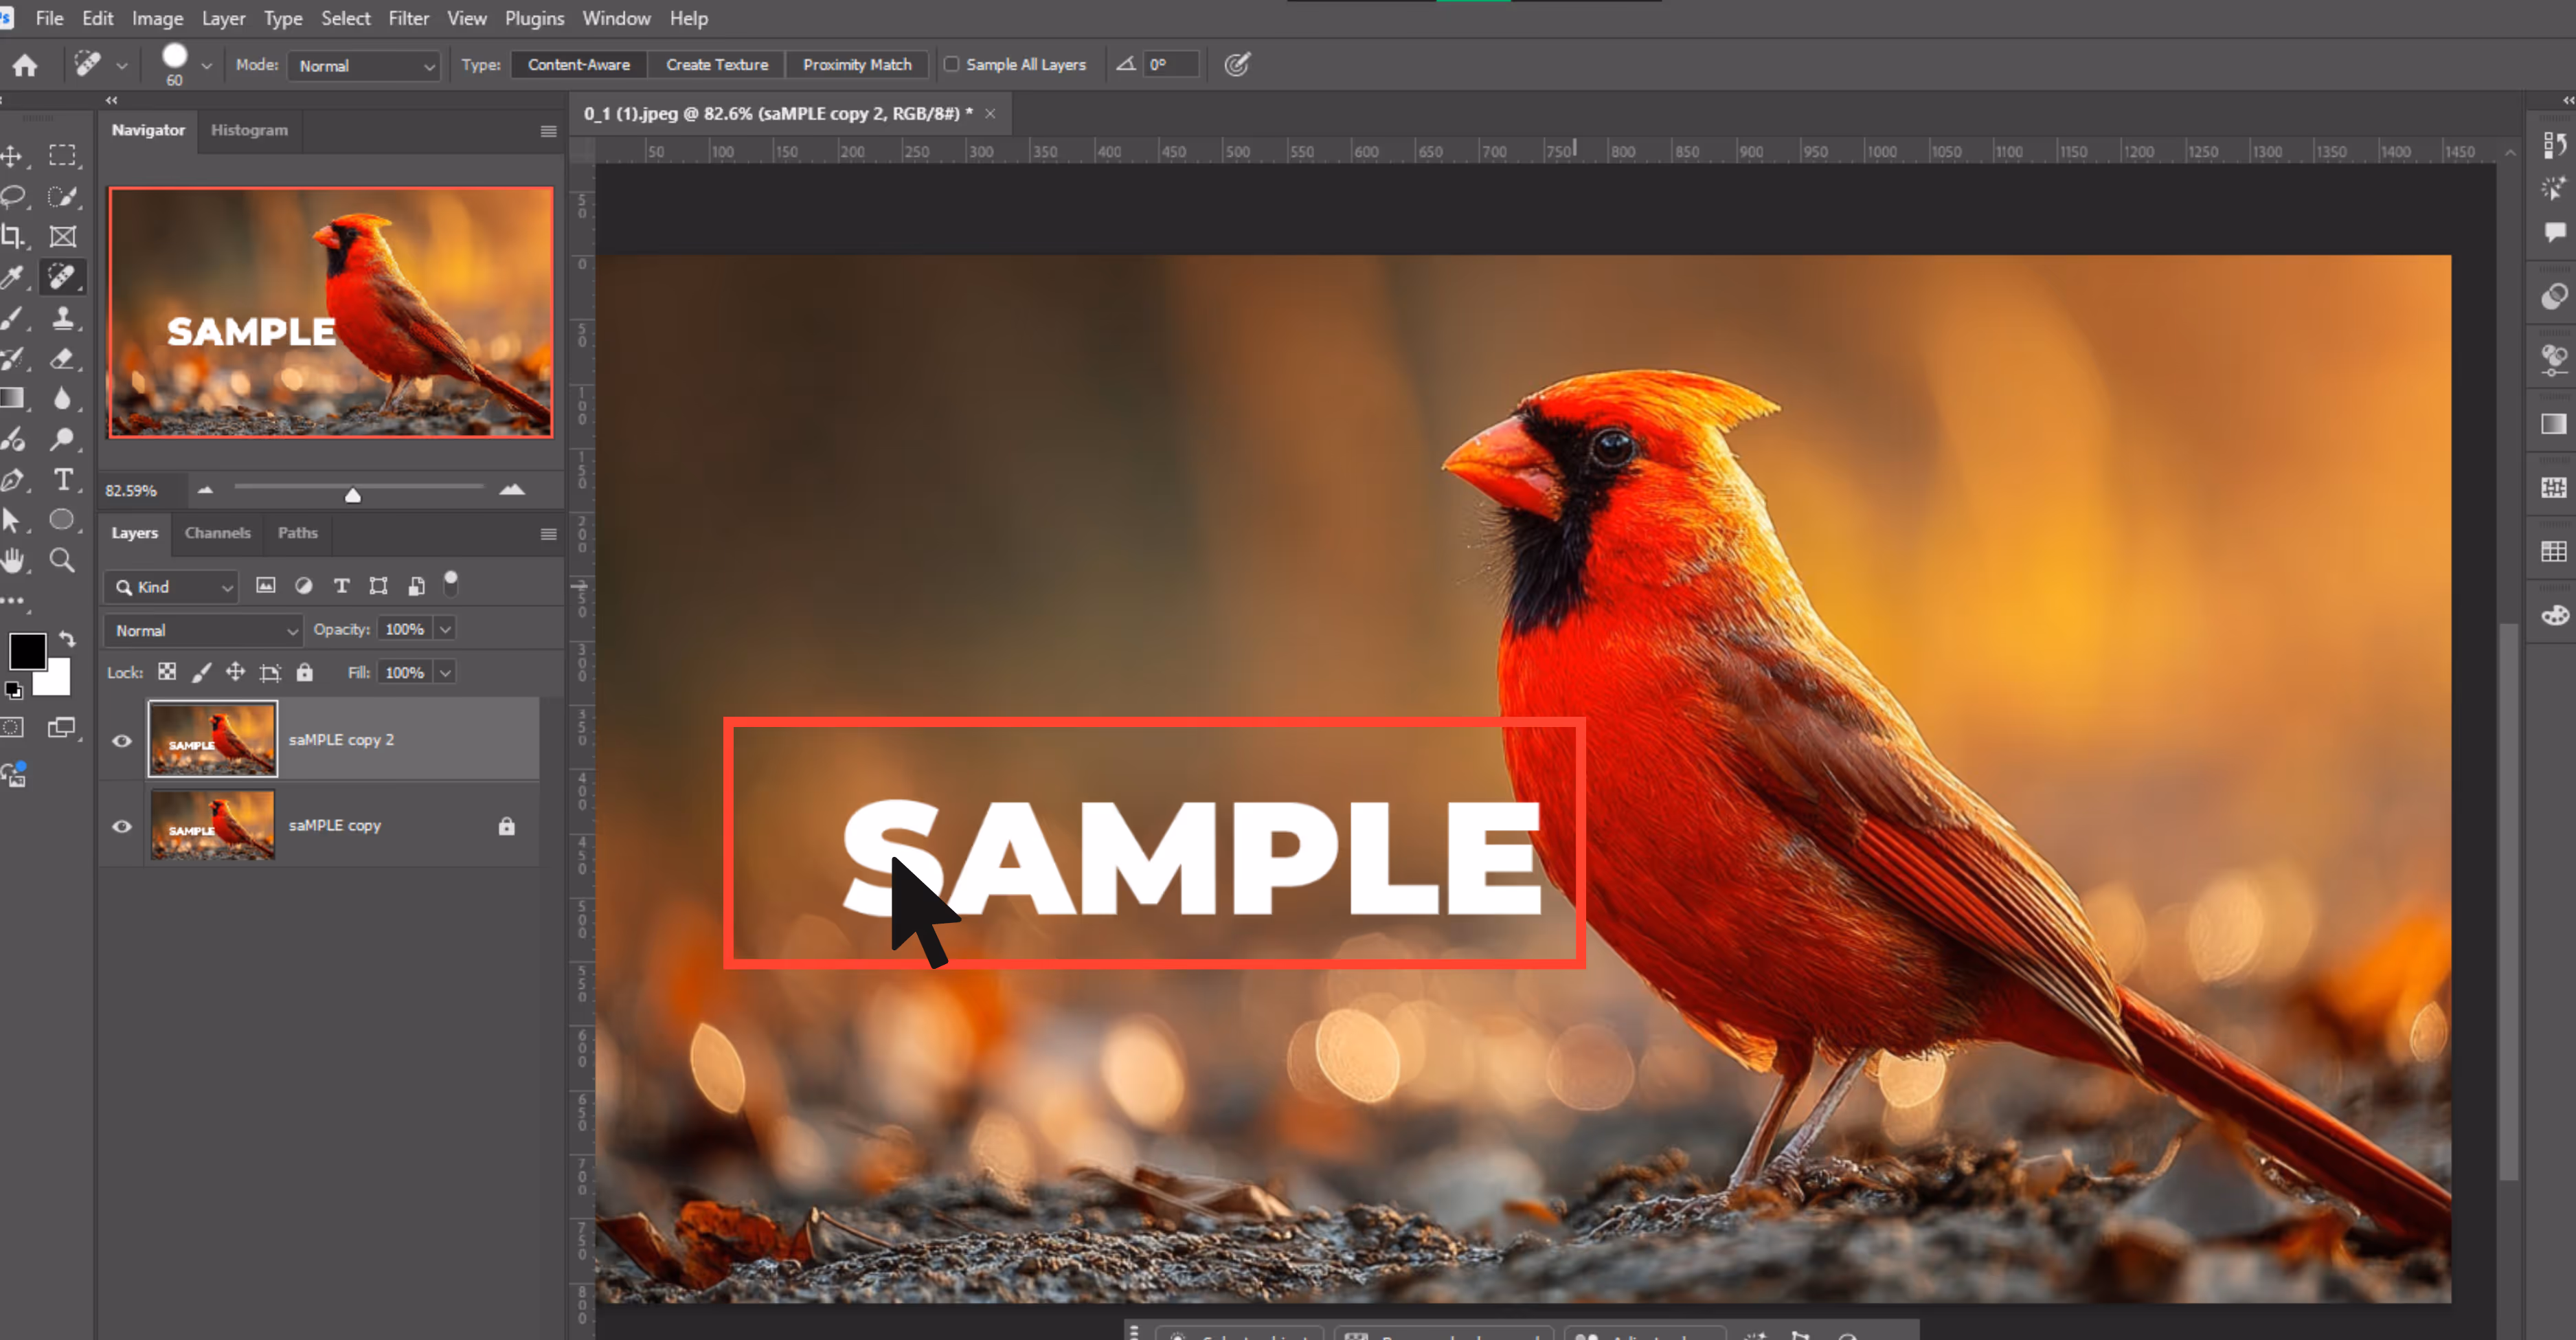
Step 7: Click or drag over the watermark. Photoshop will automatically remove the watermark.
Clone Stamp Tool
The Clone Stamp Tool is ideal for detailed areas where the background has textures or patterns.
Why do I use this tool?
- Gives full control over cloning from which area.
- Good for textured or detailed areas.
How to use the Clone Stamp Tool?
Step 1: Start by opening your image and then duplicating the layer.
Step 2: Select the Clone Stamp Tool from the toolbar on the left side.
Step 3: Then adjust your brush size in the options.

Step 4: Now hold Alt and click on a clean area near the watermark.
Step 5: Release the key and paint over the watermark using thin strokes.
Step 6: Constantly re-sample different parts (hold Alt and click again) to prevent obvious repetition.
Step 7: Use light strokes for fine removal of the watermark.
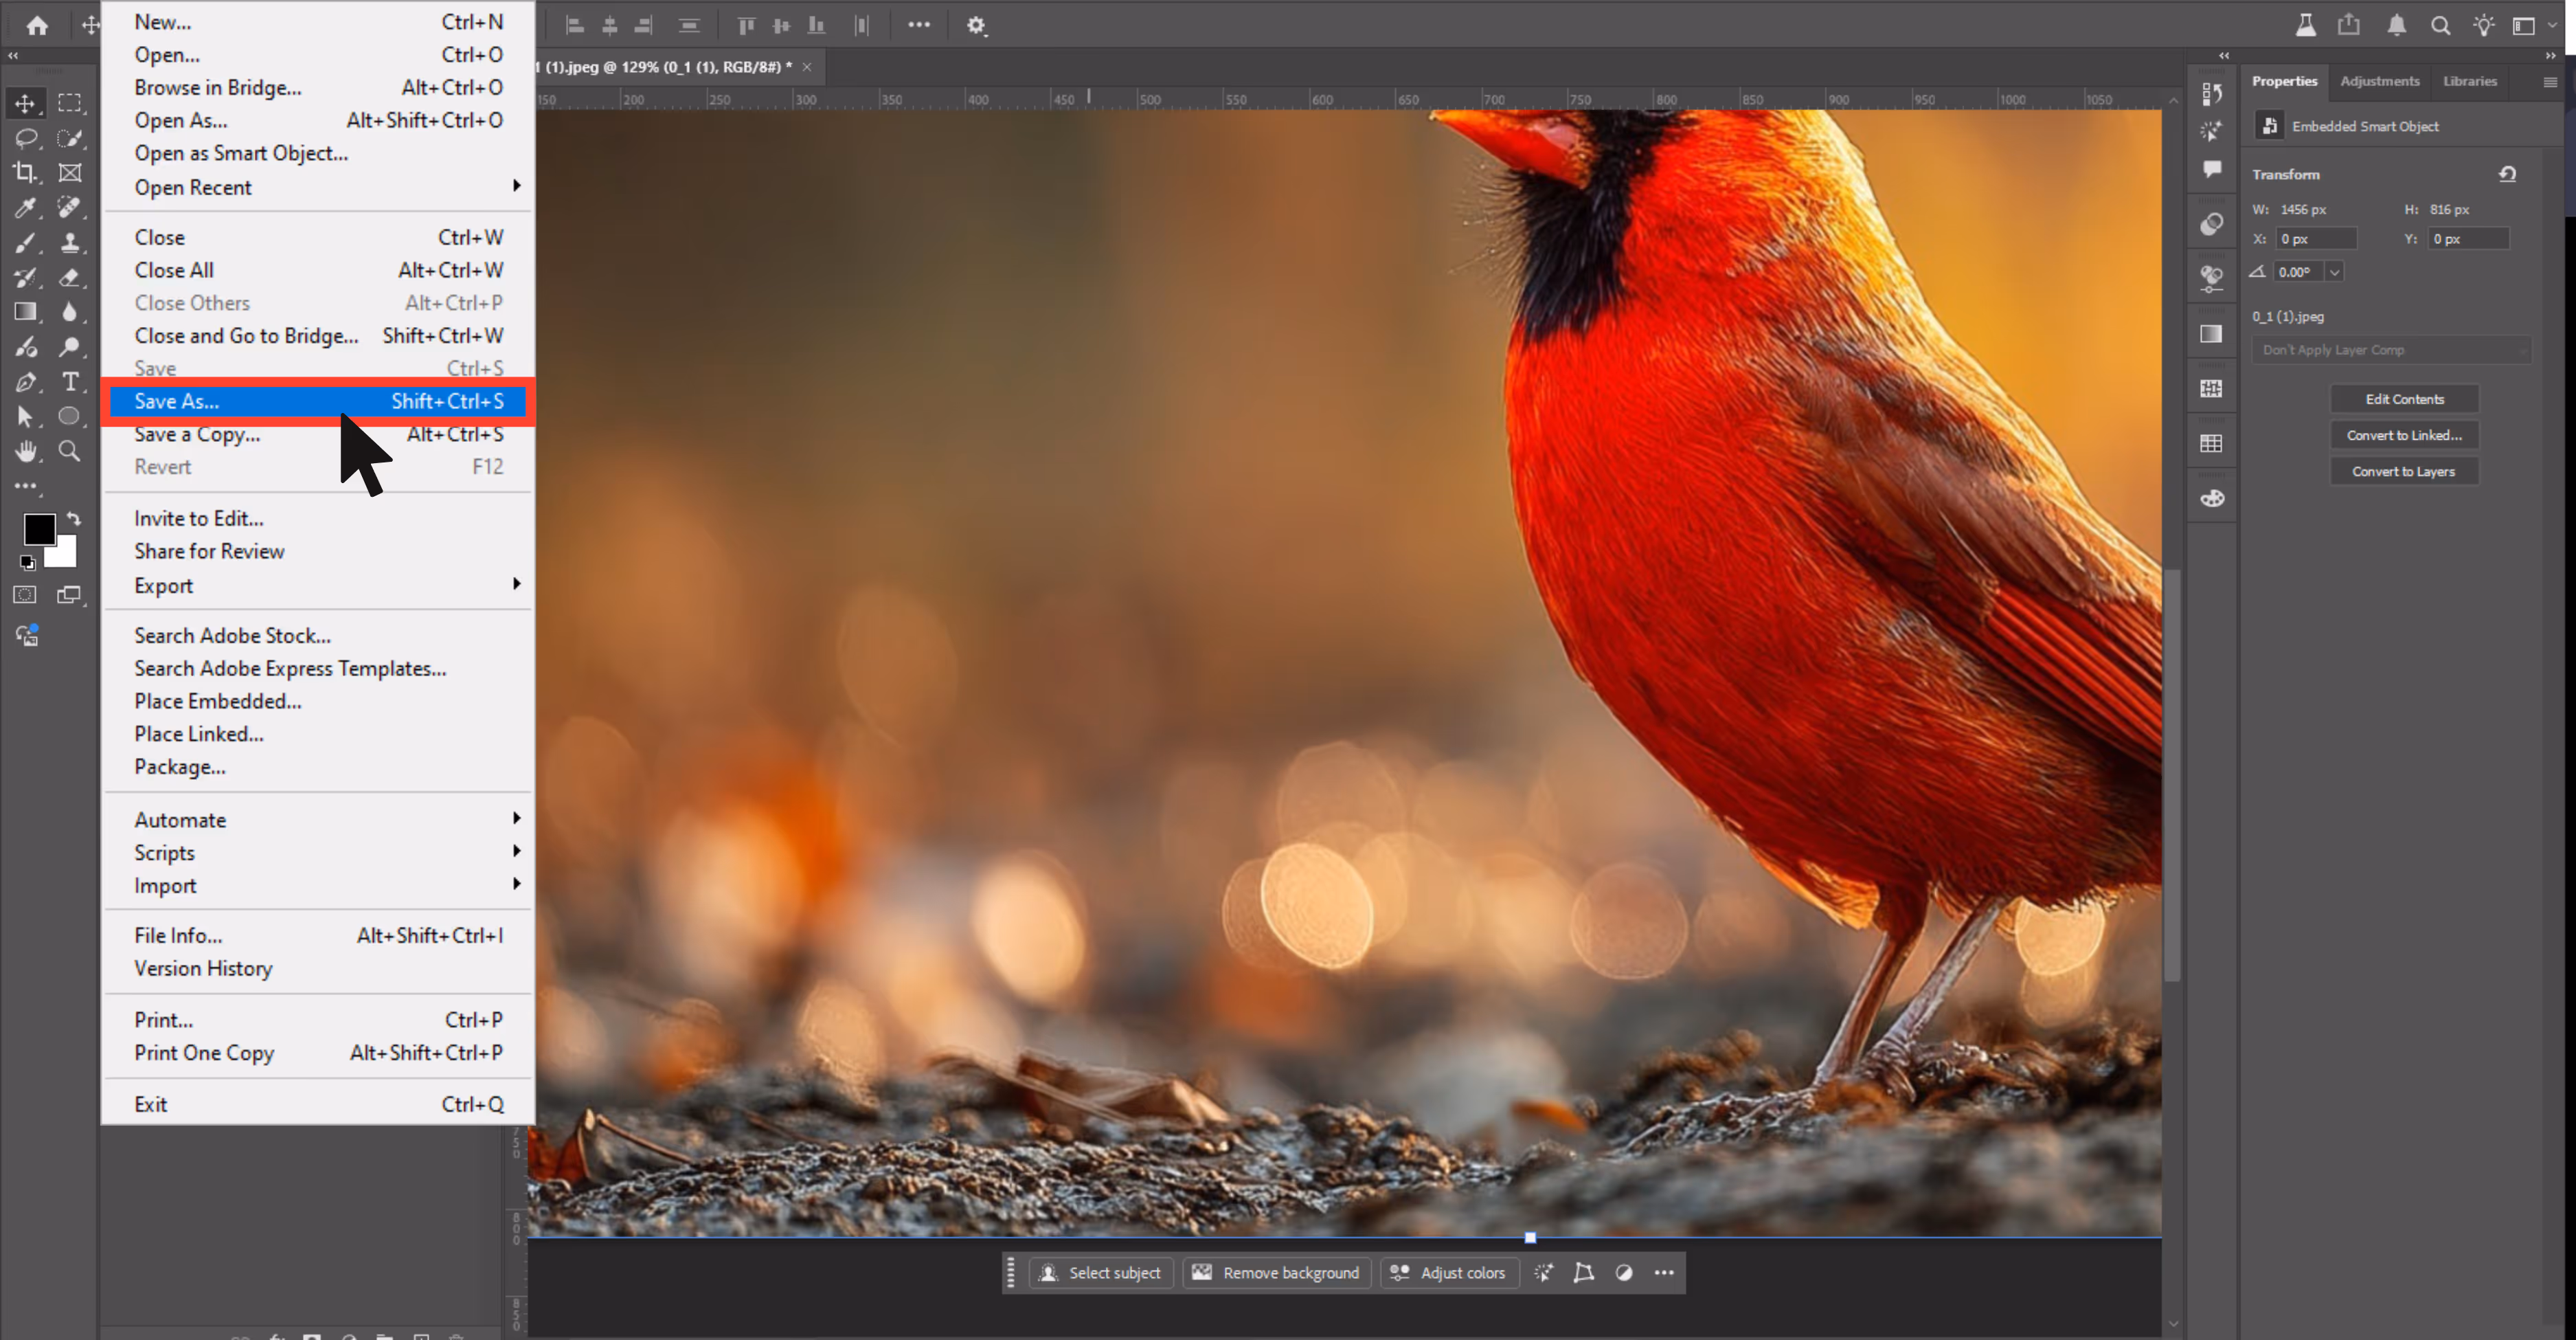
Step 8: Zoom in to clean the edges for a clean result. Once done, save your image via File > Save> Save As.
How to remove Disney PhotoPass watermarks for free online? (Top 5 tools)
If you’re not comfortable using Photoshop or don’t have access to it, don’t worry. Several AI-based tools allow you to remove watermarks for free.
Most of them are browser-based, require no installation, and are beginner-friendly. I tested a lot of tools, but have come up with the 5 best watermark removers for your Disney PhotoPass images:
1. Pixelbin
After trying a few one-click tools, I wanted something a bit more powerful—especially for batch editing or working on high-quality Disney event photos. That’s when I turned to Pixelbin, I felt like getting all editing features in one place.
It’s an AI-powered image editing platform built for people who need clean, fast results—perfect if you’re dealing with multiple Disney photos or want something more refined than quick browser tools.
Why did I like it?
- It’s built for modern image editing—smart, fast, and accurate.
- The Studio Editor feels super clean and beginner-friendly.
- Great for batch watermark removal.
- Excellent if you’re editing Disney photos for a scrapbook, blog, or personal e-commerce-style gallery.
Steps to remove the Disney PhotoPass watermark with Pixelbin?
Step 1: Head over to Pixelbin Studio Editor.
Step 2: From the dashboard, click on “Upload Image” and select the test image.
Step 3: Once the image is ready, select the “Watermark” option from the left panel and click on Auto. The AI will process within 5–7 seconds.
Step 4: It showed a before/after preview for your easy understanding.
Step 5: Once you are done, click on “Download” and select the image’s file format, and download the watermark-free version.
2. Inpaint
When I first started testing watermark removal tools, I wanted something that didn’t require me to sign up, download anything, or watch a tutorial just to figure it out. That’s exactly why I gave Inpaint a chance.
And what do I find? It’s a simple tool that runs directly in your browser. No Photoshop skills, no downloads, and no stress. For Disney PhotoPass watermarks that are light, semi-transparent, and placed over less detailed areas of the image, this tool handles it really well.
Why did I like it?
- It's easy and simple, just upload and inpaint will remove the watermark automatically.
- No account or login needed.
- Fast processing is perfect for quick edits.
- It's ideal for small to medium watermarks that aren’t sitting on busy or textured backgrounds.
Steps to remove the Disney PhotoPass watermark with Inpaint
Step 1: Go to Inpaint.com and download the software.
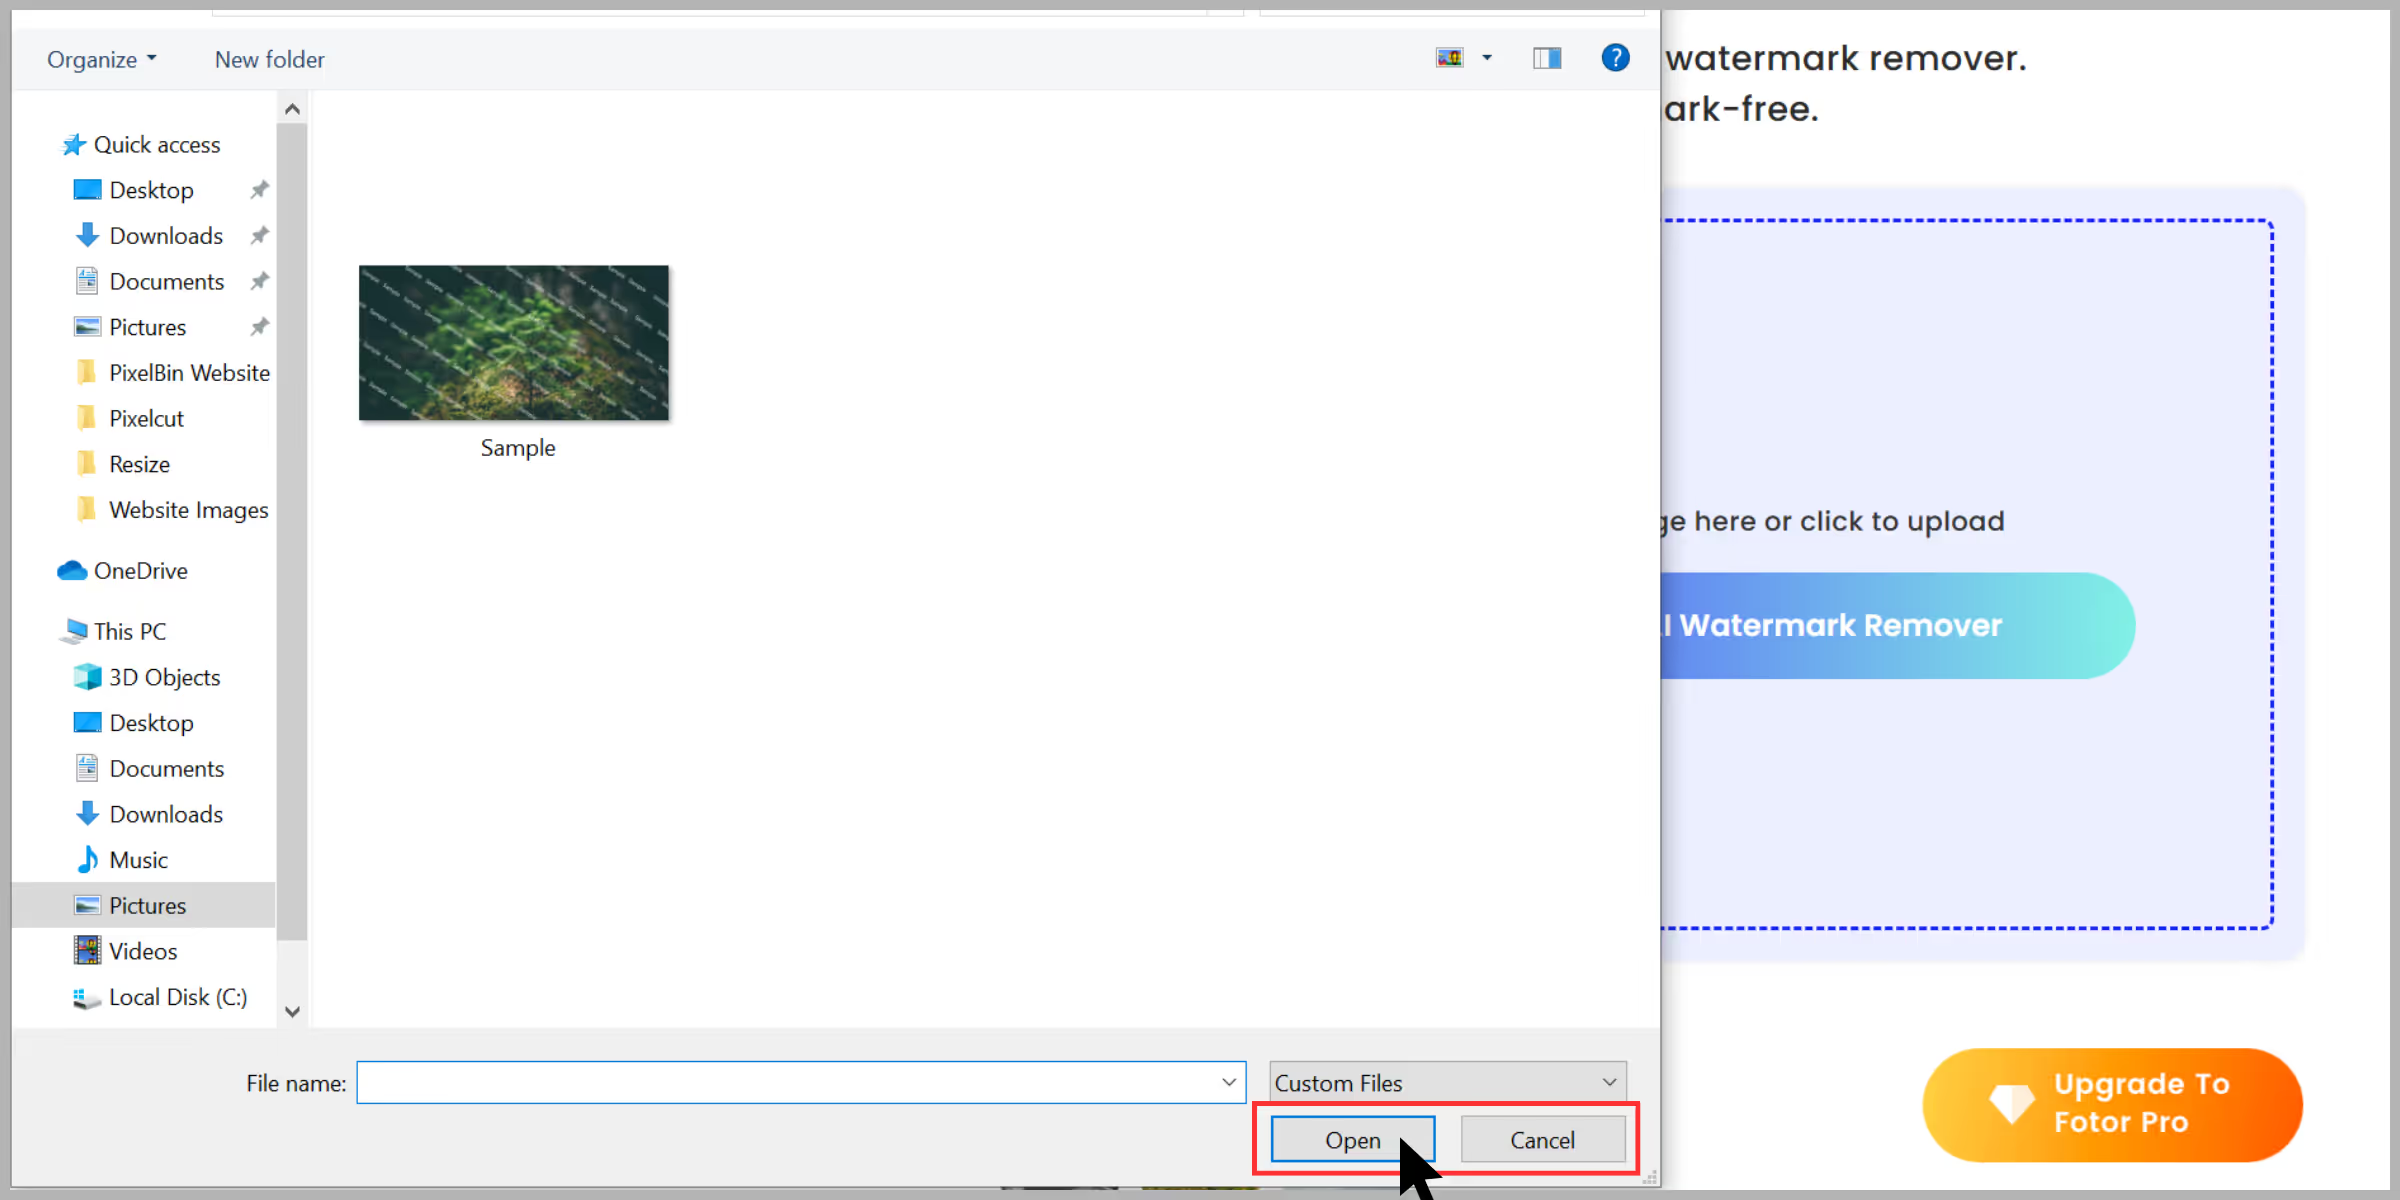
Step 2: Click on “Upload Image” and open it, then select your Disney photo.
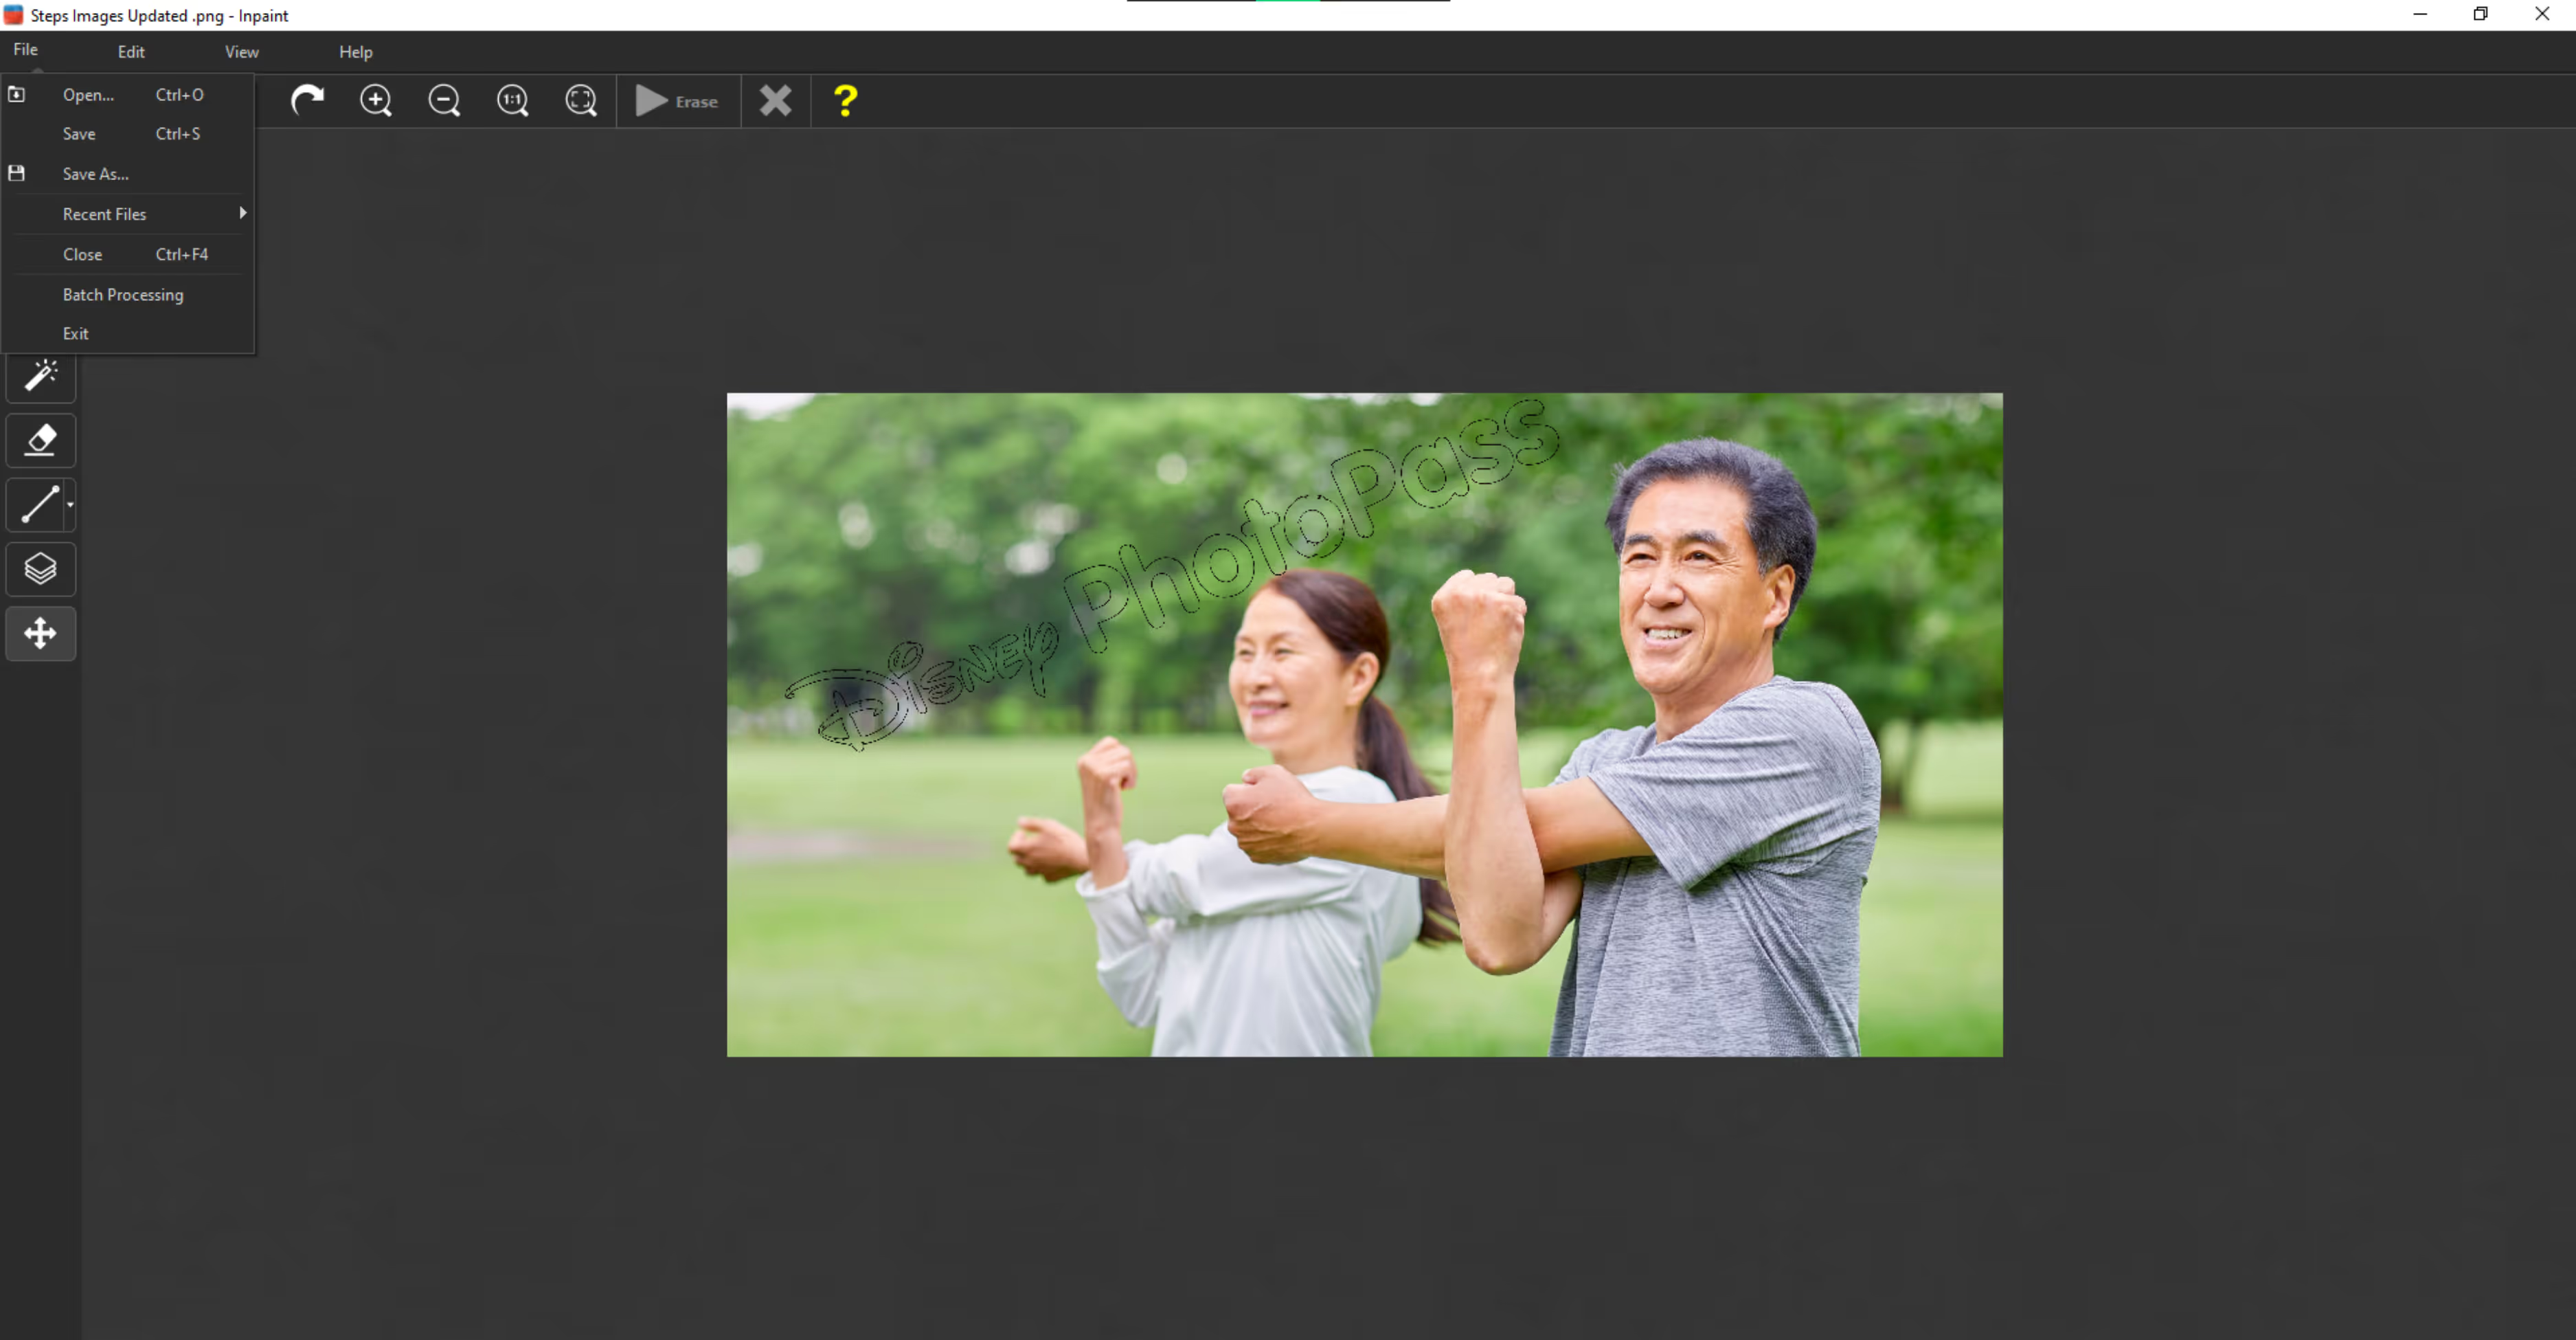
Step 3: Use the red marker tool to paint over the watermark area. You can zoom in for better precision.
.avif)
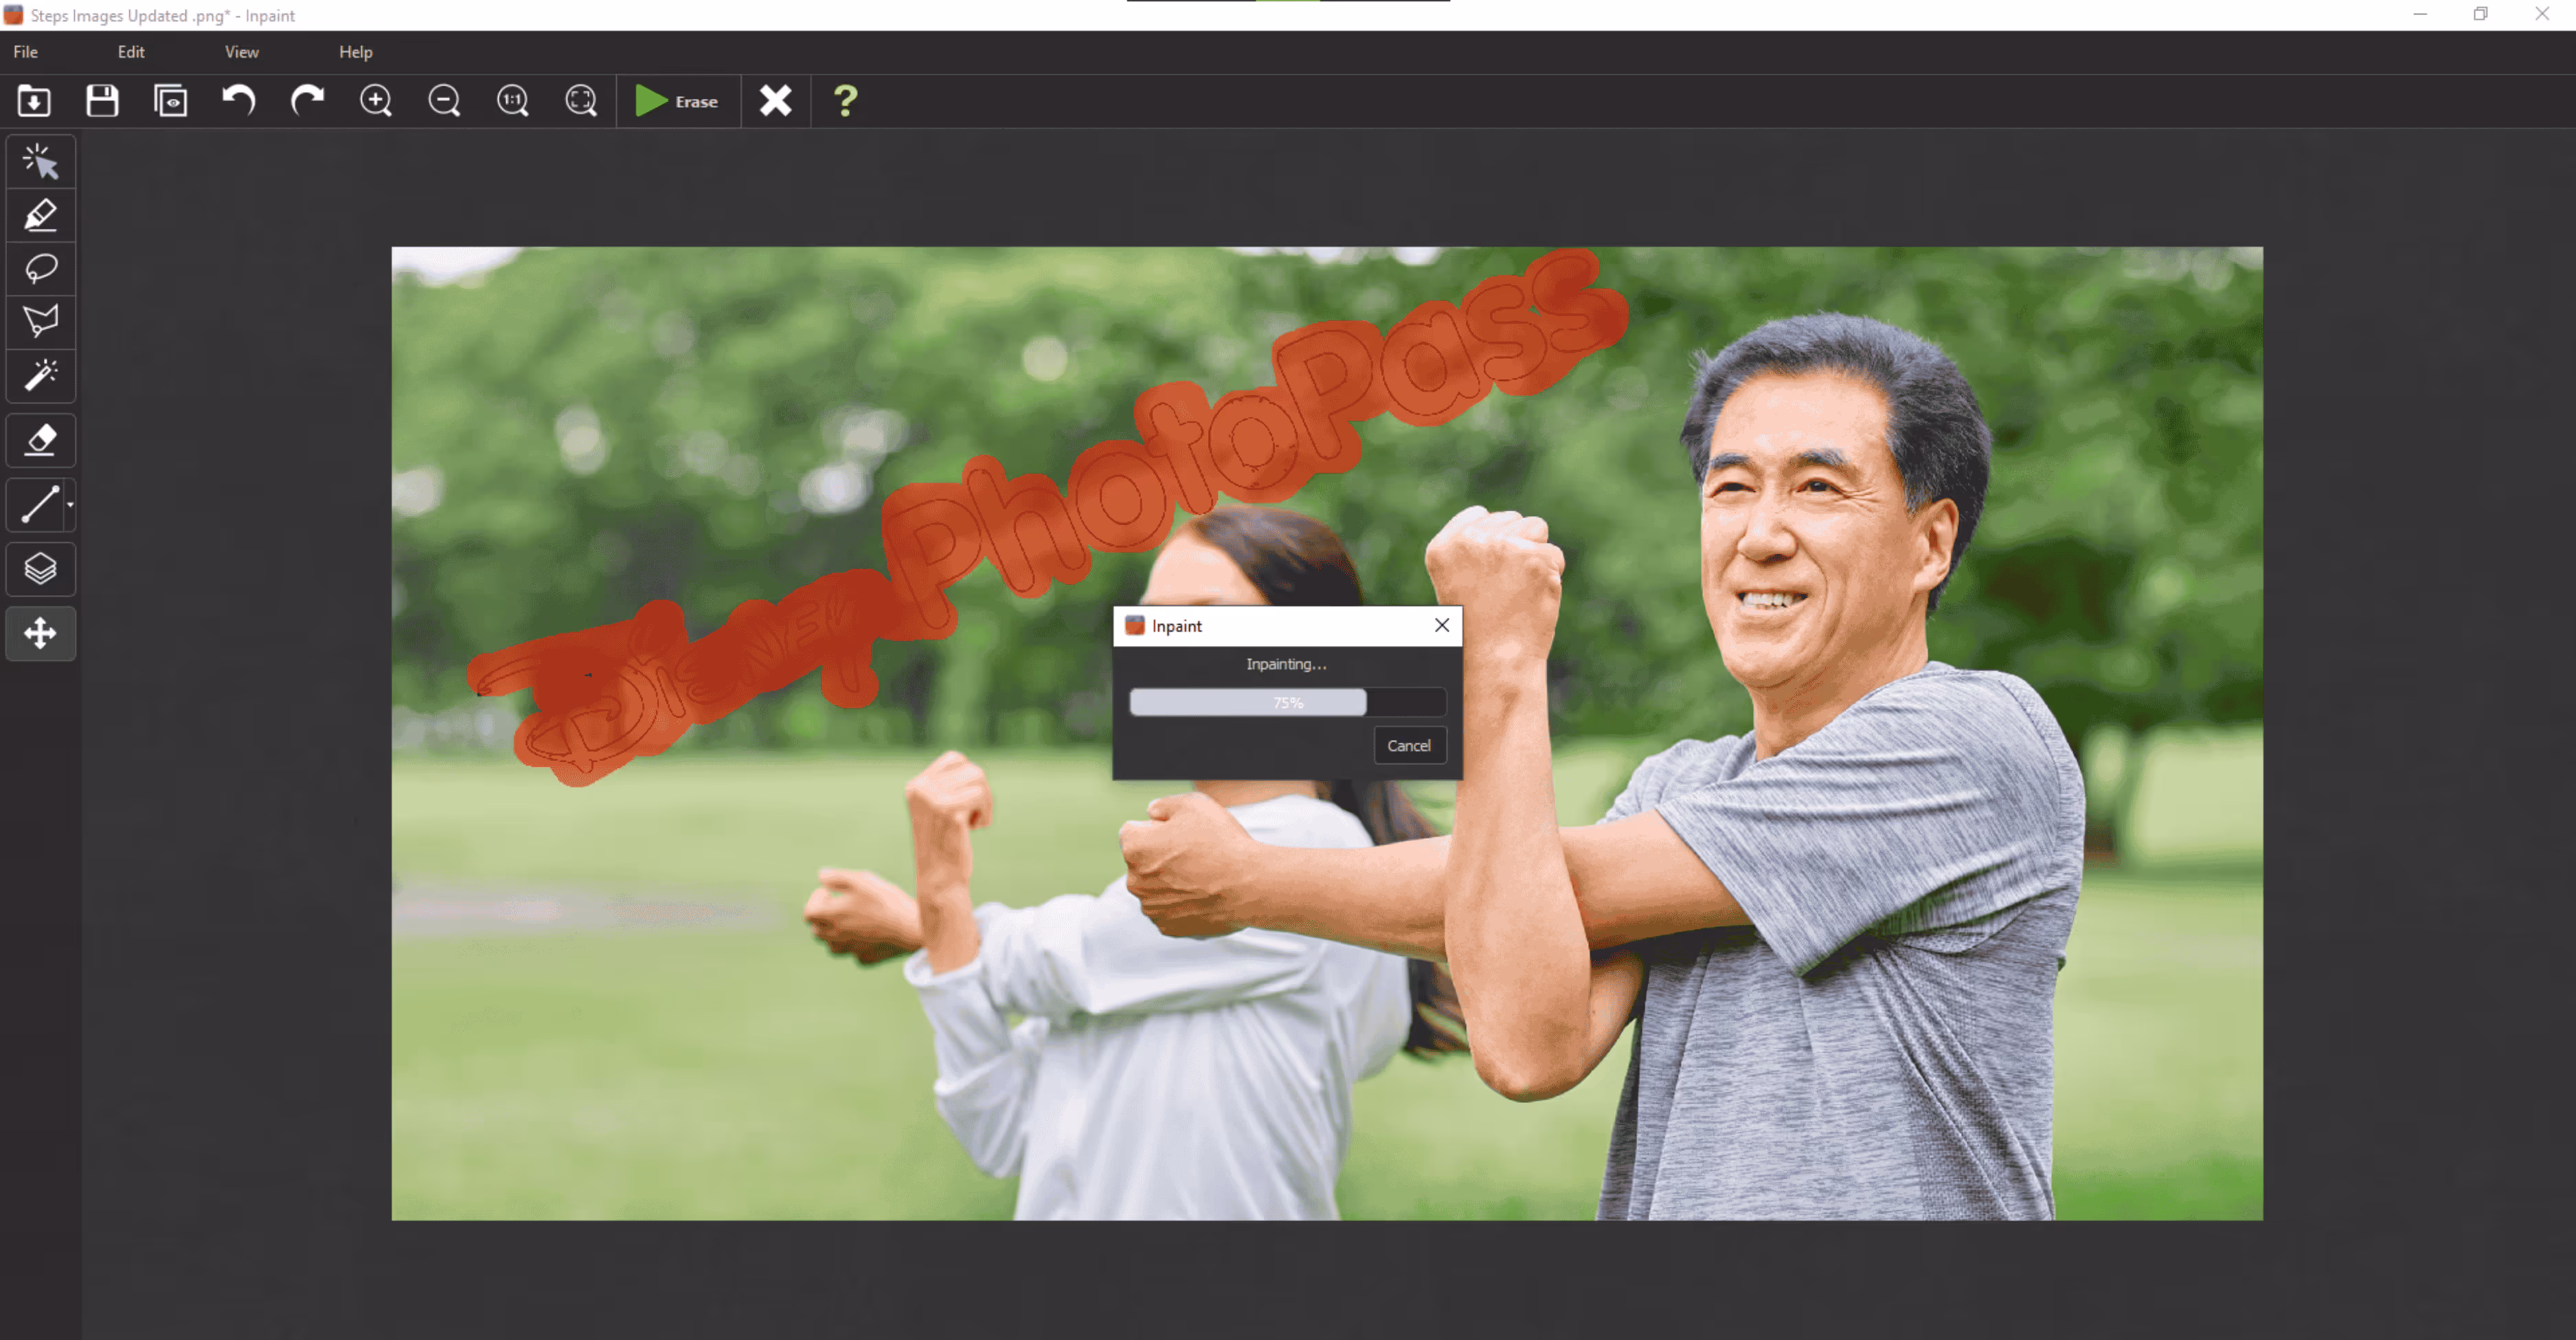
Step 4: Once marked, click the “Erase” button.
.avif)
Step 5: The AI will process your request and intelligently fill in the area.
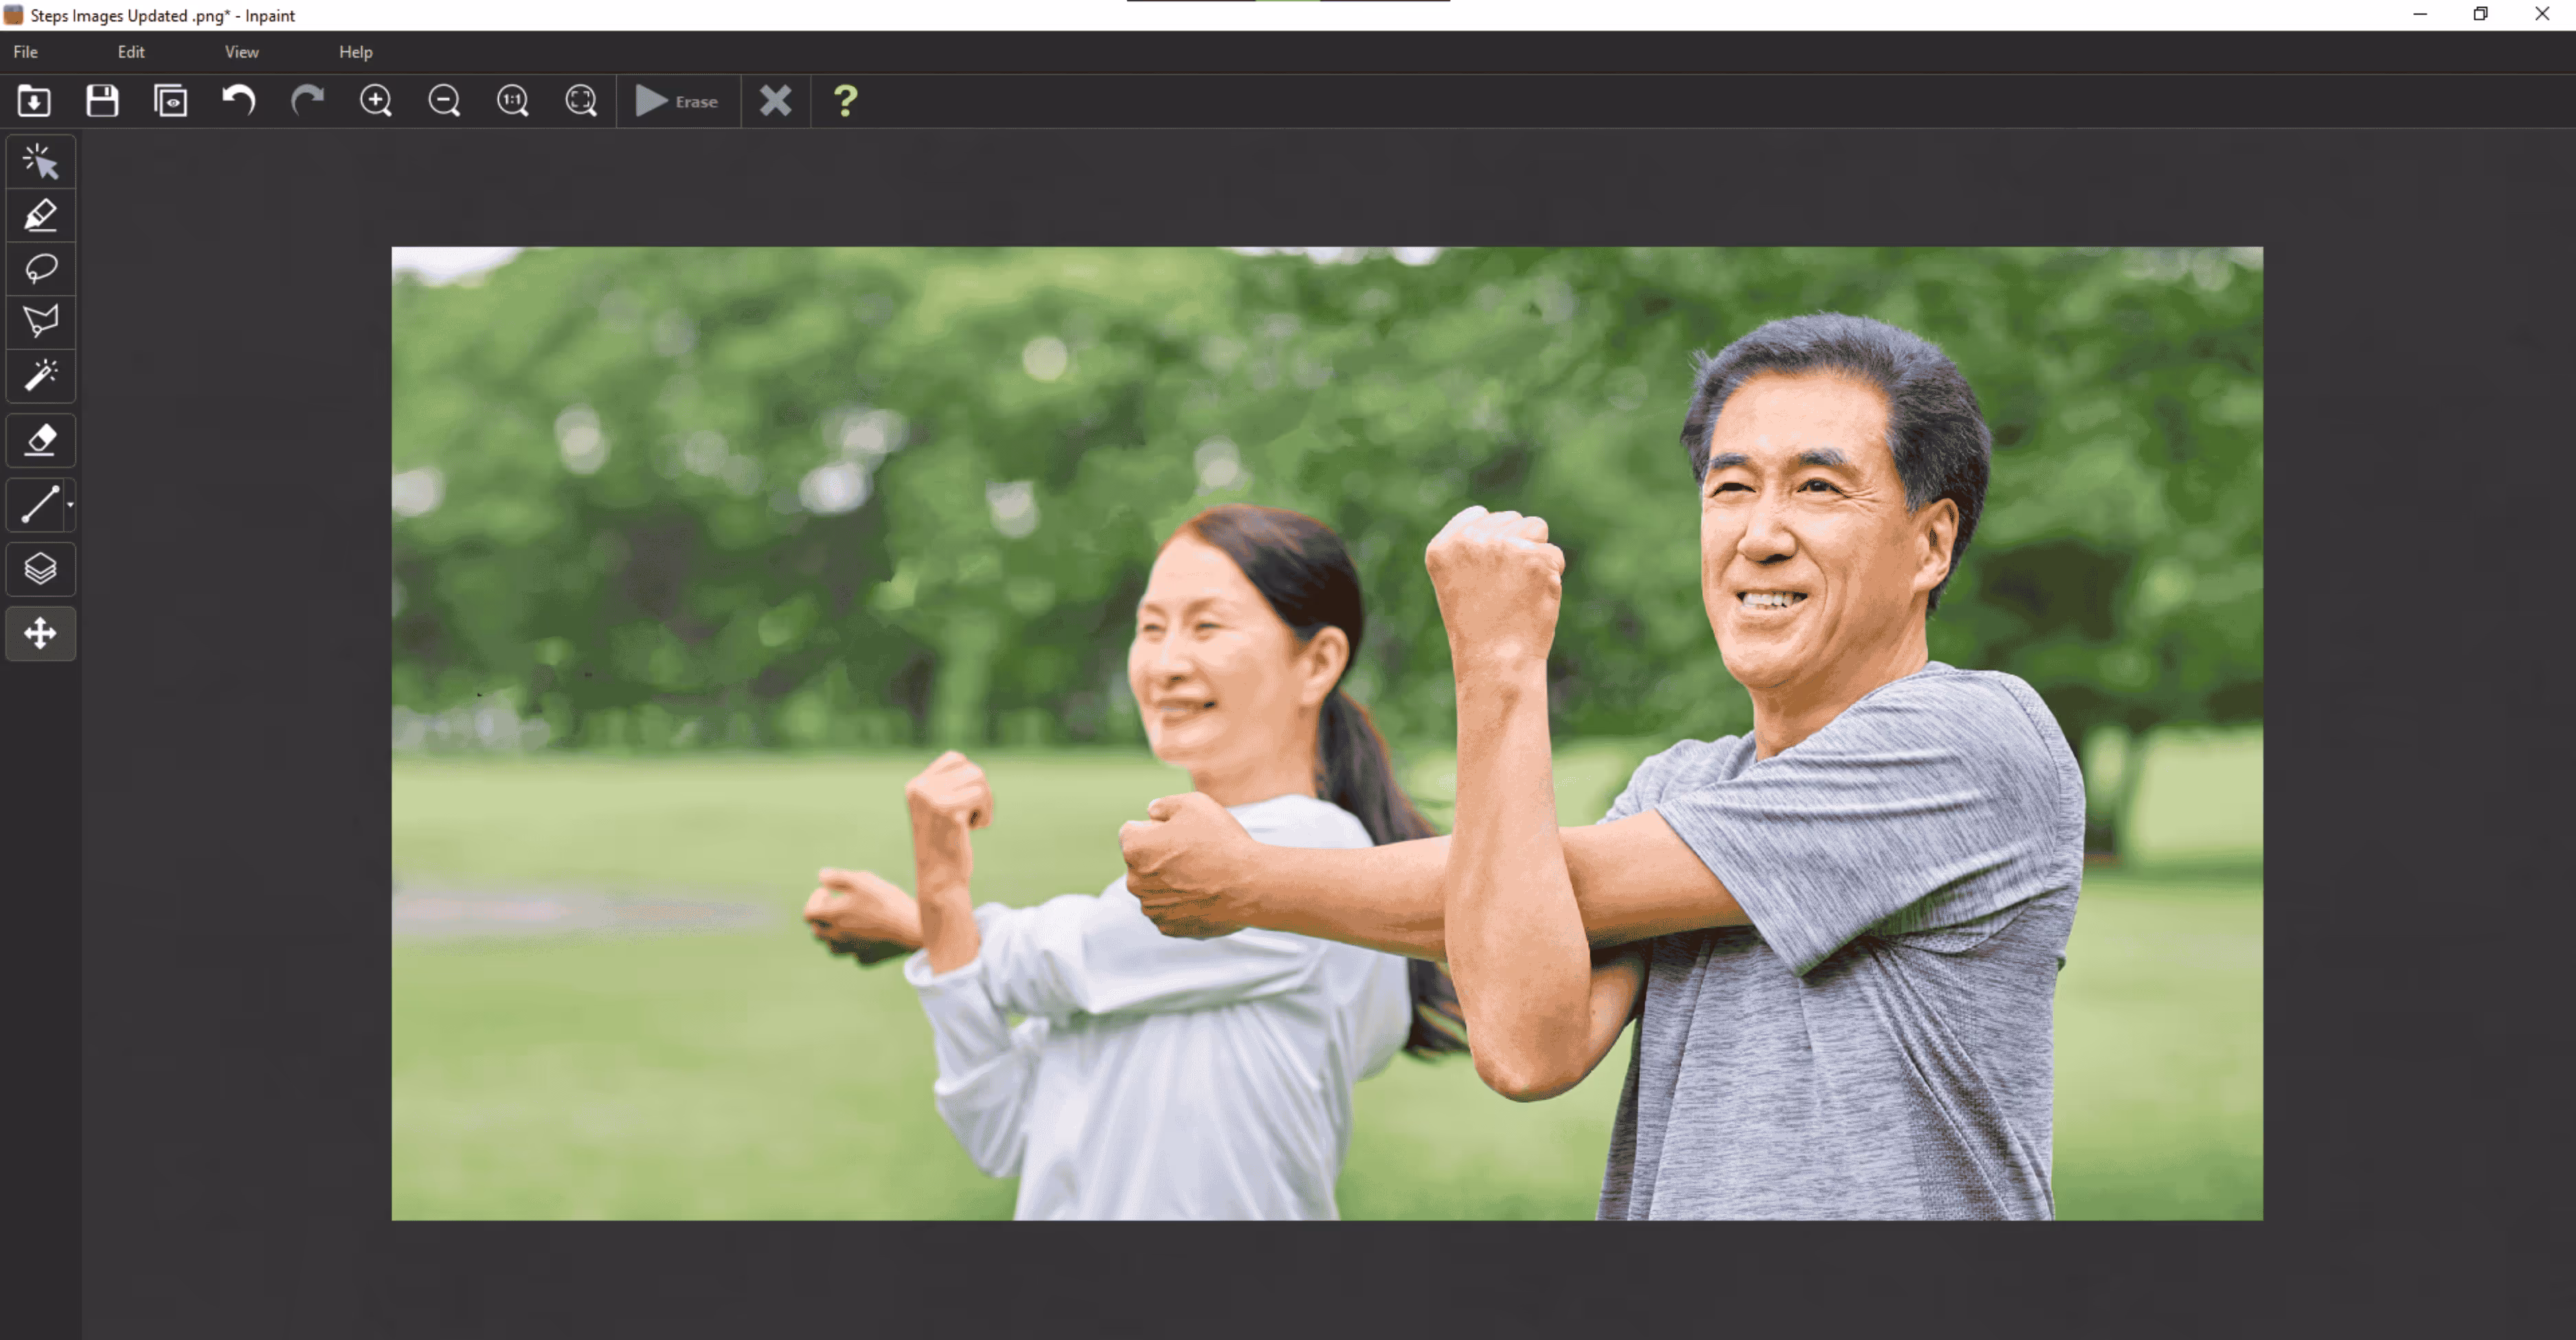
Step 6: When you're happy with the result, just download the cleaned-up image.
3.WatermarkRemover.io
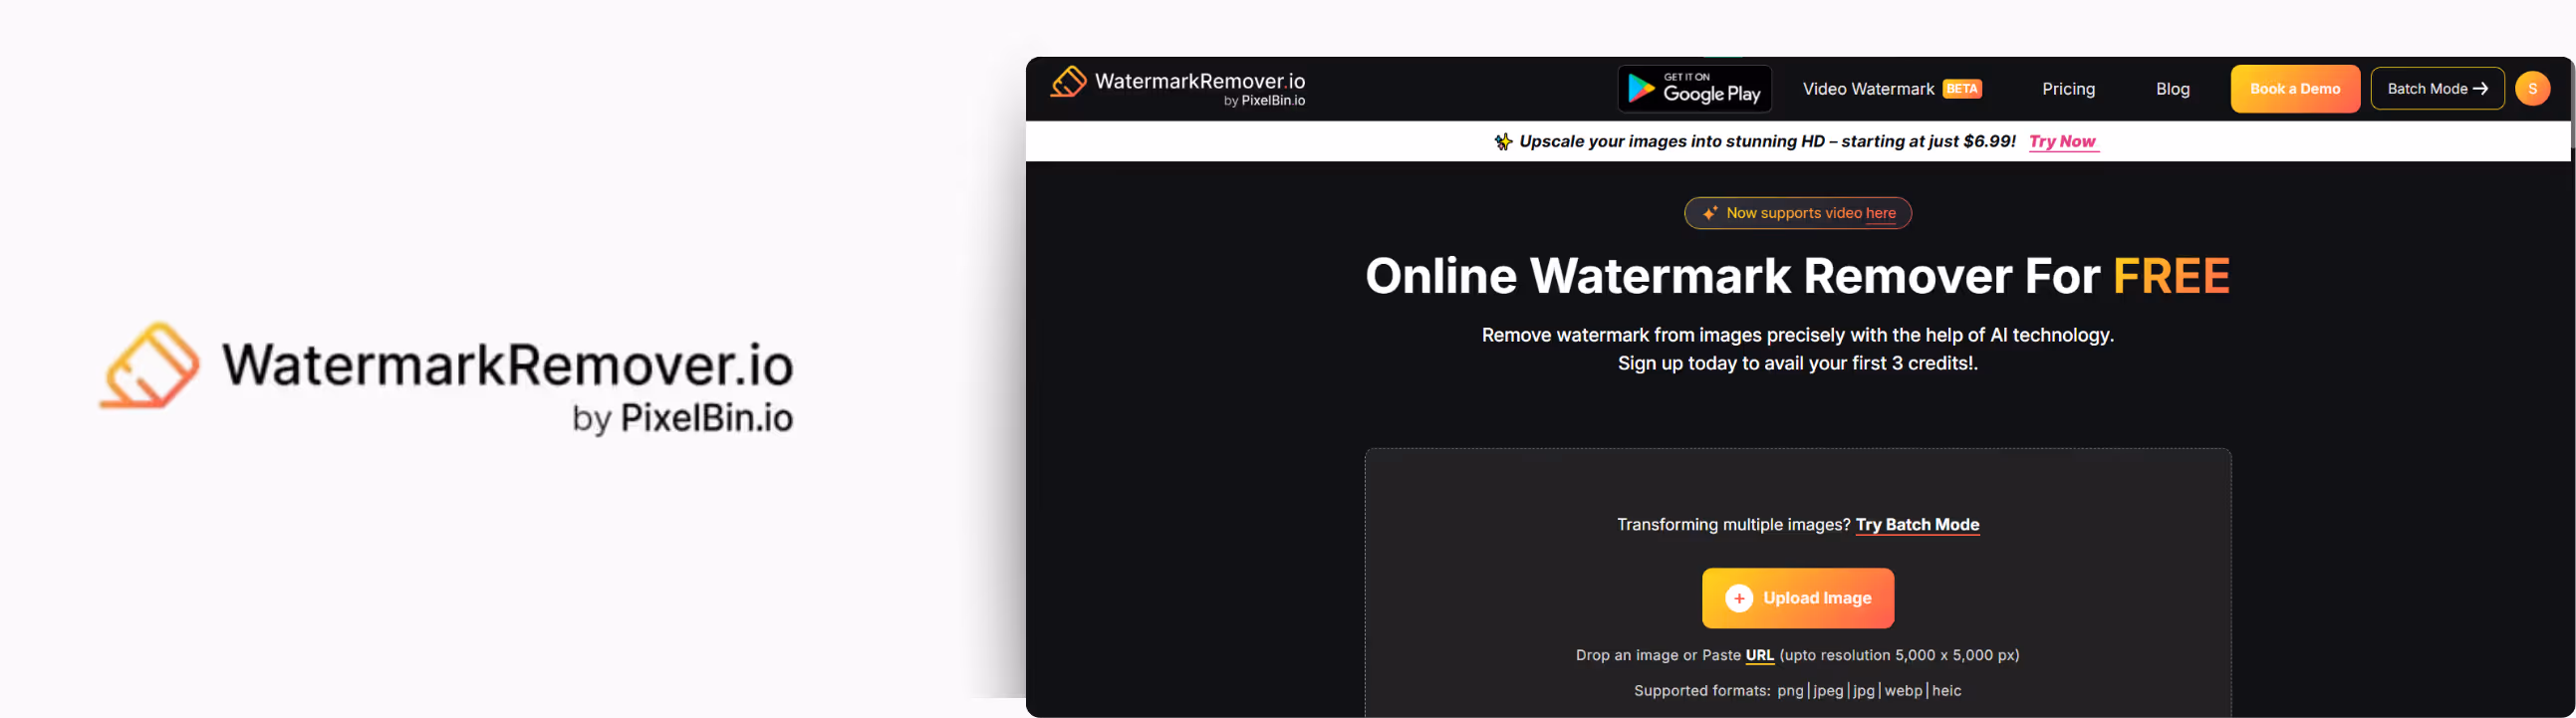
If you’re looking for an easy and simple tool to remove a watermark from a photo without any editing skills, then this tool is one of the best. I tested it out on a few different images, and here’s everything I found.
Why did I like it?
- Just upload, and the tool does the rest.
- No signup or login is required to use the basic features, which are free to use.
- Beginner-friendly interface.
- The AI algorithm works great for images with complex backgrounds.
- No added watermark on the output image.
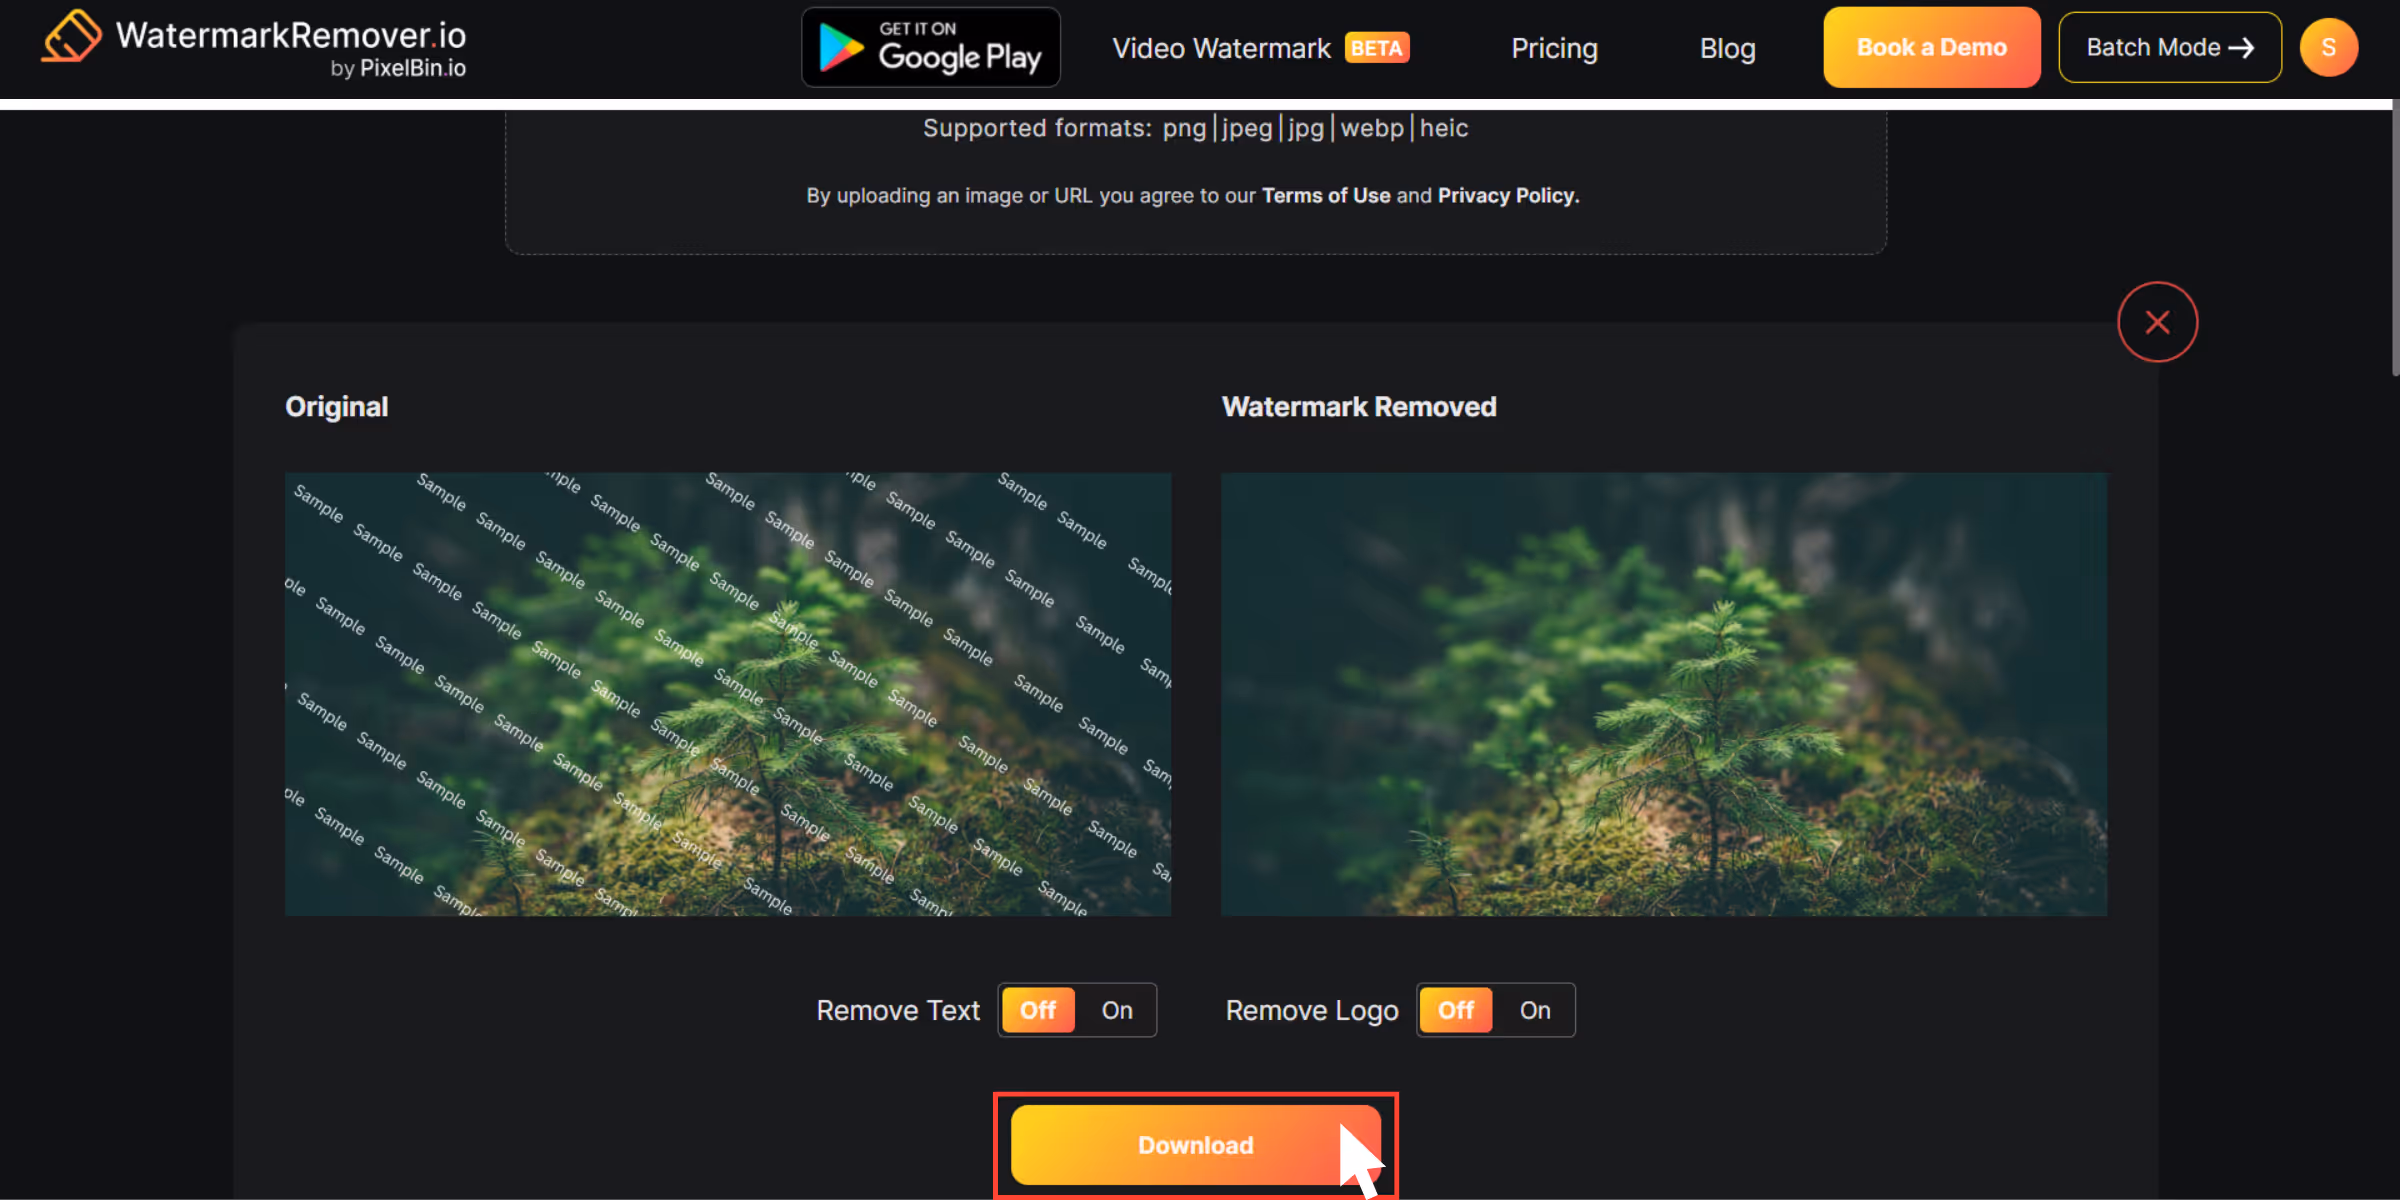
Steps to remove the Disney PhotoPass watermark with WatermarkRemover.io?
Step 1: Go to WatermarkRemover.io.
Step 2: Click the “Upload Image” button (they accept JPG, PNG, WEBP, HEIC, and JPEG).
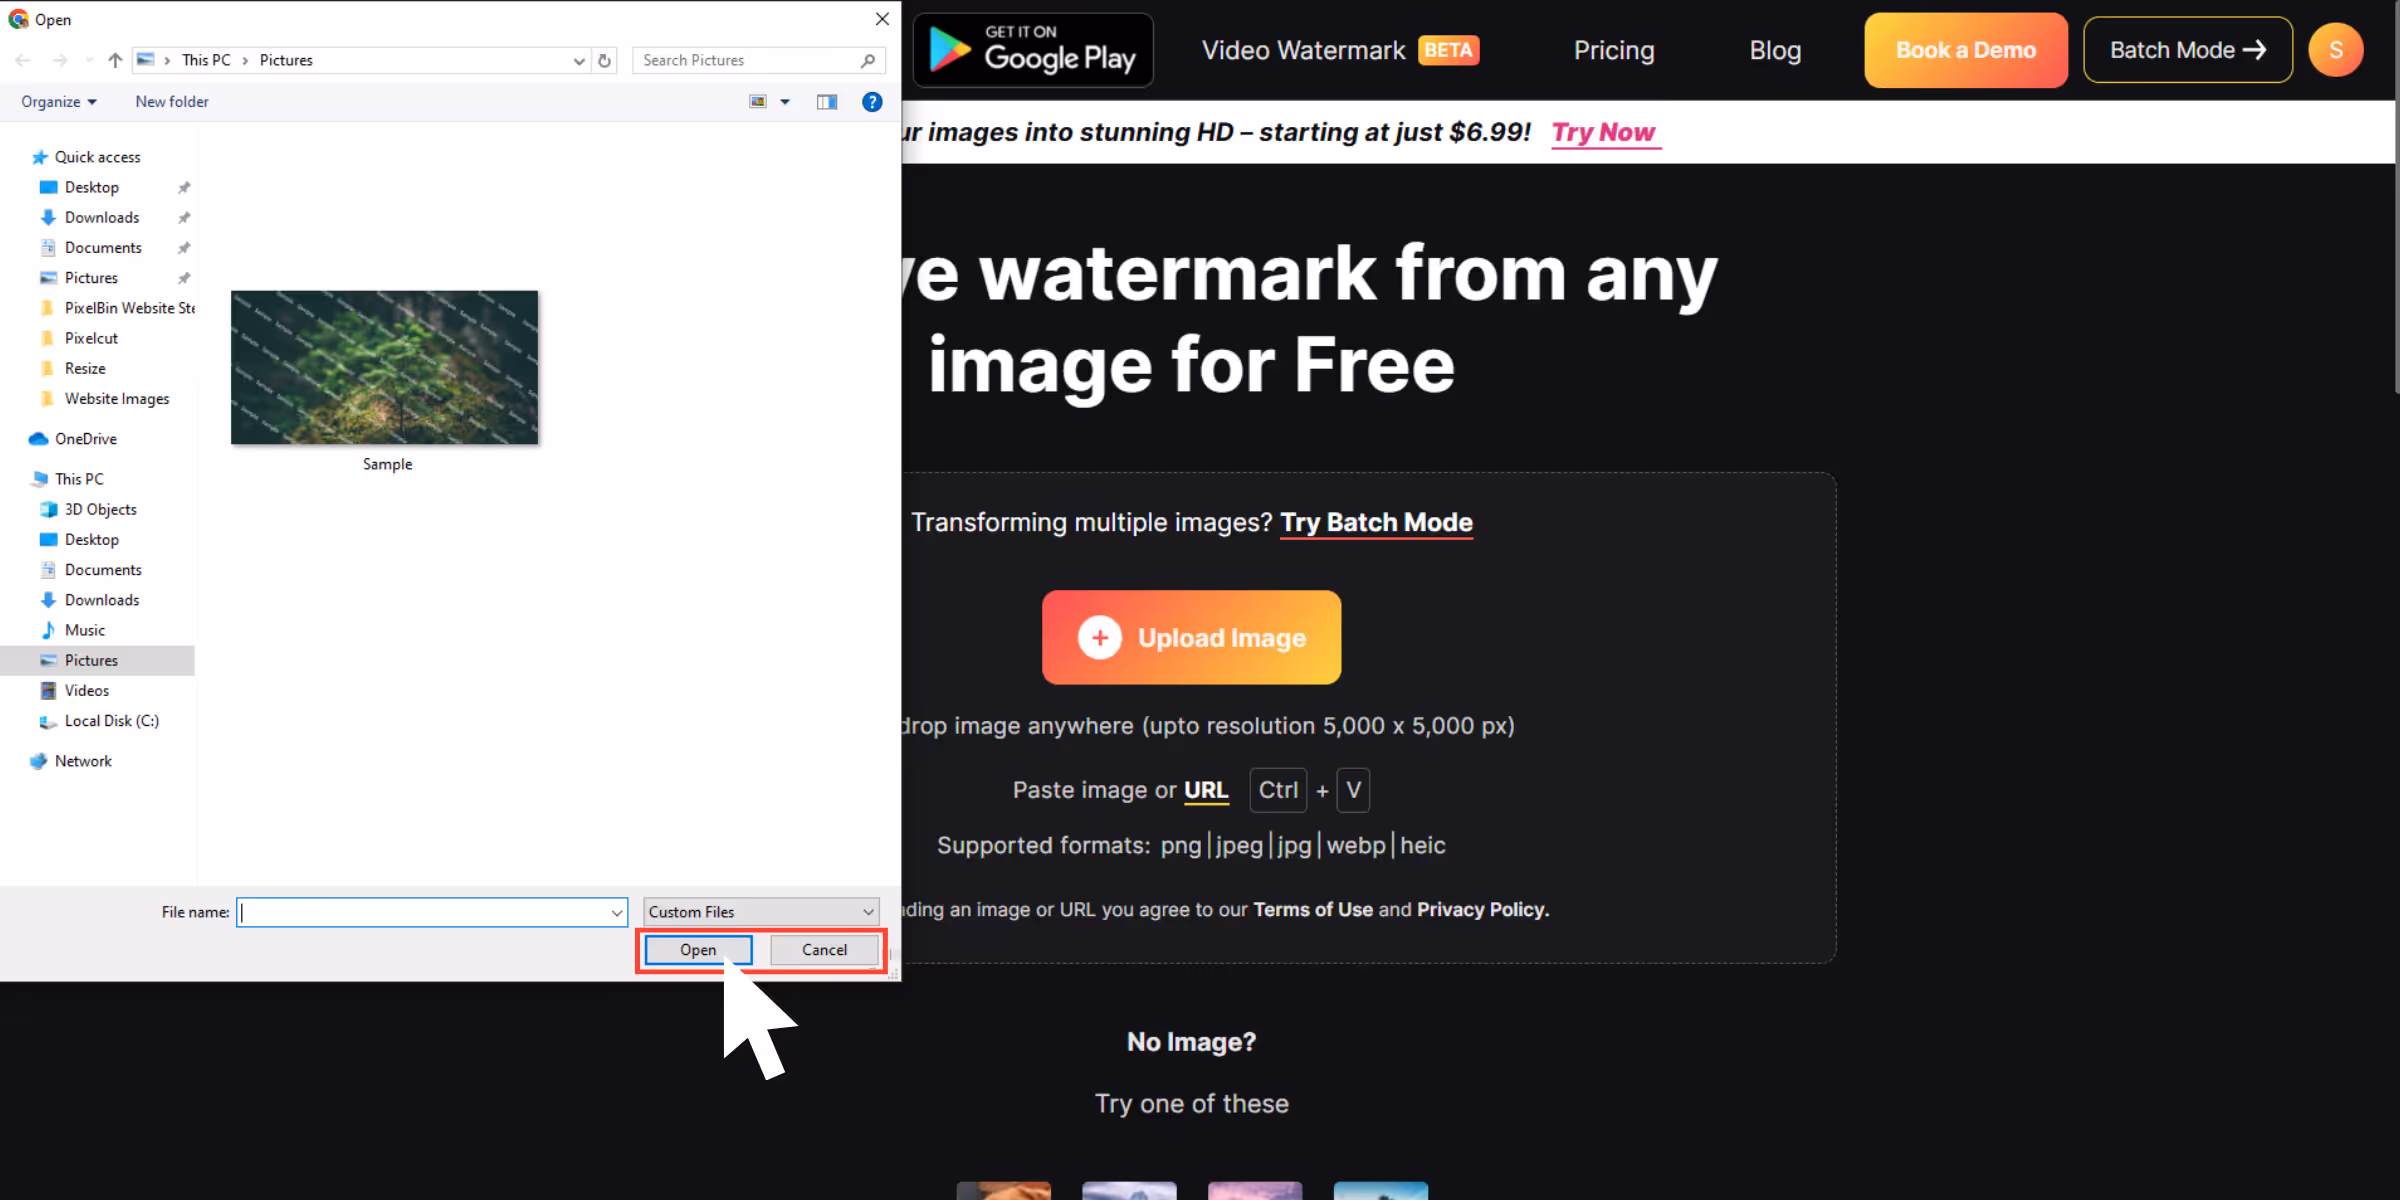
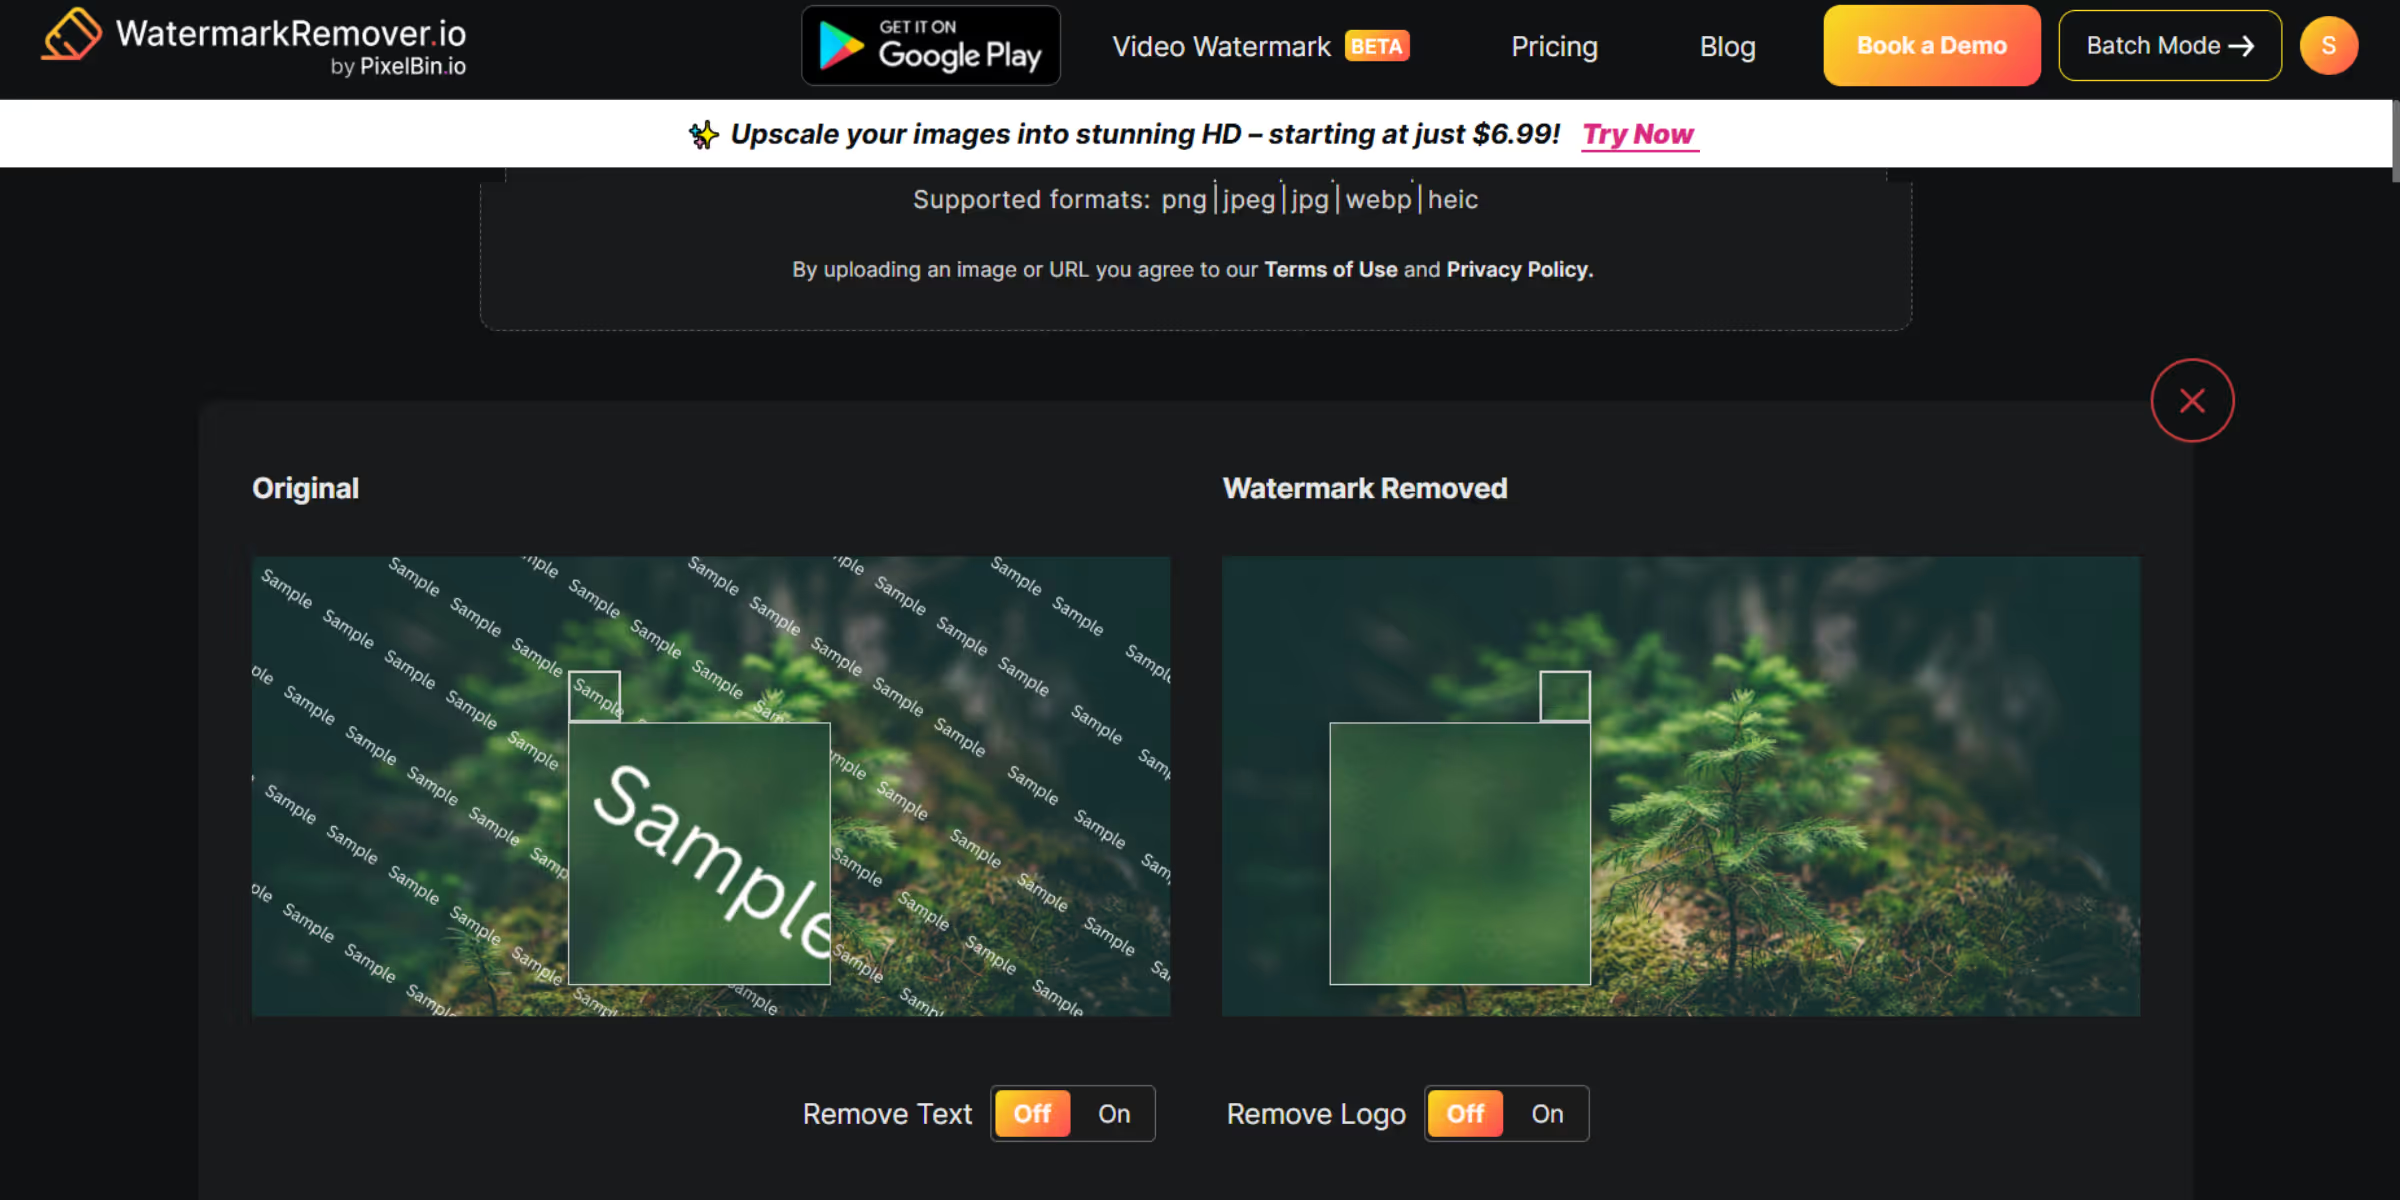
Step 3: After uploading the image, click on remove text or click on remove logo according to your need.
.avif)
Step 4: After using the features. The tool will automatically show a before-and-after slider, so I can compare.
Step 5: Hit Download and save the cleaned-up image to your desktop.
4. Watermark Remover by Fotor

When I first opened Fotor’s watermark remover, I didn't expect too much; it looked more like a graphic design app than a photo editor.
The feature that caught my eye was that Fotor gives you manual control with brush and lasso tools to target your watermark areas without any hassle.
Why did I like it?
- The zoom-in feature is available and adjusts the brush size for precision.
- The before/after slider made it easy to compare results.
- It includes batch processing, and you can add 50 images at once.
- If you want to edit the image, some extra tools like crop, adjust, and text are available.
- Remove watermarks pretty fast, even from HD images, without deteriorating the quality.
Steps to remove the Disney PhotoPass watermark with Fotor?
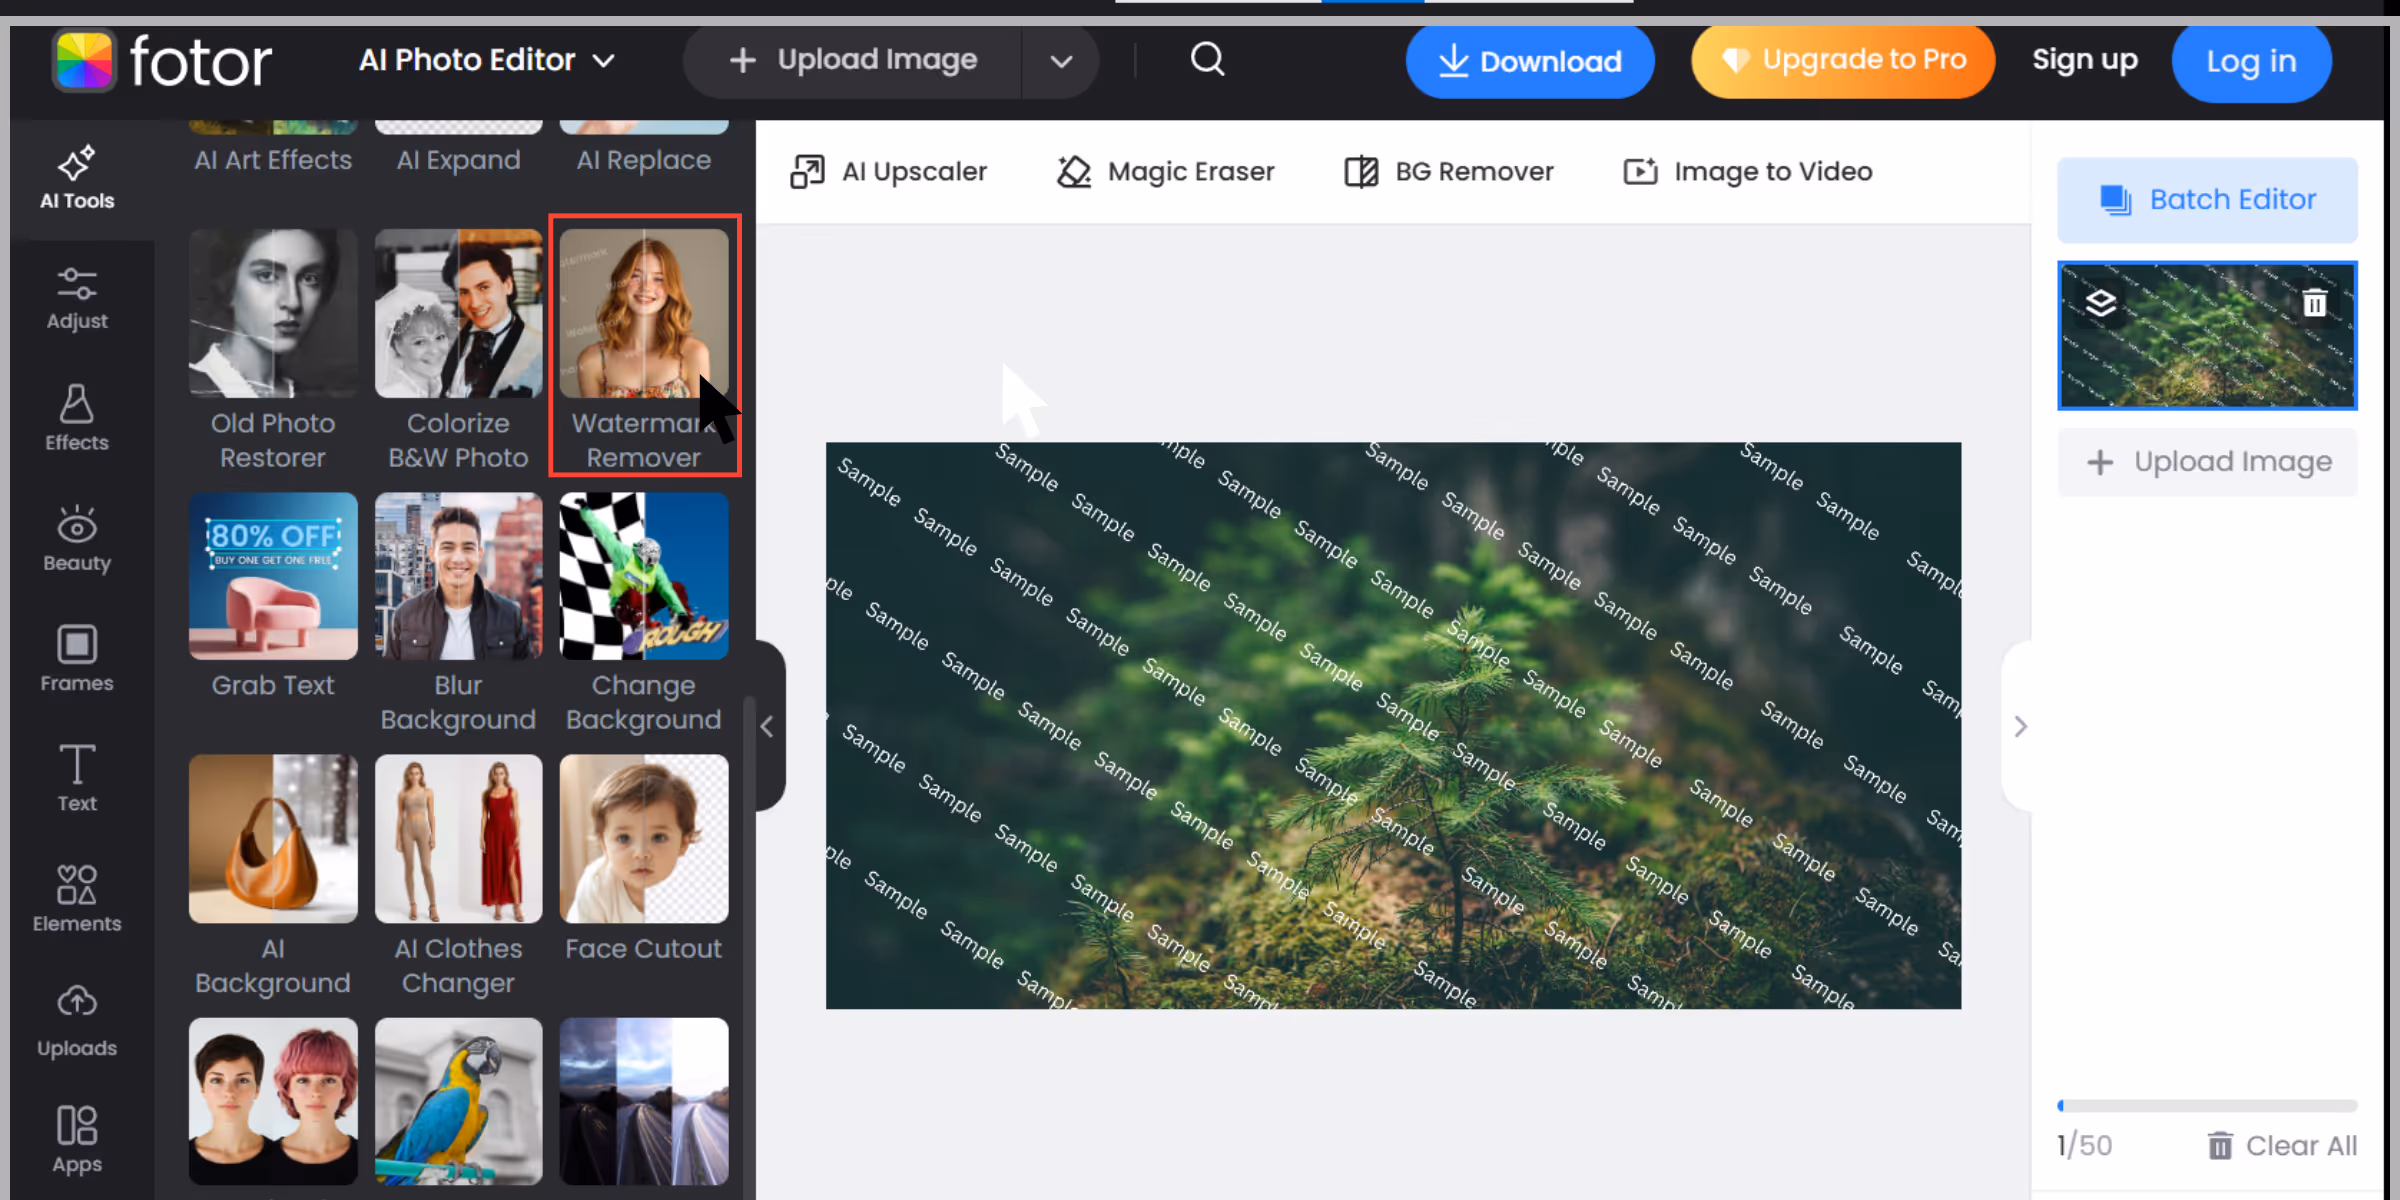
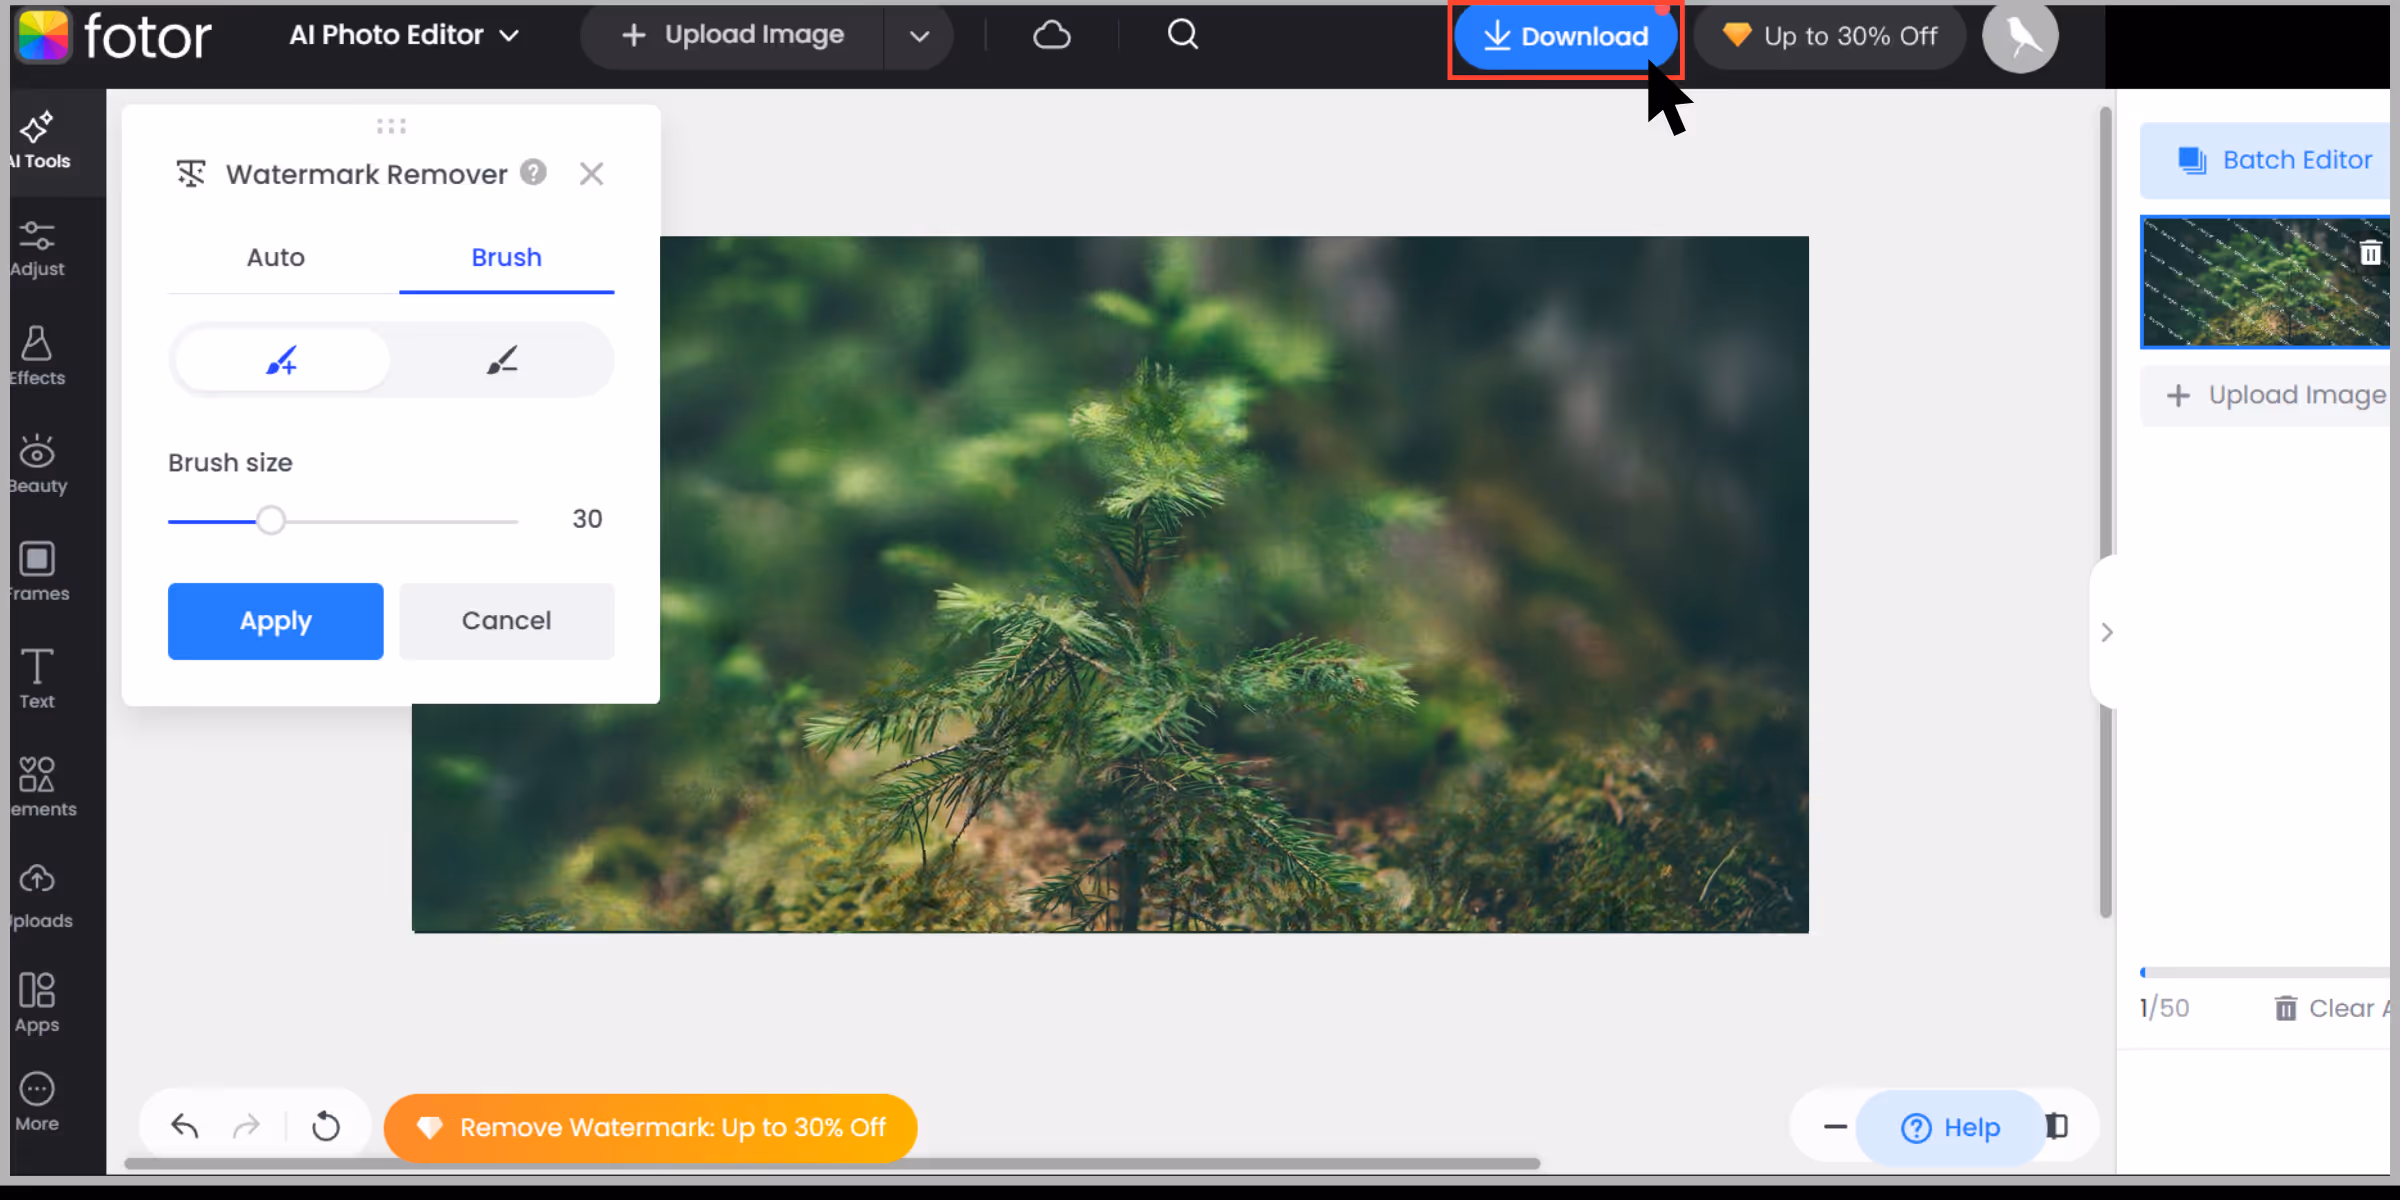
Step 1: Go to Fotor’s watermark remover.

Step 2: Upload the image by selecting “Upload Image.”
Step 3: On the left panel, click “AI Tools” and then choose “Watermark Remover.”
Step 4: Highlight the watermark using the “Brush” tool (you can adjust the brush size to fit closely around the watermark). Or else you can use the “advanced” feature for free with credits, and the AI will remove the watermark automatically.
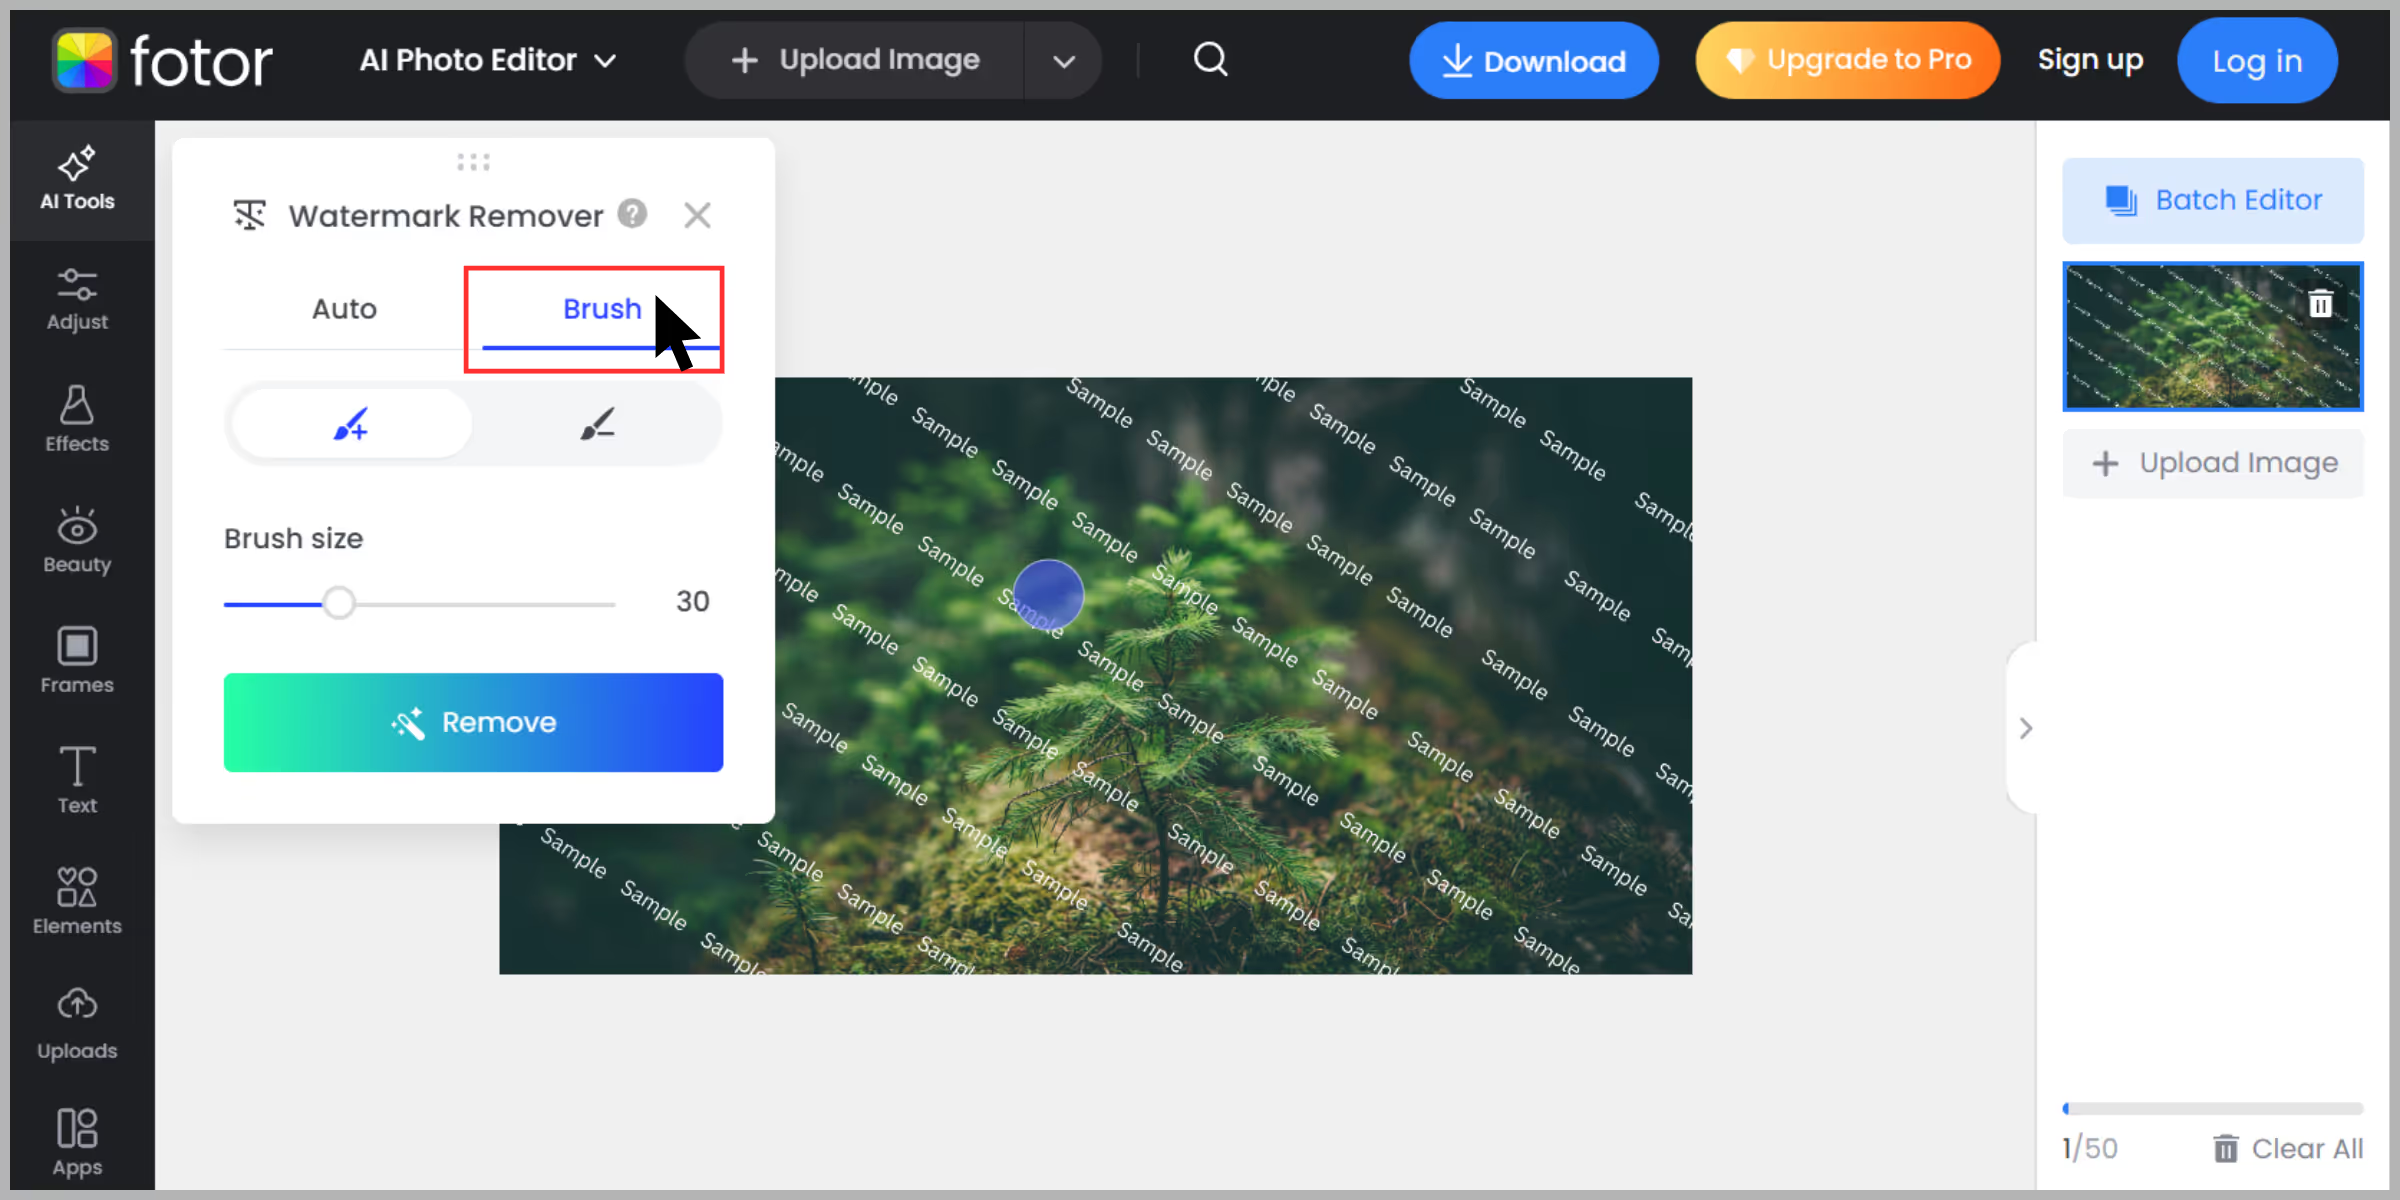
Step 5: Click on “Remove.”

Step 6: Click “Download” and you’re done– but you have to sign up or upgrade to Fotor Pro for high-resolution export.
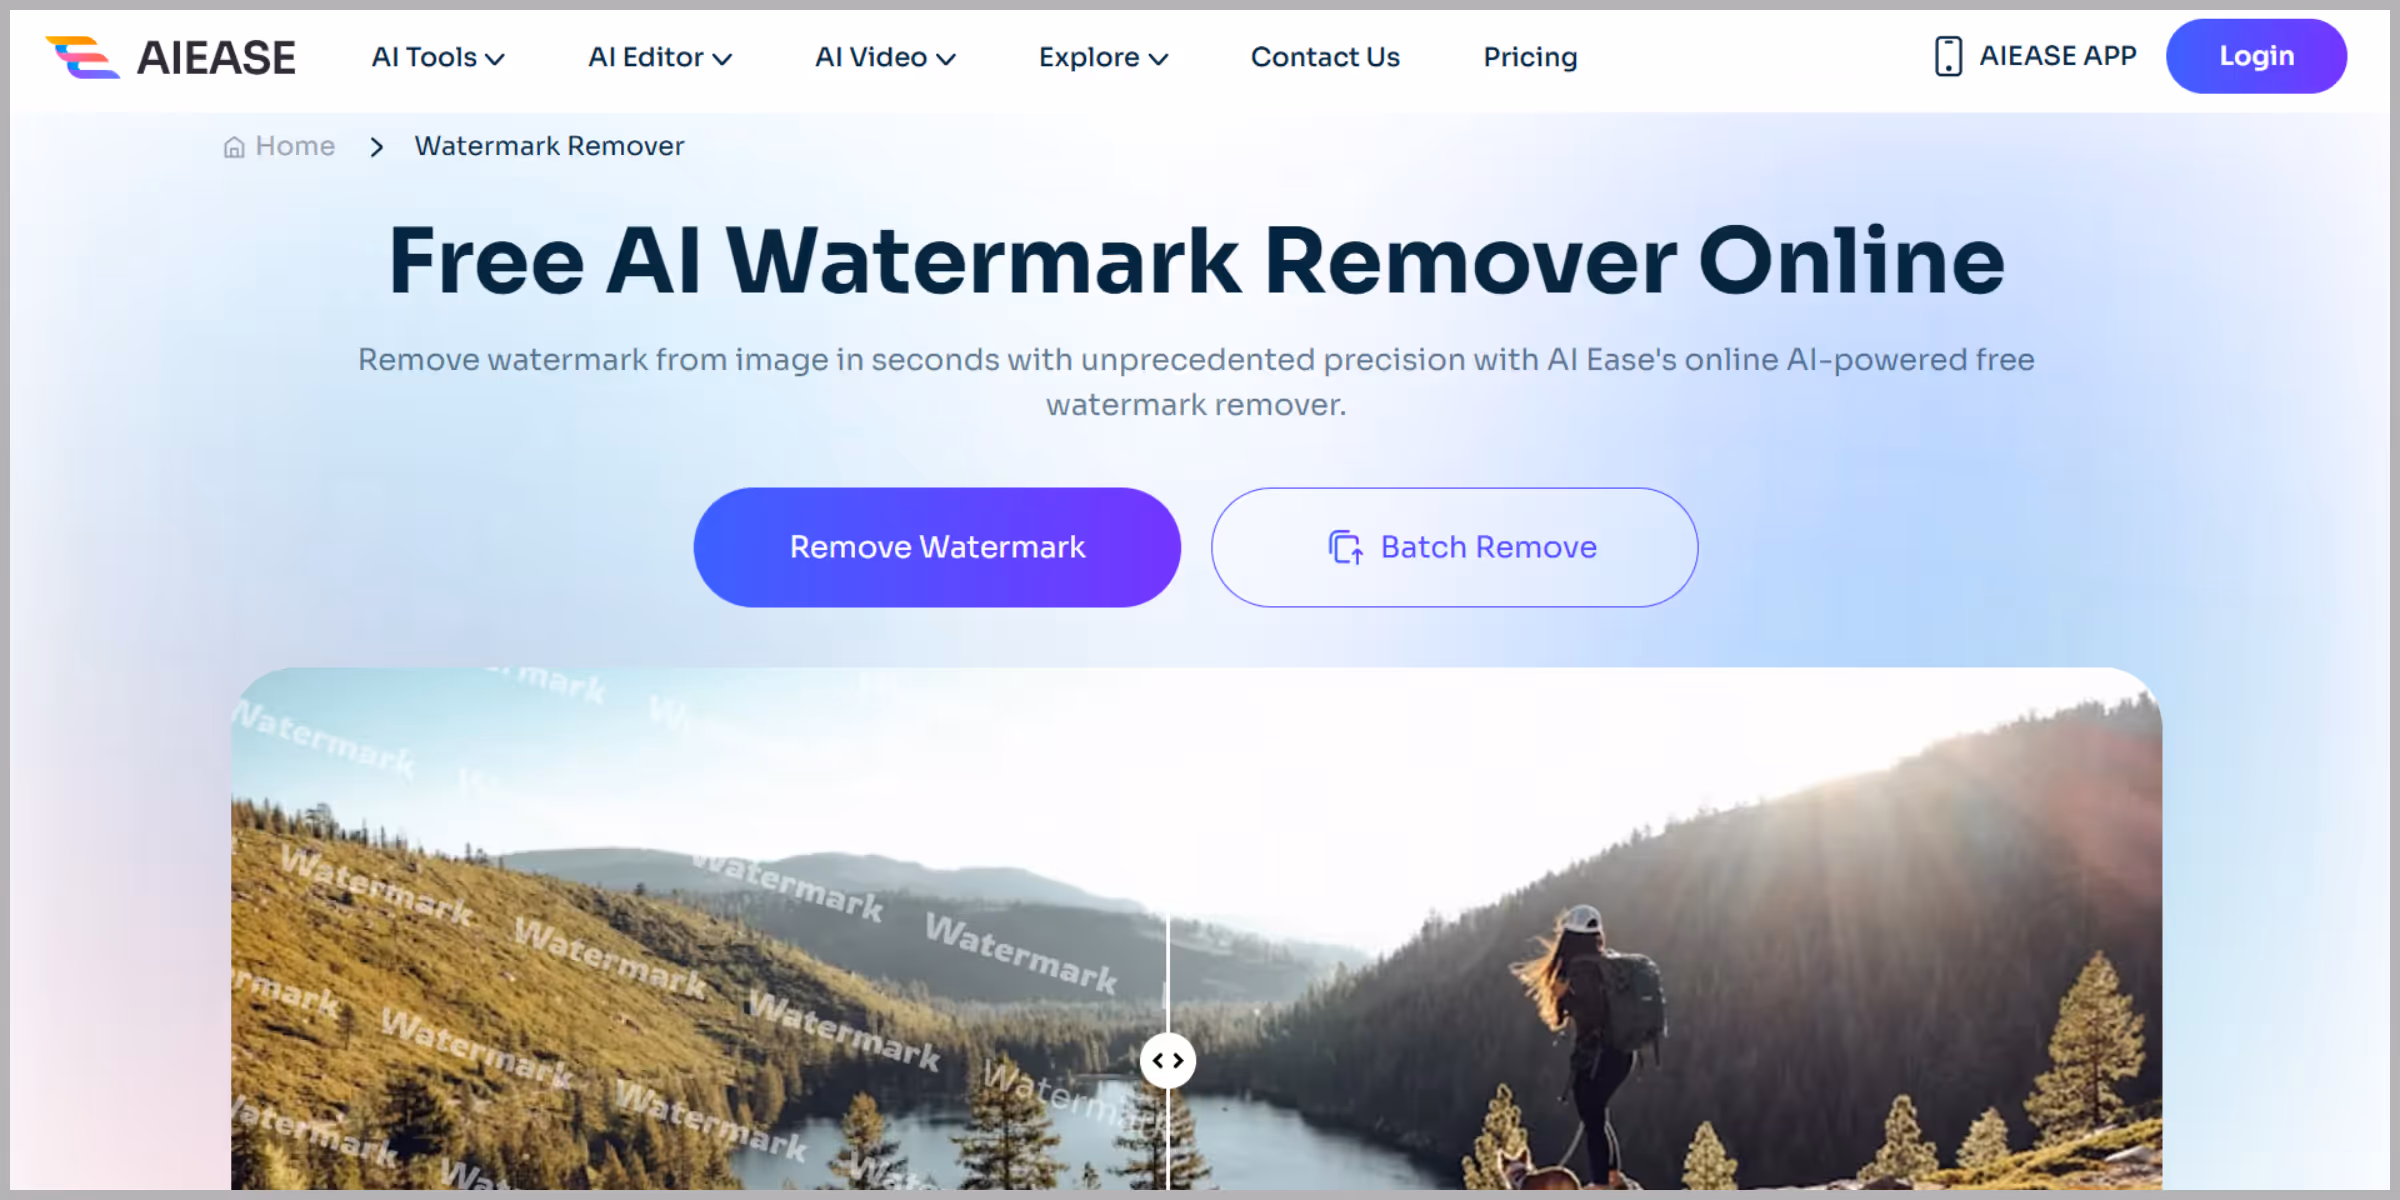
5. AIEase Watermark Remover

After scrolling through a lot of tools, I stumbled upon AIEase. I was convinced by its tagline: “One-click Watermark Removal.” I decided to test it with an image having logo and signature watermarks mixed over different backgrounds, and here is what I actually found out after using the tool.
Why did I like it?
- Simple and fast AI watermark cleanup.
- Batch processing is available up to 10 images.
- It works on a smartphone using a browser.
- Supports image formats like JPG, JPEG, WEBP, PNG, and BMP.
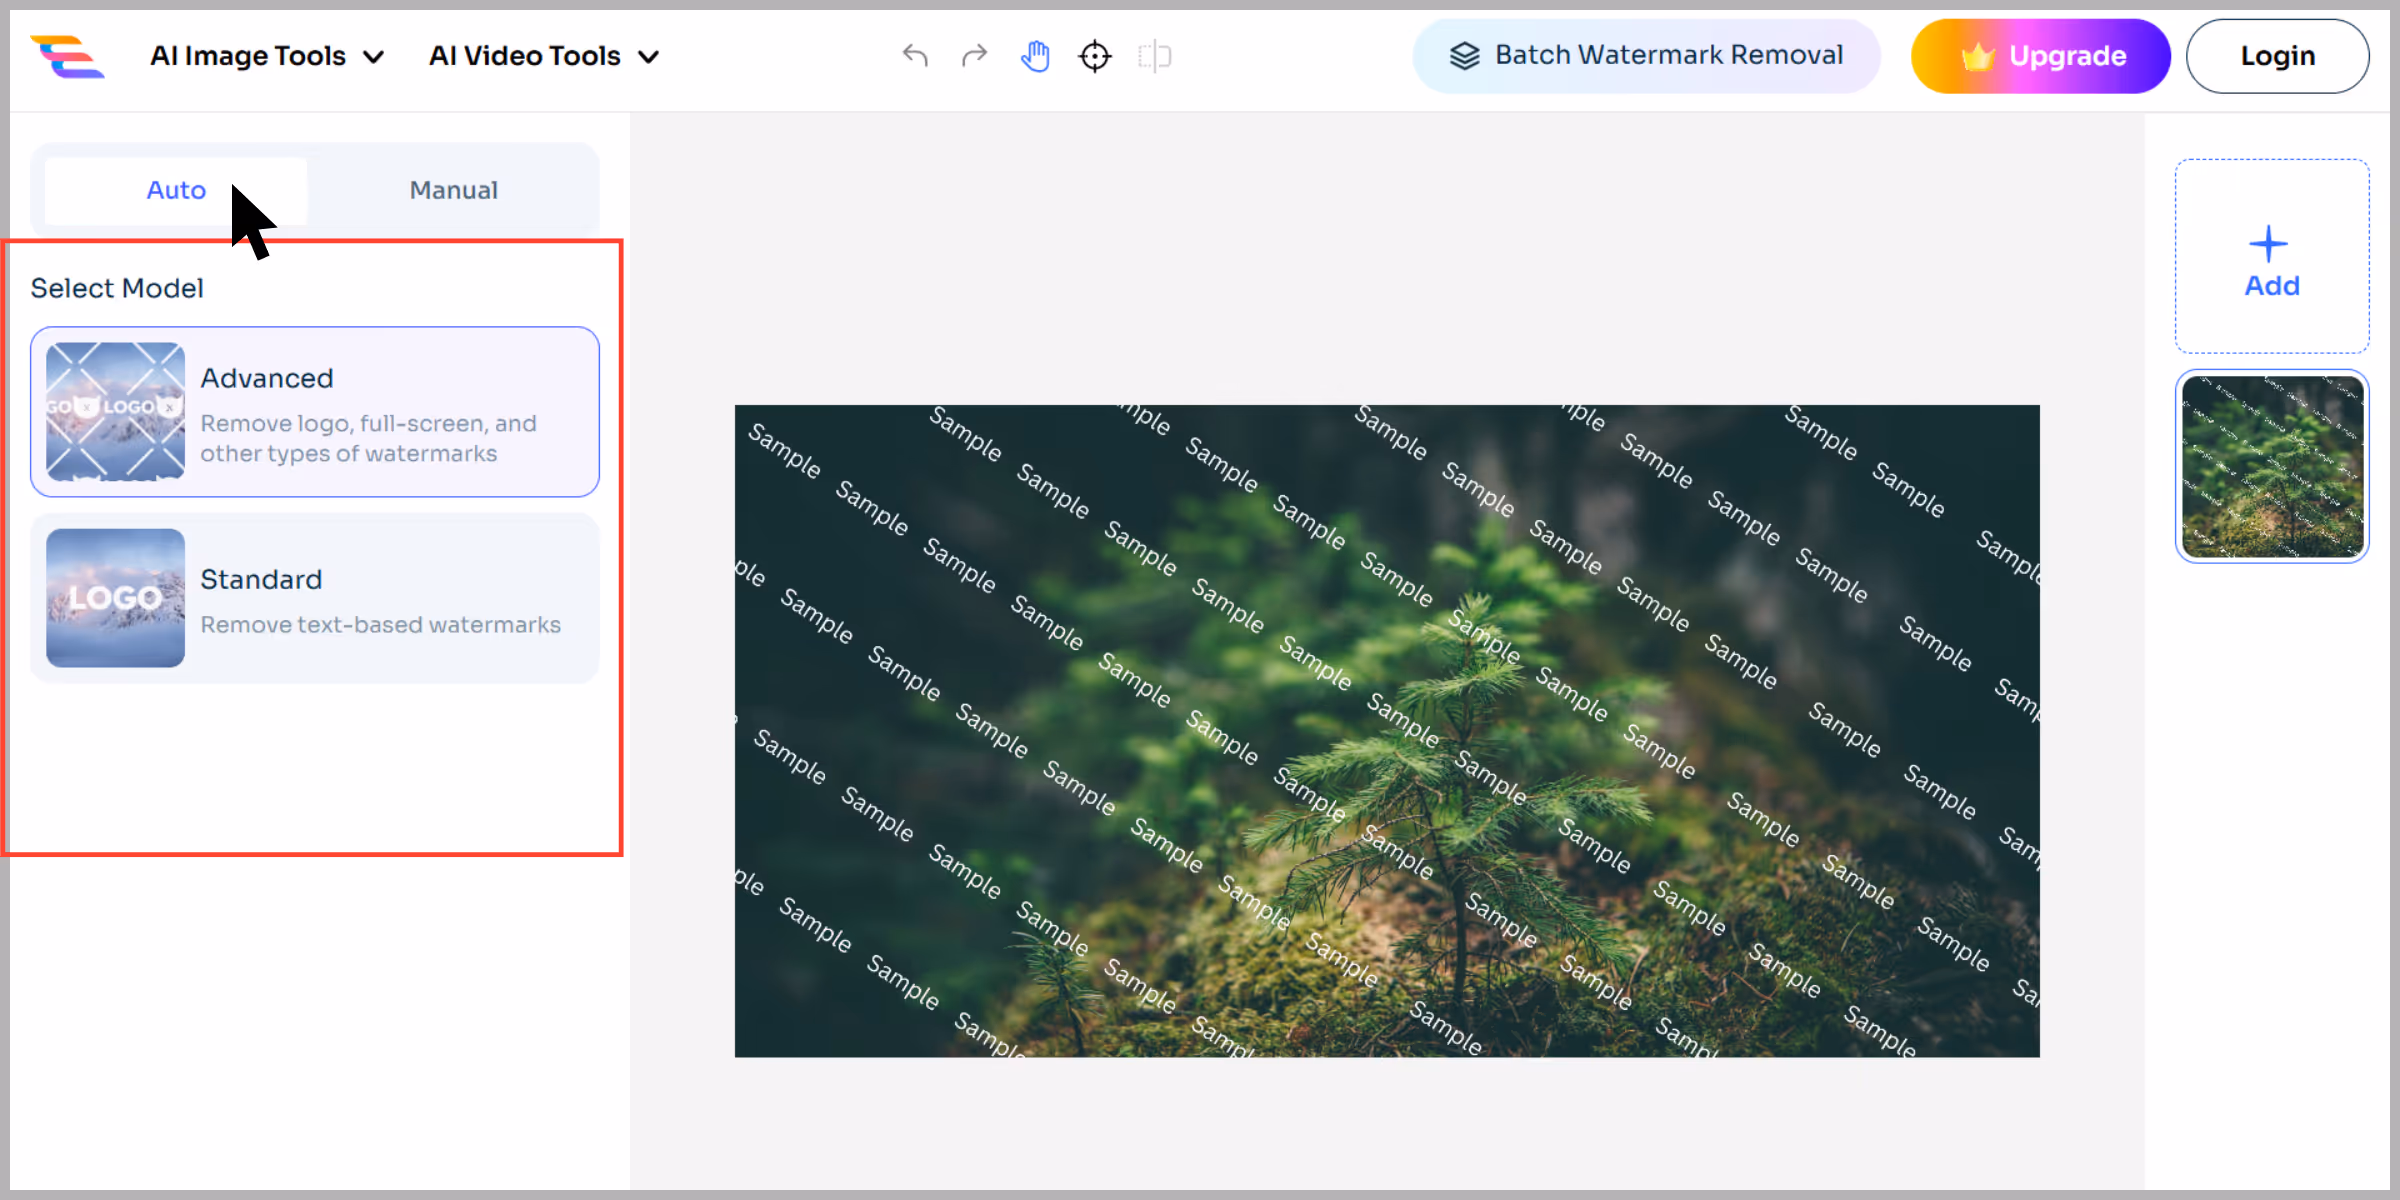
How to remove a watermark using AIEase?
Step 1: Visit the AIEase Image Watermark Remover page.
Step 2: Upload images that you want to test.

Step 3: Click on “Auto Mode”—the AI detected and removed the watermark instantly.
Step 4: Toggle to “Manual” to clean small remnants using the brush, rectangle, and eraser tools.
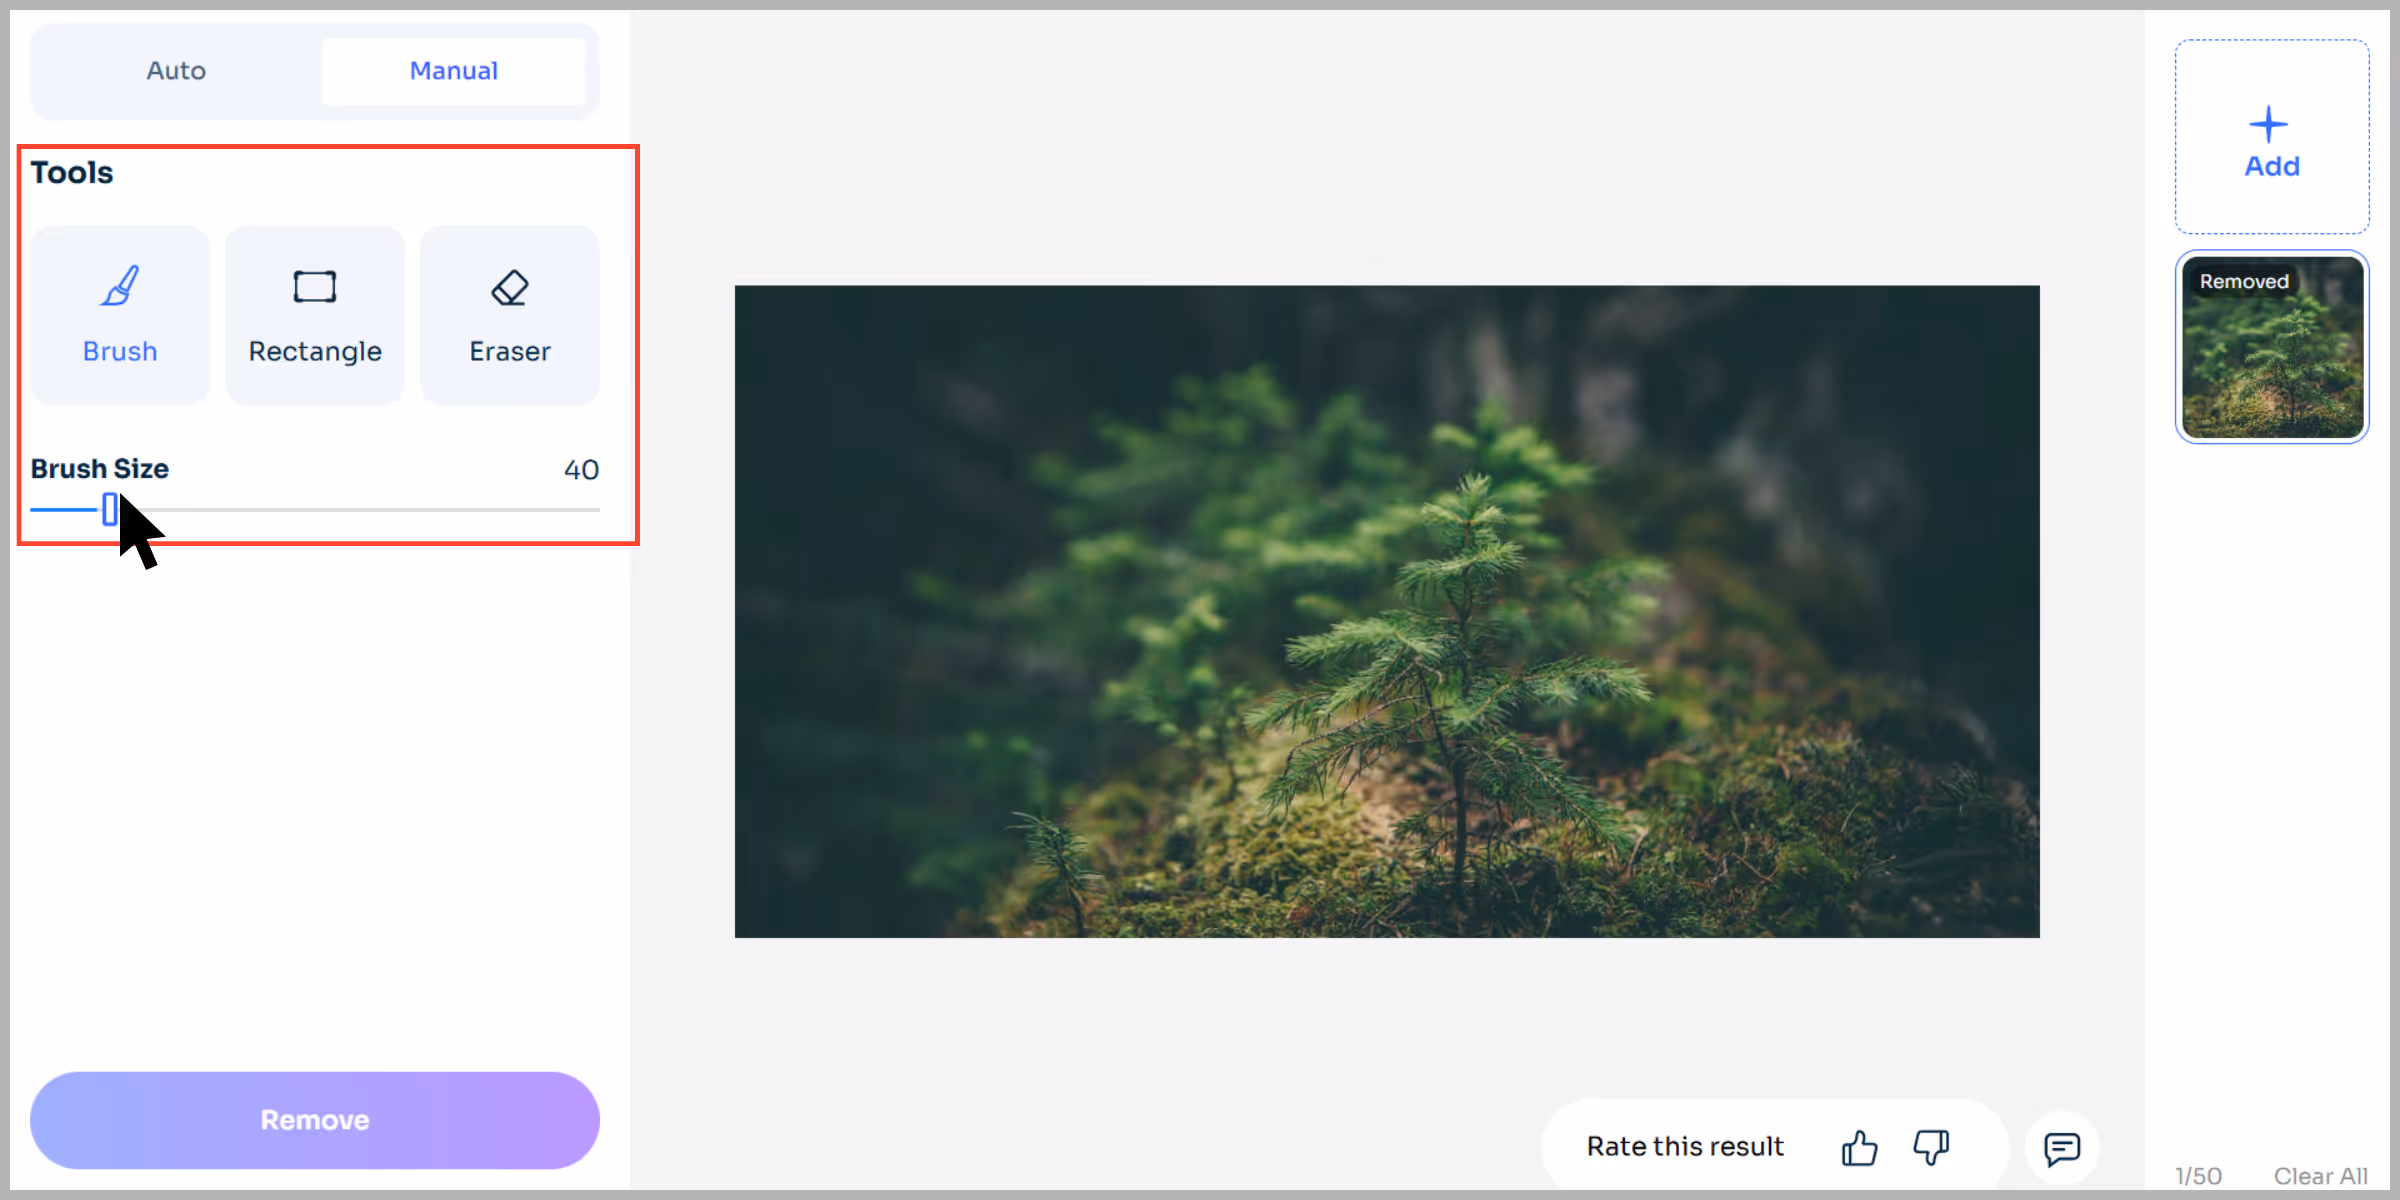
Step 5: Hit “Remove”, preview the result with the “Eyes” icon.
.avif)
Step 6: Download the final image—no sign-up, no watermarks.
.avif)
What to do if you don't have a clean version after using the tools?
Sometimes you’ve tried all the tools, but the result isn’t clean enough—or maybe you never got a high-resolution version. Here’s what you can do:
Re-check the Disney account
Often, the high-resolution image may be available in your Disney PhotoPass or My Disney Experience account.
Steps to check:
Step 1: Go to My Disney Experience.
Step 2: Log in to your account.
Step 3: Navigate to "Photos."
Step 4: Look for the original, unwatermarked version.
Step 5: If you purchased Memory Maker or individual images, they should be downloadable without the watermark.
Contact Disney PhotoPass support
If your account doesn’t show the unwatermarked version:
- Go to the Disney Help Centre.
- Start a live chat or call customer service.
- Mention your PhotoPass ID or image code.
- Ask if your download window has expired.
- They may be able to reissue or extend your photo access.
Pro tip: If you took photos during a promotion or special event, support may also help verify your eligibility.
Look for the memory maker expiry
Your downloads may have expired. Disney world typically gives 45 days to download your PhotoPass photos after they’re taken. If you didn’t act within that window:
- You may be able to request an extension.
- Proof of purchase or account activity may be required.
- Log in to your email and search for the Memory Maker receipt.
Final thoughts
Removing watermarks is authentic only if you have legal ownership or the right reason. The Disney PhotoPass watermark becomes necessary if you purchased the images and want to modify them. Photoshop offers high-quality and control for removing watermarks.
On the other hand, free AI-based tools are an alternative for beginners or people who need quick edits on the go. Tools like Pixelbin, Inpaint, WatermarkRemover.io, and other aforementioned tools have made watermark removal accessible to all.
FAQs
Yes. Once you've purchased the image through PhotoPass or Memory Maker, you have the right to edit and remove the watermark.
Using an AI tool like WatermarkRemover.io is the fastest and most beginner-friendly method.
Photoshop is more accurate and detailed, but AI tools are quicker and easier for casual use.
It can if done improperly. Always work on a duplicate layer and use high-resolution images.
No. Preview images are not licensed for public or personal use. You must purchase the images to use or edit them.
Yes. Purchased images are automatically available for download without the watermark in your Disney account.